DDTrace C++
在 C++ 代码中应用 DDTrace,需要修改业务代码,并且对于常见的中间件和库也没有对应的 SDK 集成,需手动在现有业务代码中进行埋点。
安装库和依赖
cmake 安装
cmake 可能无法通过 yum 或 apt-get 安装到较高的版本,建议直接去其官网下载最新版本。也可以直接使用观测云托管的源码或Windows 二进制。
# 从源码安装 cmake
wget https://static.guance.com/gfw/cmake-3.24.2.tar.gz
tar -zxvf cmake-3.24.2.tar.gz
./bootstrap --prefix=/usr/local
make
make install

# 验证一下当前版本
cmake --version
cmake version 3.24.2
gcc 安装 7.x 的版本:
C++ 代码示例
以下 C++ 代码演示了基本的 trace 埋点操作,其模拟的业务是一个读取本地磁盘文件的操作。
#include <datadog/opentracing.h>
#include <datadog/tags.h>

#include <stdarg.h>
#include <memory>
#include <chrono>
#include <fstream>
#include <string>
#include <chrono>
#include <thread>
#include <sys/stat.h>

datadog::opentracing::TracerOptions tracer_options{"", 0, "compiled-in-example"};
auto tracer = datadog::opentracing::makeTracer(tracer_options);

std::ifstream::pos_type filesize(const char* filename) {
    std::ifstream in(filename, std::ifstream::ate | std::ifstream::binary);
    return in.tellg();
}

std::string string_format(const std::string fmt_str, ...) {
    int final_n, n = ((int)fmt_str.size()) * 2;
    std::unique_ptr<char[]> formatted;
    va_list ap;
    while(1) {
        formatted.reset(new char[n]);
        strcpy(&formatted[0], fmt_str.c_str());
        va_start(ap, fmt_str);
        final_n = vsnprintf(&formatted[0], n, fmt_str.c_str(), ap);
        va_end(ap);
        if (final_n < 0 || final_n >= n)
            n += abs(final_n - n + 1);
        else
            break;
    }
    return std::string(formatted.get());
}

int runApp(const char* f) {
    auto span_a = tracer->StartSpan(f);
    span_a->SetTag(datadog::tags::environment, "production");
    span_a->SetTag("tag", "app-ok");
    span_a->SetTag("file_len", string_format("%d", filesize(f)));
}

int main(int argc, char* argv[]) {
    for (;;) {
        runApp(argv[0]);
        runApp("file-not-exists");
        std::this_thread::sleep_for(std::chrono::milliseconds(1000));
    }

    tracer->Close();
    return 0;
}
编译运行
LD_LIBRARY_PATH=/usr/local/lib64 g++ -std=c++14 -o demo demo.cc -ldd_opentracing -I ./dd-opentracing-cpp/deps/include
LD_LIBRARY_PATH=/usr/local/lib64 DD_AGENT_HOST=localhost DD_TRACE_AGENT_PORT=9529 ./demo
此处可以将 libdd_opentracing.so 以及对应的头文件放到任意目录,然后调整 LD_LIBRARY_PATH 以及 -I 参数即可。
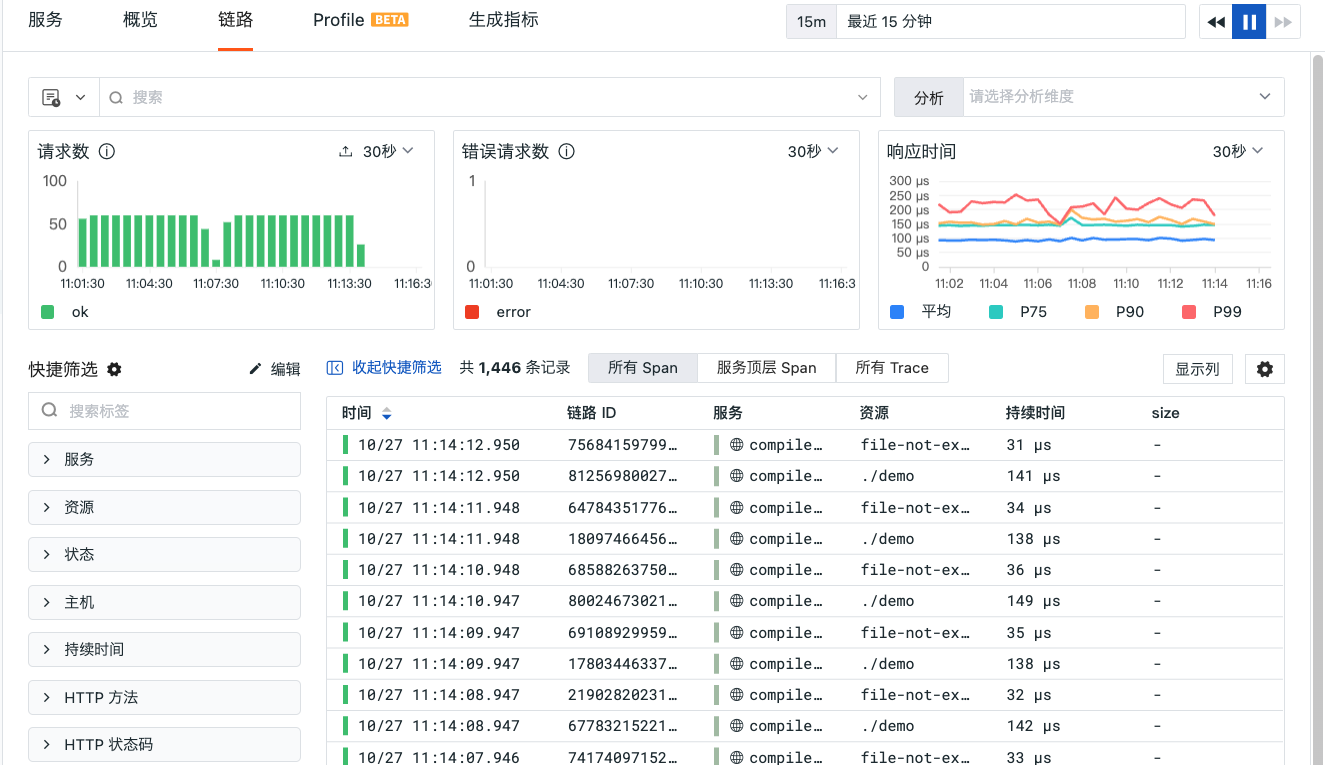
程序运行一段时间后,即可在观测云看到类似如下 trace 数据:
环境变量支持
支持的环境变量
以下环境变量支持在启动程序的时候指定 DDTrace 的一些配置参数,其基本形式为:
常用的几个 ENV 如下。更多 ENV 支持,可参见 DDTrace 文档。
-
DD_VERSION设置应用程序版本,如
1.2.3、2022.02.13 -
DD_AGENT_HOST默认值:
localhost设置 DataKit 地址
-
DD_TRACE_AGENT_PORT设置 DataKit trace 数据的接收端口。这里需手动指定 DataKit 的 HTTP 端口(一般为 9529)
-
DD_ENV设置应用当前的环境,如 prod、pre-prod 等
-
DD_SERVICE设置应用服务名
-
DD_TRACE_SAMPLING_RULES这里用 JSON 数组来表示采样设置(采样率应用以数组顺序为准),其中
sample_rate为采样率,取值范围为[0.0, 1.0]。示例一:设置全局采样率为 20%:
DD_TRACE_SAMPLE_RATE='[{"sample_rate": 0.2}]' ./my-app示例二:服务名通配
app1.*、且 span 名称为abc的,将采样率设置为 10%,除此之外,采样率设置为 20%:DD_TRACE_SAMPLE_RATE='[{"service": "app1.*", "name": "b", "sample_rate": 0.1}, {"sample_rate": 0.2}]' ./my-app -
DD_TAGS这里可注入一组全局 tag,这些 tag 会出现在每个 span 和 profile 数据中。多个 tag 之间可以用空格和英文逗号分割,例如
layer:api,team:intake、layer:api team:intake
