Datakit 버전 업데이트 모범 사례
1. 수동 업데이트 (총 2단계)
단계 1: 먼저 datakit --version 실행
(목적: 업데이트 전후 버전 비교를 용이하게 하기 위함) 결과는 다음과 같습니다.
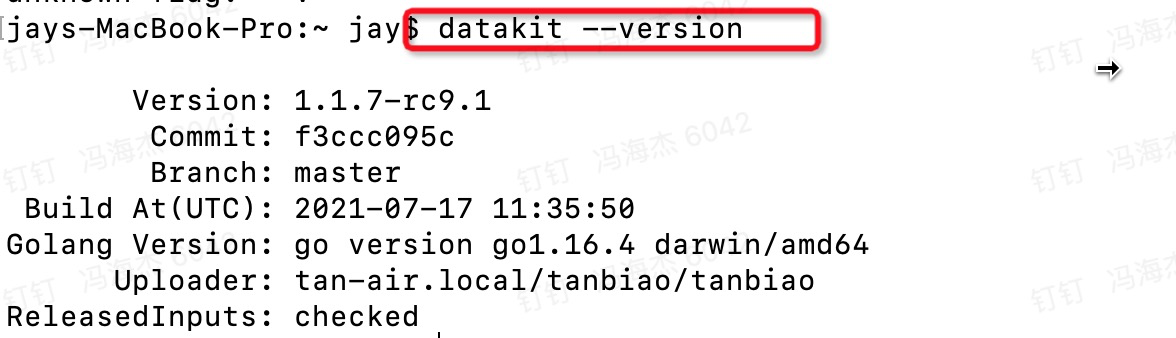
단계 2: 명령어 실행 (해당하는 명령어를 선택하세요)
[Linux에 설치]
| X86 amd64 | sudo -- sh -c 'curl https://static.guance.com/datakit/installer-linux-amd64 -o dk-installer && chmod +x ./dk-installer && ./dk-installer -upgrade && rm -rf ./dk-installer' |
|---|---|
| X86 i386 | sudo -- sh -c 'curl https://static.guance.com/datakit/installer-linux-386 -o dk-installer && chmod +x ./dk-installer && ./dk-installer -upgrade && rm -rf ./dk-installer' |
| arm | sudo -- sh -c 'curl https://static.guance.com/datakit/installer-linux-arm -o dk-installer && chmod +x ./dk-installer && ./dk-installer -upgrade && rm -rf ./dk-installer' |
| arm64 | sudo -- sh -c 'https://static.guance.com/datakit/installer-linux-arm64 -o dk-installer && chmod +x ./dk-installer && ./dk-installer -upgrade && rm -rf ./dk-installer' |
[Windows에 설치]
| 64비트 | Import-Module bitstransfer; start-bitstransfer -source [https://static.guance.com/datakit/installer-windows-amd64.exe](https://static.guance.com/datakit/installer-windows-amd64.exe) -destination .dk-installer.exe; .dk-installer.exe -upgrade; rm .dk-installer.exe |
|---|---|
| 32비트 | Import-Module bitstransfer; start-bitstransfer -source [https://static.guance.com/datakit/installer-windows-386.exe](https://static.guance.com/datakit/installer-windows-amd64.exe) -destination .dk-installer.exe; .dk-installer.exe -upgrade; rm .dk-installer.exe |
[MacOS에 설치]
| 전체 | sudo -- sh -c "curl [https://static.guance.com/datakit/installer-darwin-amd64](https://static.guance.com/datakit/installer-darwin-amd64) -o dk-installer && chmod +x ./dk-installer && ./dk-installer -upgrade && rm -rf ./dk-installer" |
|---|---|
2. 자동 업데이트 (현재 자동 업데이트는 Linux만 지원)
단계 1: 업데이트 스크립트 준비
다음 스크립트 내용을 DataKit이 설치된 머신의 설치 디렉터리에 복사하고 datakit-update.sh로 저장합니다. (이름은 임의로 지정 가능)
#!/bin/bash
# Update DataKit if new version available

otalog=/usr/local/datakit/ota-update.log
installer=https://static.guance.com/datakit/installer-linux-amd64

# 참고: RC 버전의 DataKit을 업데이트하지 않으려면 `--accept-rc-version`을 제거하세요.
/usr/local/datakit/datakit --check-update --accept-rc-version --update-log $otalog

if [[ $? == 42 ]]; then
 echo "update now..."
 sudo -- sh -c "curl ${installer}  -o dk-installer &&
     chmod +x ./dk-installer &&
     ./dk-installer --upgrade --ota --install-log "${otalog}" &&
     rm -rf ./dk-installer"
fi
단계 2: crontab 작업 추가
다음 명령어를 실행하여 crontab 규칙 추가 화면으로 이동합니다:
다음 규칙을 추가합니다:
Tips: crontab 기본 구문은 다음과 같습니다
*   *   *   *   *     <command to be execute>
^   ^   ^   ^   ^
|   |   |   |   |
|   |   |   |   +----- 요일 (0 - 6) (일요일=0)
|   |   |   +--------- 월 (1 - 12)
|   |   +------------- 일 (1 - 31)
|   +----------------- 시 (0 - 23)
+--------------------- 분 (0 - 59)
다음 명령어를 실행하여 crontab이 설치되었는지 확인합니다:
crontab 서비스가 실행 중인지 확인합니다:
설치에 성공하고 업데이트를 시도한 경우 update_log에서 다음과 유사한 로그를 확인할 수 있습니다:
2021-05-10T09:49:06.083+0800 DEBUG  ota-update datakit/main.go:201  get online version...
2021-05-10T09:49:07.728+0800 DEBUG  ota-update datakit/main.go:216  online version: datakit 1.1.6-rc0/9bc4b960, local version: datakit 1.1.6-rc0-62-g7a1d0956/7a1d0956
2021-05-10T09:49:07.728+0800 INFO   ota-update datakit/main.go:224  Up to date(1.1.6-rc0-62-g7a1d0956)
실제로 업데이트가 발생한 경우 다음과 유사한 업데이트 로그를 볼 수 있습니다:
2021-05-10T09:52:18.352+0800 DEBUG ota-update datakit/main.go:201 get online version...
2021-05-10T09:52:18.391+0800 DEBUG ota-update datakit/main.go:216 online version: datakit 1.1.6-rc0/9bc4b960, local version: datakit 1.0.1/7a1d0956
2021-05-10T09:52:18.391+0800 INFO  ota-update datakit/main.go:219 New online version available: 1.1.6-rc0, commit 9bc4b960 (release at 2021-04-30 14:31:27)
...