メールサービスの設定
概要
この記事では、Guance のメールアラートサービスの設定方法を説明します。
前提条件
- Guance が完全に初期化されていること
- メールサービスに関する以下の情報を保有していること:
hostportuseTLSuserpassworduseSSLusePlainAuth
設定手順
ステップ1:メールサービス情報の確認
middleware 名前空間の message-desk-worker Pod で以下の Python スクリプトを実行します。スクリプト内の host、port、sender、password、use_tls、recipient、useSSL、usePlainAuth パラメータを実際の値に変更し、設定が正しいかどうかを確認します。
cat <<EOF> test-maile.py
from mailer import Mailer
from mailer import Message

host = 'smtp.example.com'
port = 587
sender = 'your_email@example.com'
password = 'your_email_password'
use_tls = True
recipient = 'recipient@example.com'
use_ssl = False
use_plain_auth = False

message = Message(From=sender, To=recipient)
message.Subject = 'Test email'
message.Body = 'This is a test email'

mailer = Mailer(host=host, port=587, use_tls=use_tls, usr=sender, pwd=password, use_plain_auth=use_plain_auth, use_ssl=use_ssl)

try:
    mailer.send(message)
    print('Email sent successfully.')
except Exception as e:
    print('Error:', e)
EOF
Python スクリプトを実行します:
実行結果を確認します:

ステップ2:サービス設定の変更
注意
実際のメールサービス情報に基づいて設定を変更してください。
- Launcher にログインし、右上の「設定」をクリックします。
- 「サービス設定の変更」を選択します。
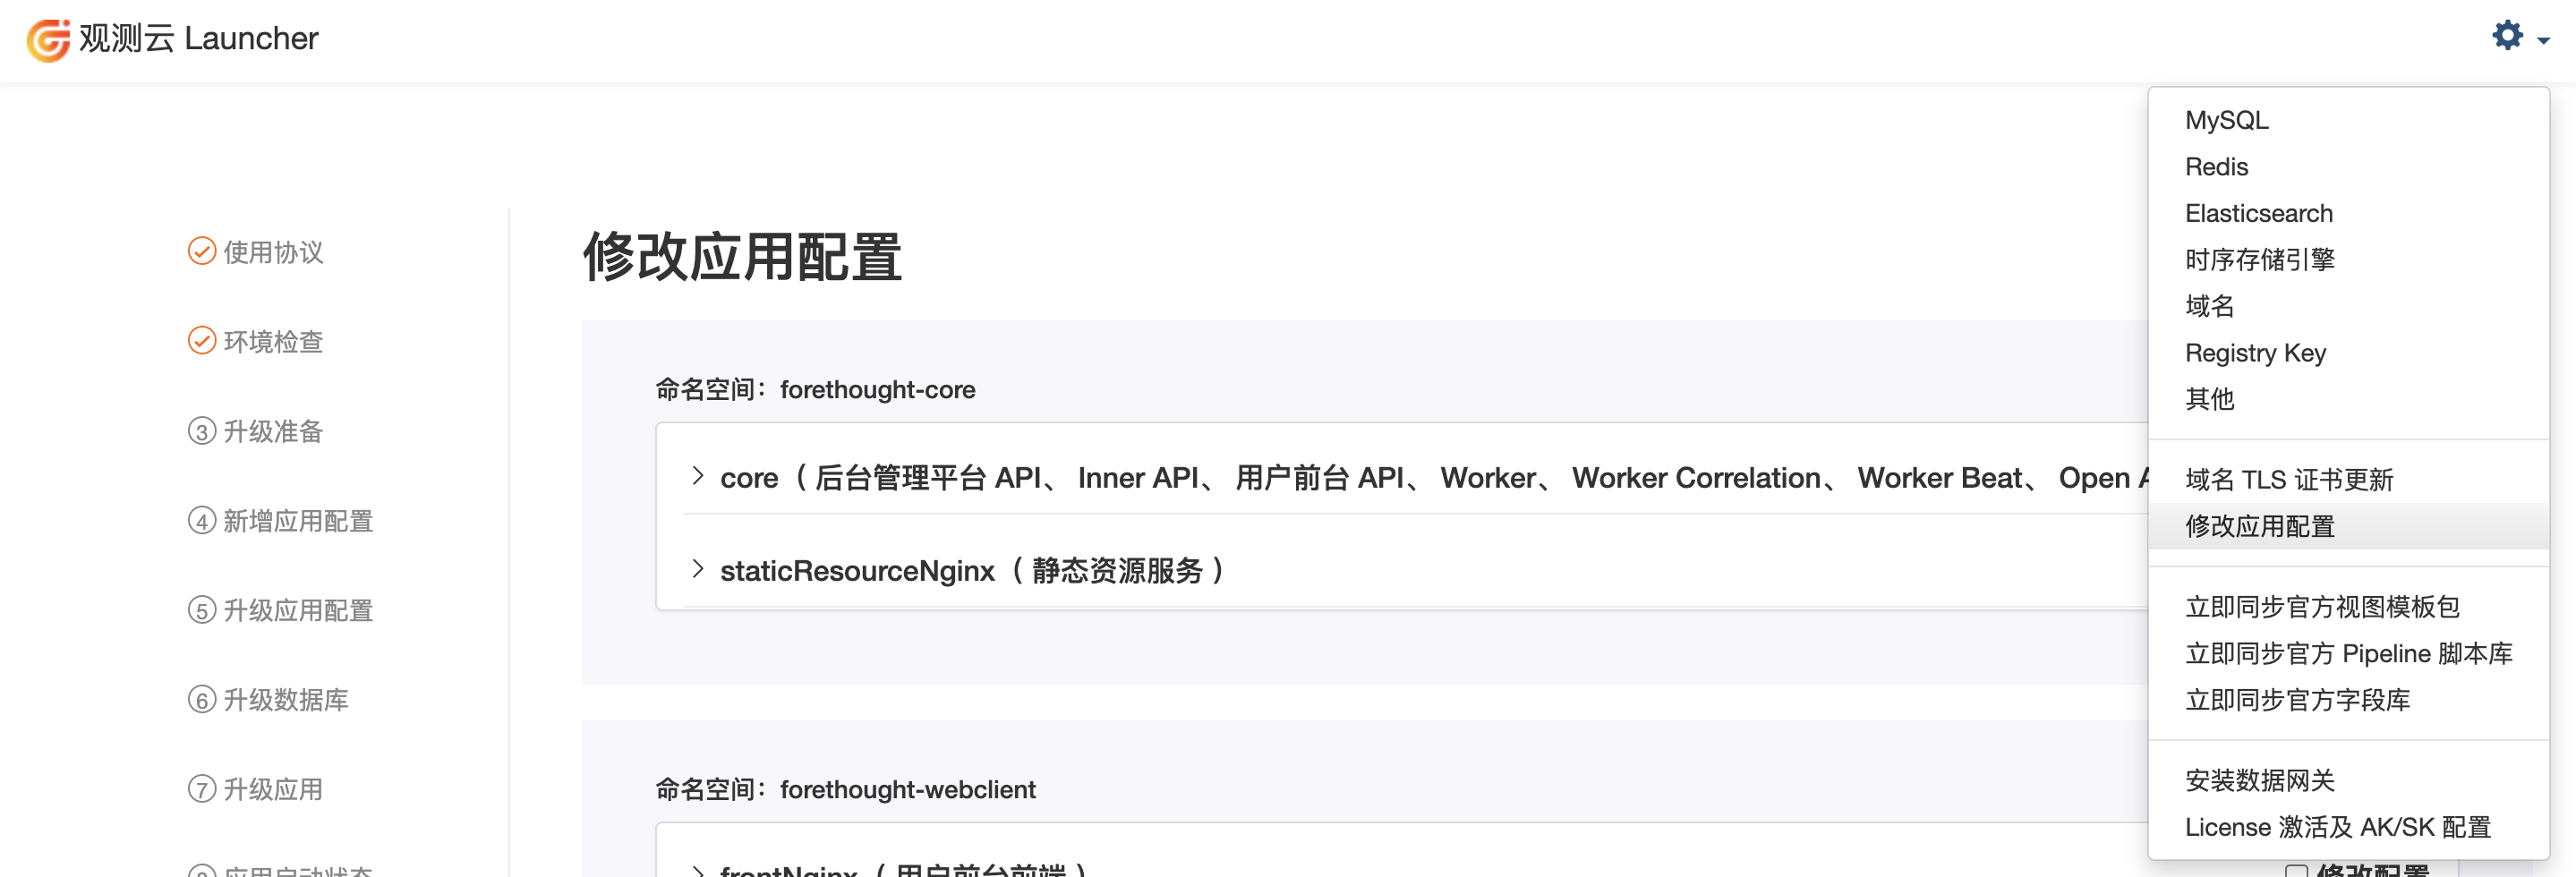
- 名前空間:func2
- 以下のサービスの設定を変更します:
- func2Config( Function Computation、 Function Computation Inner、 Task Queue Scheduler、 worker 0、 worker 1、 worker 2、 worker 3、 worker 4、 worker 5、 worker 6、 worker 7、 worker 8、 worker 9 )
- 設定ファイルの例:
# メール SMTP。実際のメールサービス情報に基づいて、以下の設定値を入力してください。
CUSTOM_MESSAGE_DESK_MAIL_HOST: 'smtpdm.aliyun.com'
CUSTOM_MESSAGE_DESK_MAIL_PORT: 465
CUSTOM_MESSAGE_DESK_MAIL_USE_SSL: true
CUSTOM_MESSAGE_DESK_MAIL_USE_TLS: false
CUSTOM_MESSAGE_DESK_MAIL_USE_PLAIN_AUTH: true
CUSTOM_MESSAGE_DESK_MAIL_FROM: 'xxxxx <noreply@xxxxx.cn>'
CUSTOM_MESSAGE_DESK_MAIL_USER: 'xxxxx@xxxxx.cn'
CUSTOM_MESSAGE_DESK_MAIL_PASSWORD: 'xxxxx'
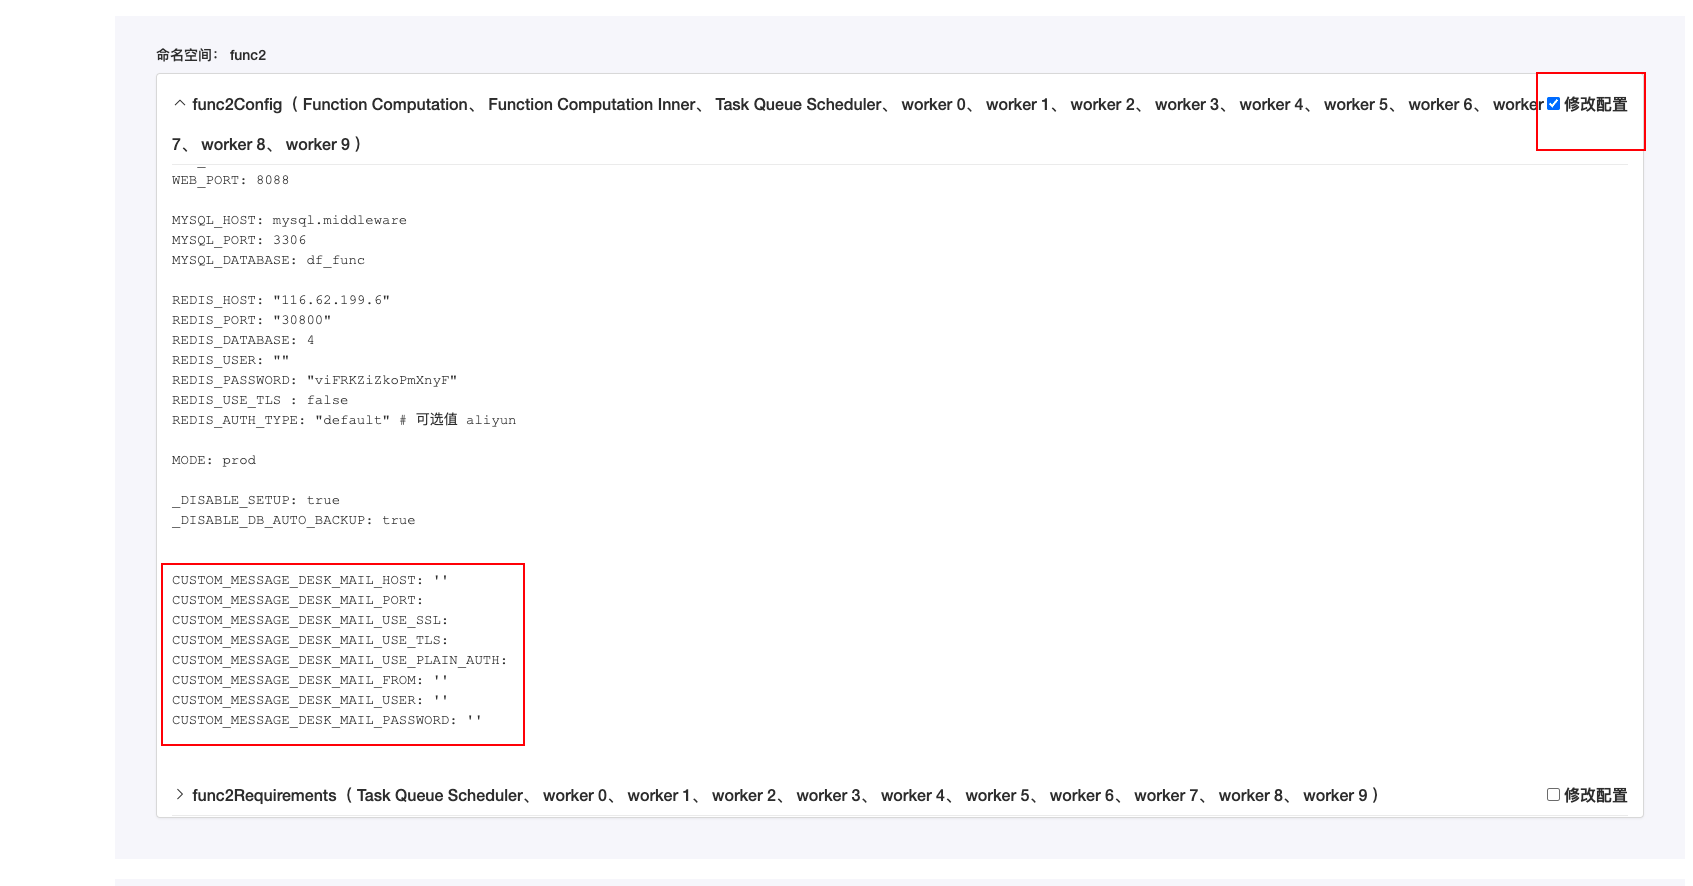
- 設定を保存して再起動します。

- 名前空間:middleware
- 以下のサービスの設定を変更します:
- messageDeskWorker( メッセージセンター Worker )
-
設定を変更します。
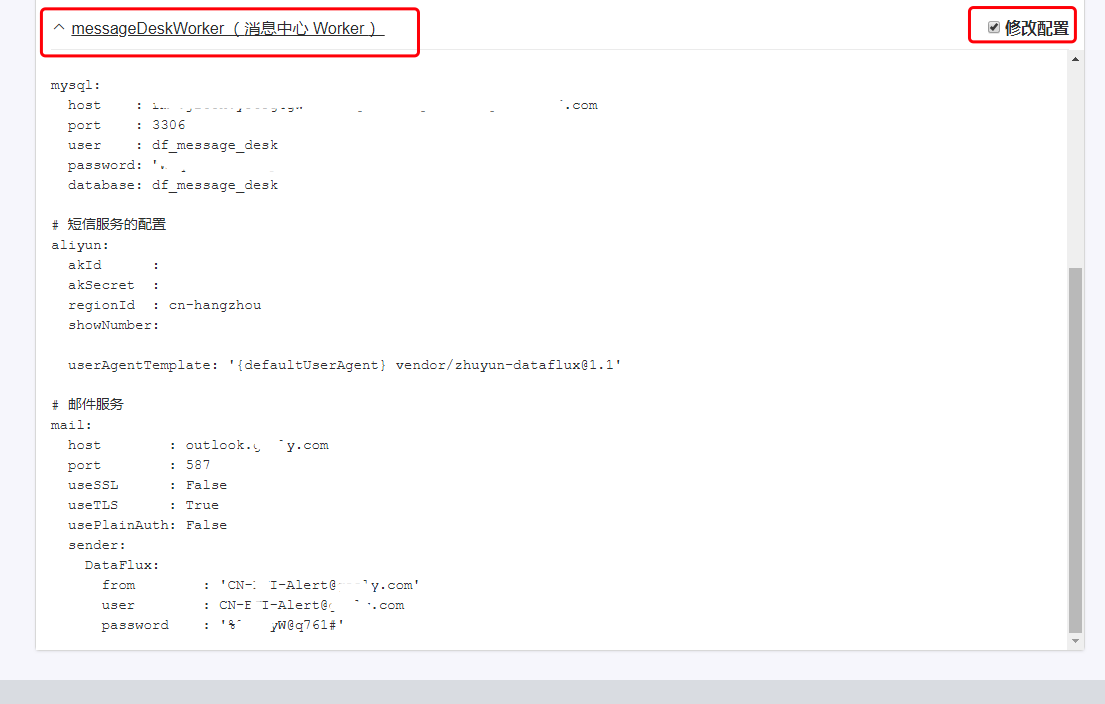
-
設定を保存して再起動します。
ステップ3:テストとトラブルシューティング
誤ったアラート設定を作成し、手動でアラートをトリガーしてテストすることができます。
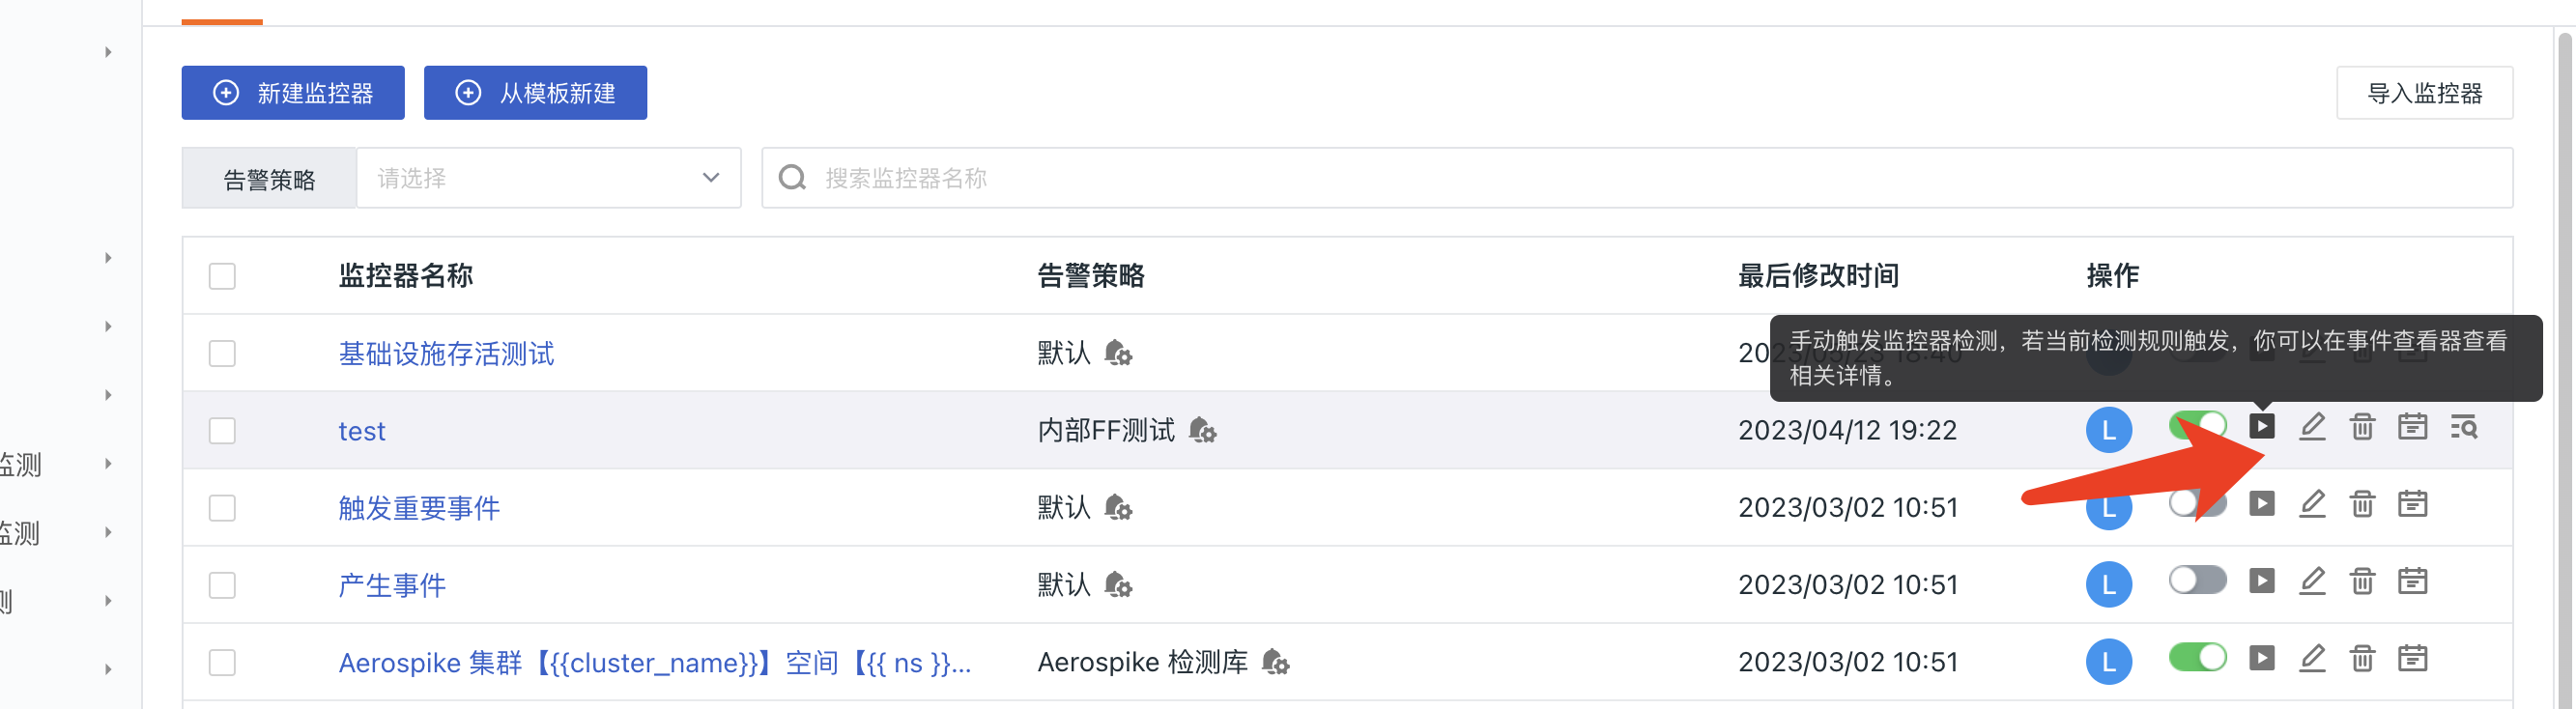
問題のトラブルシューティングについては、モニターのトラブルシューティングを参照してください。