Guance DataWay Deployment
Note
If you have deployed DataWay using Launcher, you can skip the installation steps described in this article. This article describes how to register and install DataWay using Guance management console. Alternatively, you can use Launcher for a quick installation of DataWay.
Prerequisites
- Guance has been deployed. If not, refer to Deploying Products Using Launcher.
Basic Information and Compatibility
| Name | Description |
|---|---|
| Guance Management Console | http://df-management.dataflux.cn |
| Supports Offline Installation | Yes |
| Supported Architectures | amd64/arm64 |
| Deployment Machine IP | 192.168.100.105 |
Installation Steps
1. Register DataWay
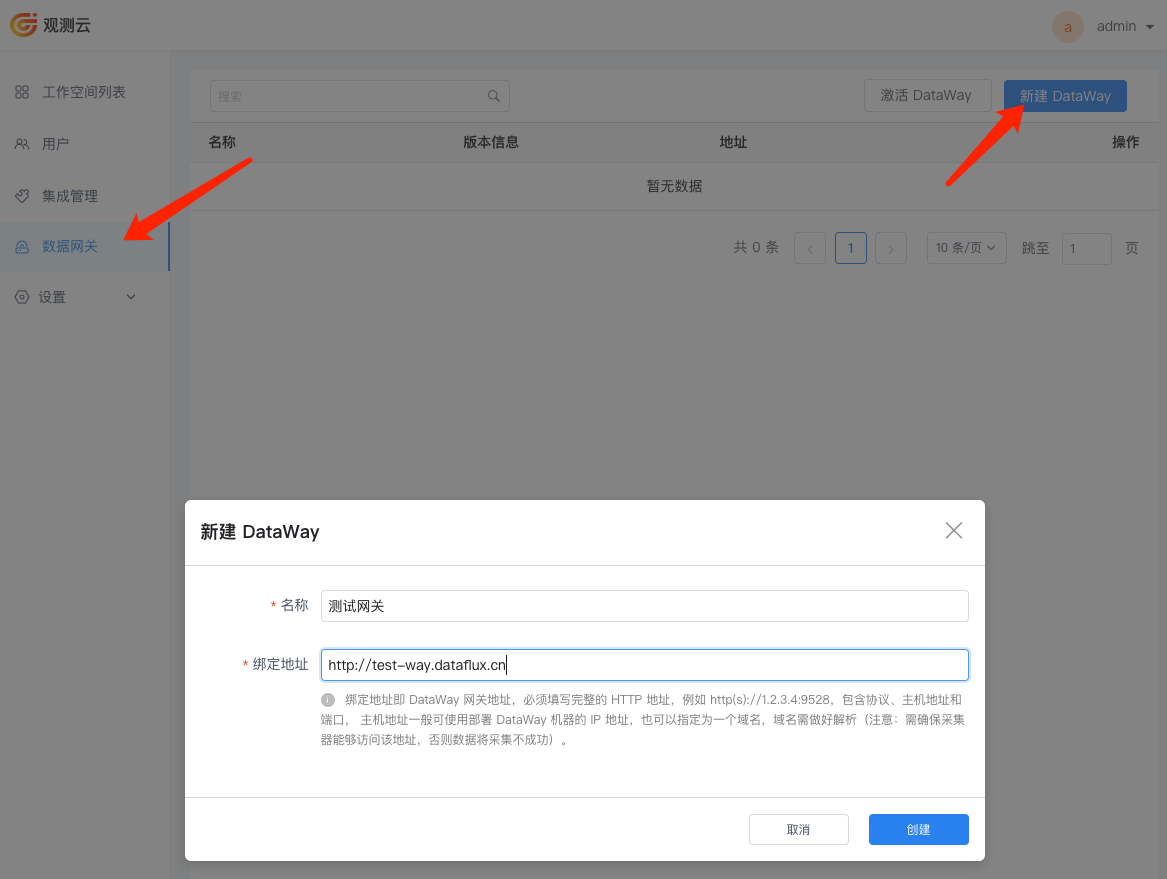
Log into the backend management console http://df-management.dataflux.cn with the administrator account. The default password is admin, and the username should be the one you set as the administrator. Navigate to the "Data Gateway" menu under the "Guance Management Console" and click on "New DataWay" to add a new data gateway.
- Name: You can enter a custom name.
- Binding Address: Access address of DataWay, which will be used when integrating DataKit. It can be formatted as
http://ip+port.
Note: When configuring the binding address of DataWay, ensure that the DataKit host can communicate with this DataWay address and can report data through it.
2. Install DataWay
Note
Ensure that the host where DataWay is deployed can access the previously configured kodo address. It is recommended that DataWay connects to kodo via the internal network!
After adding DataWay, you will receive an installation script. Copy the script and run it on the host machine where DataWay is being deployed.
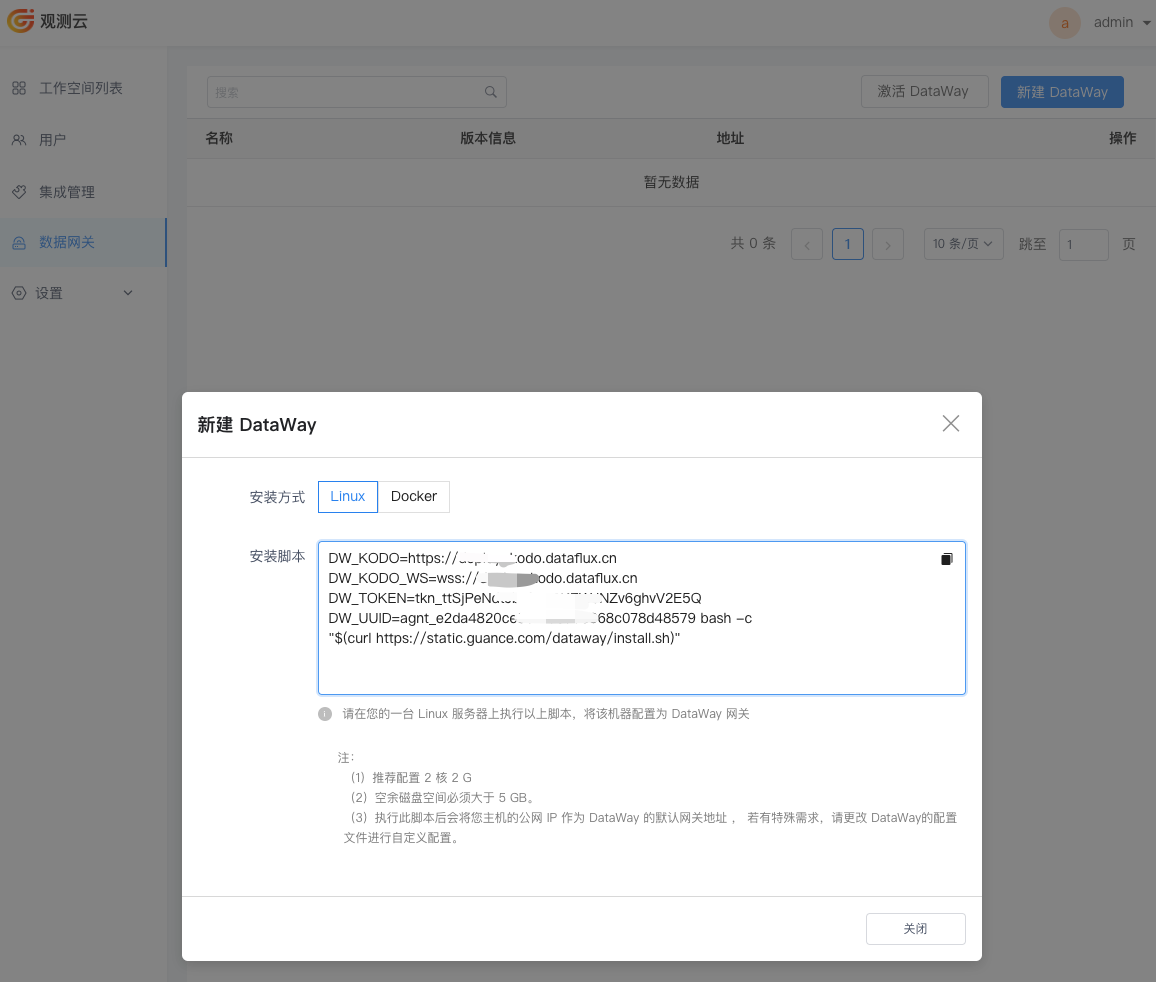
- Obtain
DW_TOKENandDW_UUID
- Modify Configuration
Update the DW_UUID and DW_TOKEN environment variables in the DataWay YAML configuration file.
- Install
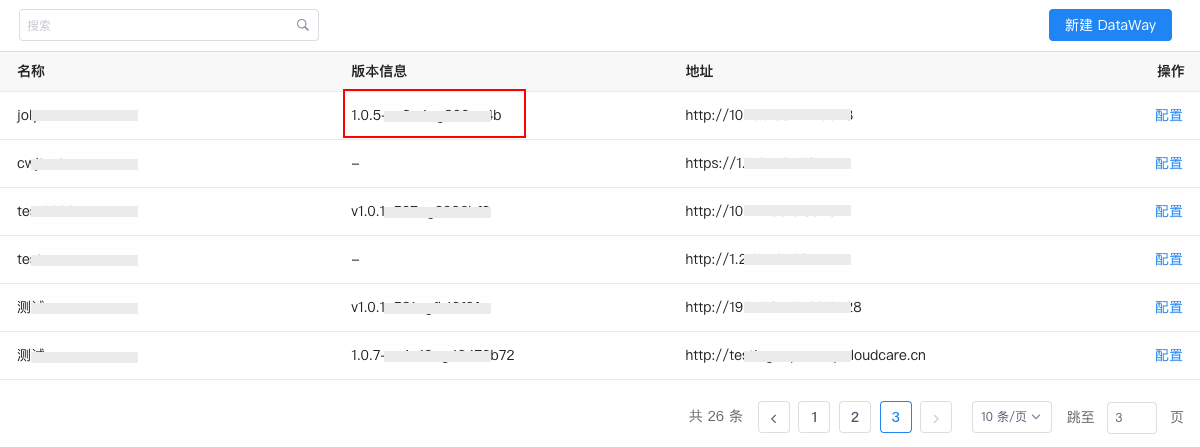
3. Verify Deployment
After installation, wait a moment and then refresh the "Data Gateway" page. If you see a version number in the "Version Info" column for the newly added data gateway, it means that this DataWay has successfully connected to Guance center, and frontend users can now use it to integrate data.
DataWay Access Settings
- Get Node IP
Sample output:
NAME         STATUS   ROLES           AGE   VERSION   INTERNAL-IP     EXTERNAL-IP   OS-IMAGE                KERNEL-VERSION          CONTAINER-RUNTIME
k8s-master   Ready    control-plane   9d    v1.24.0   10.200.14.112   <none>        CentOS Linux 7 (Core)   3.10.0-957.el7.x86_64   containerd://1.6.16
k8s-node01   Ready    <none>          9d    v1.24.0   10.200.14.113   <none>        CentOS Linux 7 (Core)   3.10.0-957.el7.x86_64   containerd://1.6.16
k8s-node02   Ready    <none>          9d    v1.24.0   10.200.14.114   <none>        CentOS Linux 7 (Core)   3.10.0-957.el7.x86_64   containerd://1.6.16
You can directly access: http://10.200.14.112:30928
10.200.14.112 is the node IP used in this example. Replace it with your own cluster IP. You can also access DataWay through a proxy service. For instructions, refer to Access Proxy Settings.
Save the following content as dataway-svc.yaml:
---
apiVersion: v1
kind: Service
metadata:
  annotations:
    service.beta.kubernetes.io/aws-load-balancer-nlb-target-type: ip
    service.beta.kubernetes.io/aws-load-balancer-scheme: internal  # Internal
    # service.beta.kubernetes.io/aws-load-balancer-ssl-cert: "" # Certificate
    # service.beta.kubernetes.io/aws-load-balancer-scheme: internet-facing  # External
  name: dataway
  namespace: utils
spec:
  ports:
  - name: 9528tcp02
    port: 80
    protocol: TCP
    targetPort: 9528
  selector:
    app: deployment-utils-dataway
  type: LoadBalancer
Deploy:
Check the NLB address:
You can directly access: http://nlbIP
You can directly access port 9528 on the installation machine.