Role Management
If you need to assign different system access permissions to employees for permission isolation, you can use the Role Management feature. Role Management provides an intuitive permission management entry point, supports customizing the permission scope of each role, creating new roles, and assigning permissions to roles to meet the permission requirements of different users.
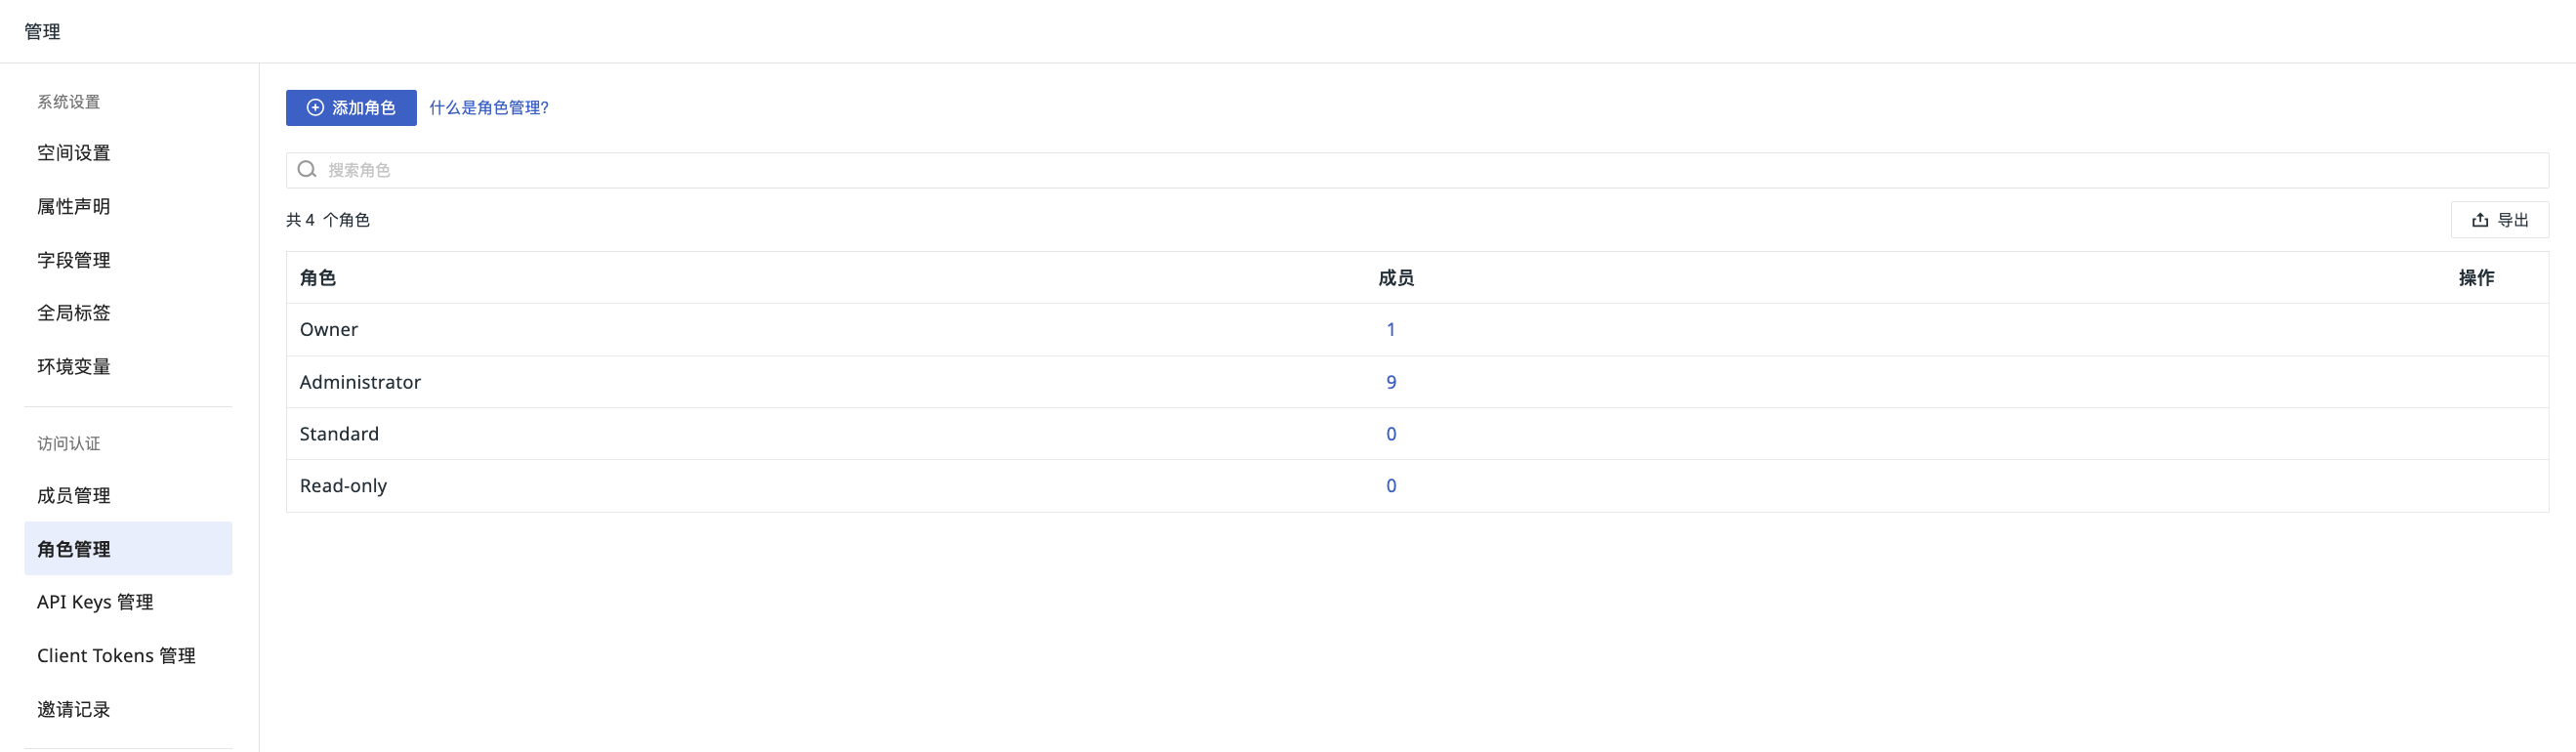
Default Roles
If different teams in your organization need to view or operate on different features, you can invite members to join the current Workspace and assign role permissions to them, thereby controlling which Guance features members can access and operate.
The system provides four member roles by default:
-
Owner
-
Administrator
-
Standard
-
Read-only
Default roles cannot be deleted, nor can their permission scopes be changed.
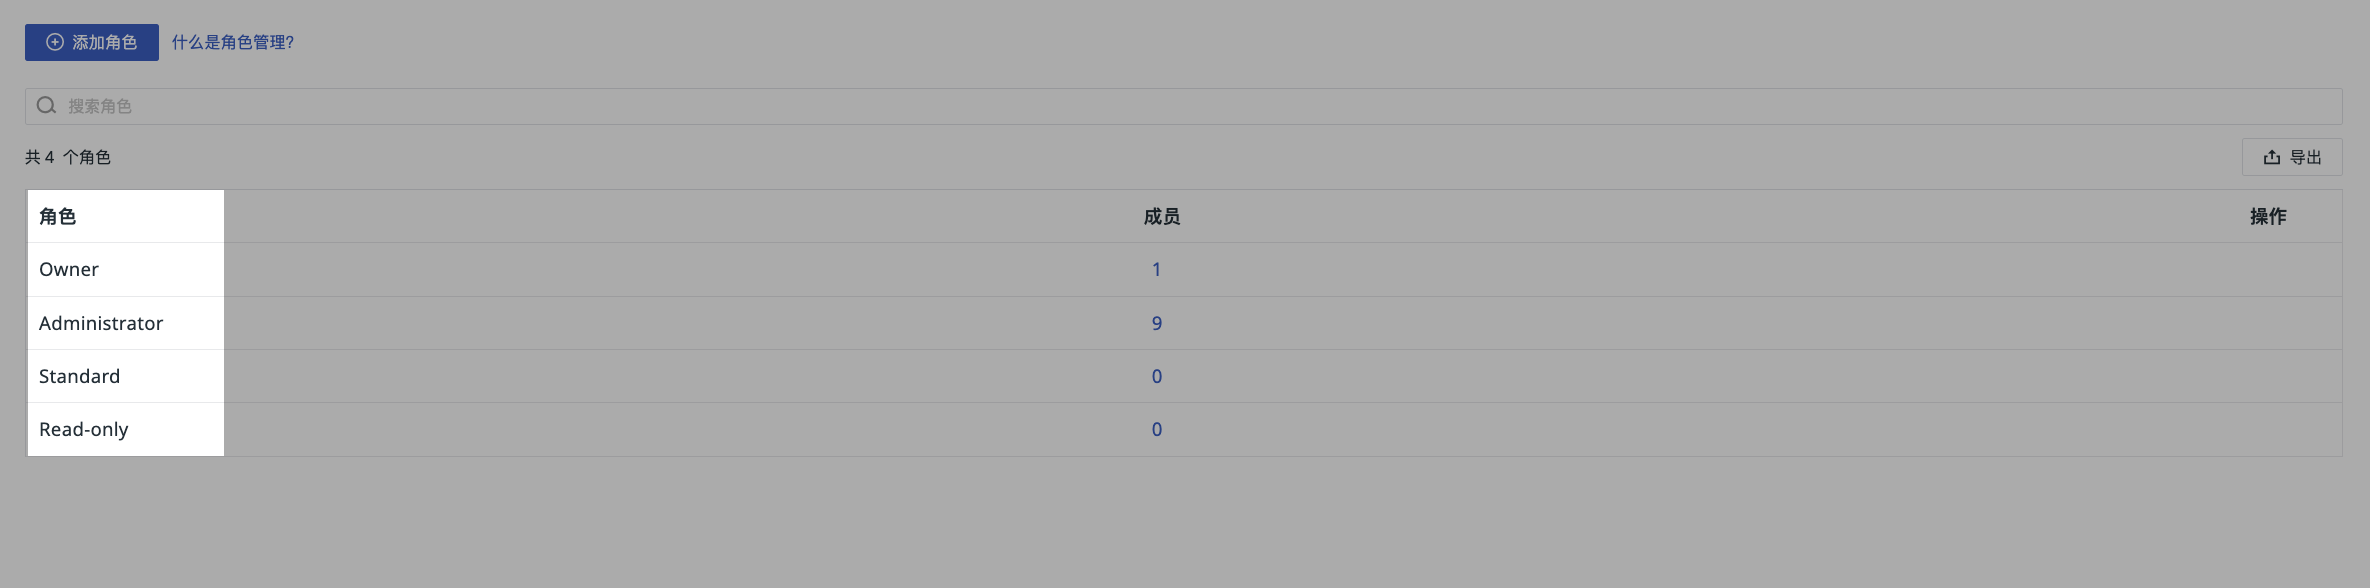
Permission Description
For the permission scope of different default roles, see the document Permission List.
-
Owner: The owner of the current Workspace. Has all operation permissions within the Workspace and can adjust the role permissions of other members. If the granted role permissions include "View Token", the authorization review process is triggered.
-
The creator of the Workspace is the Owner by default;
-
A Workspace can have only one Owner;
-
The Owner cannot leave the Workspace;
-
The Owner can transfer ownership to a Workspace member. After the transfer succeeds, the original Owner is downgraded to Administrator.
-
-
Administrator: The administrator of the current Workspace. Has read and write permissions for the Workspace and can adjust the role permissions of members other than the Owner;
-
Standard: A standard member of the current Workspace. Has read and write permissions for the Workspace;
-
Read-only: A read-only member of the current Workspace. Can only view data in the Workspace and has no write permissions.
Custom Roles
In addition to the default roles, you can create new roles in Role Management and assign permission scopes to them to meet different permission requirements.
-
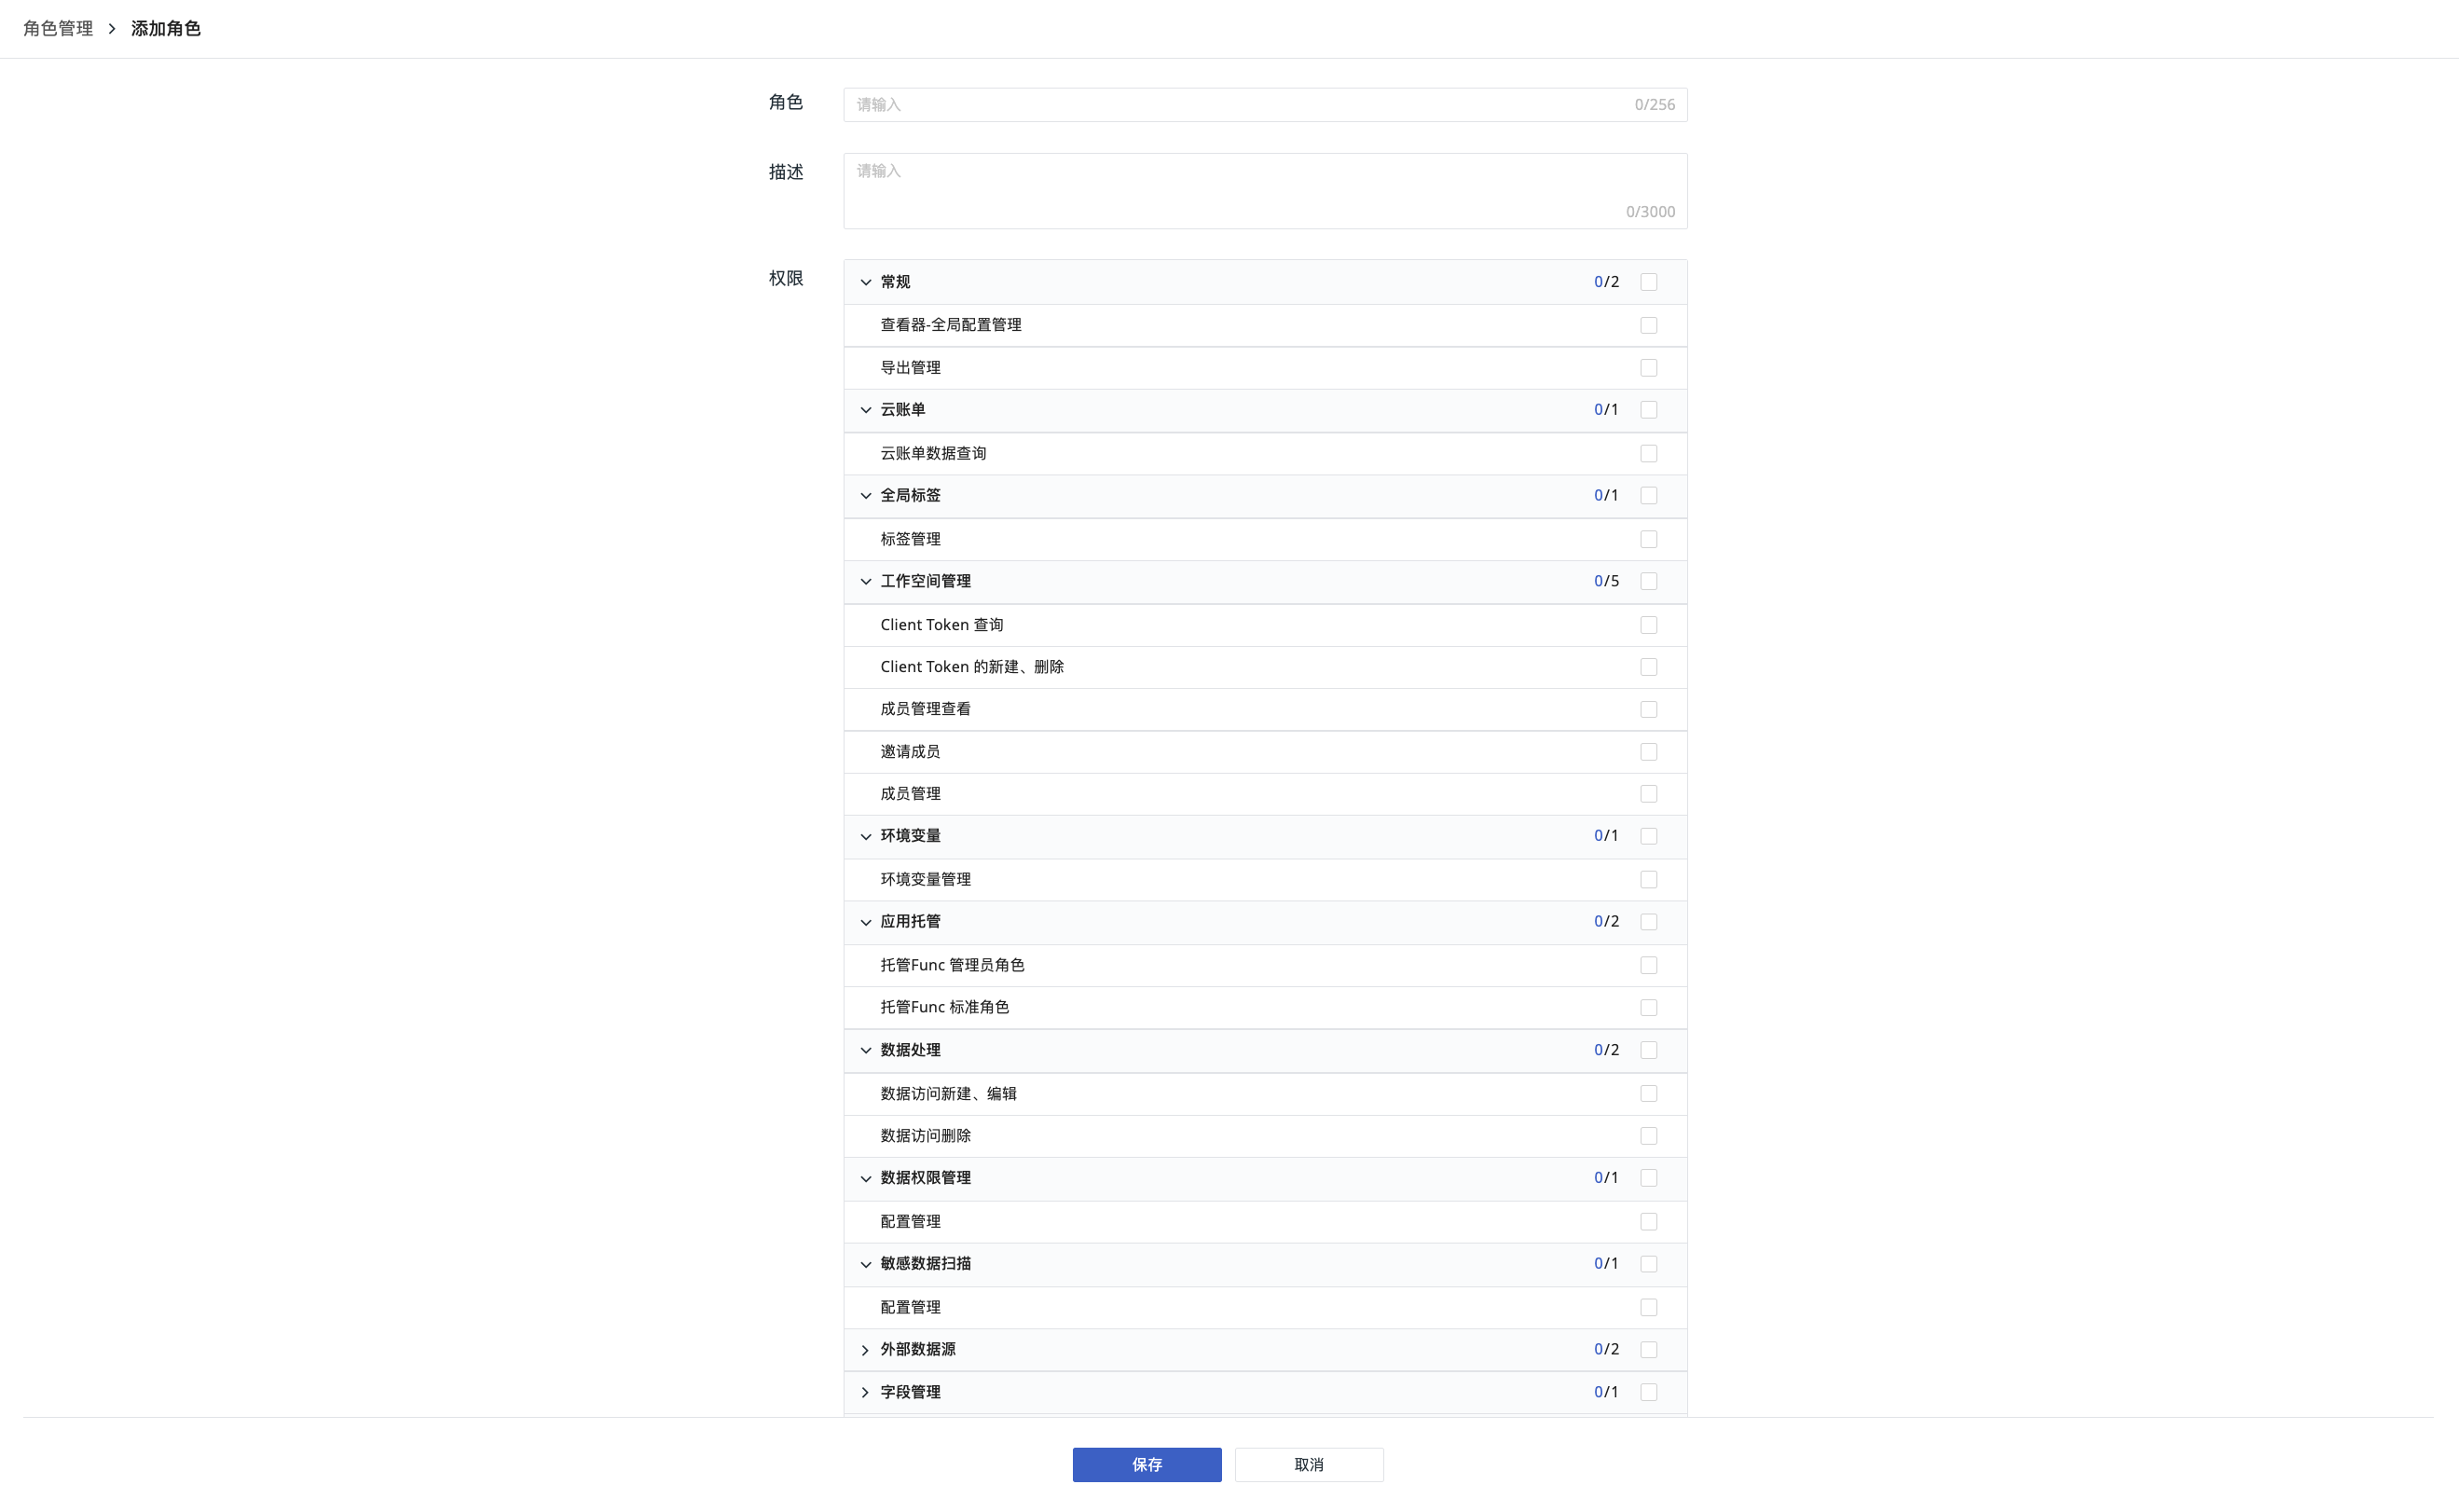
On the Management > Role Management page, click "Add Role";
-
Define the role name and description;
-
Select the feature permission scopes;
-
Save.
Note
Only Owner and Administrator can create custom roles.
Manage Roles
You can perform the following operations on custom roles:
-
Export the permissions of all roles as a list;
-
Edit and adjust role permissions;
-
If the role is not associated with any member account, it can be deleted;
-
Clone an existing role to create a new role;
- Based on the permissions of an existing role, cloning reduces the number of steps and allows you to quickly add or remove permissions and create a role
-
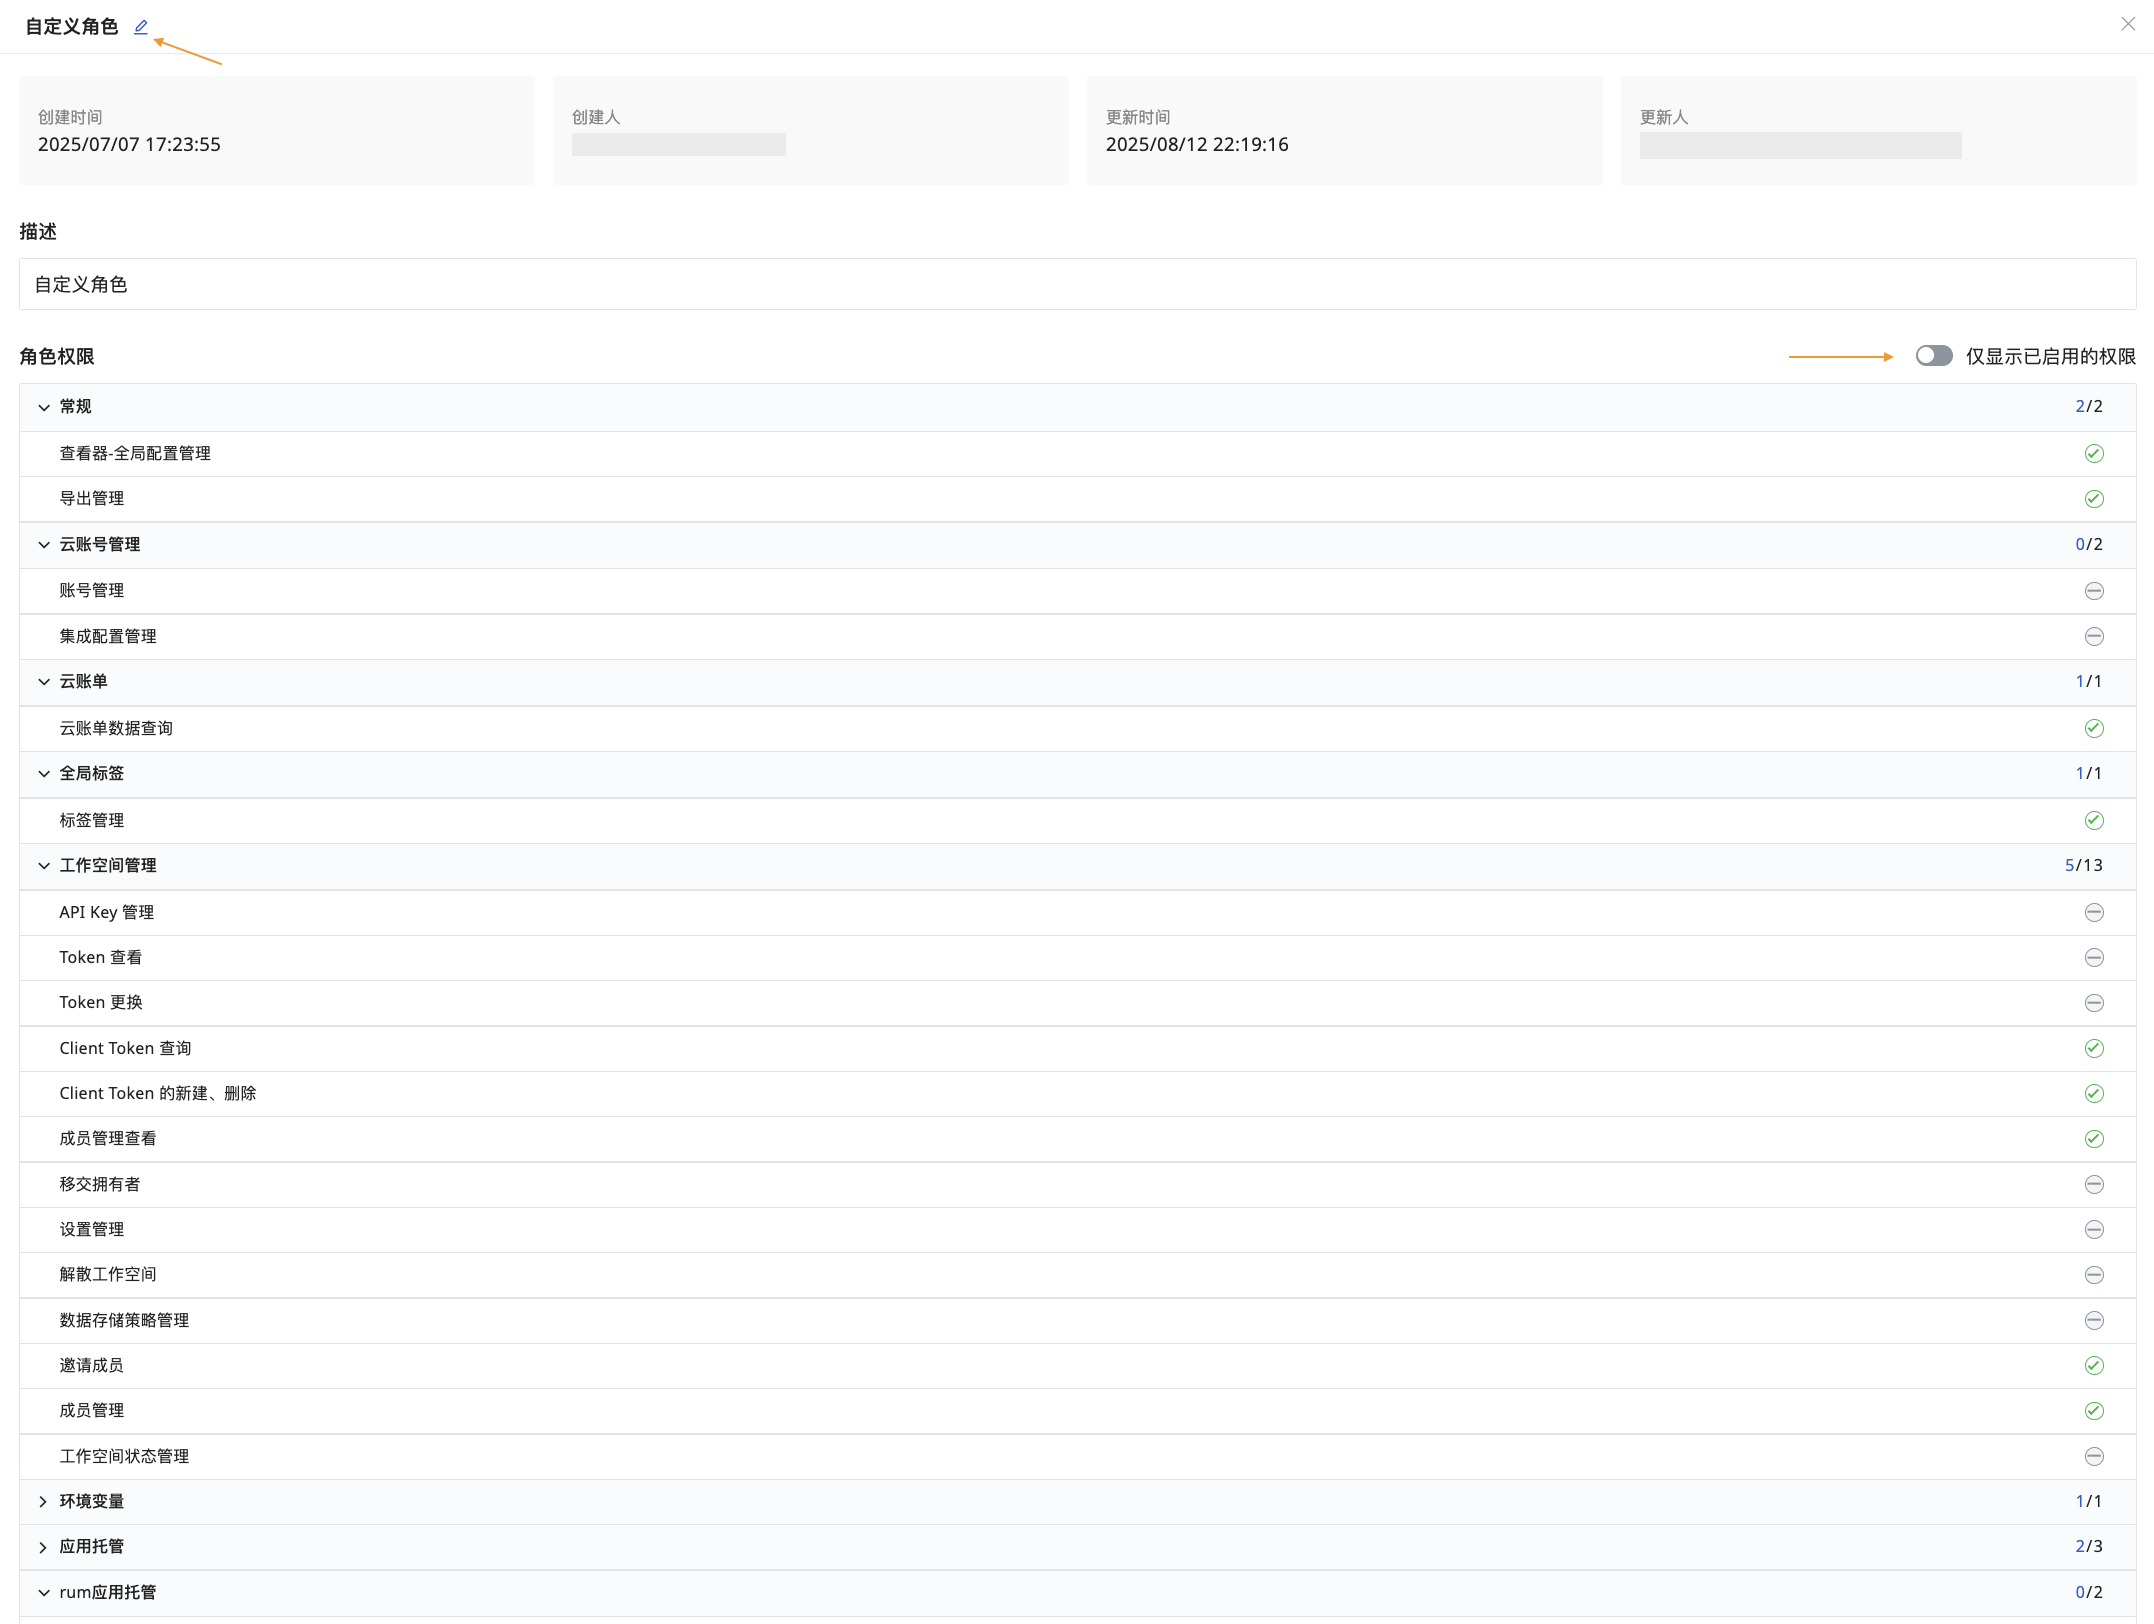
Click any custom role to view its details, including the role name, creation/update time, creator/updater, description, and role permissions;
- Click the edit button to the right of the role name at the top to modify role permissions;
- In the role list, you can enable the "Show only enabled permissions" toggle.
Associate Data Access Rules
Roles define the operations a member can perform, while data access rules define the data scope a member can view. The two are independent resources. In the Role Management list, to the right of the Members column, you can use the Data Access Rules column to view the number of rules currently associated with default roles and custom roles, and maintain the association between roles and rules.
- Click or hover over the rule count to select Edit or Go to Data Access; this is also available when the count is
0; - Selecting Edit opens the "Associate Data Access Rules" drawer on the right side of the current page. You can search for rule names, view rule information by page, and select or clear the rules associated with the current role;
- After saving, the system only updates the association between the role and the data access rules. It does not modify rule names, data types, filter conditions, or field masking configurations;
- Selecting Go to Data Access takes you to the Data Access page and automatically applies the current role as a filter condition;
- Deleted data access rules are not included in the rule count.
After the association succeeds, when a member queries data, the system calculates the applicable data access rules based on the member's role.
Notes on System Default Roles
- Owner is not restricted by data access rules;
- When rules are associated with an Administrator, the data scope is restricted and masking is applied according to the rules. When no rule is associated, even if “Data Access Scope Limit” is enabled, the Administrator can still query data within the original permission scope.
Permission Notes
Viewing rule counts and rule details requires both the role view permission and the data access view permission. Only after you have the data access management permission can you edit and save associations. Without the data access view permission, rule details are not returned, and the page will display -- or hide the column according to permission rules.
Permission Change Review
When setting role permissions for a Workspace member, if the granted role permissions include "View Token", the system sends verification information to the Guance Billing Center and initiates the permission change review process.
-
If the Billing Center accepts the verification, the permission change succeeds;
-
If the Billing Center rejects the verification, the permission change fails and the original role permissions remain;
-
If the Billing Center has not reviewed the request, you can change the member to another role. Once the change succeeds, the original permission change review request becomes invalid.
Warning
-
Currently, only Owner and Administrator have the "View Token" permission. If a member of a Commercial Plan Workspace needs to be elevated to Administrator, the elevation must be reviewed in the Billing Center;
-
Members of Free Plan Workspaces can be directly elevated to Administrator without going to the Billing Center for review.
Elevating to Administrator in Commercial Plan
-
Go to Management > Member Management;
-
Select the member you want to elevate to Administrator;
-
Click the Edit button on the right, and in the dialog box, select Administrator;
-
Confirm.
The system only allows the Owner and Administrator roles to grant Administrator permissions to members of the current Workspace. Only the Owner role can approve Administrator permissions in the Billing Center.
If you are an Administrator of the current Workspace and need to elevate a member, you need to notify the Guance Billing Center administrator to log in to the Billing Center and perform the operation;
If you are the Owner of the current Workspace, you can click Go to Billing Center for Review directly and perform the operation without logging in to the Guance Billing Center.
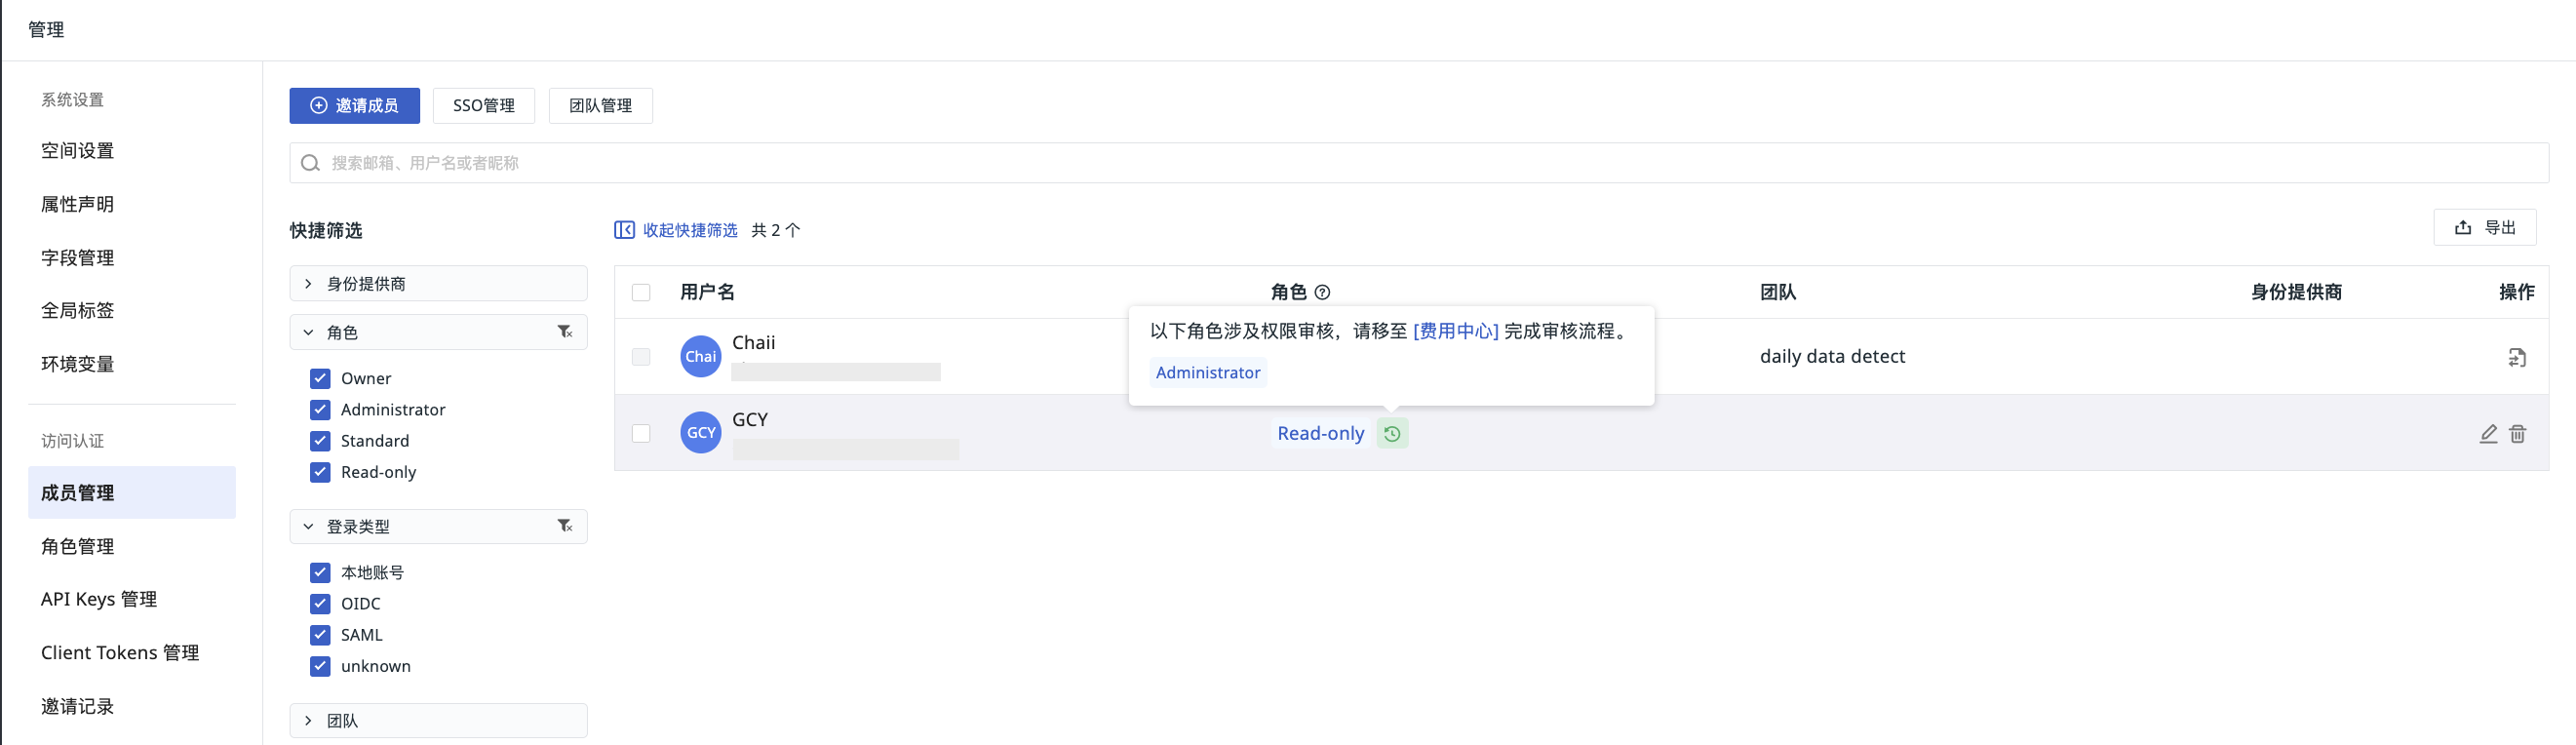
In the Member Management list, you can view all members whose Administrator role has not been approved. Click the icon to the right of the member's role, and in the prompt dialog, click Go to Billing Center to review.
Permission List
You can set permissions for custom roles in the Workspace.
For more details, see the document Permission List.