AAD Single Sign-On Example
Azure Active Directory (AAD) is Microsoft's cloud-based identity and access management service that helps organizations manage internal and external resources.
Procedure
1. Create an application
- Sign in to the Azure Active Directory admin center, and click Enterprise applications > All applications > New application.
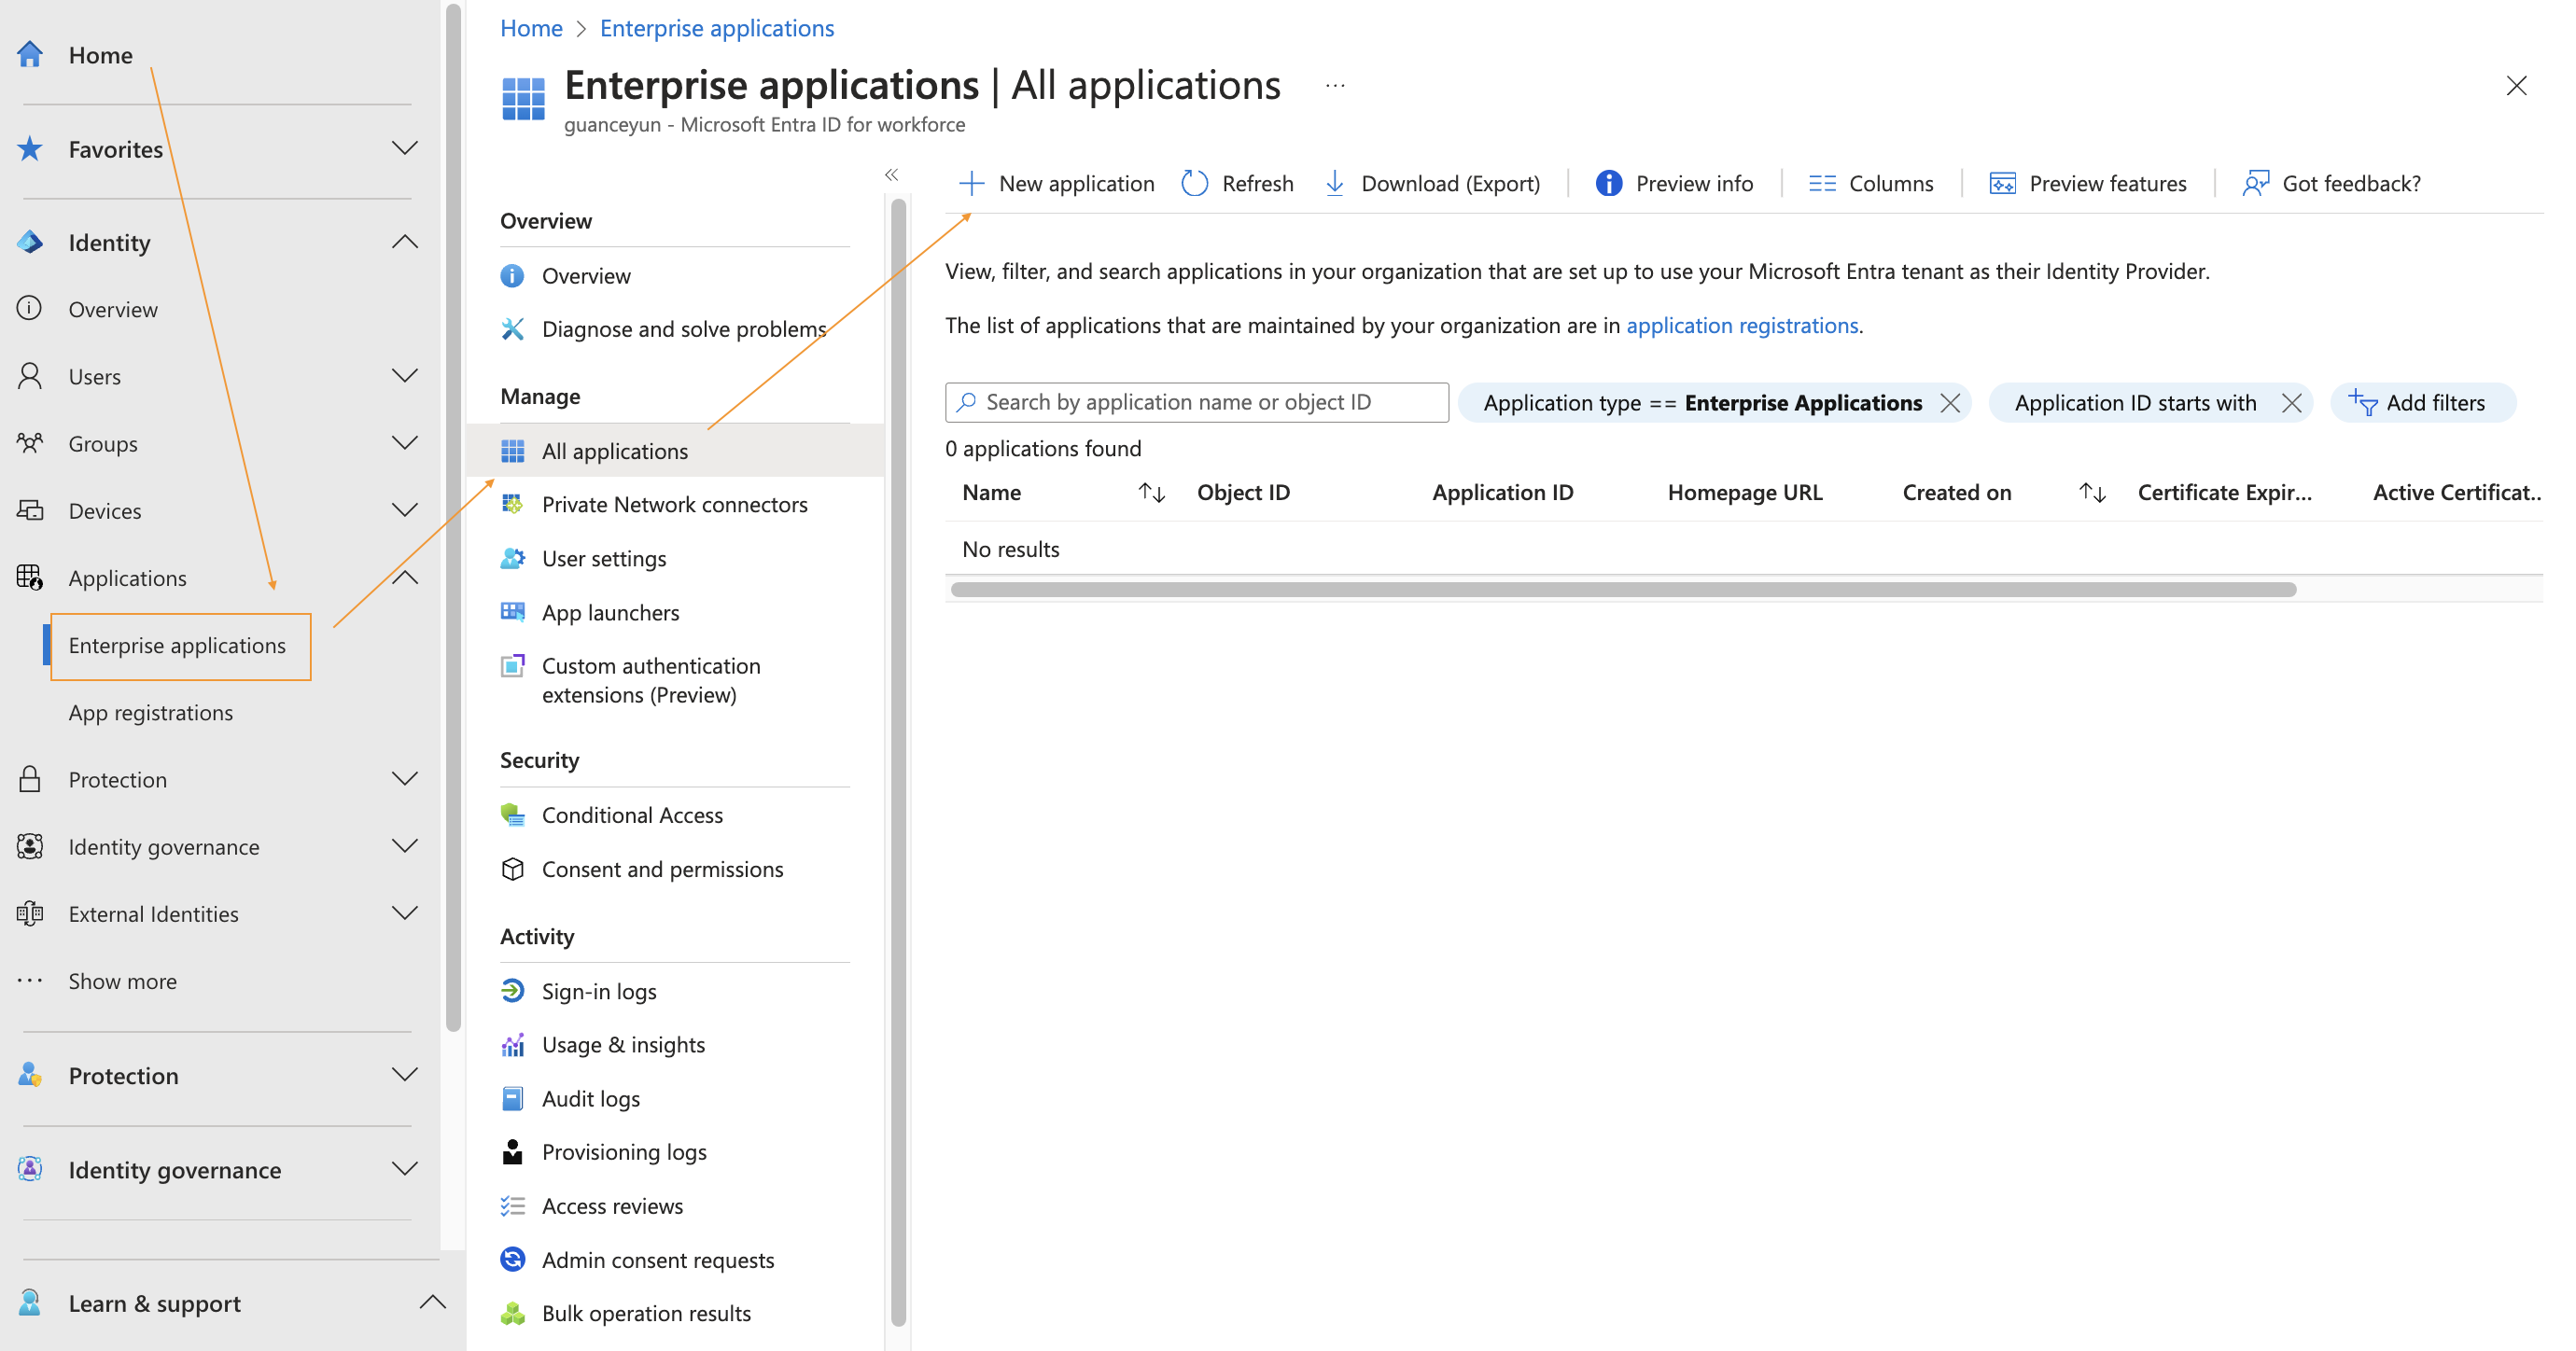
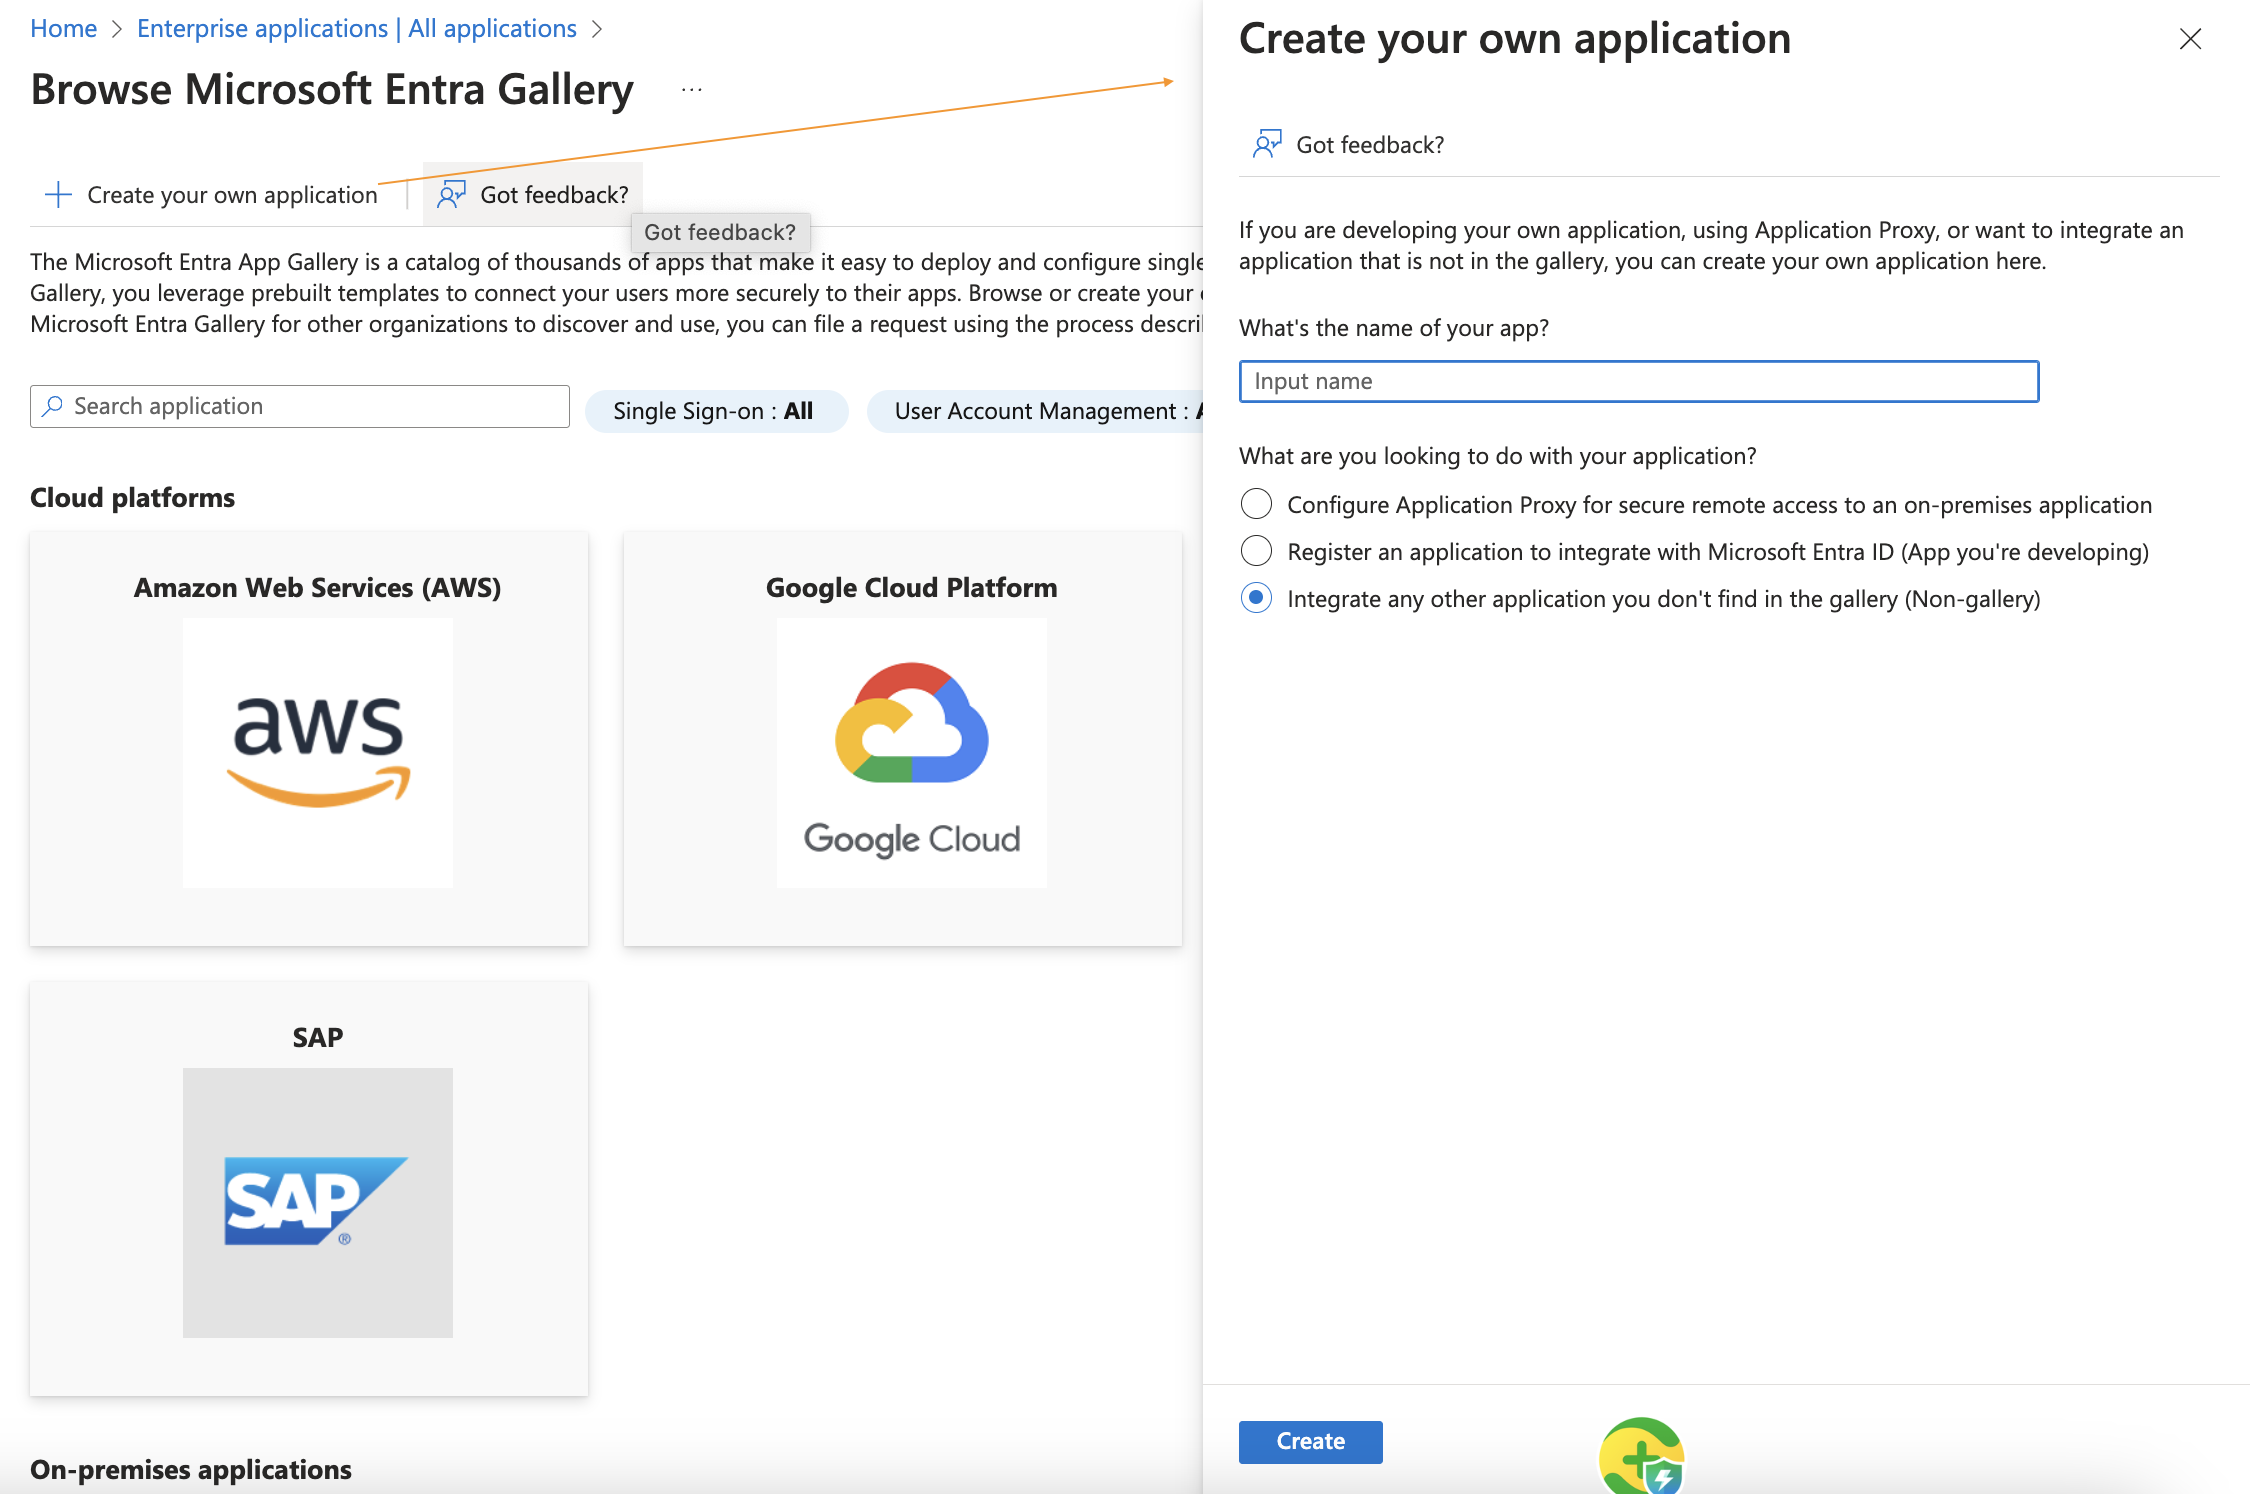
- On the New application page, click Create your own application. In the page that opens, enter an application name, select Non-gallery application, and click Create to create a new application.
2. Configure SAML for the application
Note: This step maps the AAD application attributes to Guance attributes, establishing a trust relationship between AAD and Guance.
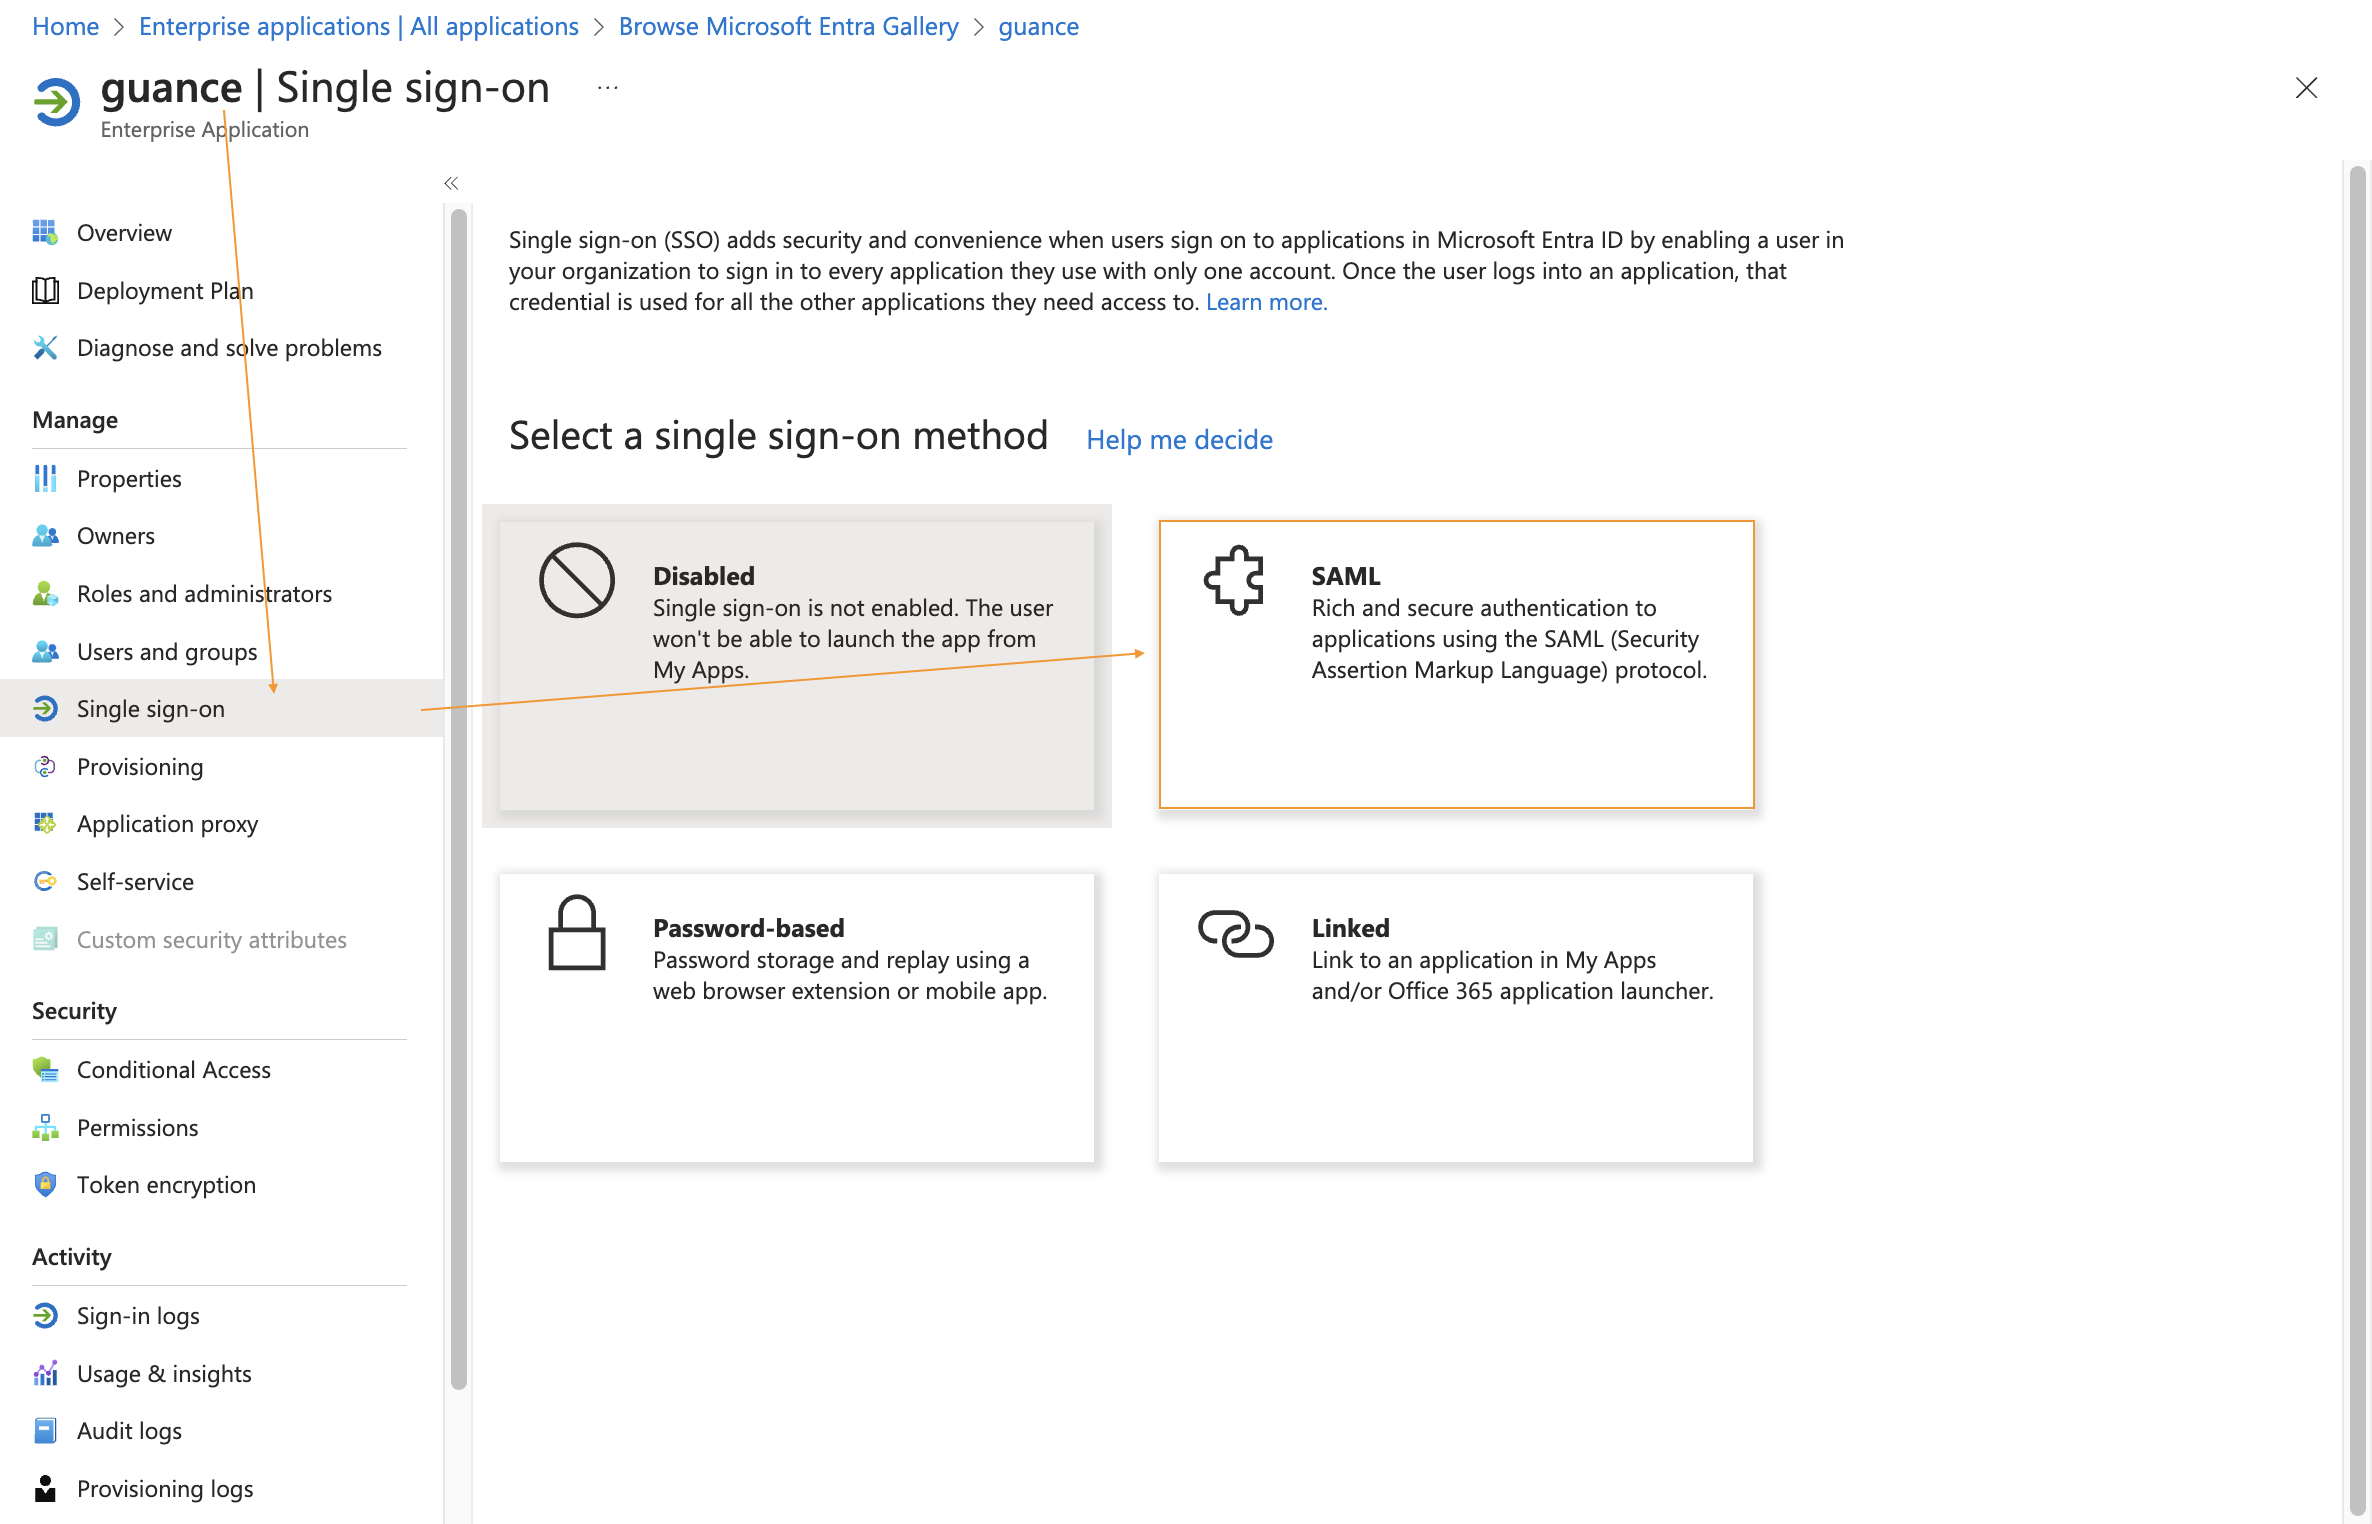
- On the newly created application, click Single sign-on and select SAML.
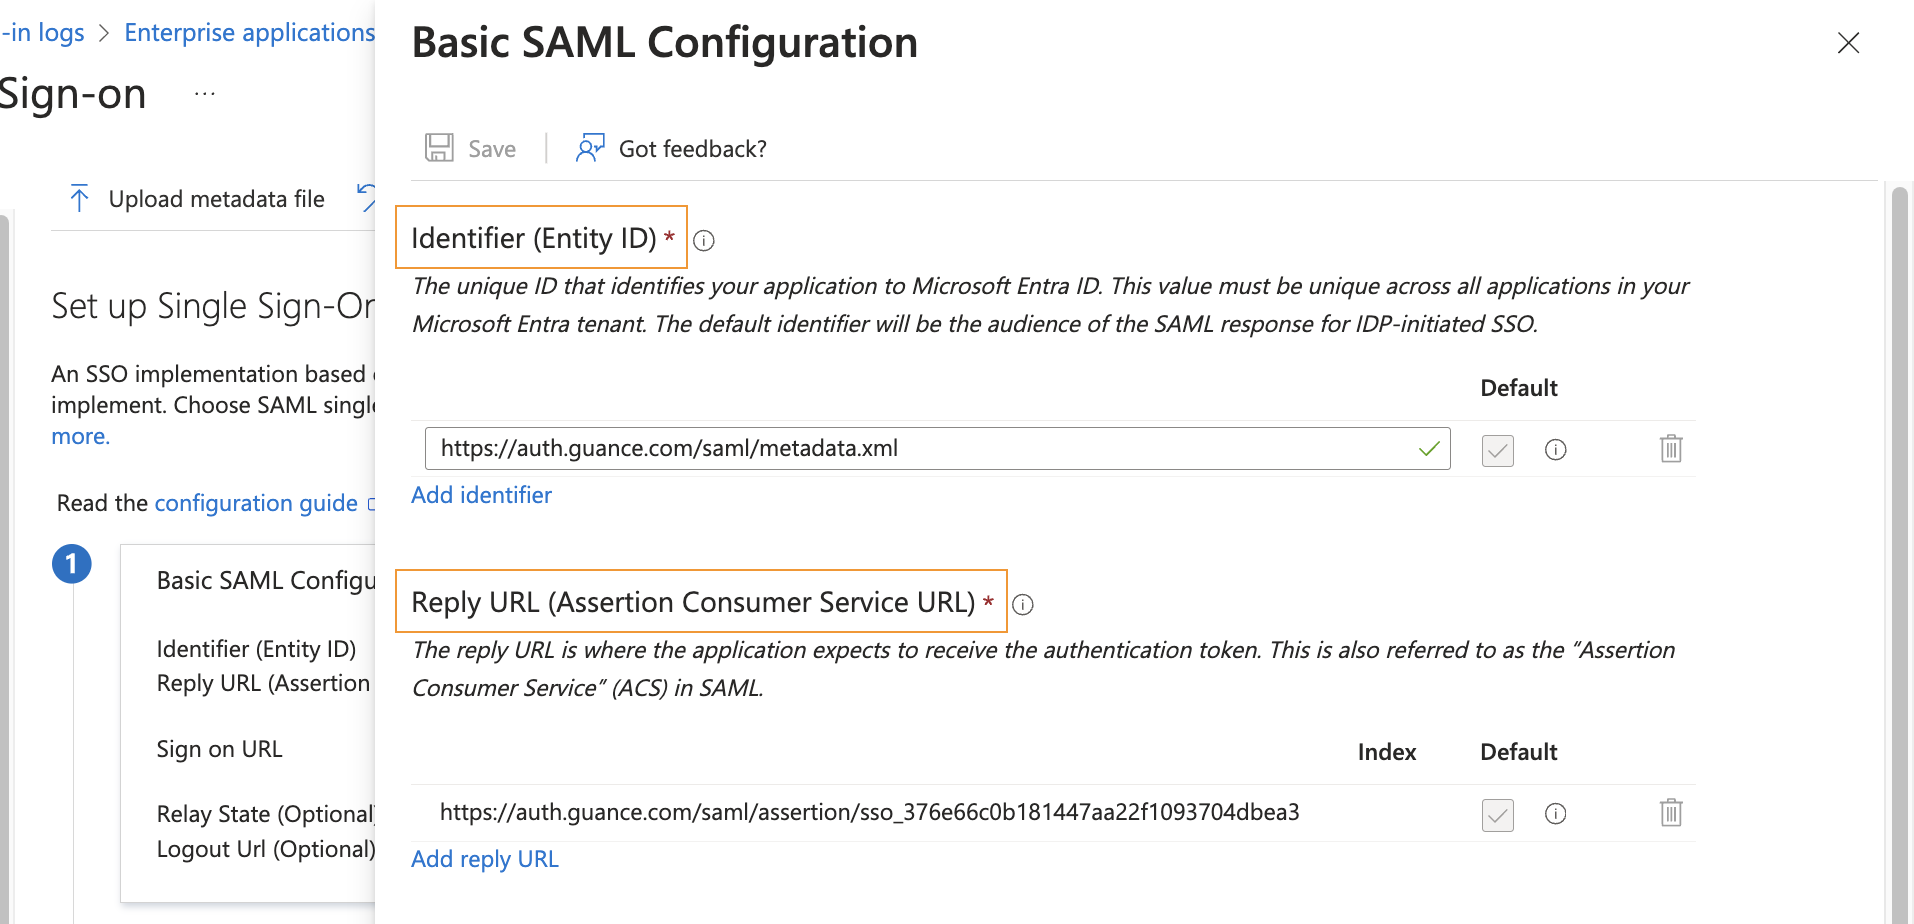
- In Set up single sign-on with SAML, under the first step Basic SAML Configuration, click Edit.
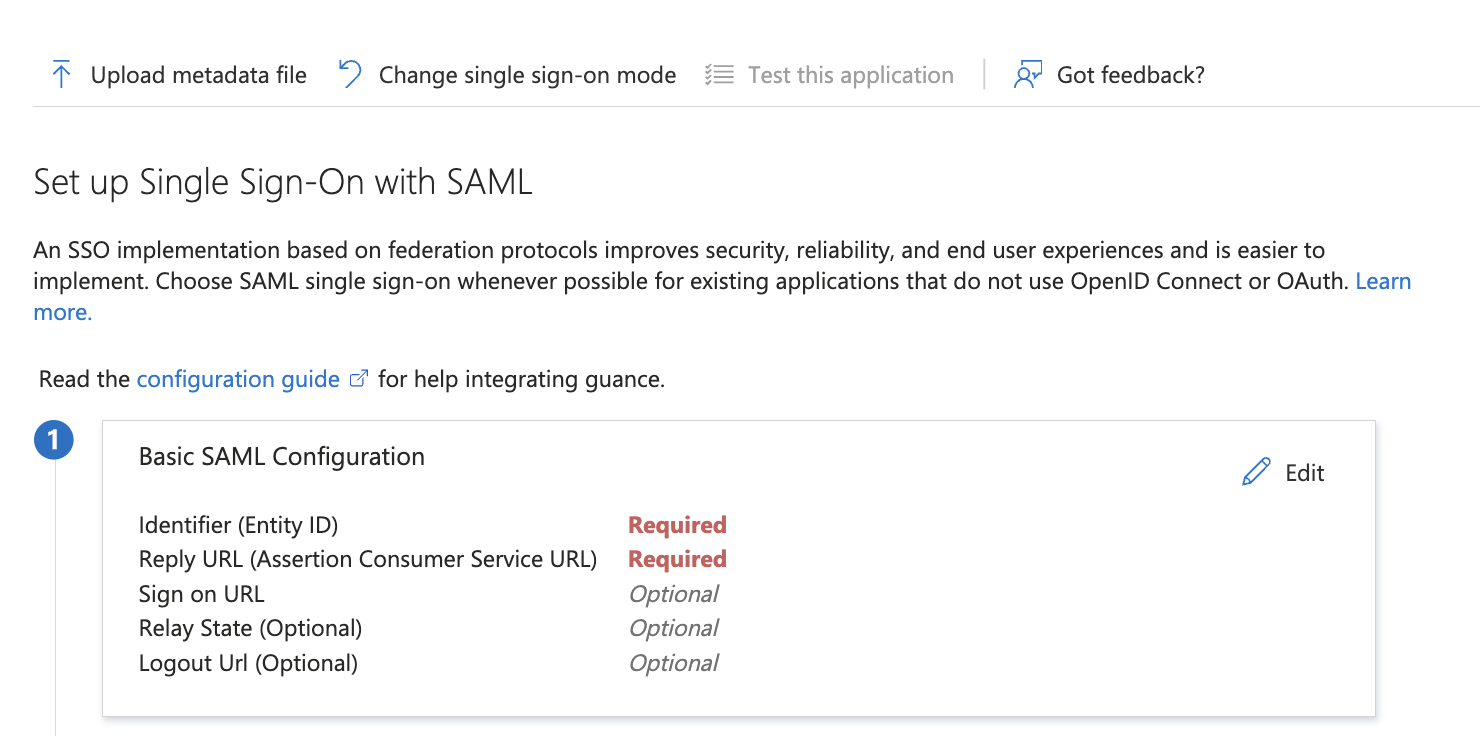
Fill in the following example values for the Assertion Consumer Service URL and Entity ID.
- Identifier (Entity ID): https://auth.guance.com/saml/metadata.xml
- Reply URL (Assertion Consumer Service URL), used temporarily: https://auth.guance.com/saml/assertion
Note: This configuration is used only to obtain the metadata document in the next step. After enabling SSO in Guance, you need to obtain the correct Entity ID and Assertion Consumer Service URL and replace them accordingly.
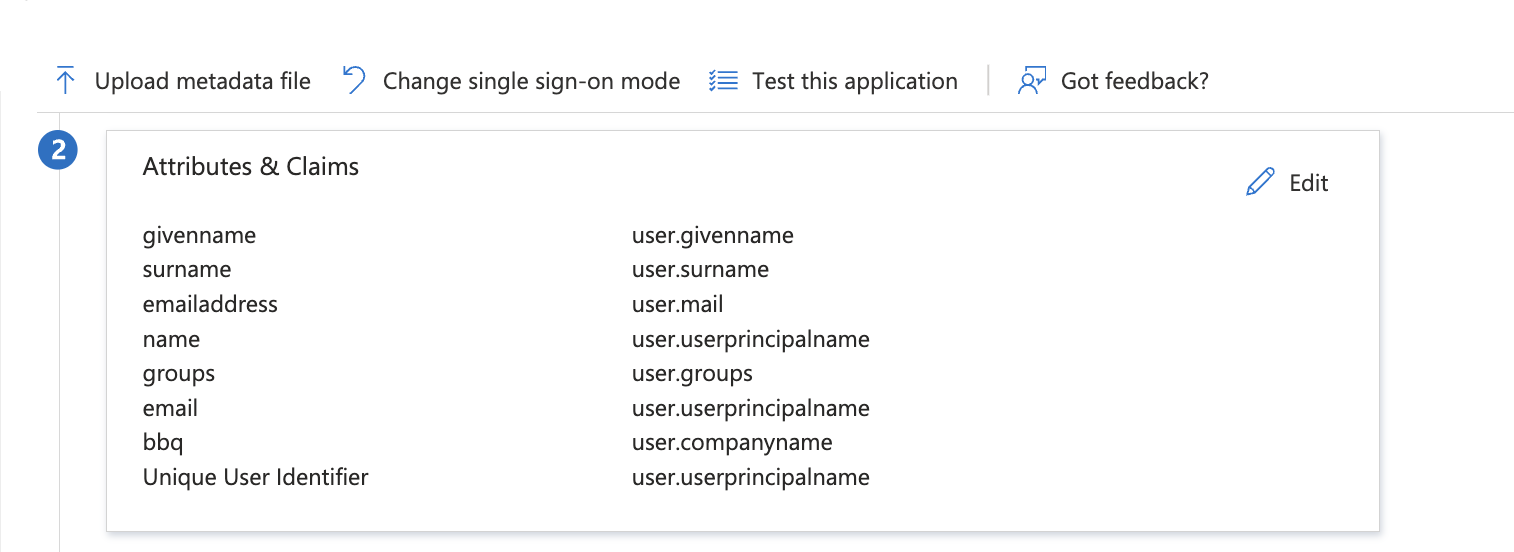
- In the second step, under Attributes & Claims, click Edit to add a claim associated with the identity provider user's email address.
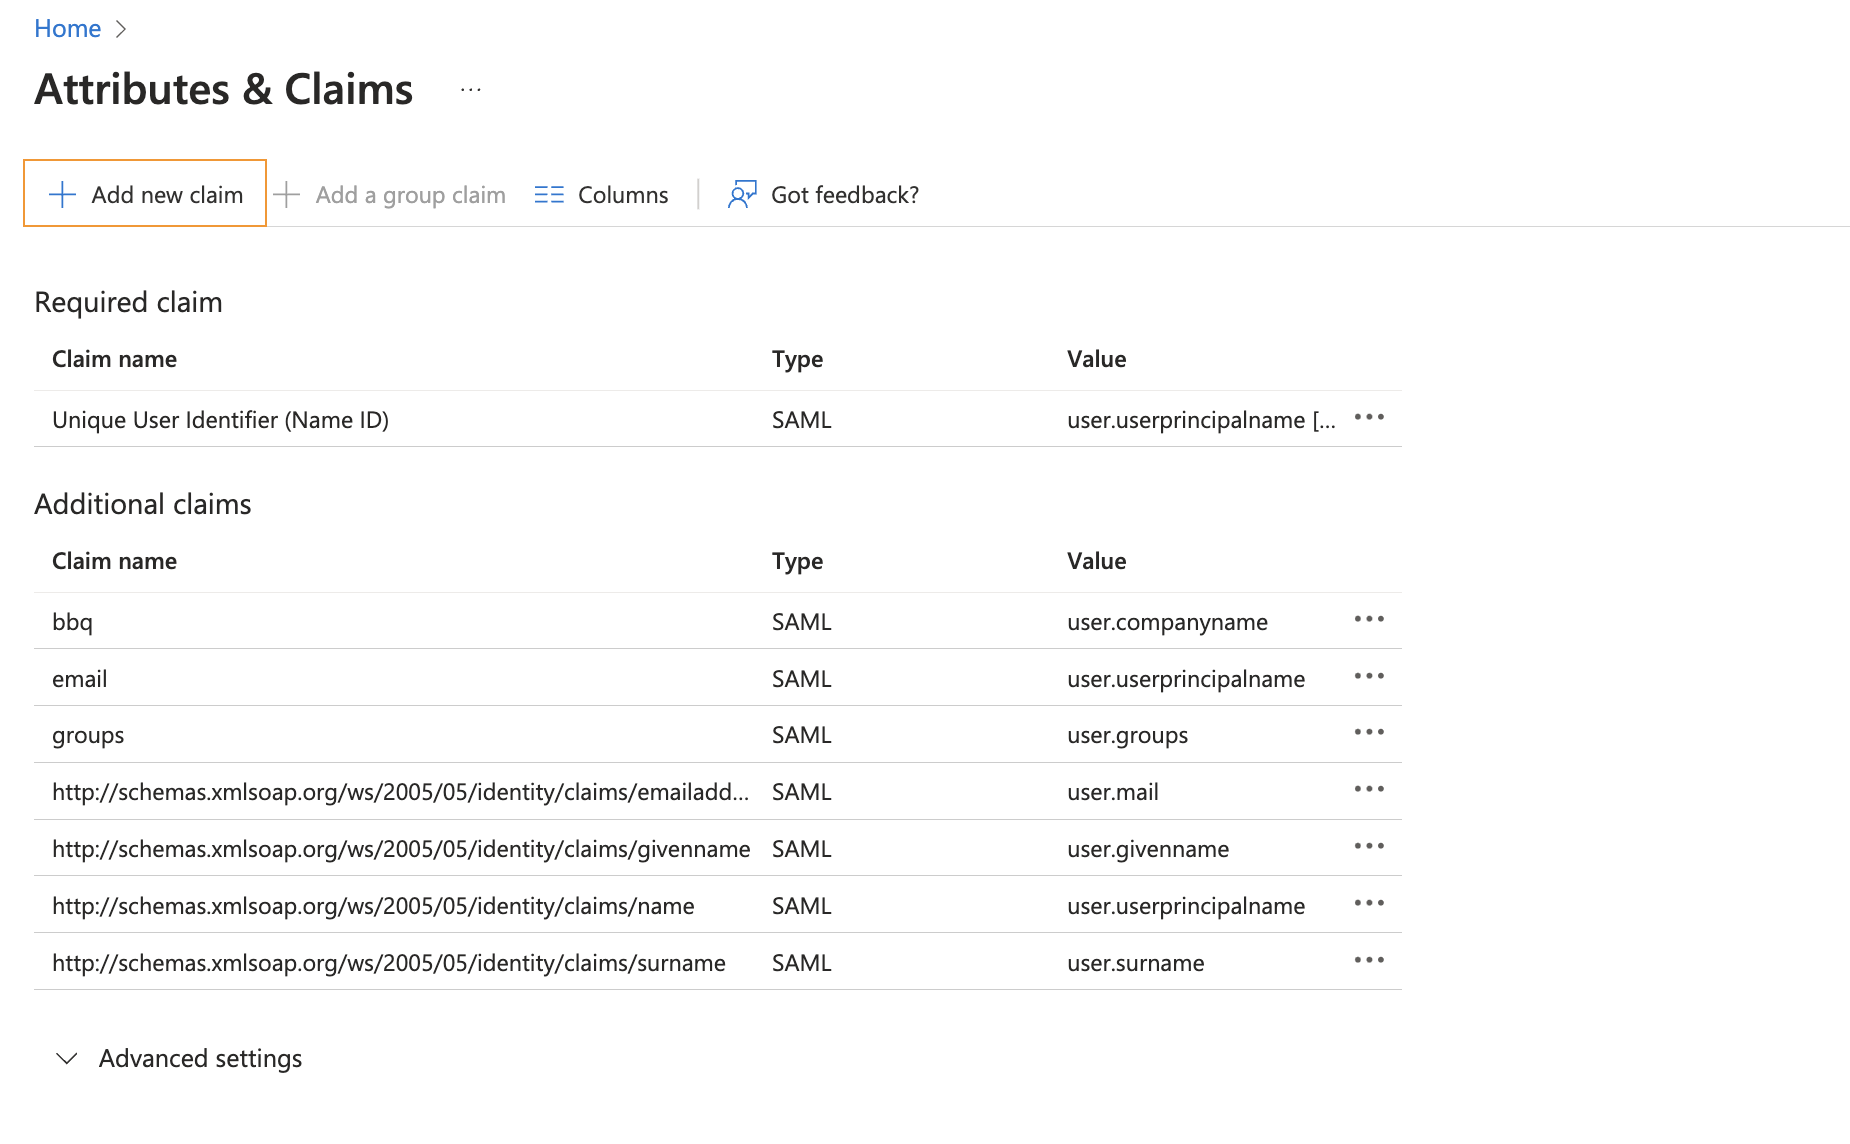
On the Attributes & Claims editing page, click Add new claim.
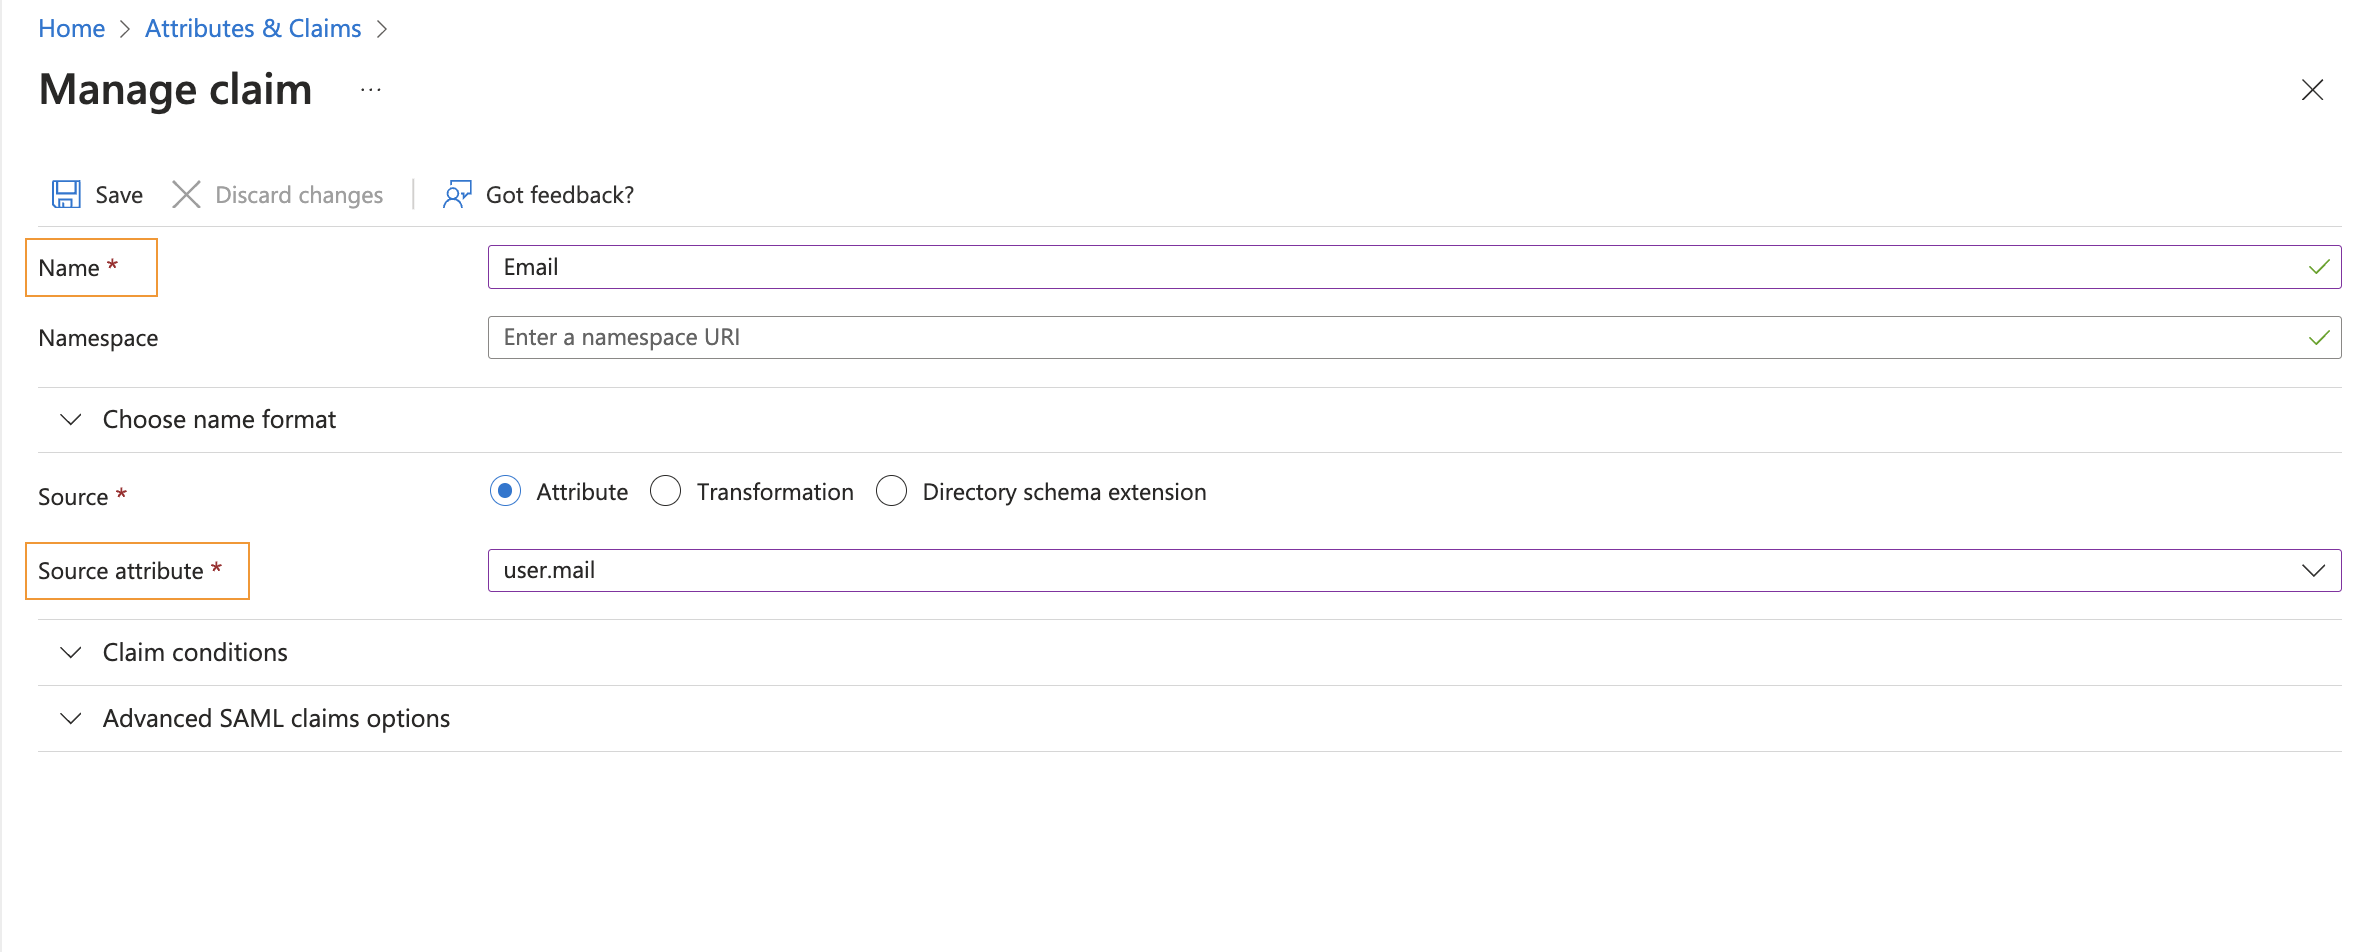
On the Manage claim page, enter a Name and Source attribute, then save:
- Name: In this example, enter Email to pass the user's email address.
- Source attribute: Select
user.mailbased on the actual email attribute of the identity provider.
Note: In SAML field mapping in Guance, set the Email mapping to the attribute name returned here (in this example, Email). Also configure the required Username mapping; the Phone Number mapping can be filled in as needed.
3. Get the AAD metadata document
Note: In this step, you can obtain the metadata document for the identity provider created in Guance.
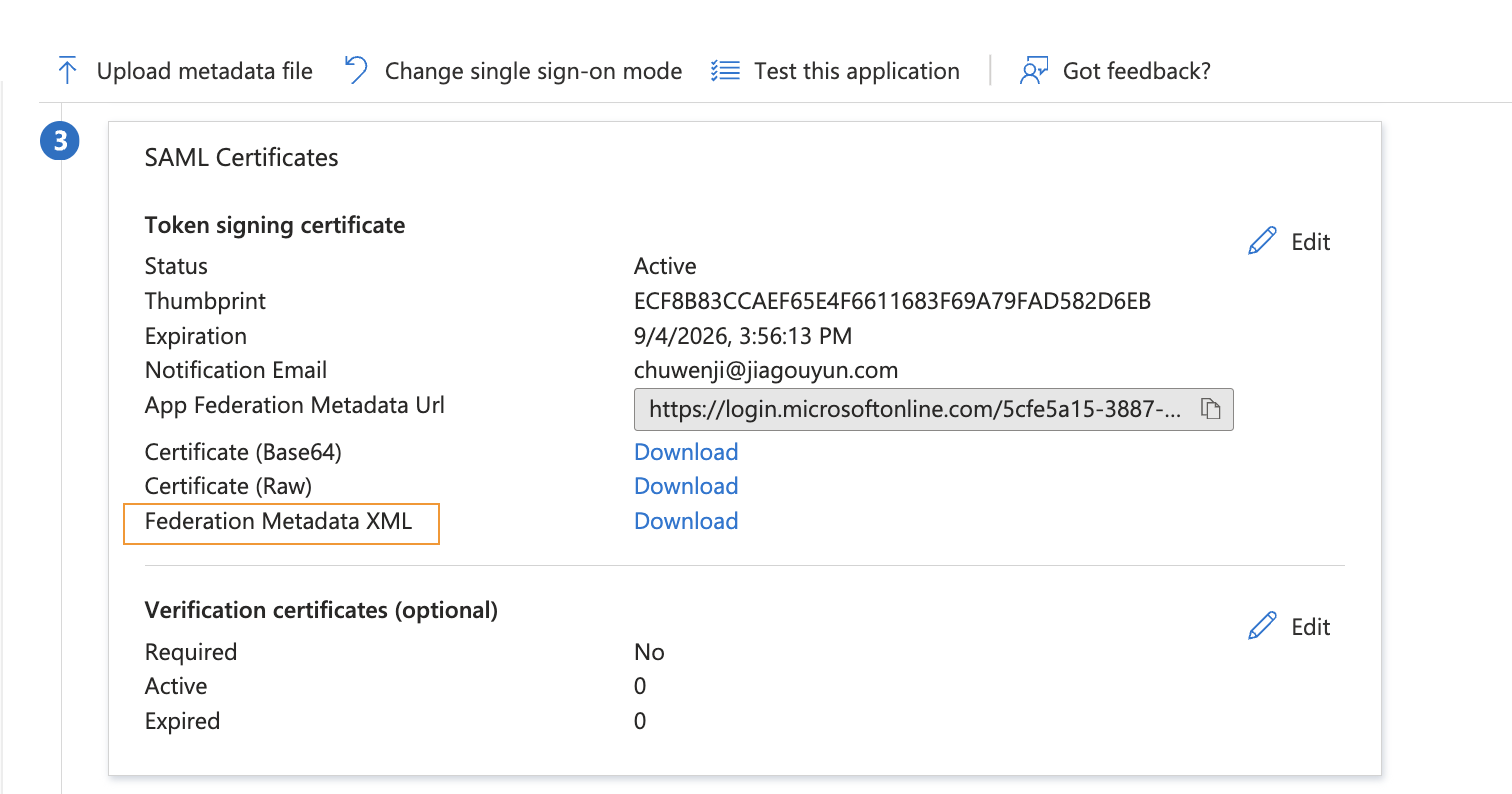
- In the third step, under SAML Signing Certificate, click Download Federation Metadata XML.
4. Enable SSO in Guance
- In the Guance workspace, go to Management > Member Management > SSO Management and Create SSO.
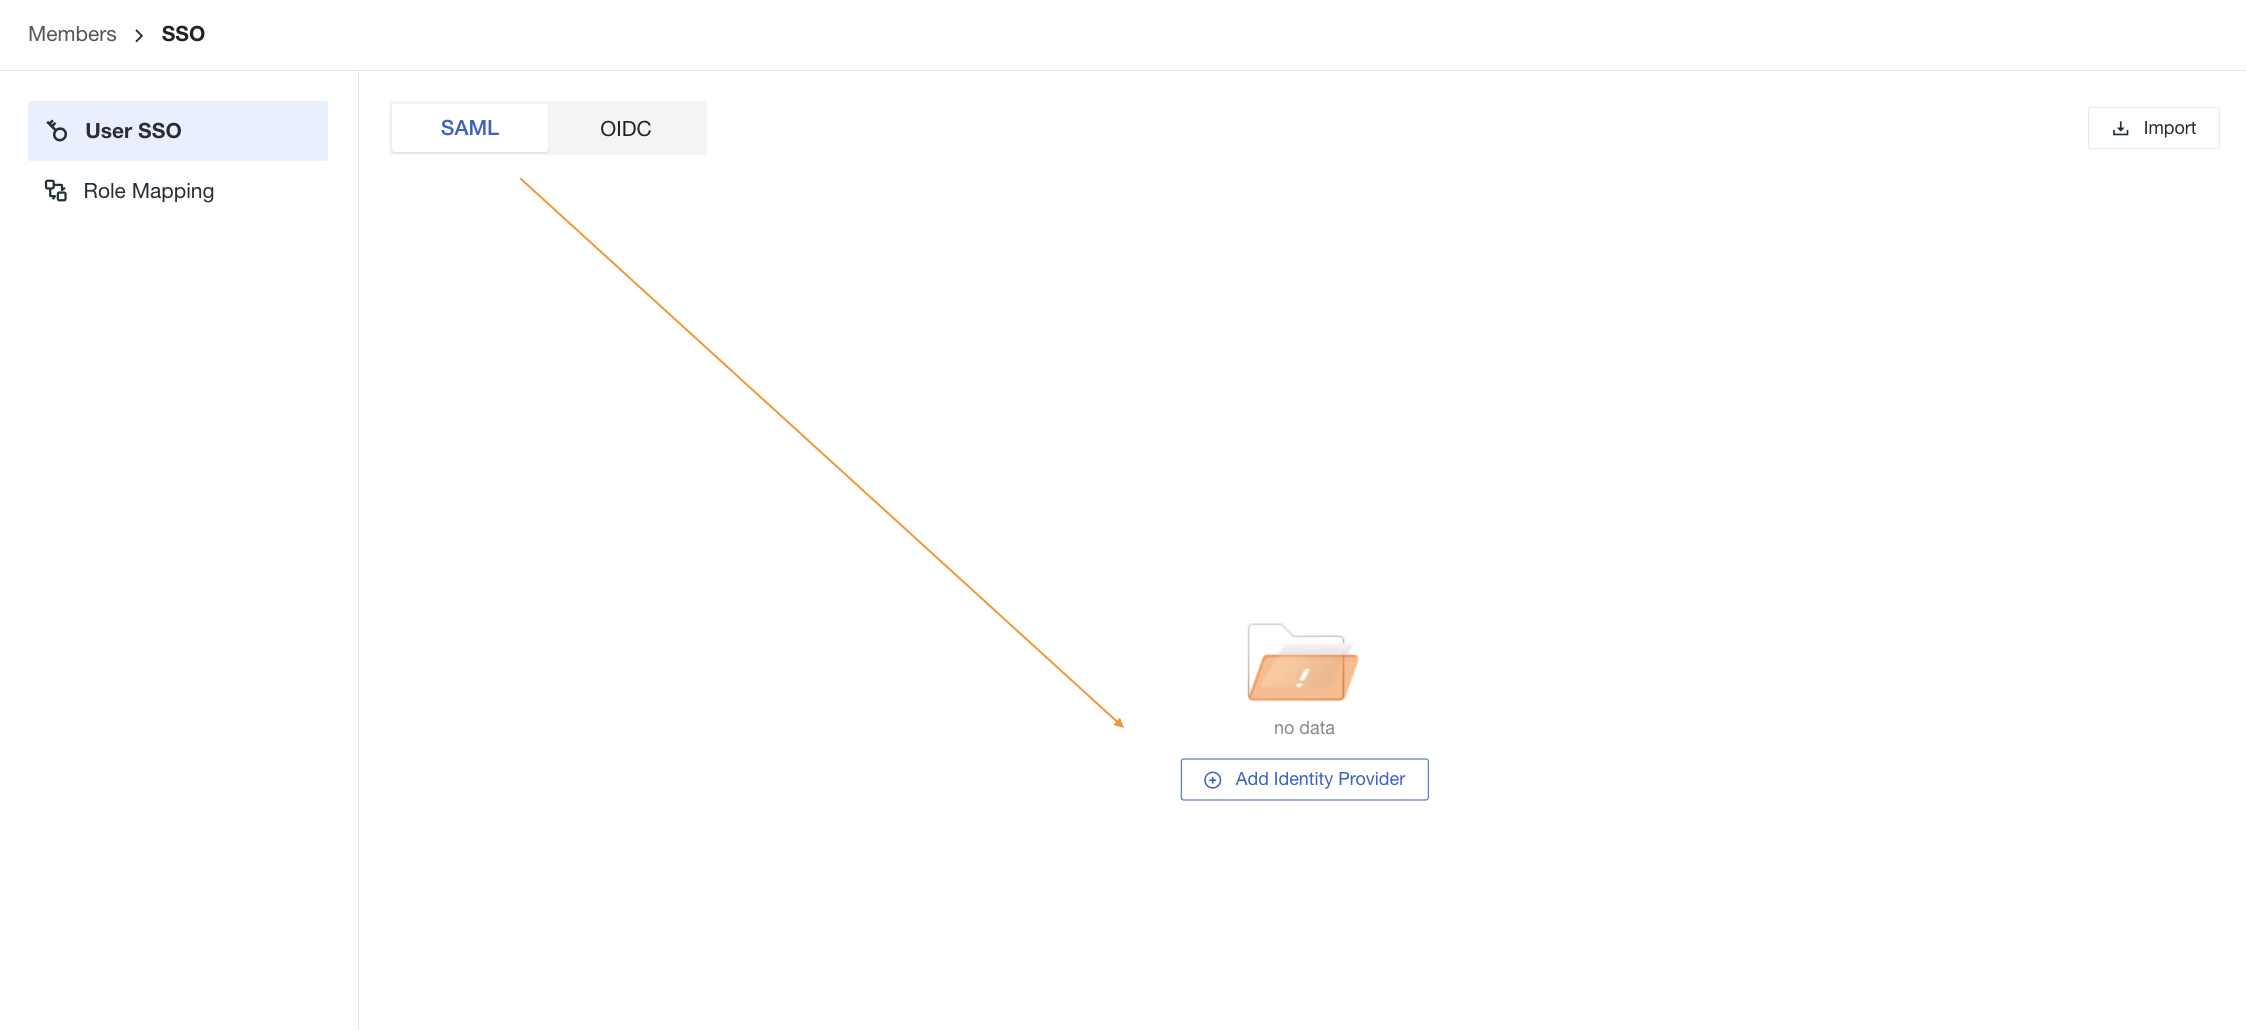
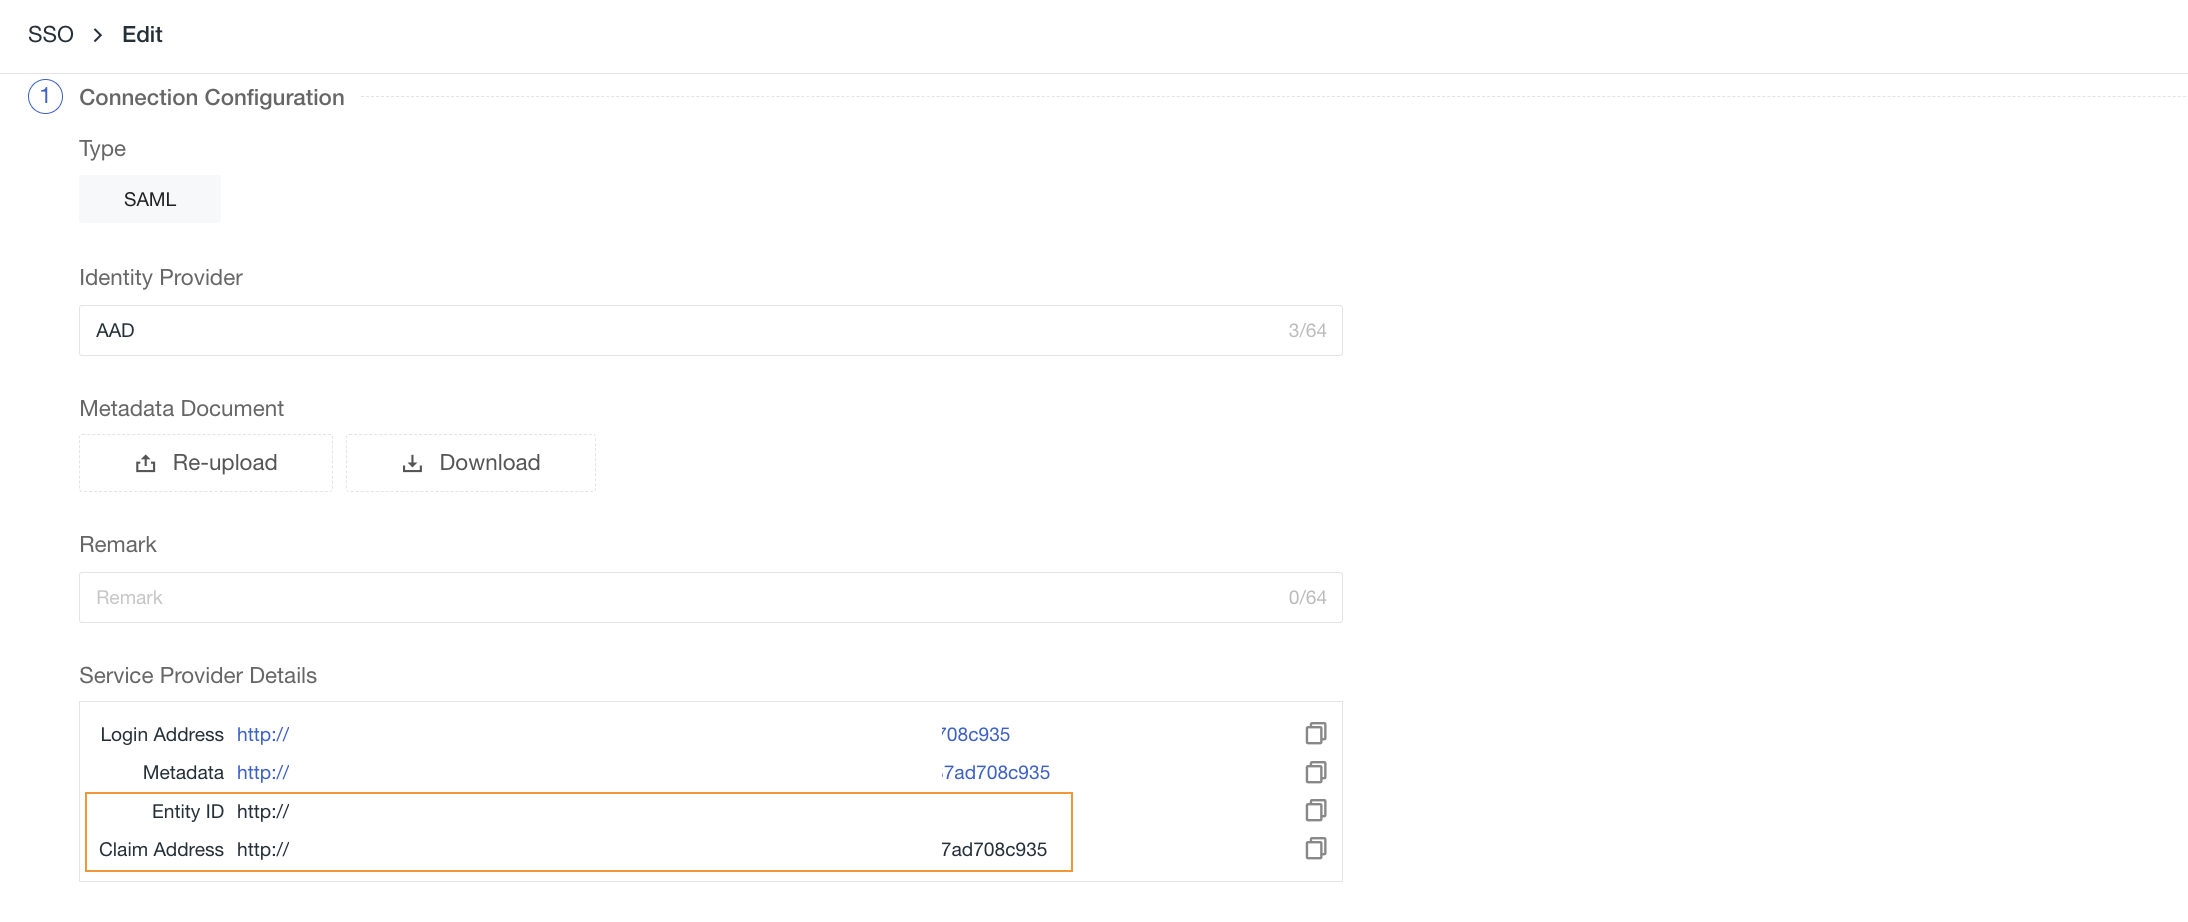
- Upload the metadata document downloaded in Step 3, configure Domain (email domain suffix), and select Role. You can then obtain the Entity ID and Assertion Consumer Service URL of this identity provider, and directly copy the Login URL to sign in.
Note: The domain is used to enable SSO by mapping email domains between Guance and the identity provider. That is, the suffix domain of the user's email address must match the domain added in Guance.
5. Replace the SAML Assertion Consumer Service URL in AAD
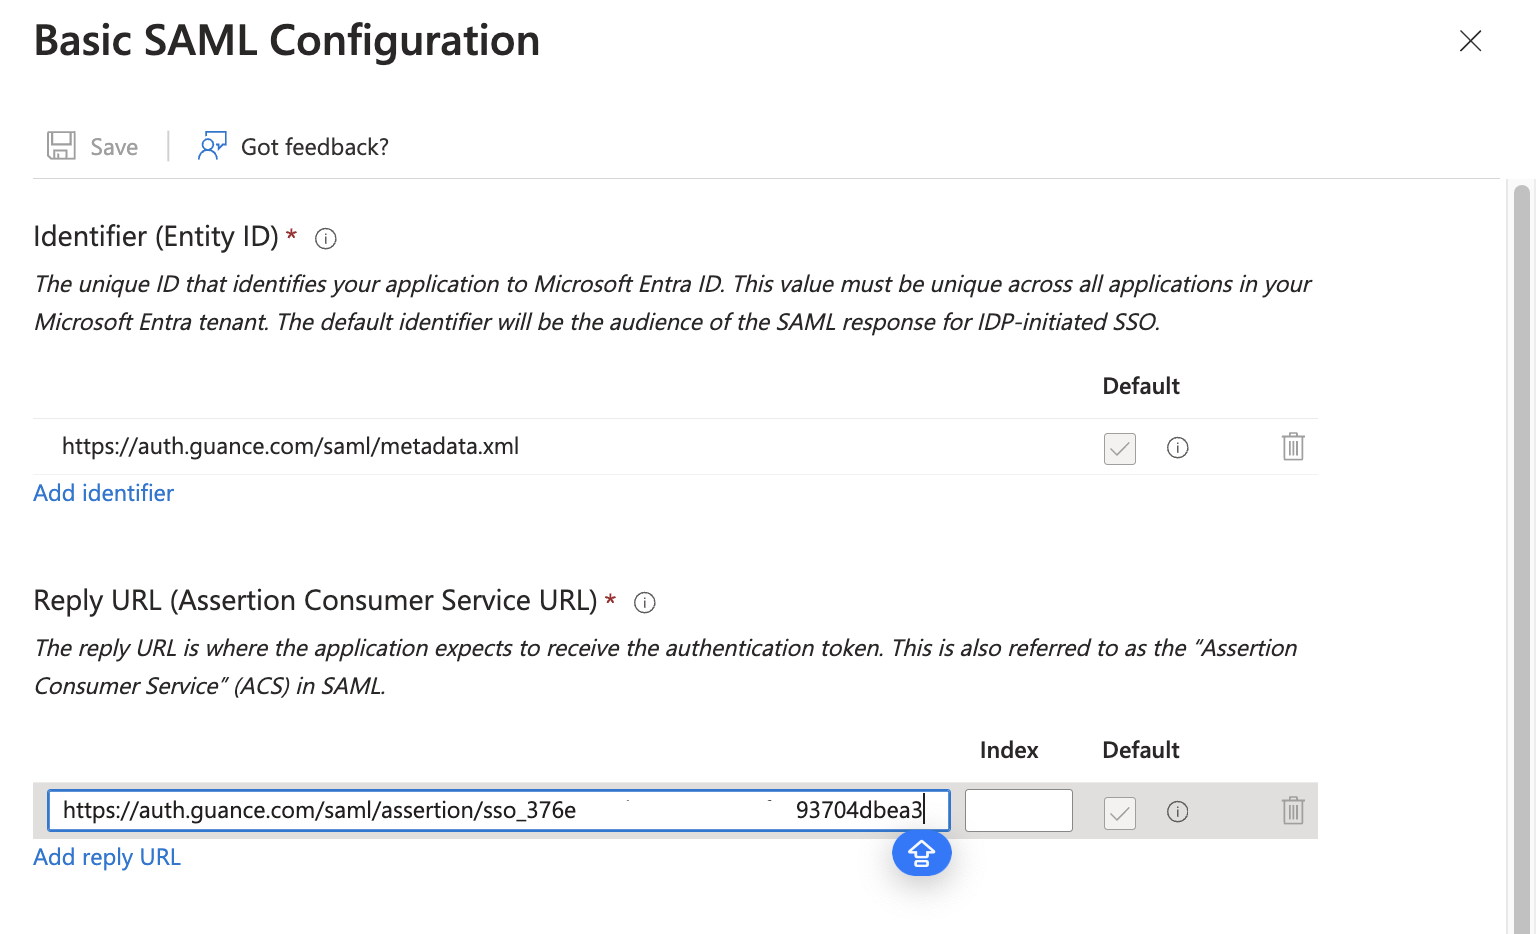
- Return to AAD and update the Entity ID and Assertion Consumer Service URL in Step 2.
Note: When configuring SSO in Guance, the Assertion Consumer Service URL configured in the identity provider's SAML must be consistent with the one in Guance for SSO to work.
6. Configure AAD users
Note: This step configures the authorized user email accounts for the identity provider created in Guance. With the configured AAD user email accounts, users can sign in to the Guance platform via SSO.
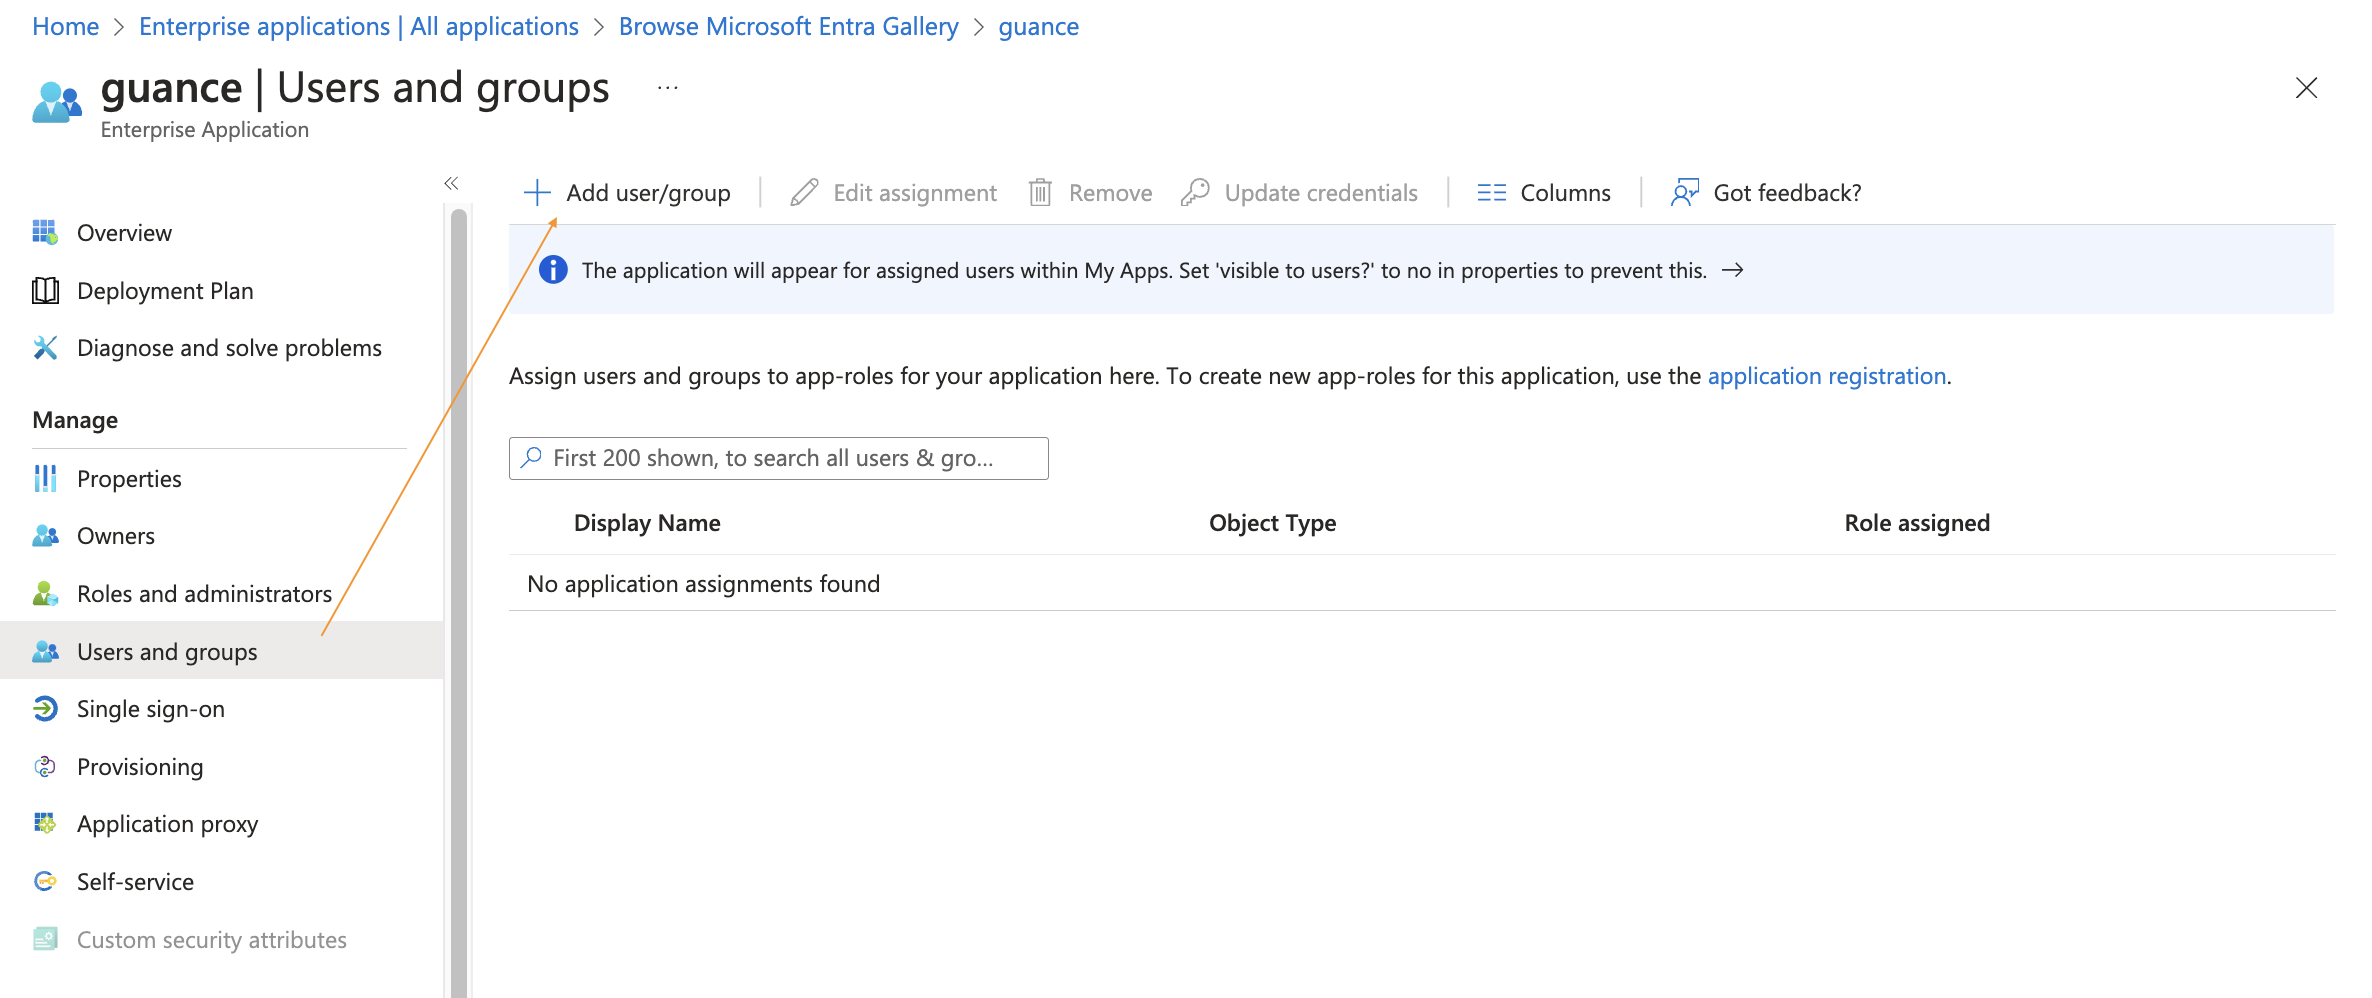
- On the newly created application, click Users and groups, then click Add user/group.
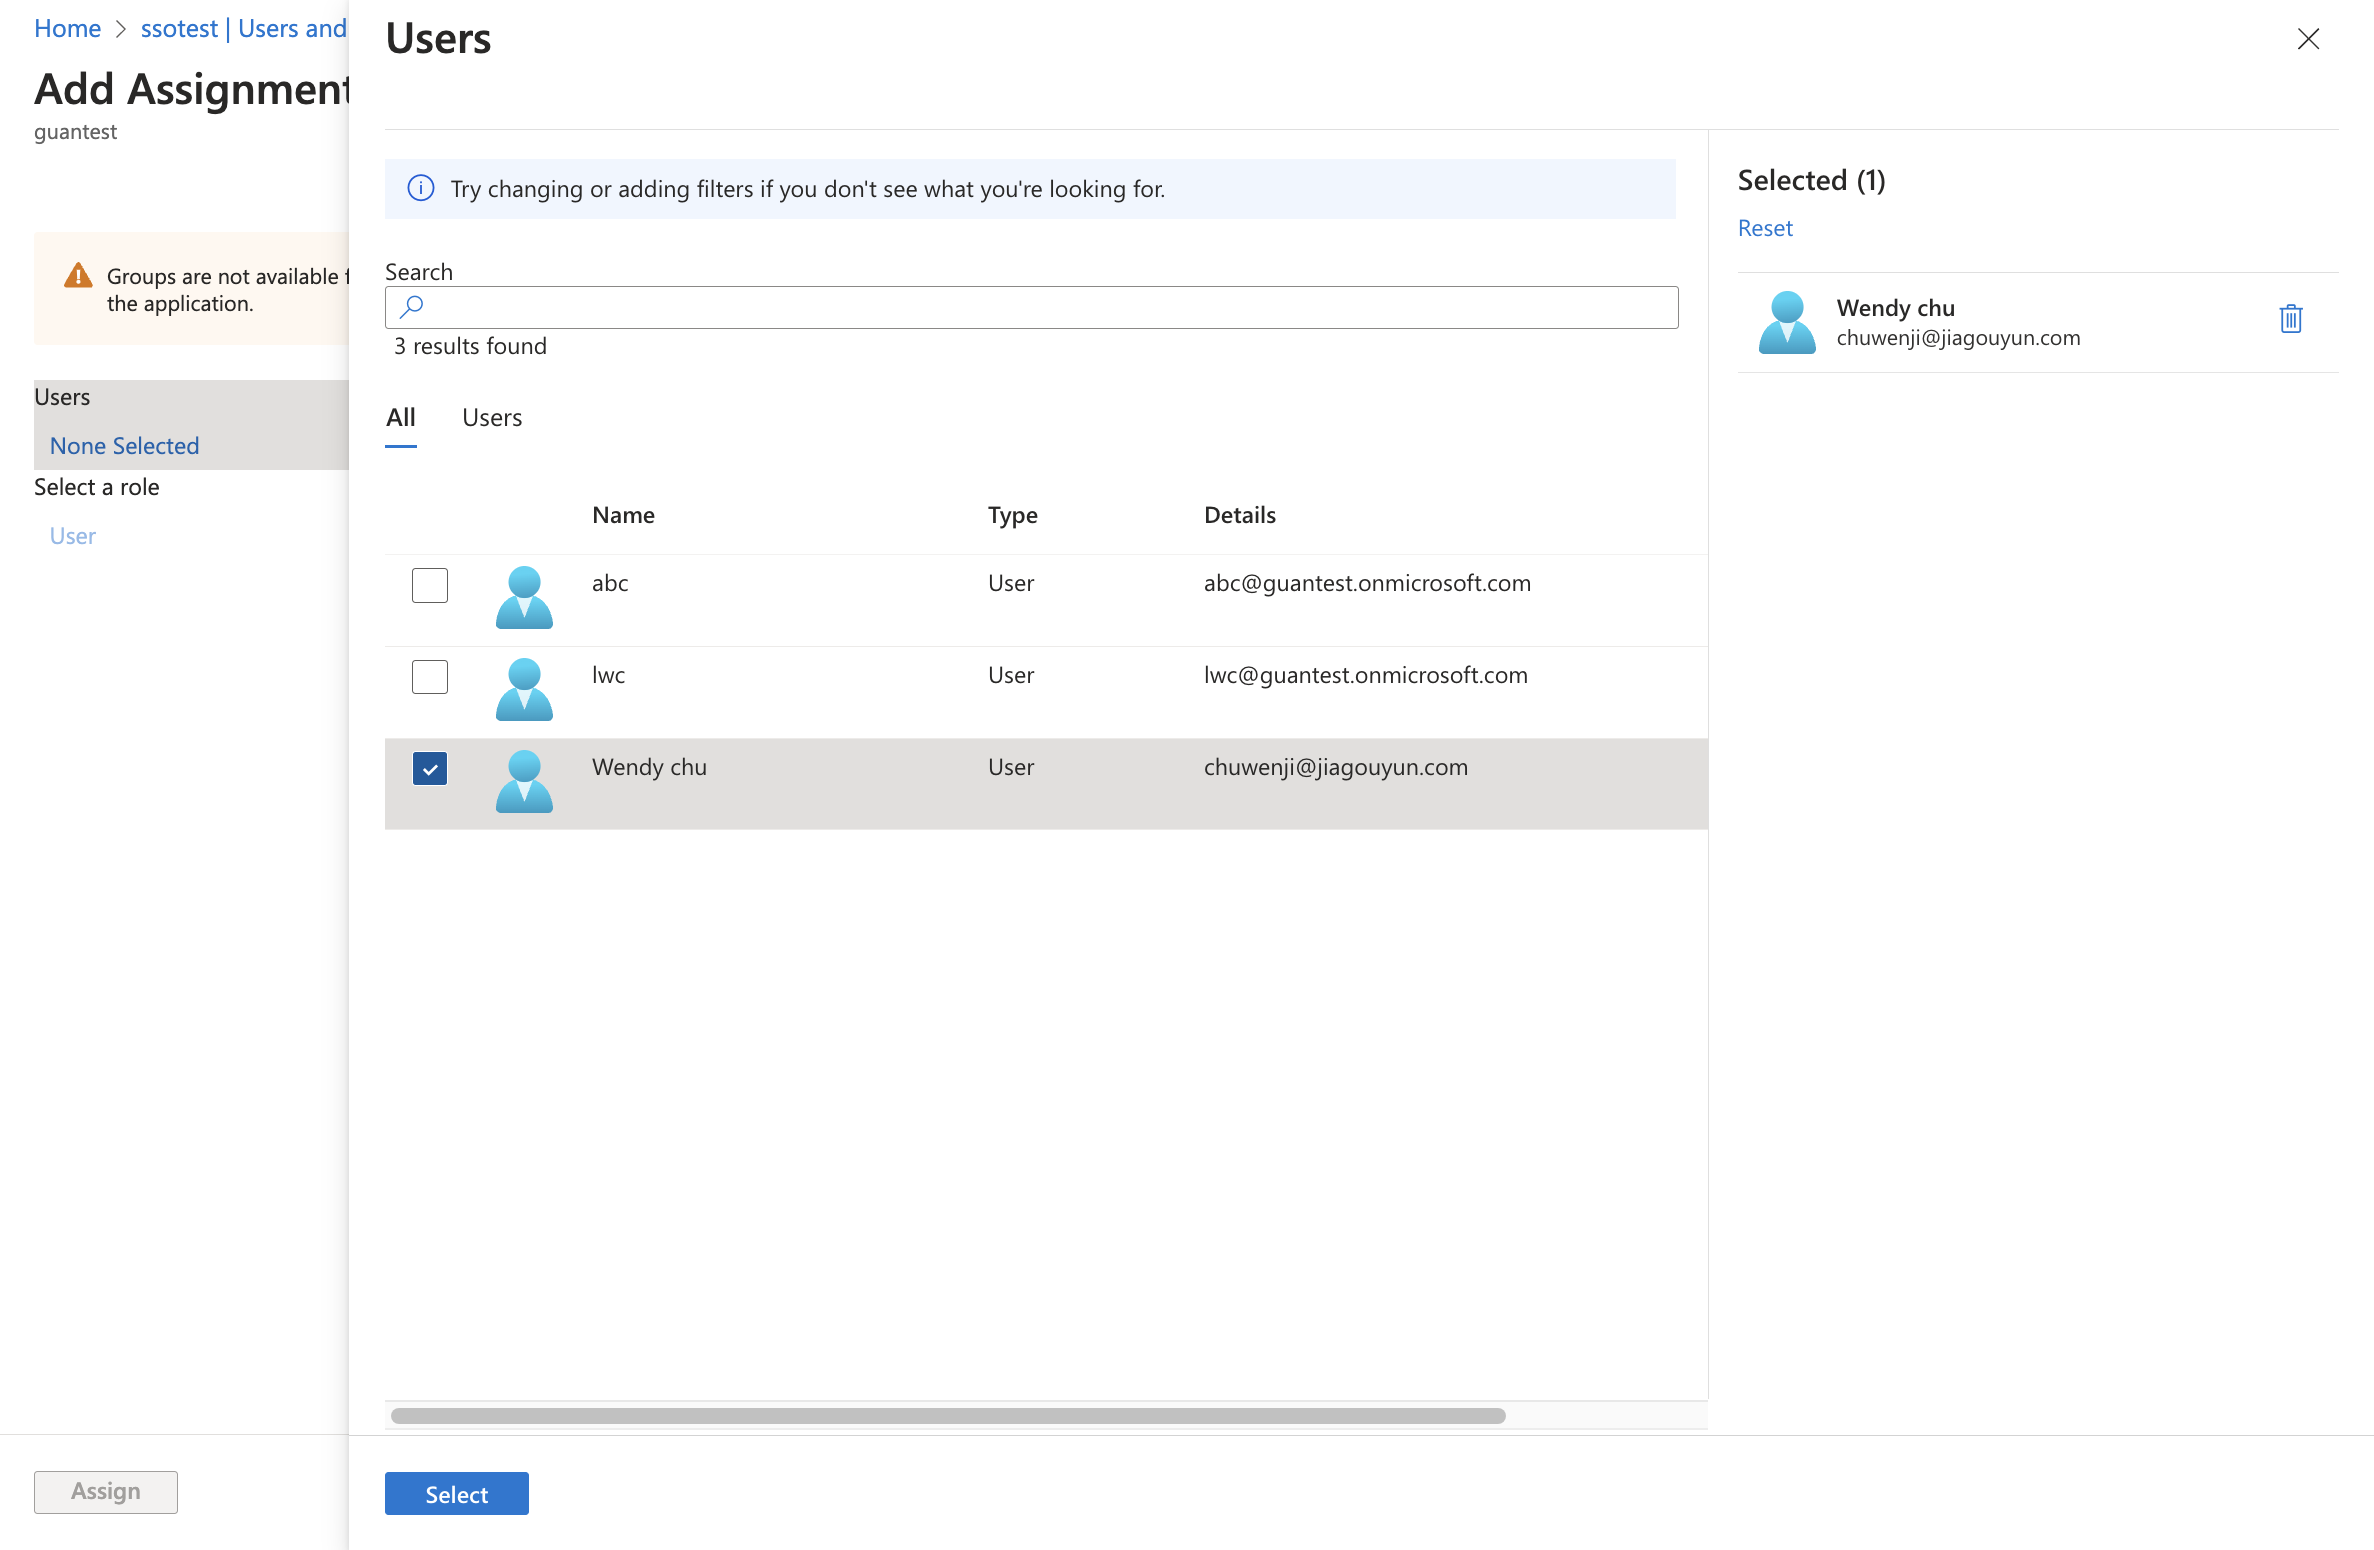
- Click None Selected, search for and select the user in the page that appears, then click Select.
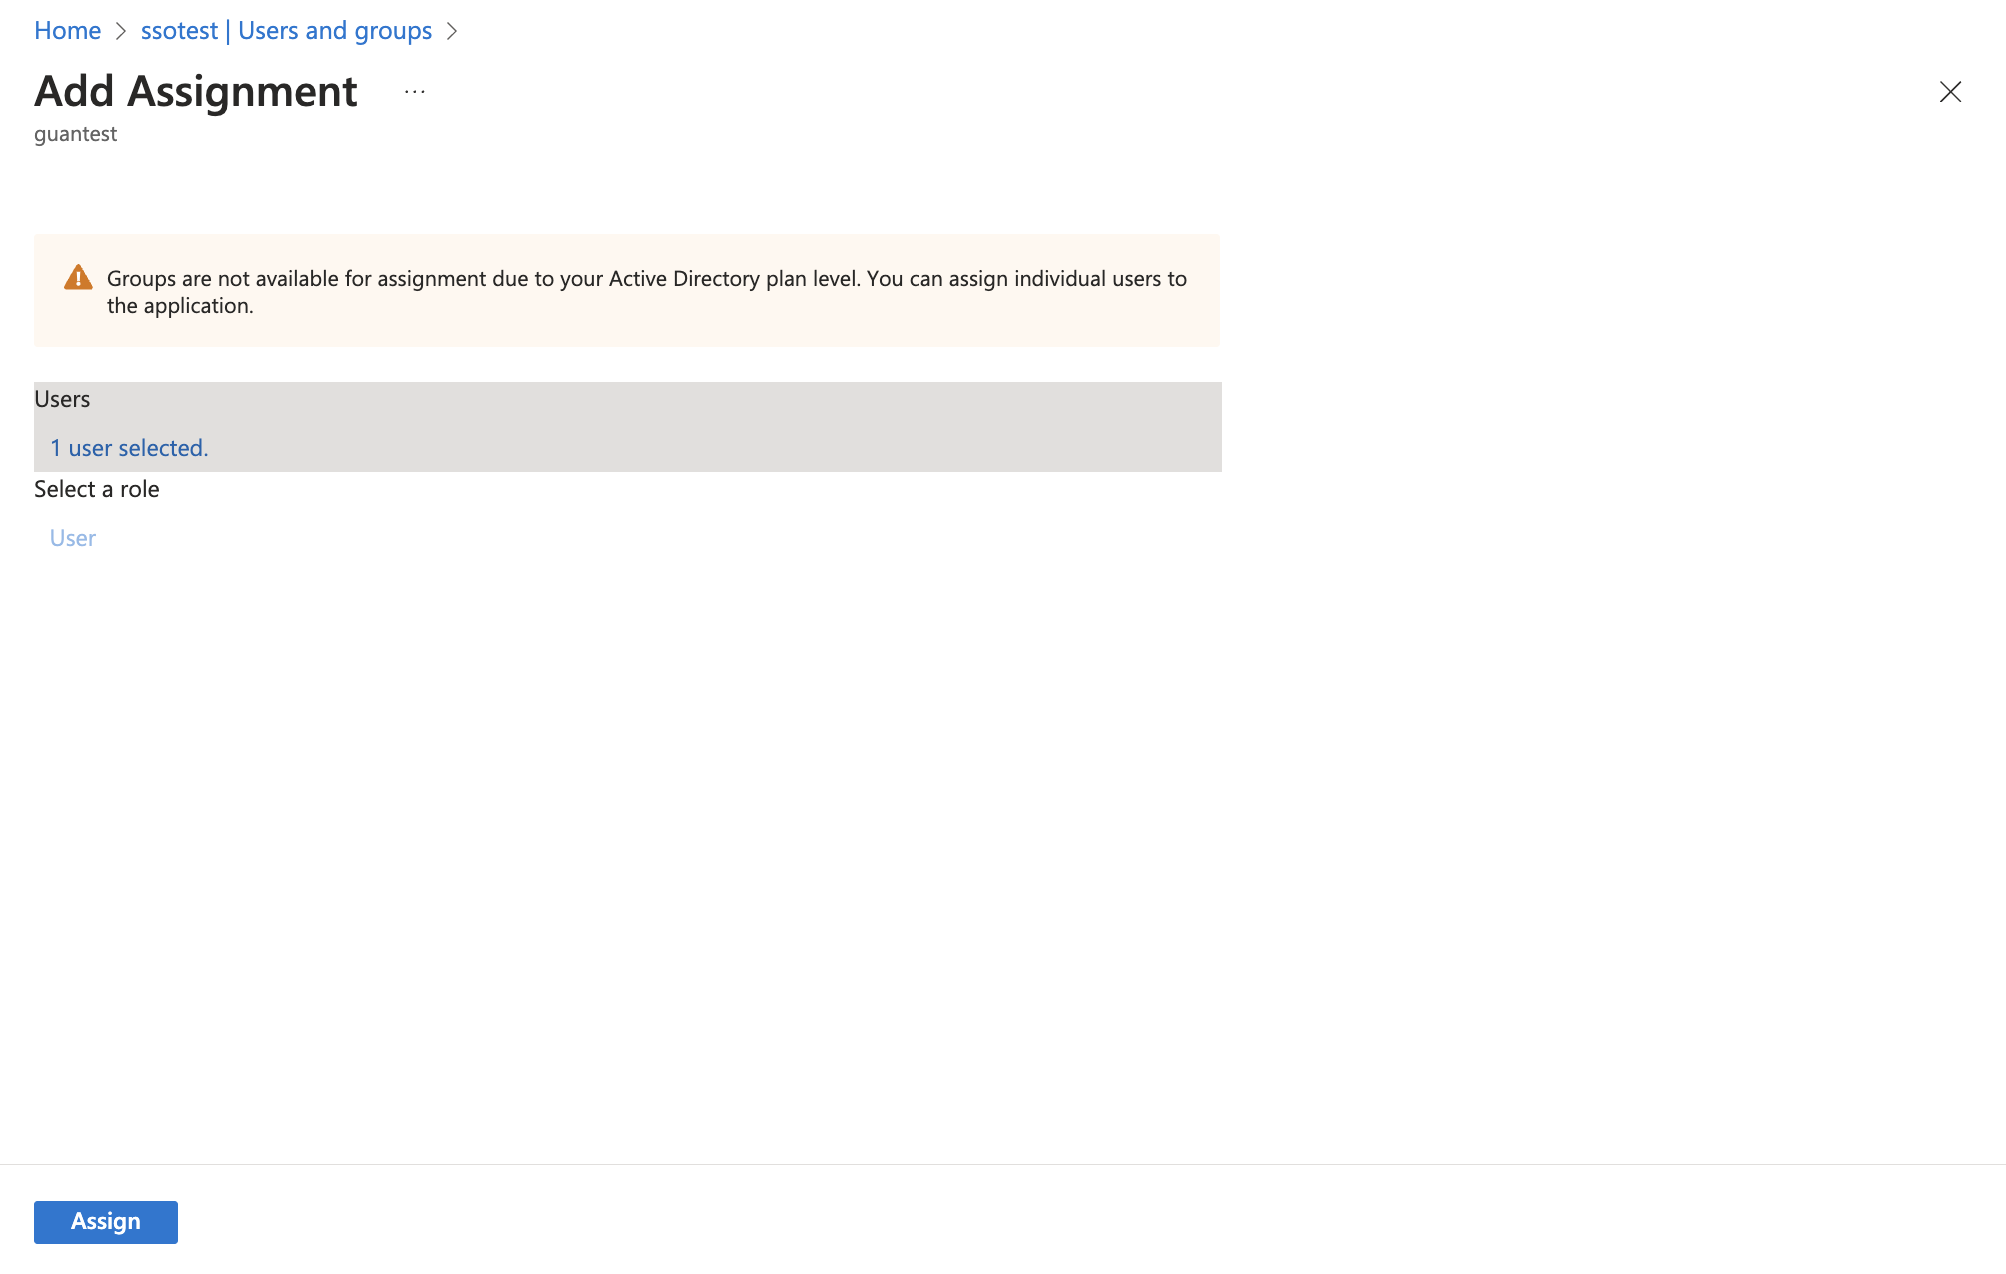
- After selecting the user, return to Add Assignment and click Add Assignment.
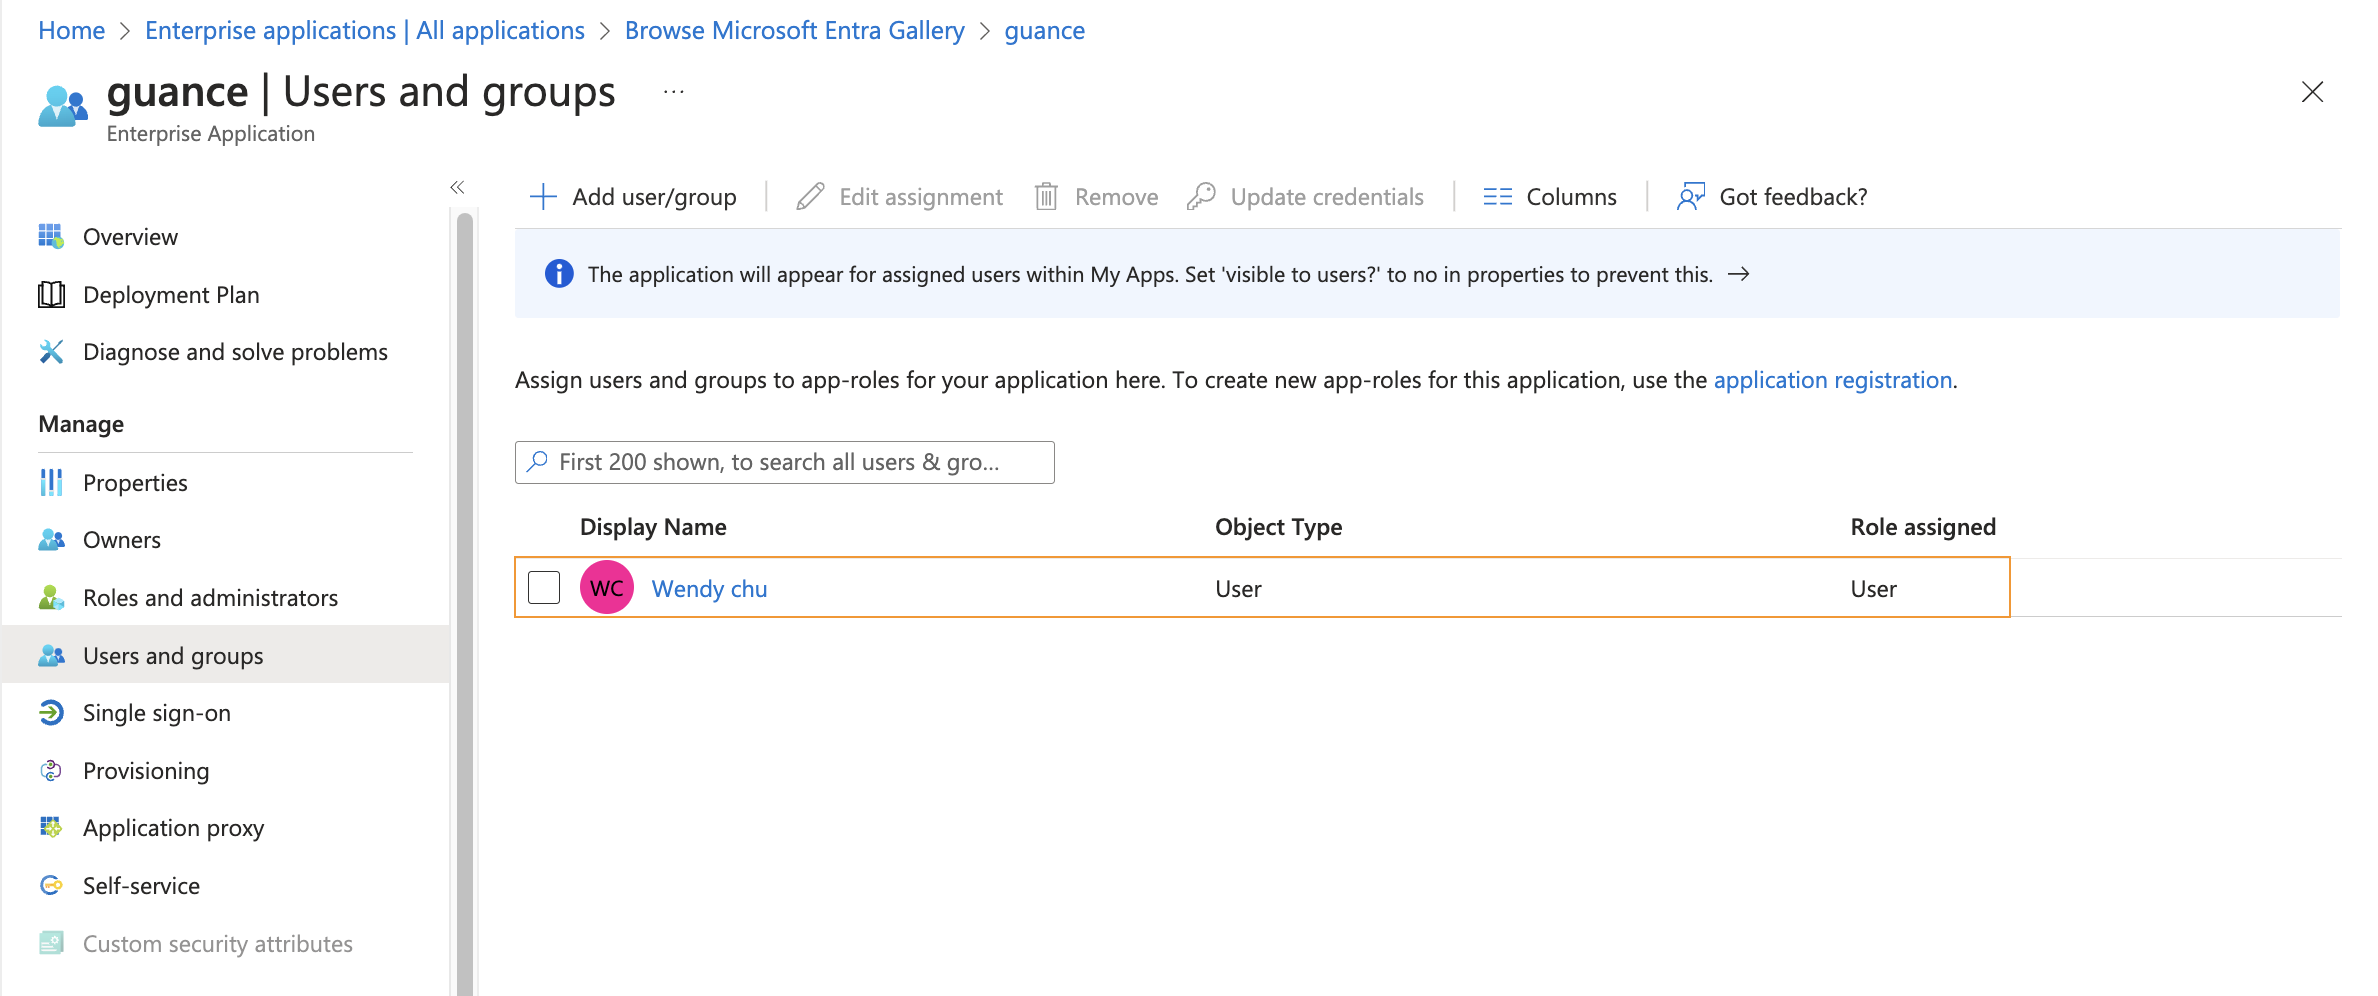
- After adding the user, you can view the assigned list of SSO-authorized users under Users and groups.
Note: If no user exists, you can create a user under the Users menu.
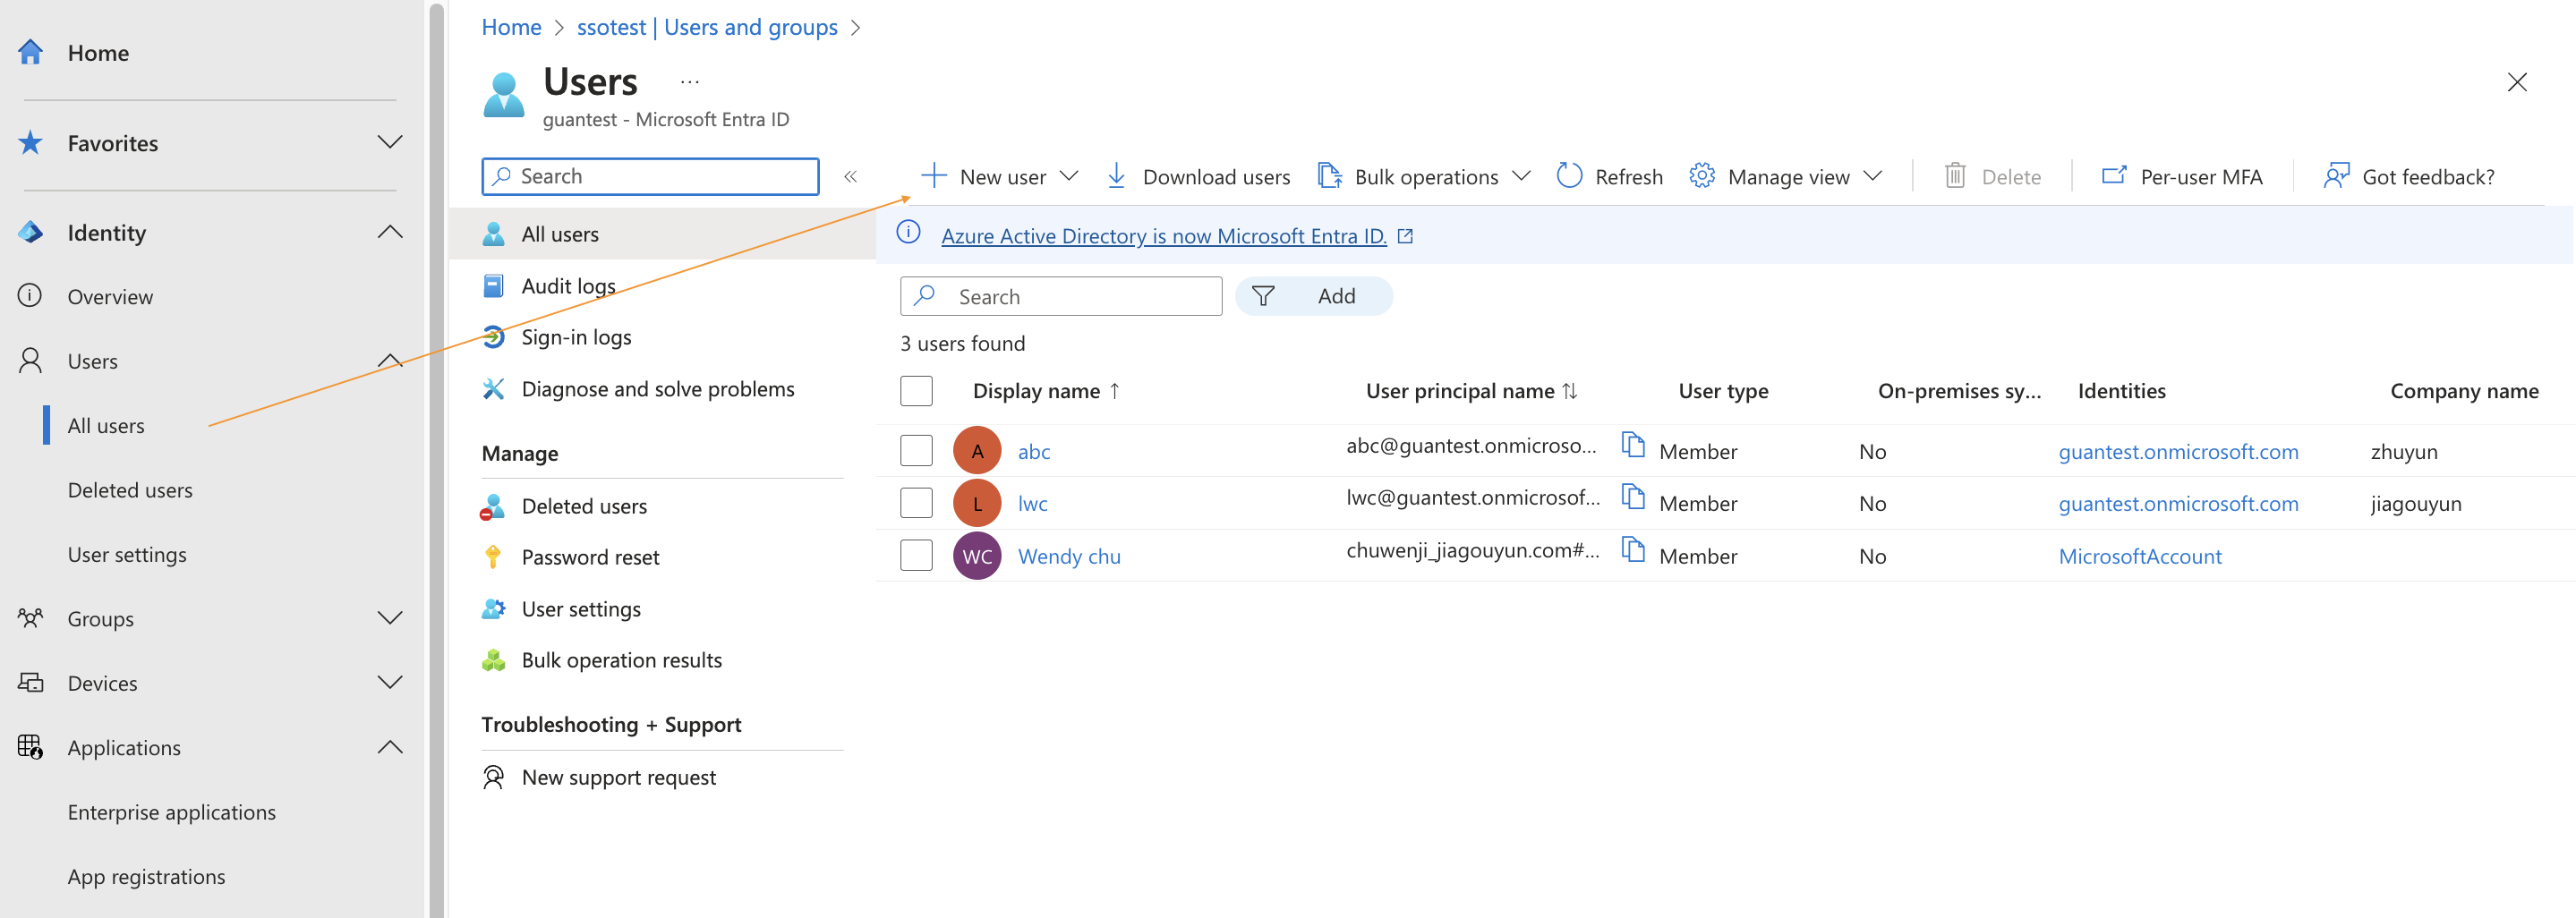
7. Use an AAD account to sign in to Guance via SSO
- After SSO configuration is complete, sign in through the Guance official website or the Guance console, and select Single Sign-On on the login page.
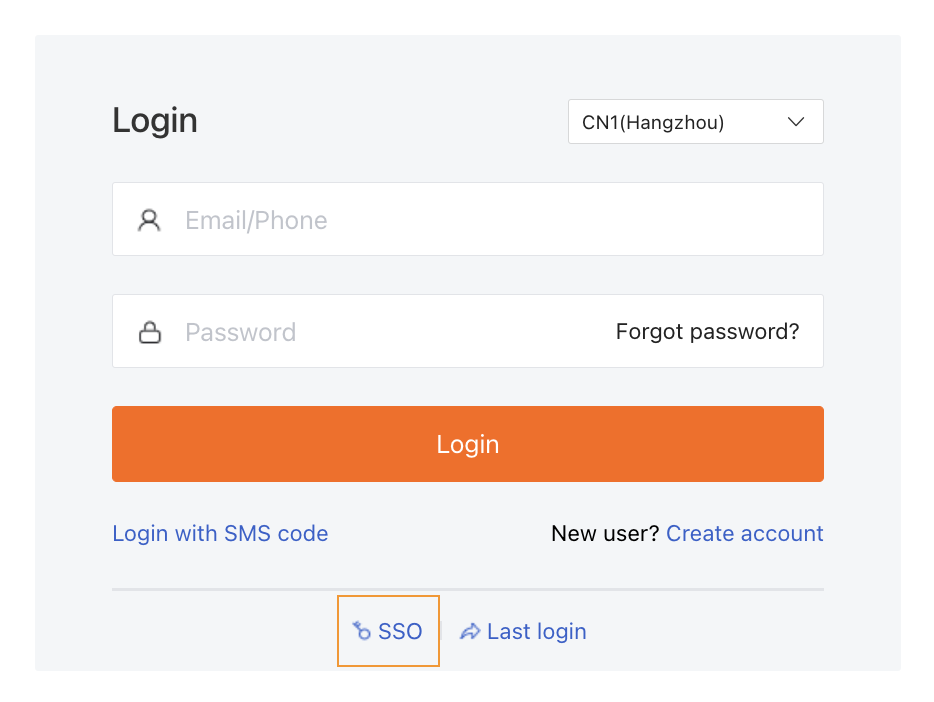
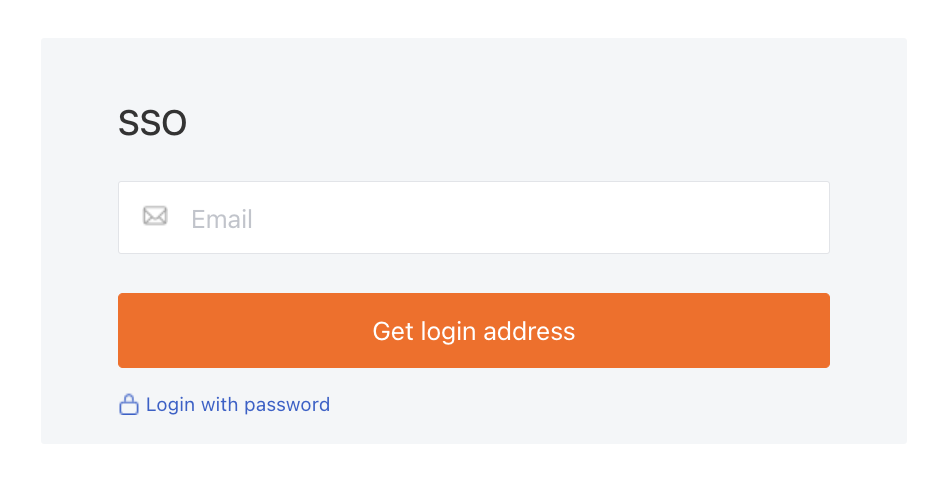
- Enter the email address used when creating the SSO, and click Get Login URL.
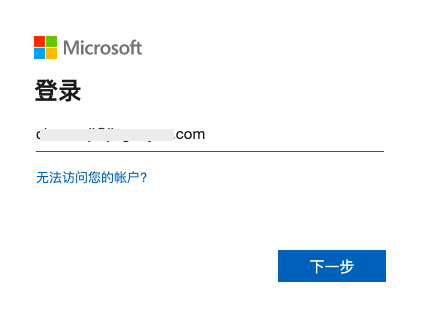
- Click the link to open the enterprise account login page.

- Enter the enterprise email address (the corporate email address configured in AAD and Guance SSO Management) and password.
- Sign in to the corresponding Guance workspace.