DingTalk Bot
To adapt to the latest DingTalk bot model, you need to first create an internal enterprise application bot on the DingTalk development platform.
For more details, refer to Creation and Installation of Internal Enterprise Application Bots.
Differences Between Old and New DingTalk Bots
- DingTalk Platform: Creating a bot has changed from directly creating it in Group Management to creating an application in the Development Platform.
- Guance: The latest DingTalk bot secret key configuration is optional.
Create an Internal Enterprise Application Bot
First, apply for Developer Permissions on the DingTalk development platform from your organization.
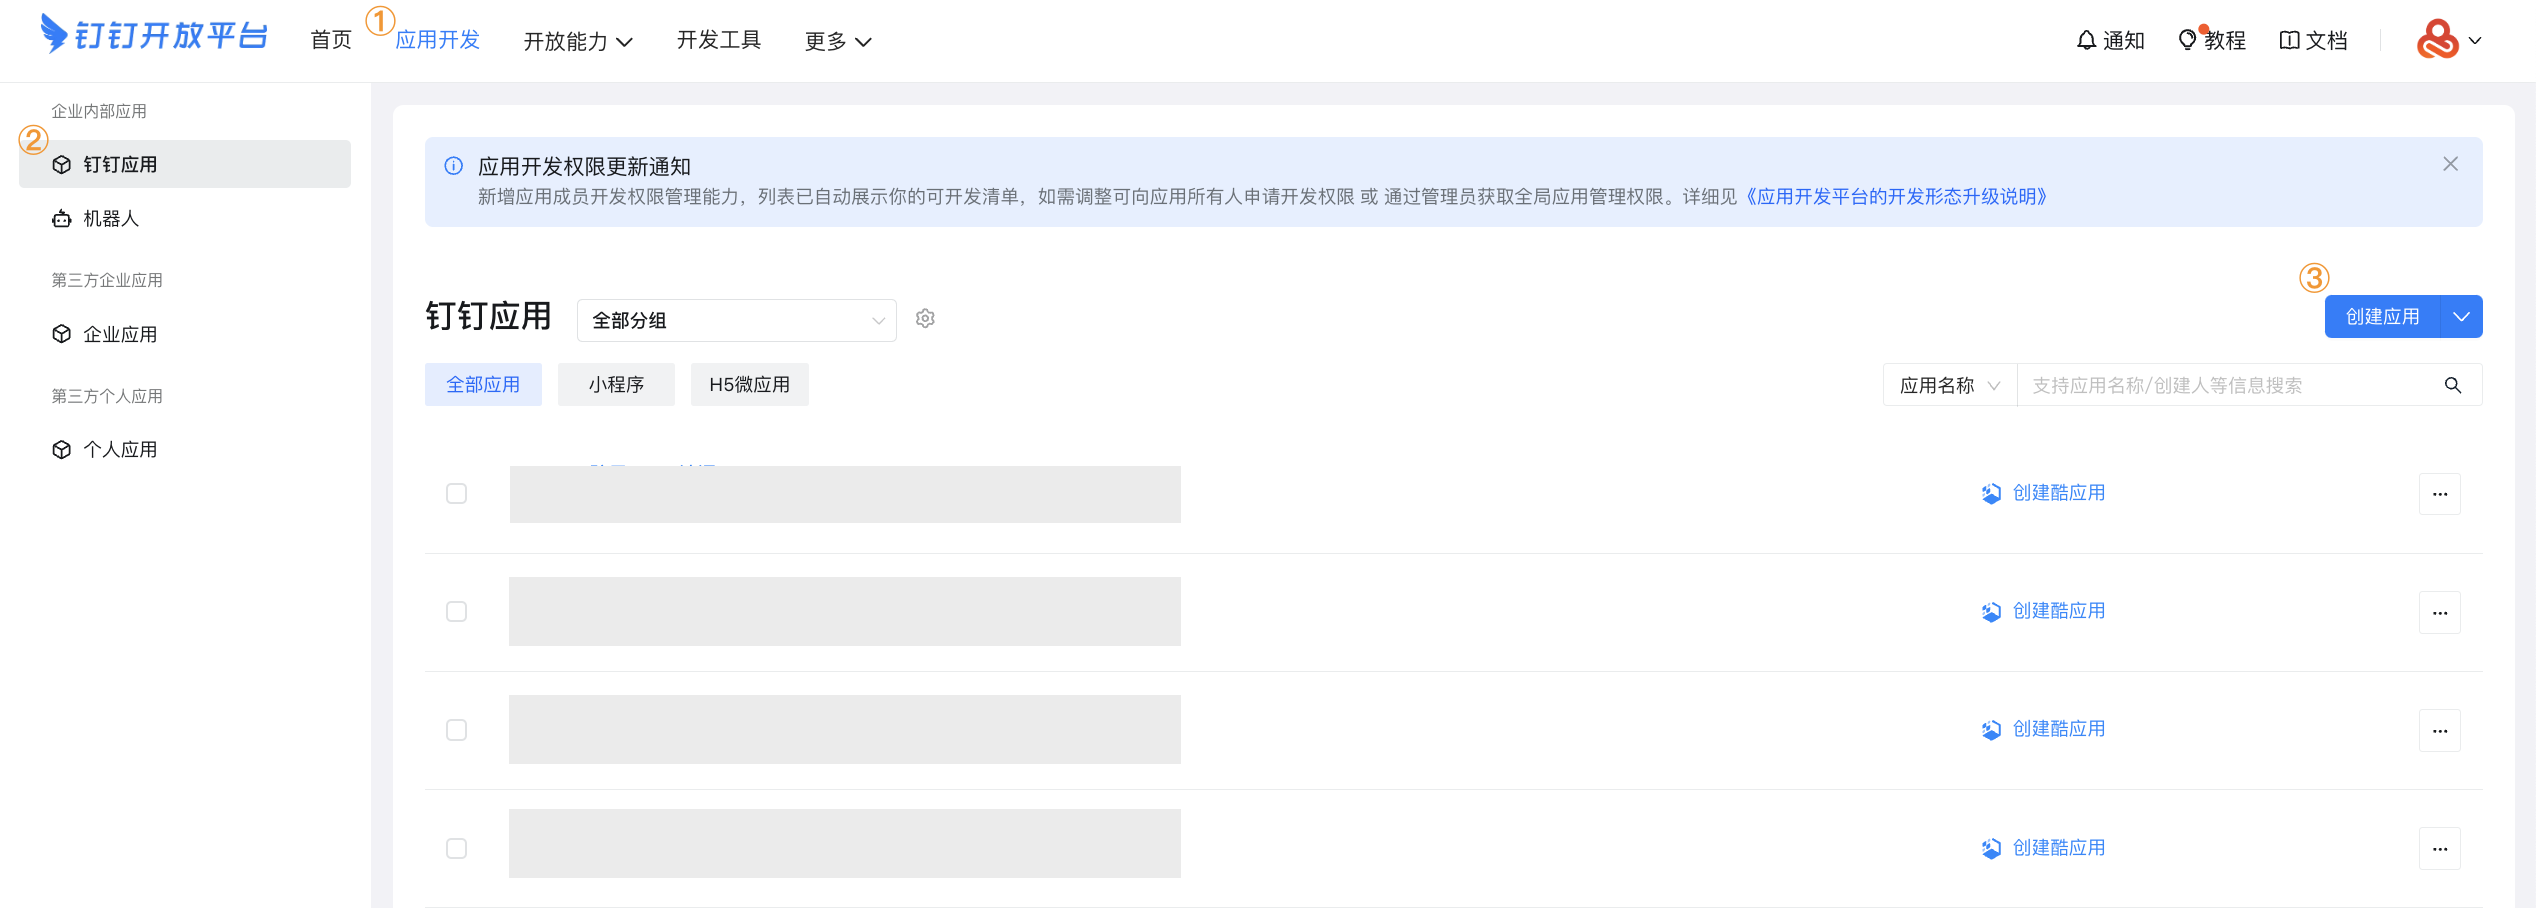
Create an Application
- Select Application Development > DingTalk Application > Create Application, then click Create Application.
- After the application is created, click Application Details on the right to go to the bot configuration page and fill in the relevant configurations.
- In the target group, click Add Bot, and select the newly created application bot from the enterprise bot list.
- Obtain the bot Webhook address. In bot management, find the newly created application bot, click View Details, and copy the Webhook address.

Note
This bot is used only for receiving information, not for interaction. The message receiving mode configuration can be chosen arbitrarily. In HTTP mode, the address can be left empty.
Return to the DingTalk Bot Configuration Page
-
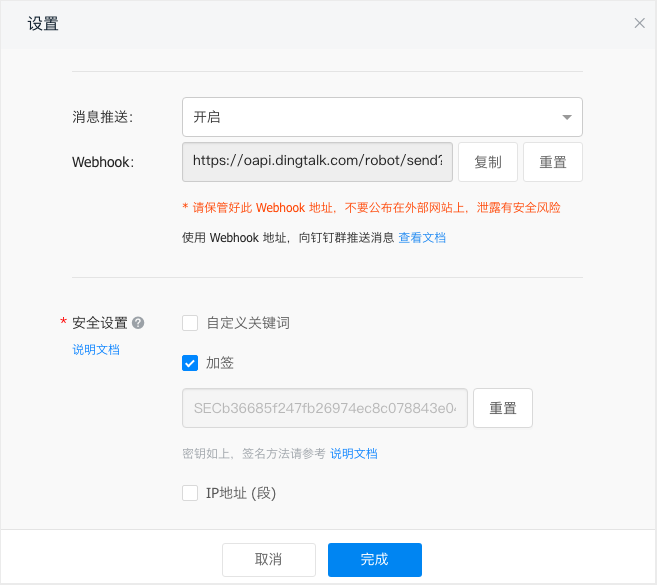
After successfully adding the bot to the DingTalk group, you can query the bot's Signing Key and Webhook address in the bot configuration details.
-
Enter the configuration information, including the custom notification target name, secret key, and Webhook address.
Configure on the Guance Side
- Return to the page for configuring DingTalk bot as a notification target.
- Define the current notification target name for identification in the notification target list.
- Fill in the secret key and Webhook address obtained in the above steps.
- Optionally test whether the notification has been sent (❗️ Send a test message to the group/channel corresponding to this Webhook. Please go to the corresponding notification target to check if the test message was sent successfully).
- Configure Operation Permissions.
- Confirm.