Create WEBSOCKET Synthetic Tests
WebSocket synthetic tests allow clients to initiate HTTP requests to a server, establish WebSocket connections, and validate requests and conditions (such as request headers, response times, etc.).
Create
Click Create > API Tests, and select WEBSOCKET protocol.
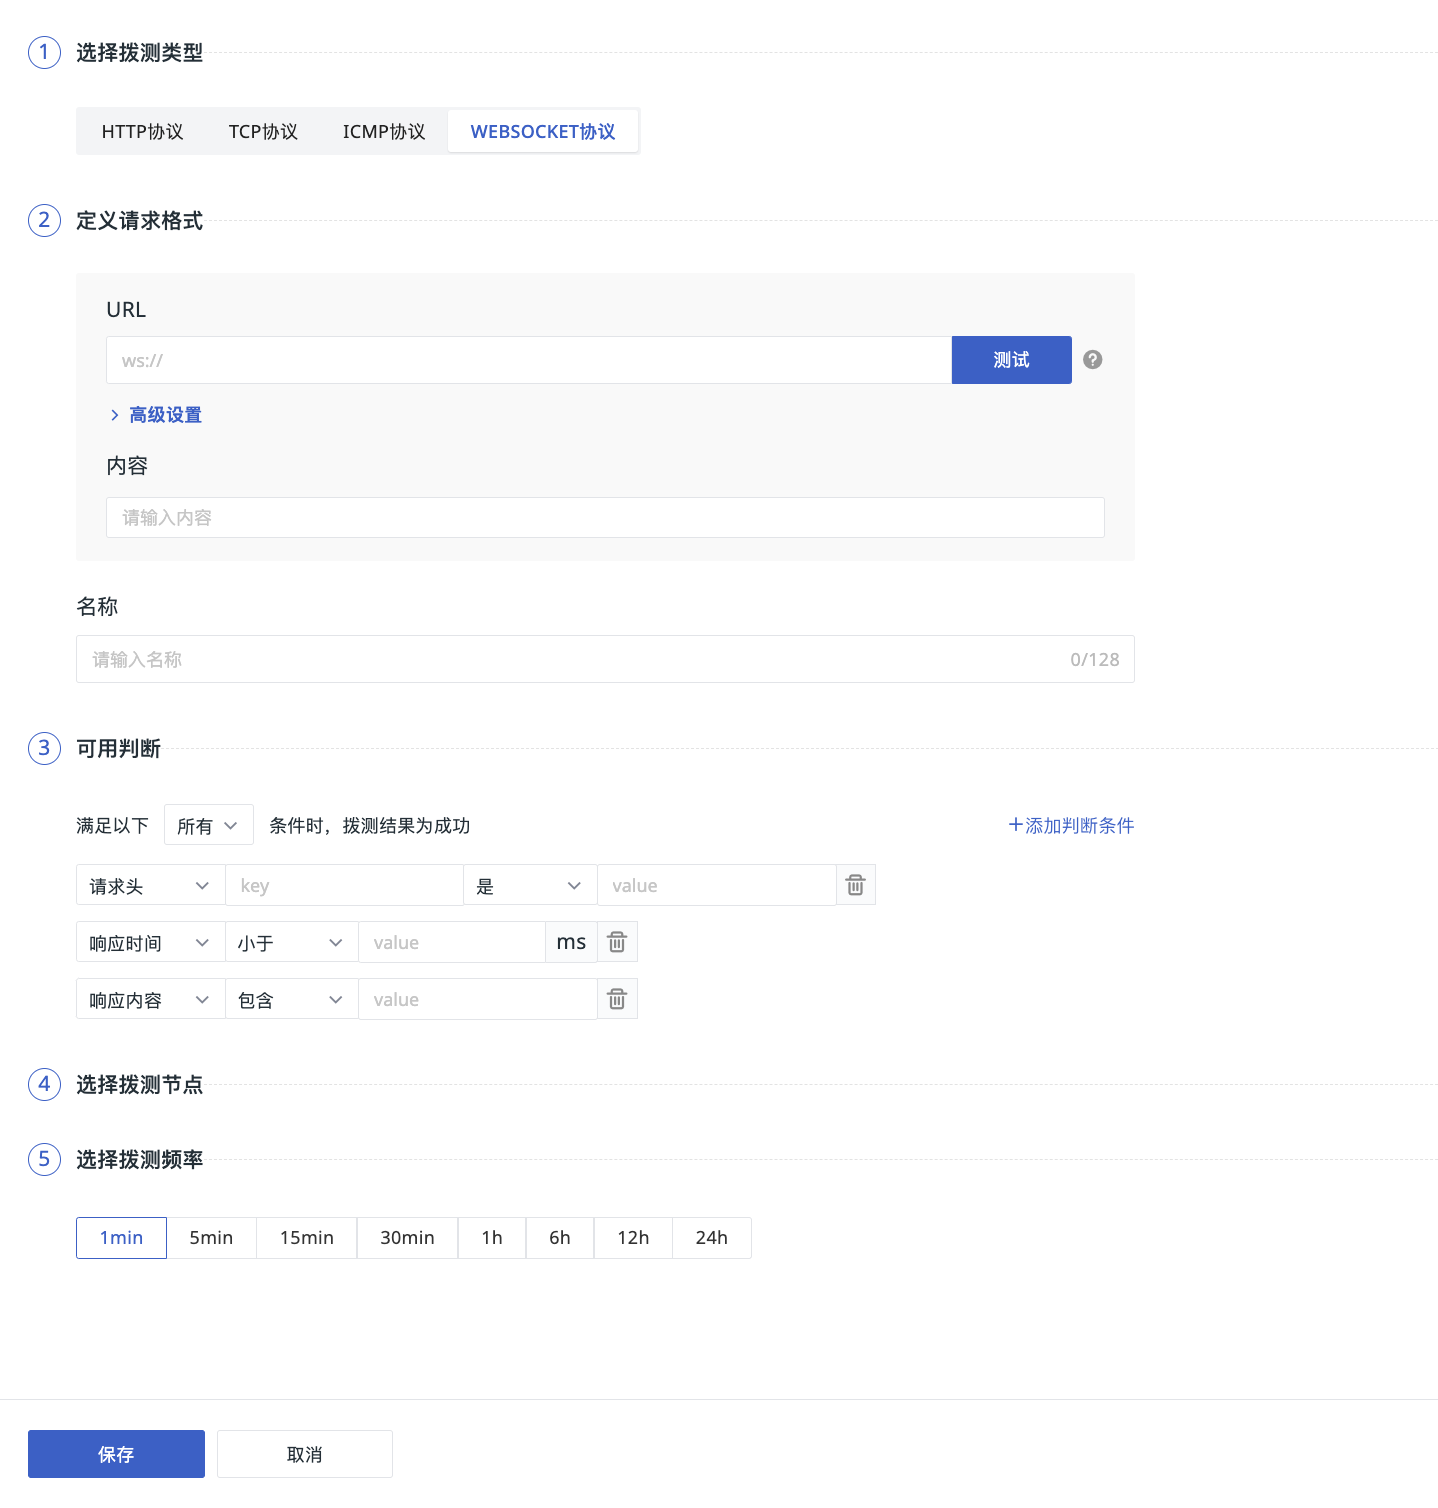
Step 1: Define Request Format
- URL: Supports entering URLs for both WS and WSS protocols.
- Advanced Settings: Supports custom request settings and authentication.
- Content: Enter the message content to be sent to the server.
- Name: Customize the name for the WebSocket synthetic test task. Duplicate names are not allowed within the current workspace.
Step 2: Availability Check
This involves adding check conditions to match data. Multiple conditions can be combined using "All" or "Any" to achieve AND or OR logical relationships.
After defining the request format and adding check conditions, click the "Test" button on the right side of the URL to verify if the synthetic test connection configuration is successful.
Note: The test result is independent of the selected node.
Step 3: Select Synthetic Test Nodes
Currently, Guance covers 14 synthetic test nodes globally. You can select one or more nodes in China or overseas regions (available only for Commercial Plan users and above) to quickly start monitoring site service quality.
Step 4: Select Synthetic Test Frequency
Select the execution frequency for the synthetic test task. The following options are supported:
- 1 minute (available only for Commercial Plan users and above)
- 5 minutes (available only for Commercial Plan users and above)
- 15 minutes (available only for Commercial Plan users and above)
- 30 minutes
- 1 hour
- 6 hours
- 12 hours
- 24 hours
In addition to the specific options provided by the system, you can also enter a custom crontab task to configure scheduled task execution based on periods such as minutes, hours, days, months, weeks, etc.