Switch Synthetic Testing Center
Overview
The official Synthetic Testing Center is managed and maintained by Guance. It provides predefined domestic and international testing nodes, enabling real-time monitoring and statistics on the availability of synthetic tests. This allows you to detect performance issues and impacted ranges of network sites before your users do.
Use Cases
- You have no network access at all and want to implement your own testing service.
- You want to implement testing services for internal sites.
Prerequisites
- Version 1.63.128 or later
When upgrading, the launcher service will guide you on whether to switch to the private Synthetic Testing Center.
During deployment, you will have the option to choose between the private or the official Synthetic Testing Center.
This article is therefore intended to address the pain point of switching testing centers after deployment. The following are the steps.
Steps
Switch to the Private Synthetic Testing Center
Log in to the launcher console → button in the upper-right corner → Other, then add the following line: dialService: buildin

Adding
dialService: buildinswitches to the private Synthetic Testing Center; changing it todialService: saasswitches to the official Synthetic Testing Center.
Click the button in the upper-right corner → Modify Application Config, then modify the DialingServer module content in the ConfigMap named core under the forethought-core Namespace.
# Cloud synthetic testing service
DialingServer:
  # Address configuration of the synthetic testing center
  use_https: true                           ## Whether to use HTTPS
  host: dflux-dial.guance.com               ## Address of the testing center, replace with the ingress domain name of your private deployment. To switch back, use the original address.
  port: 443
  timeout: 10
By default, the official synthetic testing center is used.
Add a Testing Node
Log in to the Guance console, click Synthetic Monitoring → Self-hosted Node Management → Create.
Note: If you create a node in the system workspace, all workspaces will be able to see this testing node. If you want only a single workspace to see it, create the testing node in that workspace.
Click the Get Configuration button on the far right, then follow the instructions below to install the testing node.

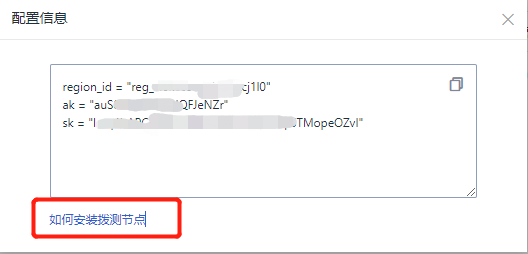
Note: In addition to these three fields, you also need to configure
serverin the DataKitdialtesting.confto point to the address of the synthetic testing center (usually the ingress domain name created during deployment or upgrade).
[[inputs.dialtesting]]
  # We can also configure a JSON path like "file:///your/dir/json-file-name"
  server = "https://dflux-dial.guance.com"

  # [require] node ID
  region_id = "default"

  # if server are dflux-dial.guance.com, ak/sk required
  ak = ""
  sk = ""
Verification
-
Log in to the Guance console, click Synthetic Monitoring → Tests → Create → HTTP Test.
-
Follow the steps below to create a test and then save it.
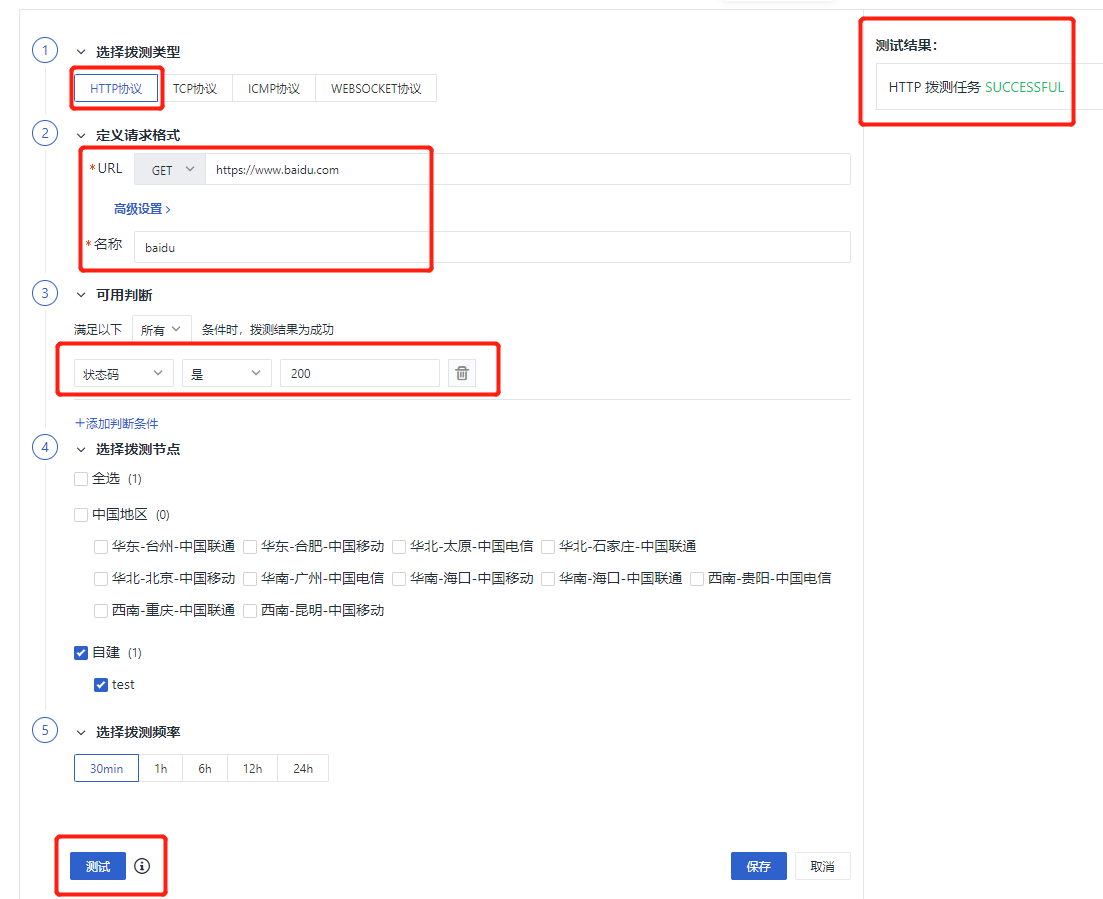
- Go back to Tests and click the test you just created.
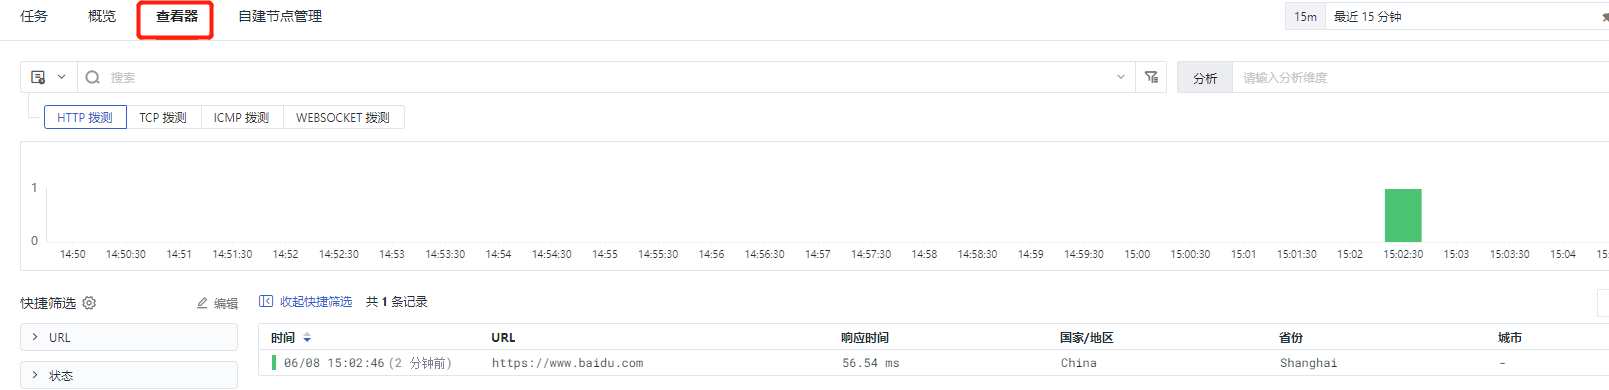
- If the data appears as shown in the image above, the setup is successful.