Multistep Tests
Multistep Tests is an advanced monitoring tool that simulates complex business processes or user operation paths by chaining multiple API requests. It allows you to create tests using response data from multiple API connections, thereby validating critical business transactions, simulating end-to-end user journeys, and supporting authentication and authorization. This testing method proactively monitors service availability and performance, ensures the normal operation of complex processes, and provides timely alerts when issues occur.
Create
Click Tasks > Create > Multistep Tests.
1. Basic Information
- Define the name of the synthetic test;
- Fill in the description as needed;
2. Select Testing Nodes
Currently, Guance covers 14 synthetic testing nodes globally. You can select one or more nodes in China or overseas regions (only available to Commercial Plan users and above) to quickly start monitoring site service quality.
3. Select Test Frequency
Select the execution frequency of the synthetic test. The following options are supported:
- 1 minute (only available to Commercial Plan users and above)
- 5 minutes (only available to Commercial Plan users and above)
- 15 minutes (only available to Commercial Plan users and above)
- 30 minutes
- 1 hour
- 6 hours
- 12 hours
- 24 hours
In addition to the system-provided options above, you can also enter a custom crontab task to configure scheduled task execution based on cycles such as minutes, hours, days, months, and weeks.
4. Define Request Steps
Click Create First Request.
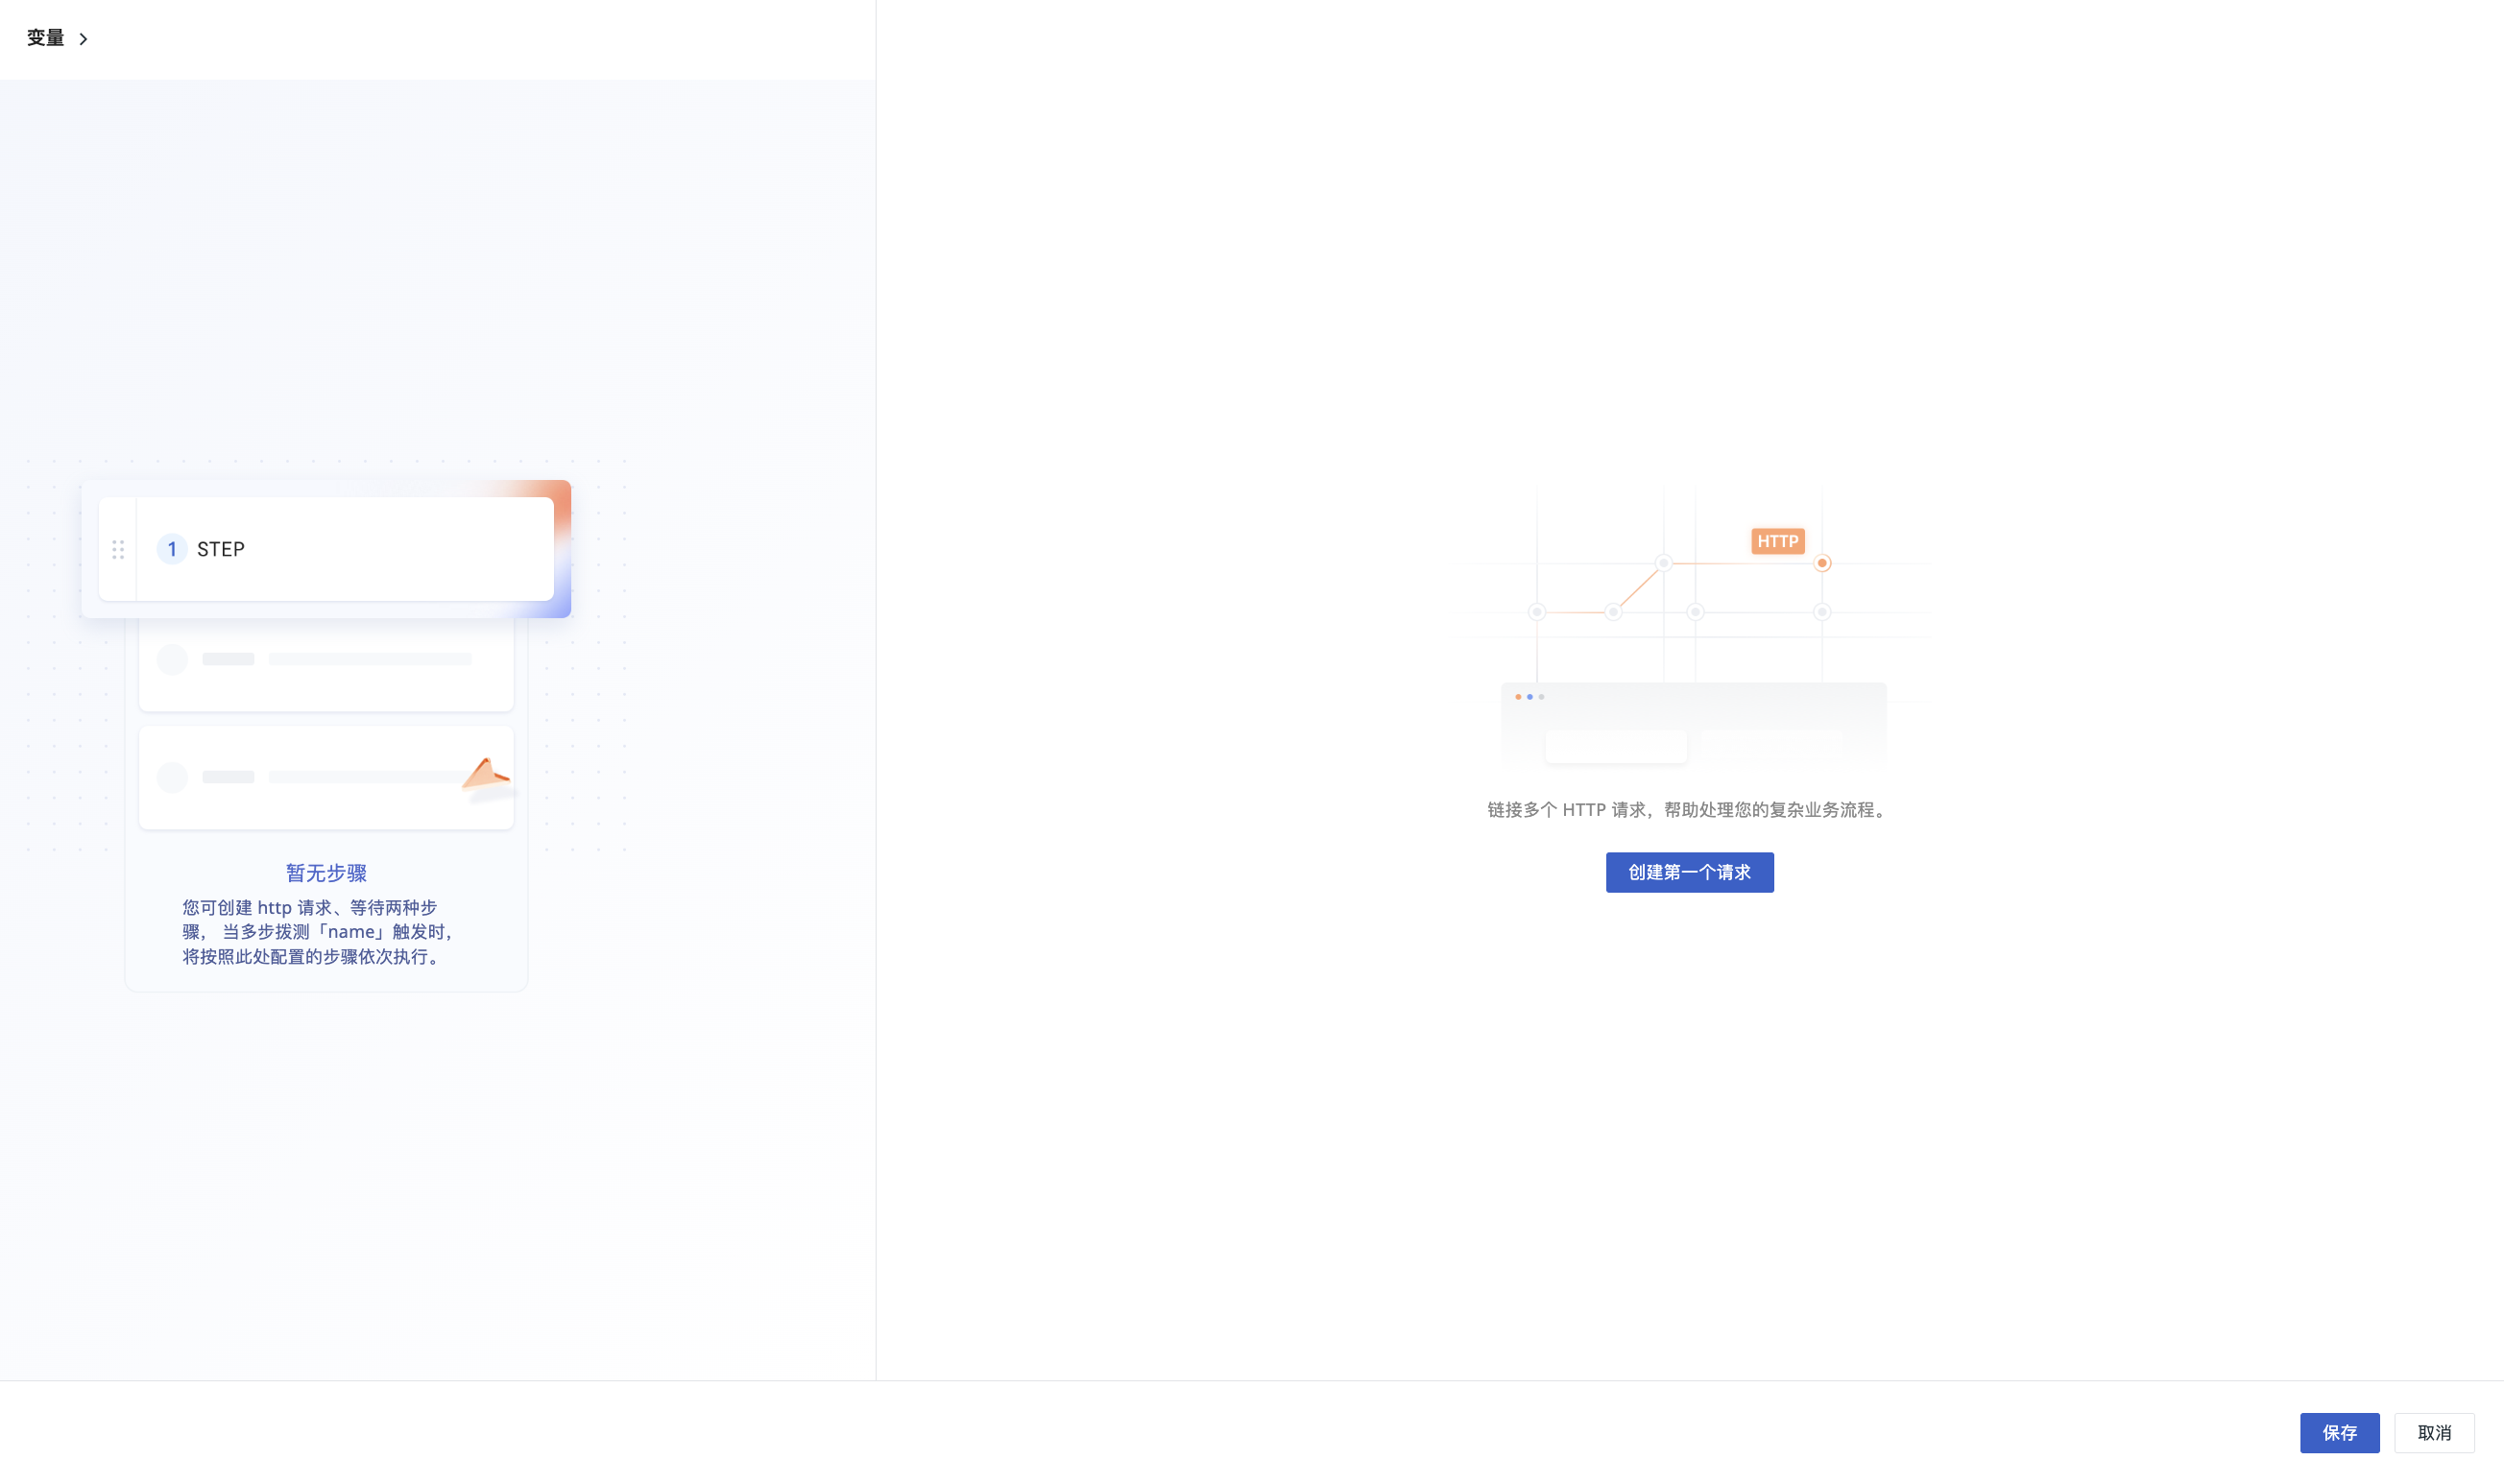
Name
Define the request name.
Define the Request Format
- Define the request URL;
- Perform Advanced Settings as needed.
Success Criteria
Default Mode
That is, define the success conditions of the test result by adding judgment conditions.
You can select "All" or "Any" between multiple conditions to implement AND or OR logic.
| Type | Operator |
|---|---|
| Response Body | contains, does not contain, is, is not, matches regex, does not match regex |
| Request Header | contains, does not contain, is, is not, matches regex, does not match regex |
| Response Time | less than |
| Status Code | is, is not, matches regex, does not match regex |
Script Mode
In Multistep Tests, Script Mode supports the following functions by writing Pipeline scripts:
- Set judgment conditions: customize complex judgment logic based on business requirements, supporting single-condition or multi-condition combinations;
- Process result data: perform custom processing on test results, including data cleaning, format conversion, and more;
- Extract fields and define variables: extract specific fields from the response and define them as variables for reuse in subsequent steps.
Script Mode flexibly satisfies the requirements of extracting specific fields from responses or performing complex condition judgments.
Example:
body = load_json(response["body"])

if body["code"] == 200 {
  result["is_failed"] = false
  vars["token"] = body["token"]
} else {
  result["is_failed"] = true
  result["error_message"] = body["message"]
}
In the script above, load_json is first used to parse the response content into a JSON object. The script then checks whether the response status code is 200. If it is 200, the token in the response content is extracted and stored via vars for use in subsequent requests. Otherwise, is_failed in result is set to true, and error_message is set to the message in the response content.
For more information, see Custom Synthetic Test.
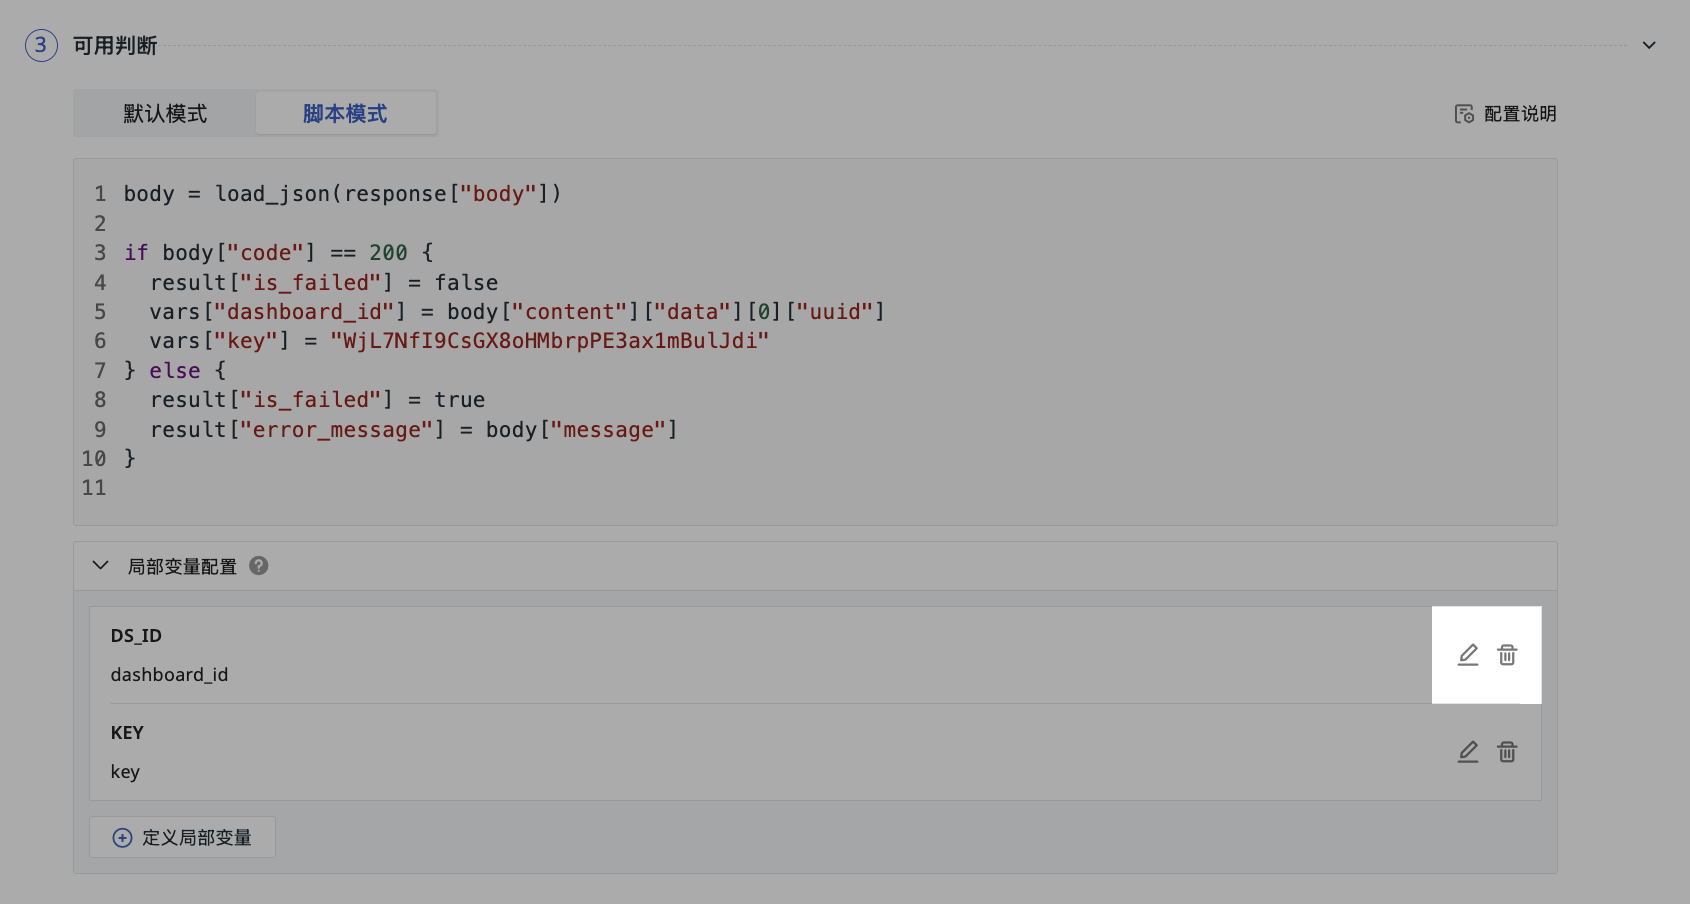
Local Variables
Local variables defined in the current Multistep Test can be referenced in subsequent request steps.
Note
You must first extract the corresponding fields in the script to define variables.
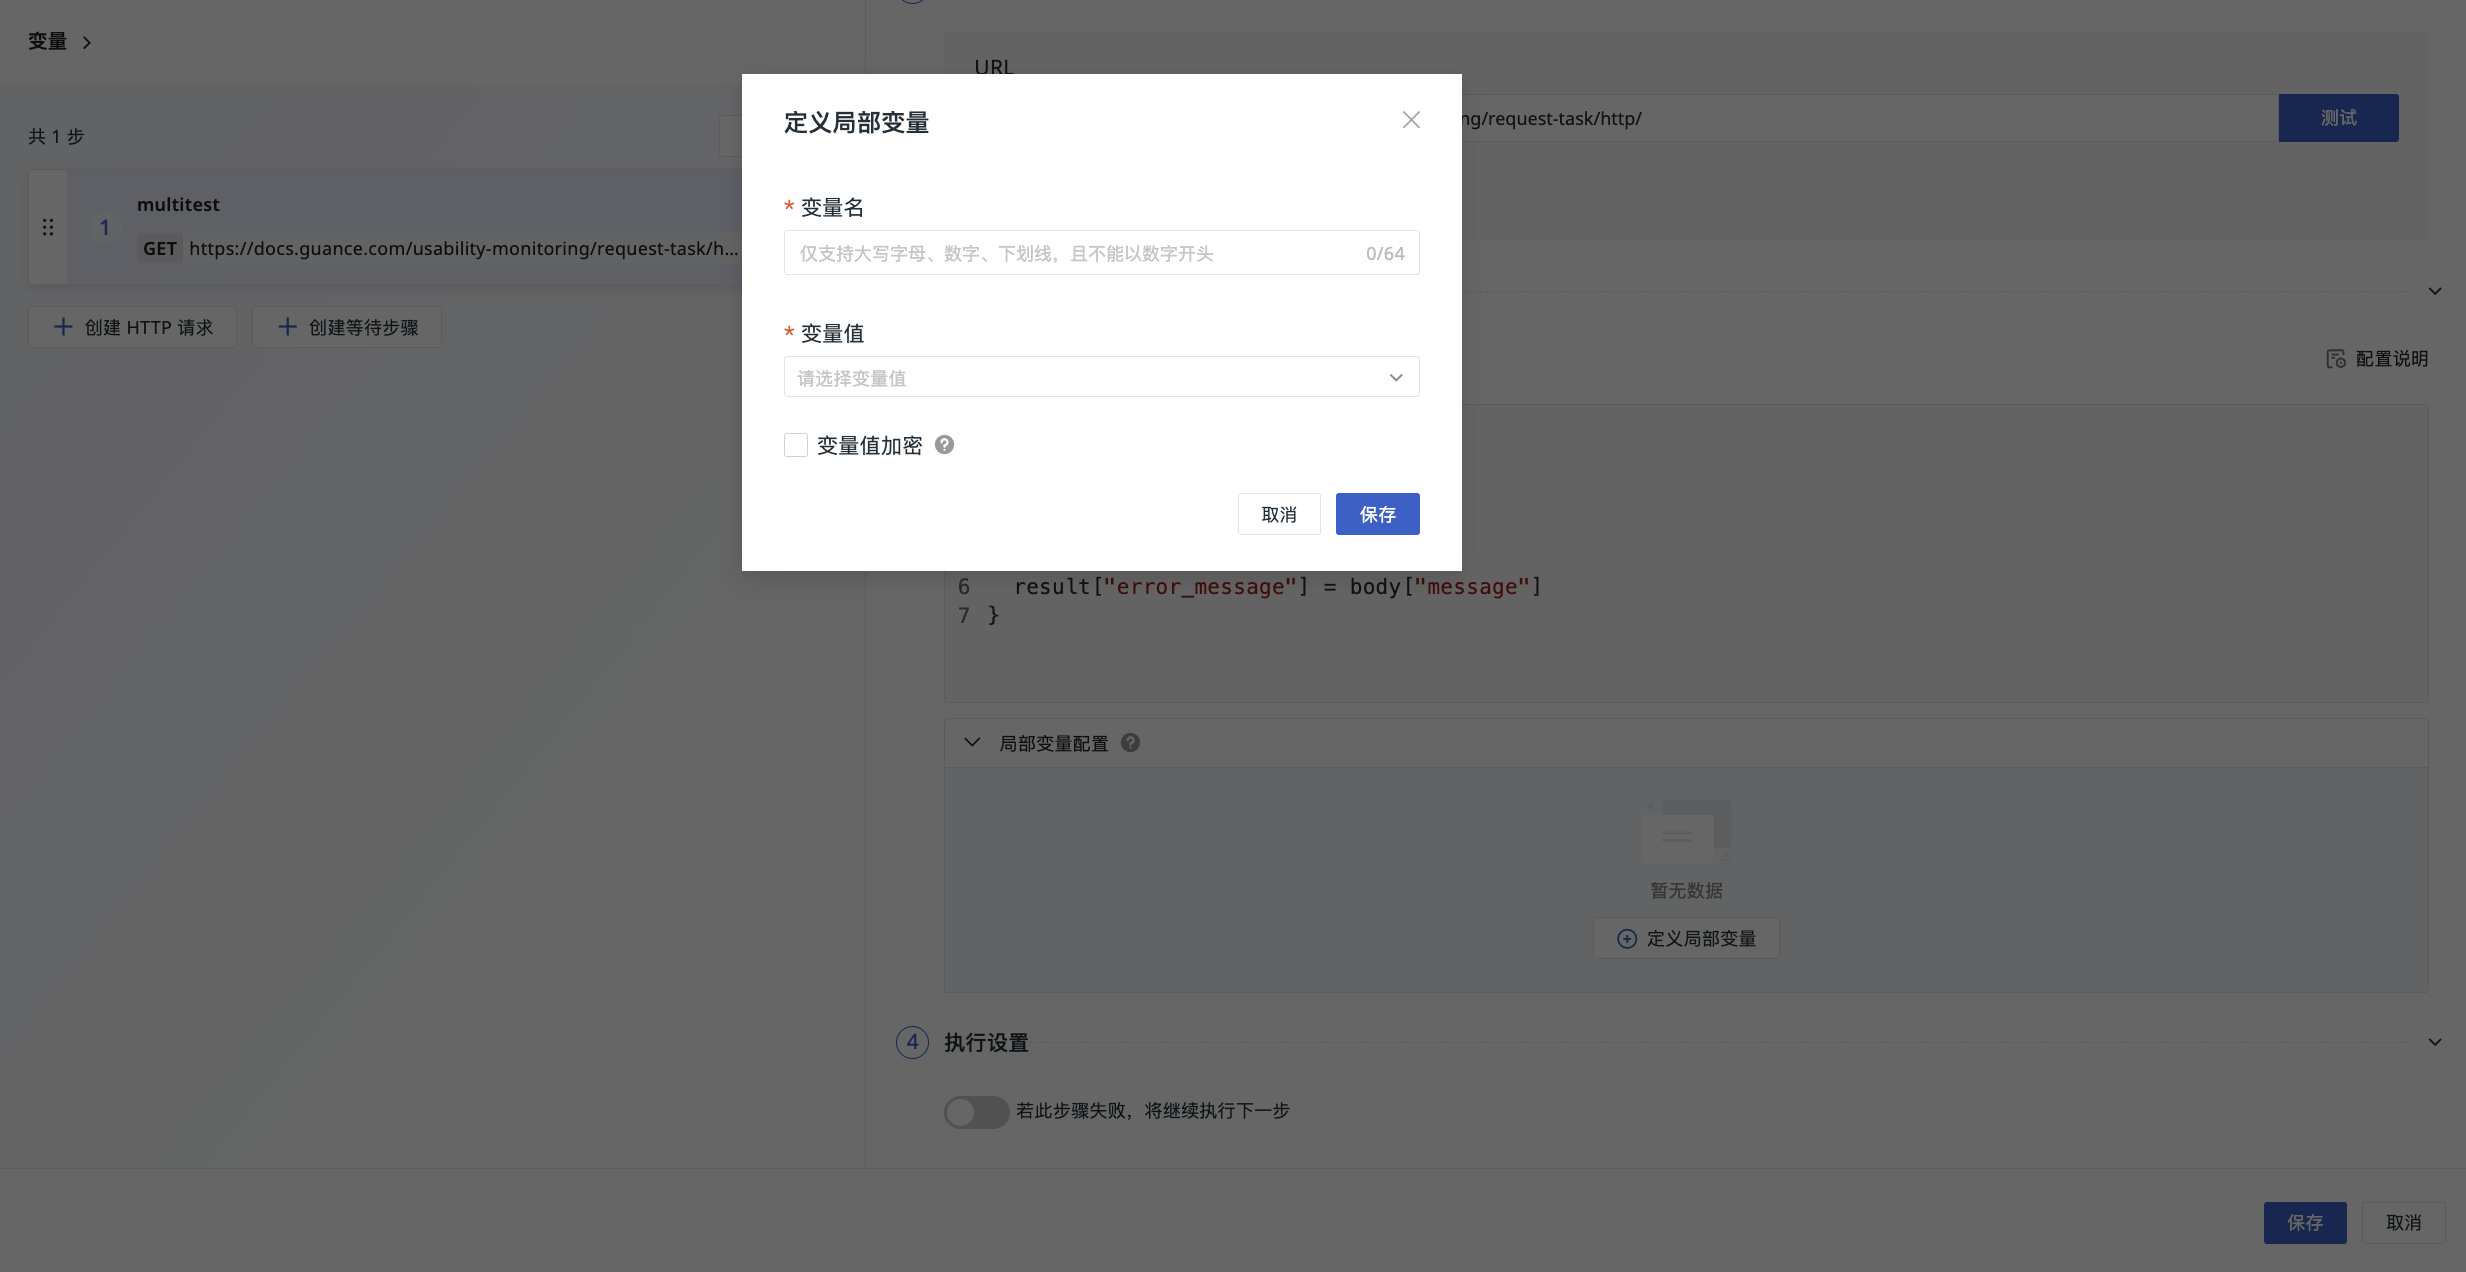
- Enter the variable name. Uppercase letters, numbers, and underscores are generally supported. Duplicate names are not allowed;
- Select the variable value, that is, the field defined as a variable in Script Mode;
- Optionally choose whether to encrypt the variable value. Once enabled, the current variable value will be hidden in the test results.
Created variables are displayed uniformly in the "Variables" area in the top-left corner. The variable count is displayed in the format {x}xx, where {x} is the variable identifier and xx is the number of variables. For example, {x}3 indicates that there are currently 3 variables.
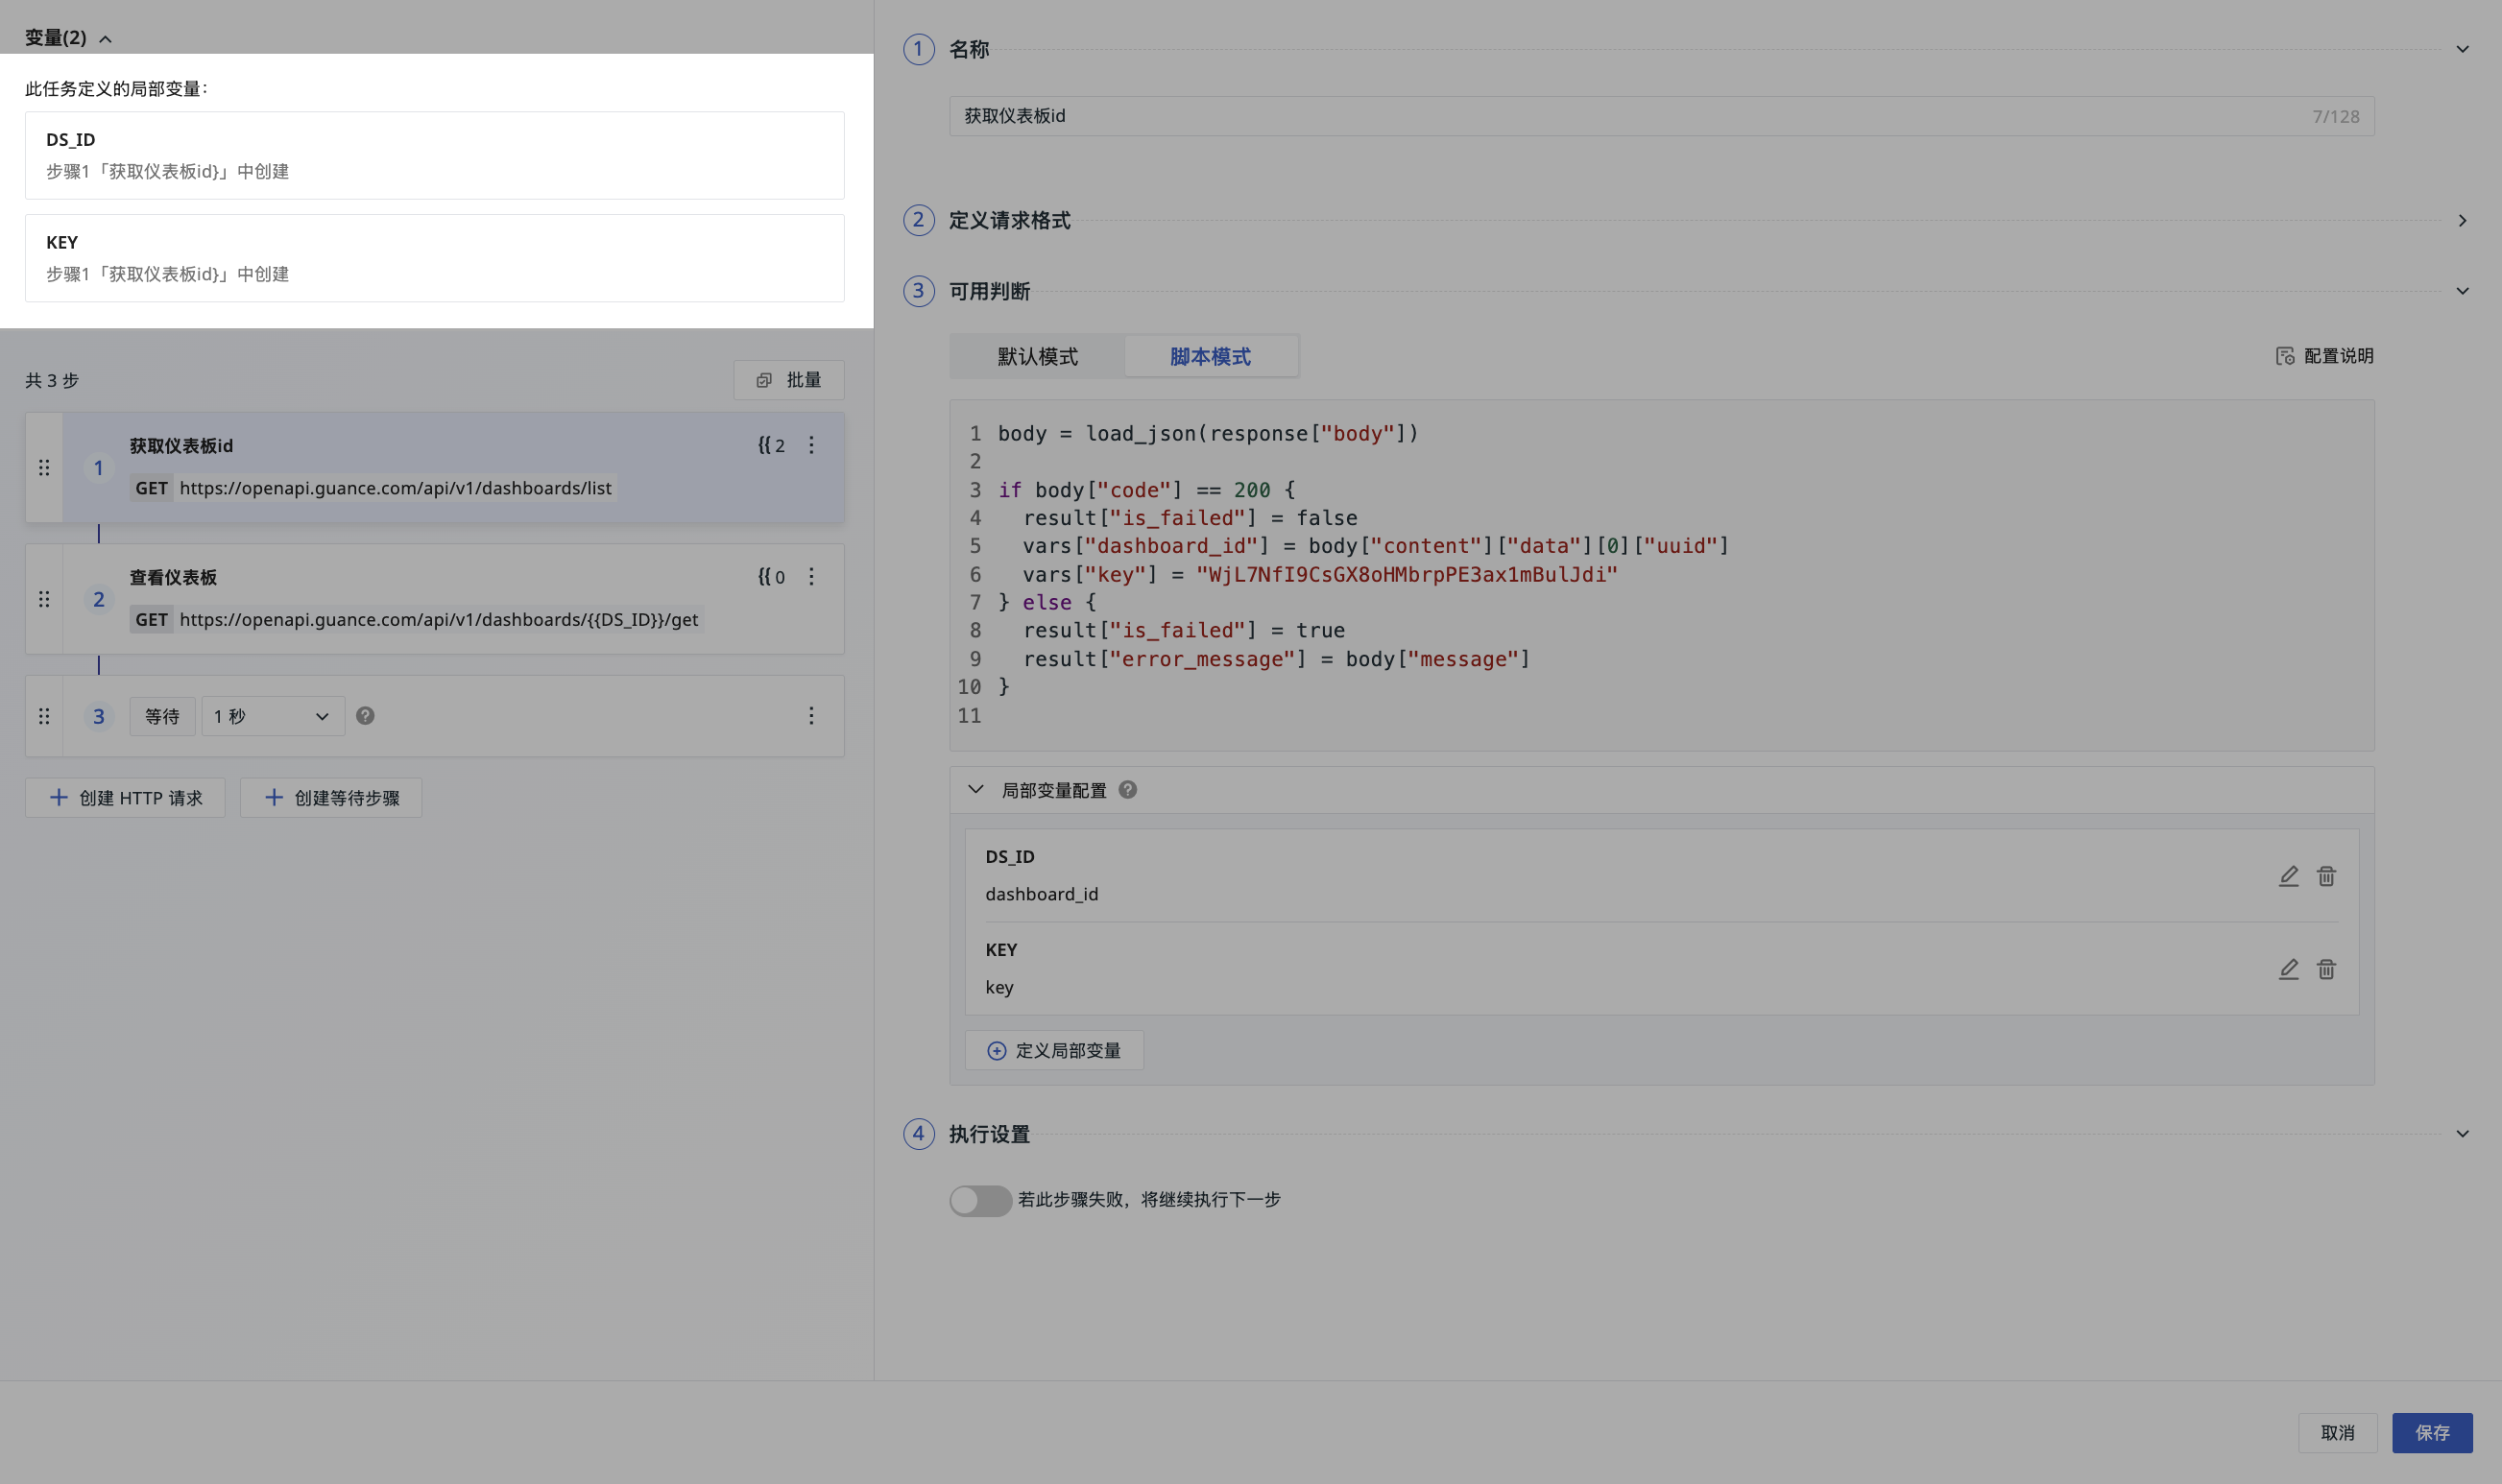
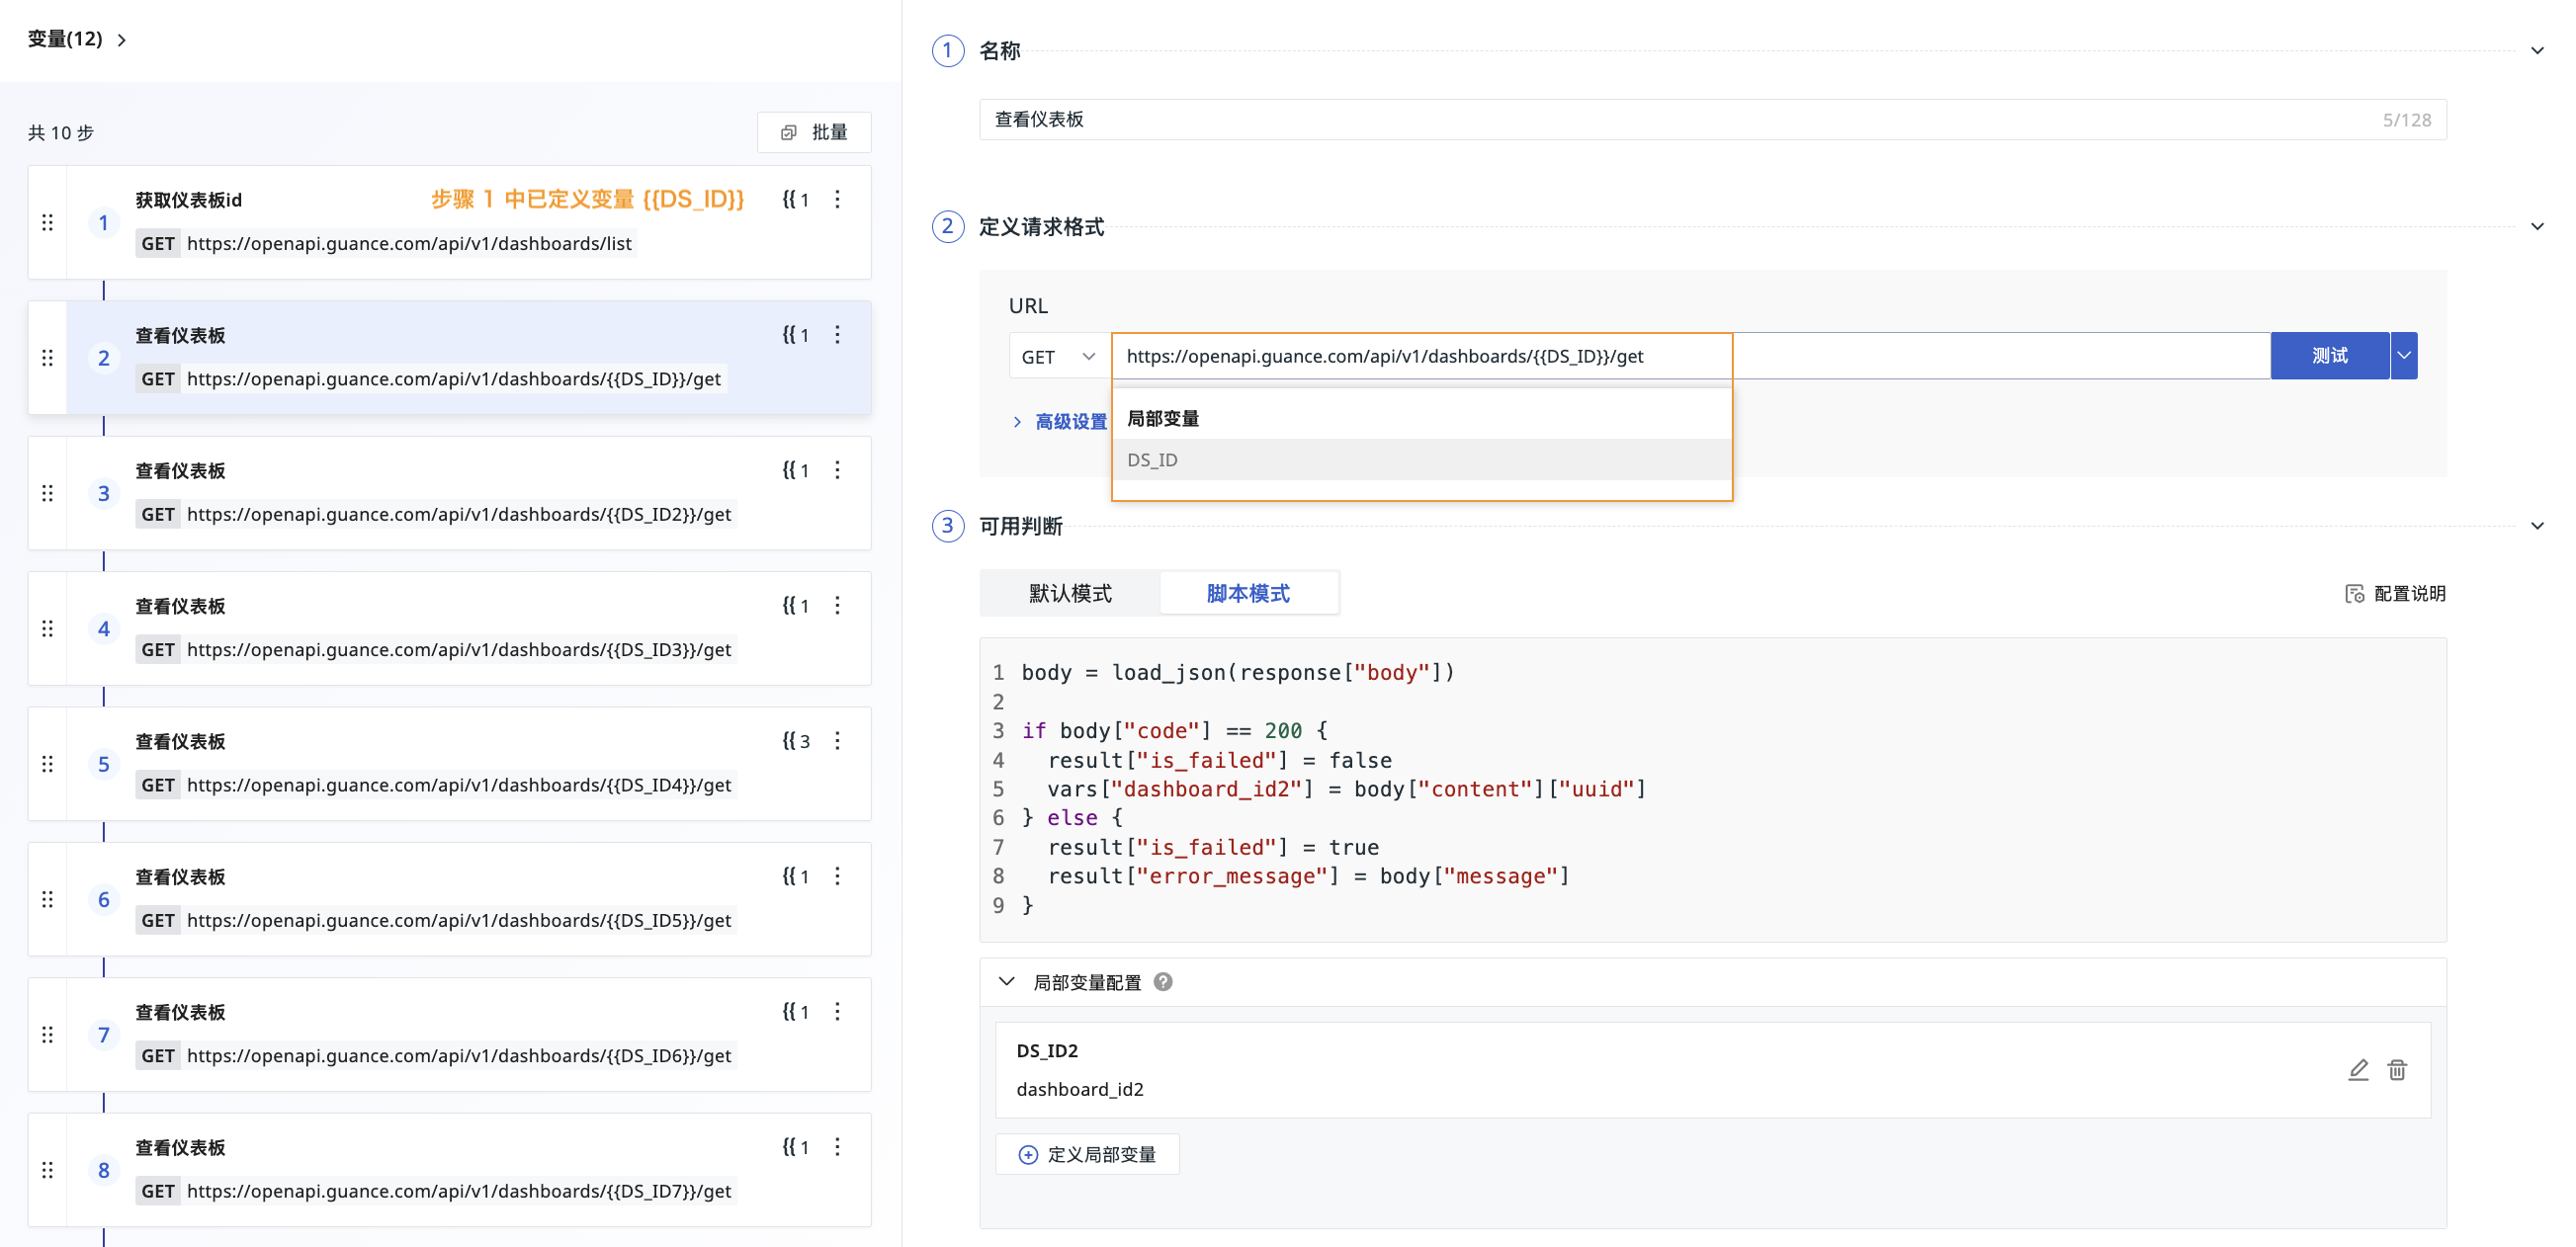
You can reference local variables in Request Header under Advanced Settings in the request format definition.
As shown in the figure, local variable {{DS_ID}} is defined in Step 1 with the value dashboard_id. In Request 2, you can directly reference this variable value in the URL.
To manage these variables, click the button on the right in the "Local Variable Configuration" area to edit or delete them.
Note
- After deleting a local variable, requests in the current Multistep Test that reference this variable will no longer be able to use it;
- After modifying the name of a local variable, steps that reference the original name will no longer be able to recognize the variable.
Execution Settings
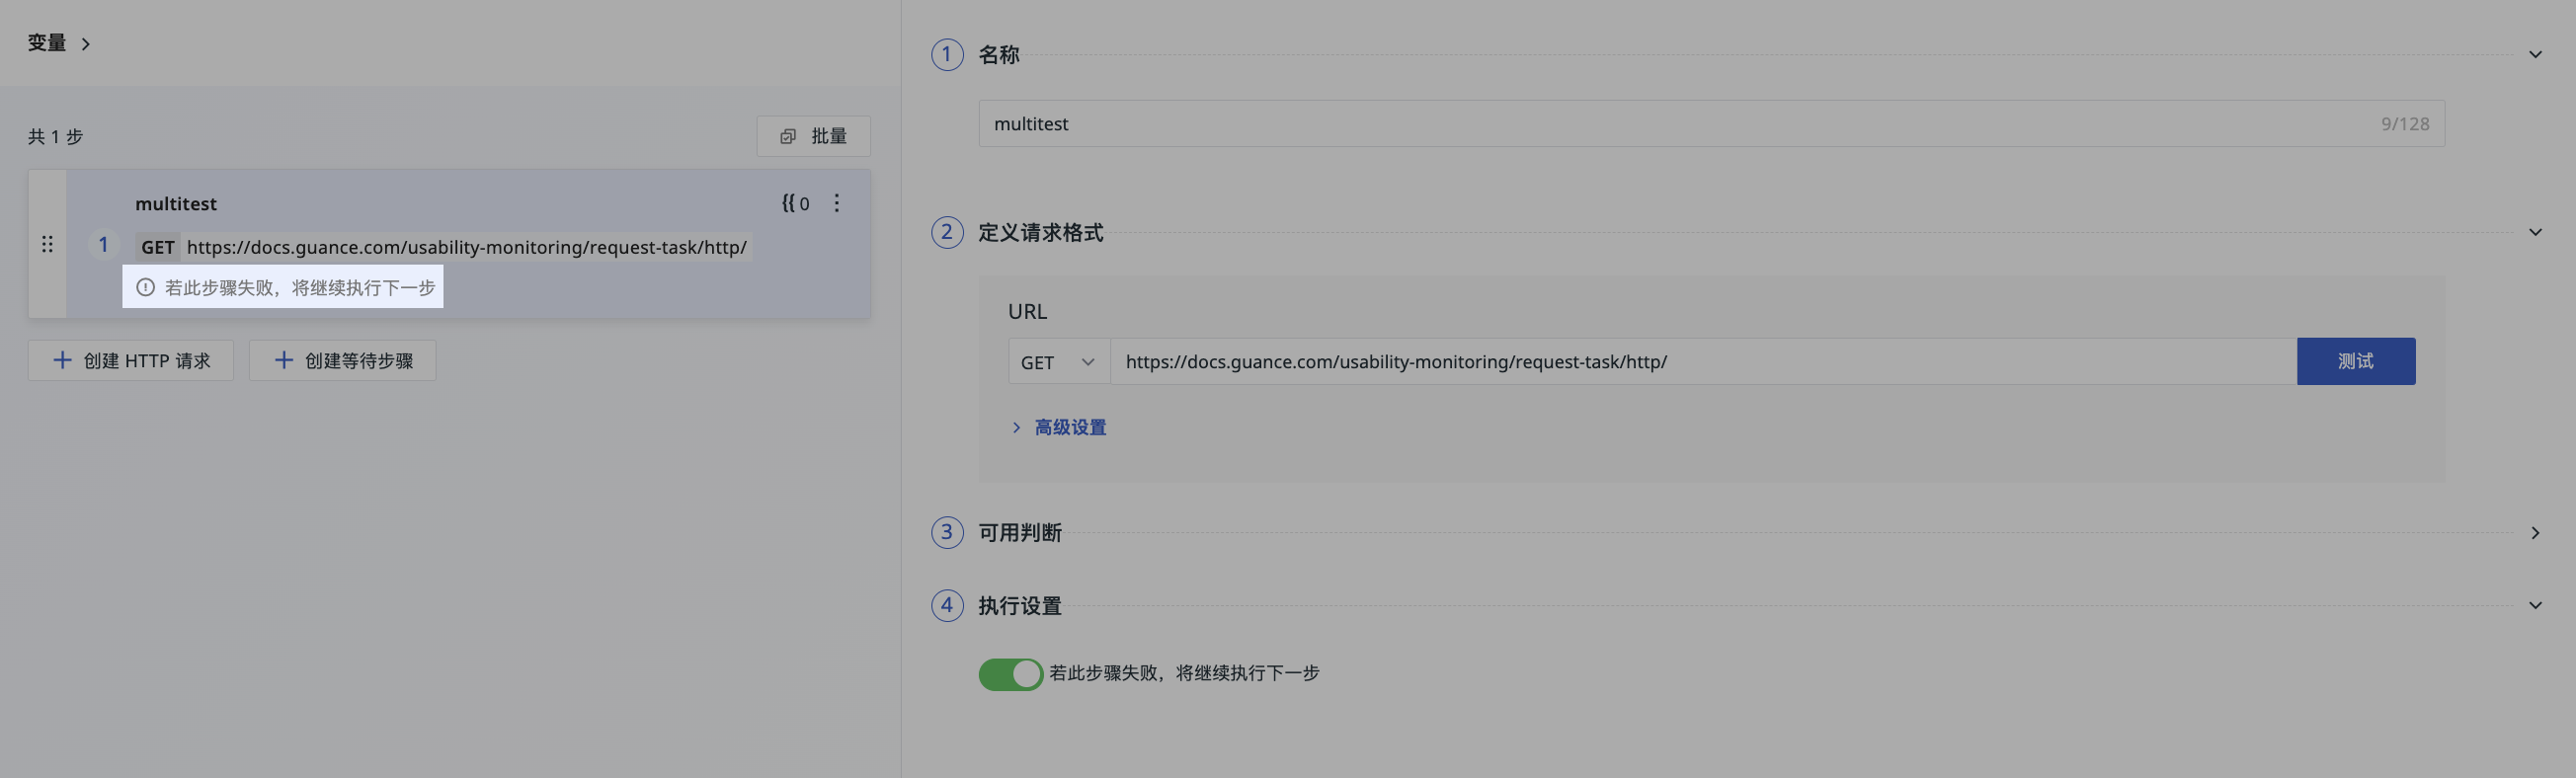
Select "If this step fails, continue to the next step" to skip the error and continue executing subsequent steps when the current step fails.
Test
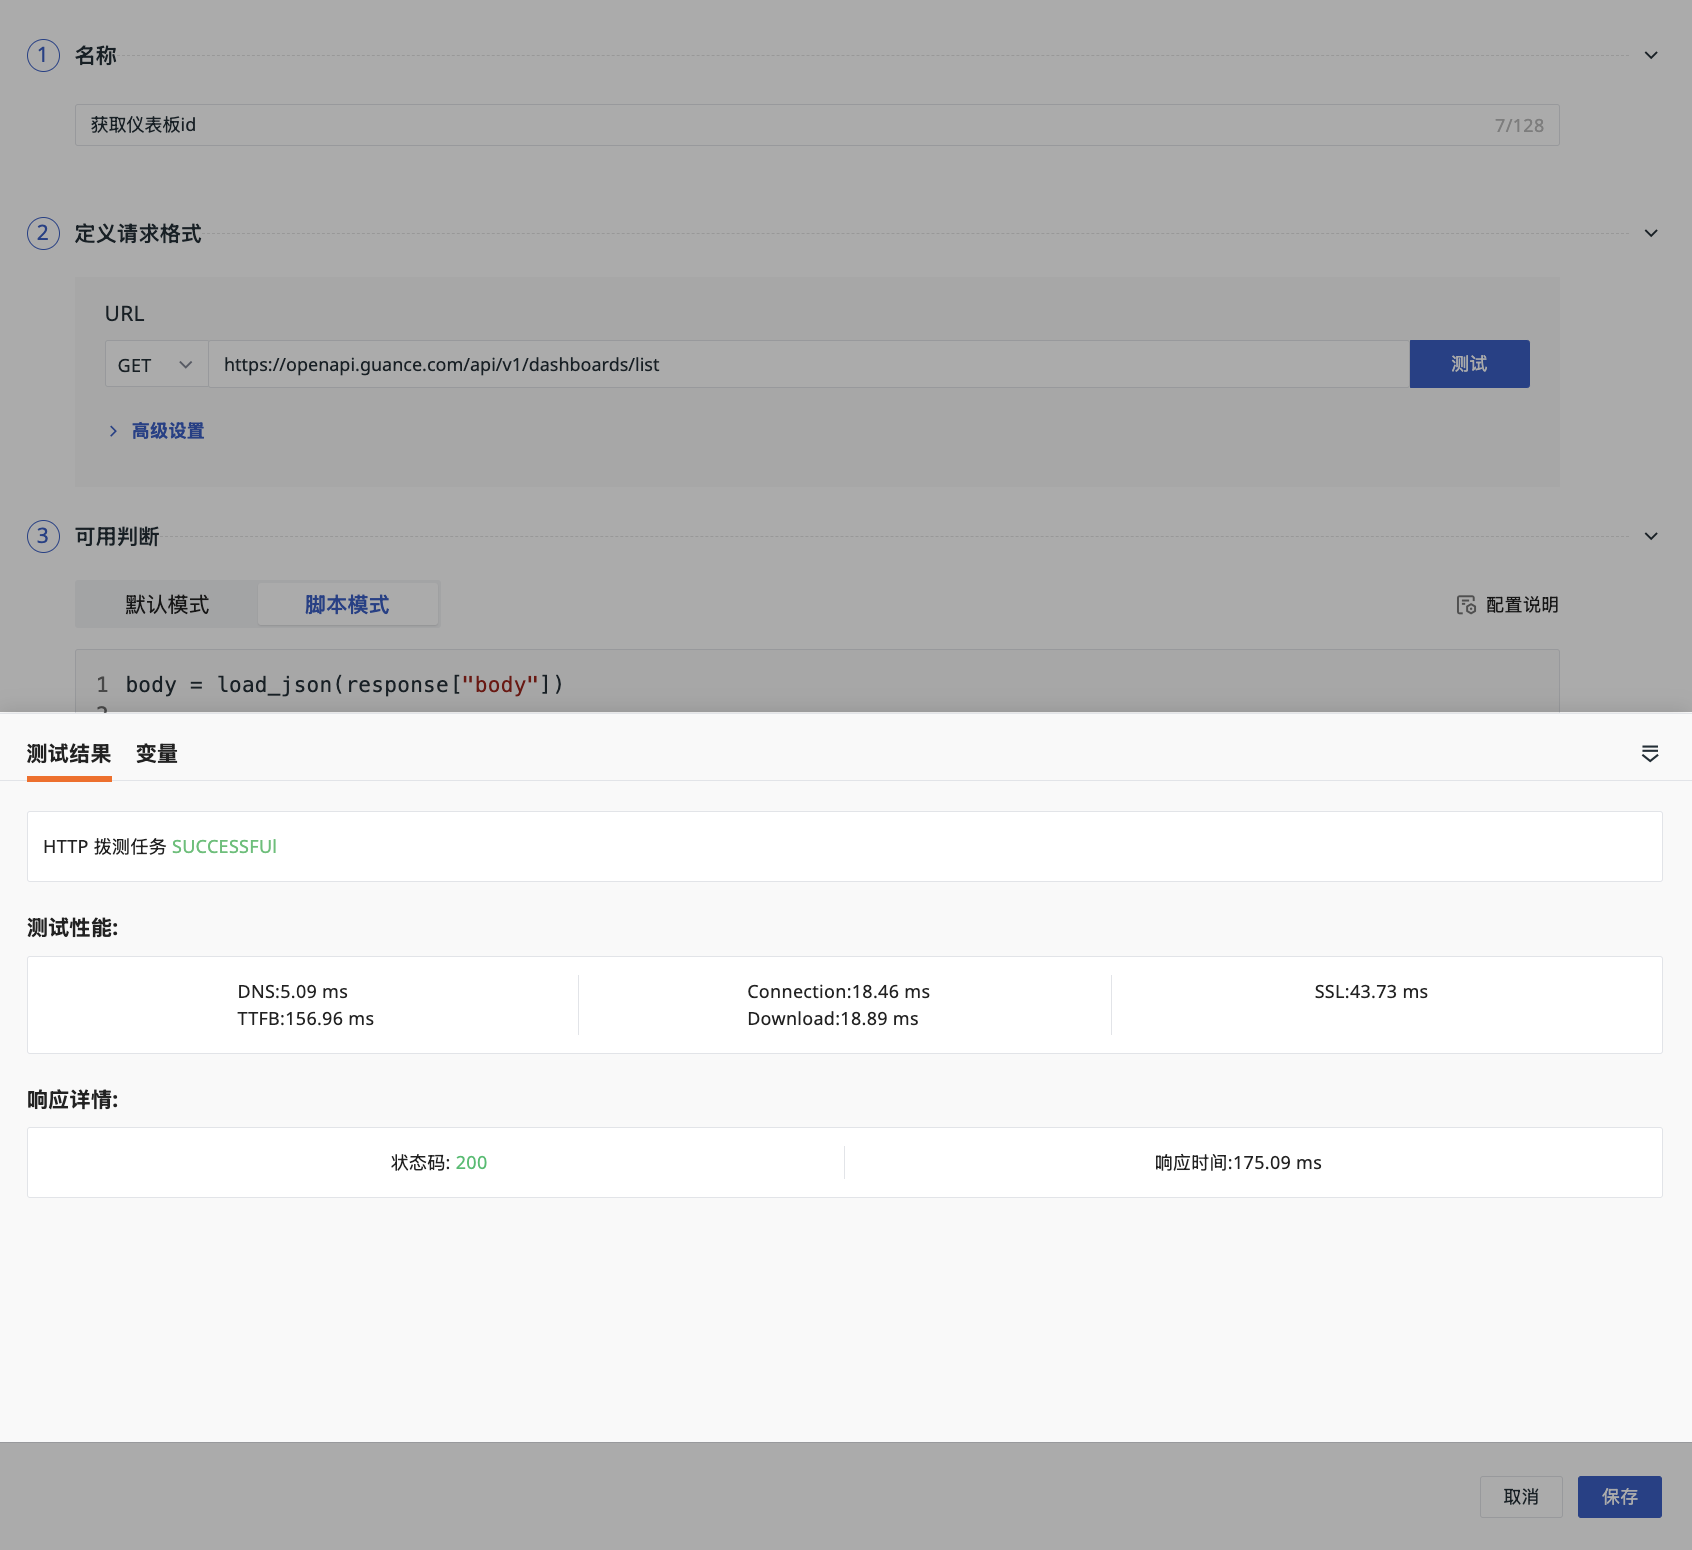
After the task step is created, click the "Test" button to quickly verify the test result. The test task runs asynchronously. After execution is complete, the system displays the following information:
- Test Performance: displays the performance metrics during the test.
- Response Details: provides detailed response content to help troubleshoot issues.
- Variables: view the variables configured in requests and URLs under the current task.
If you start testing from a step after the first request, you can test the current task directly, or choose to start testing from the first task.
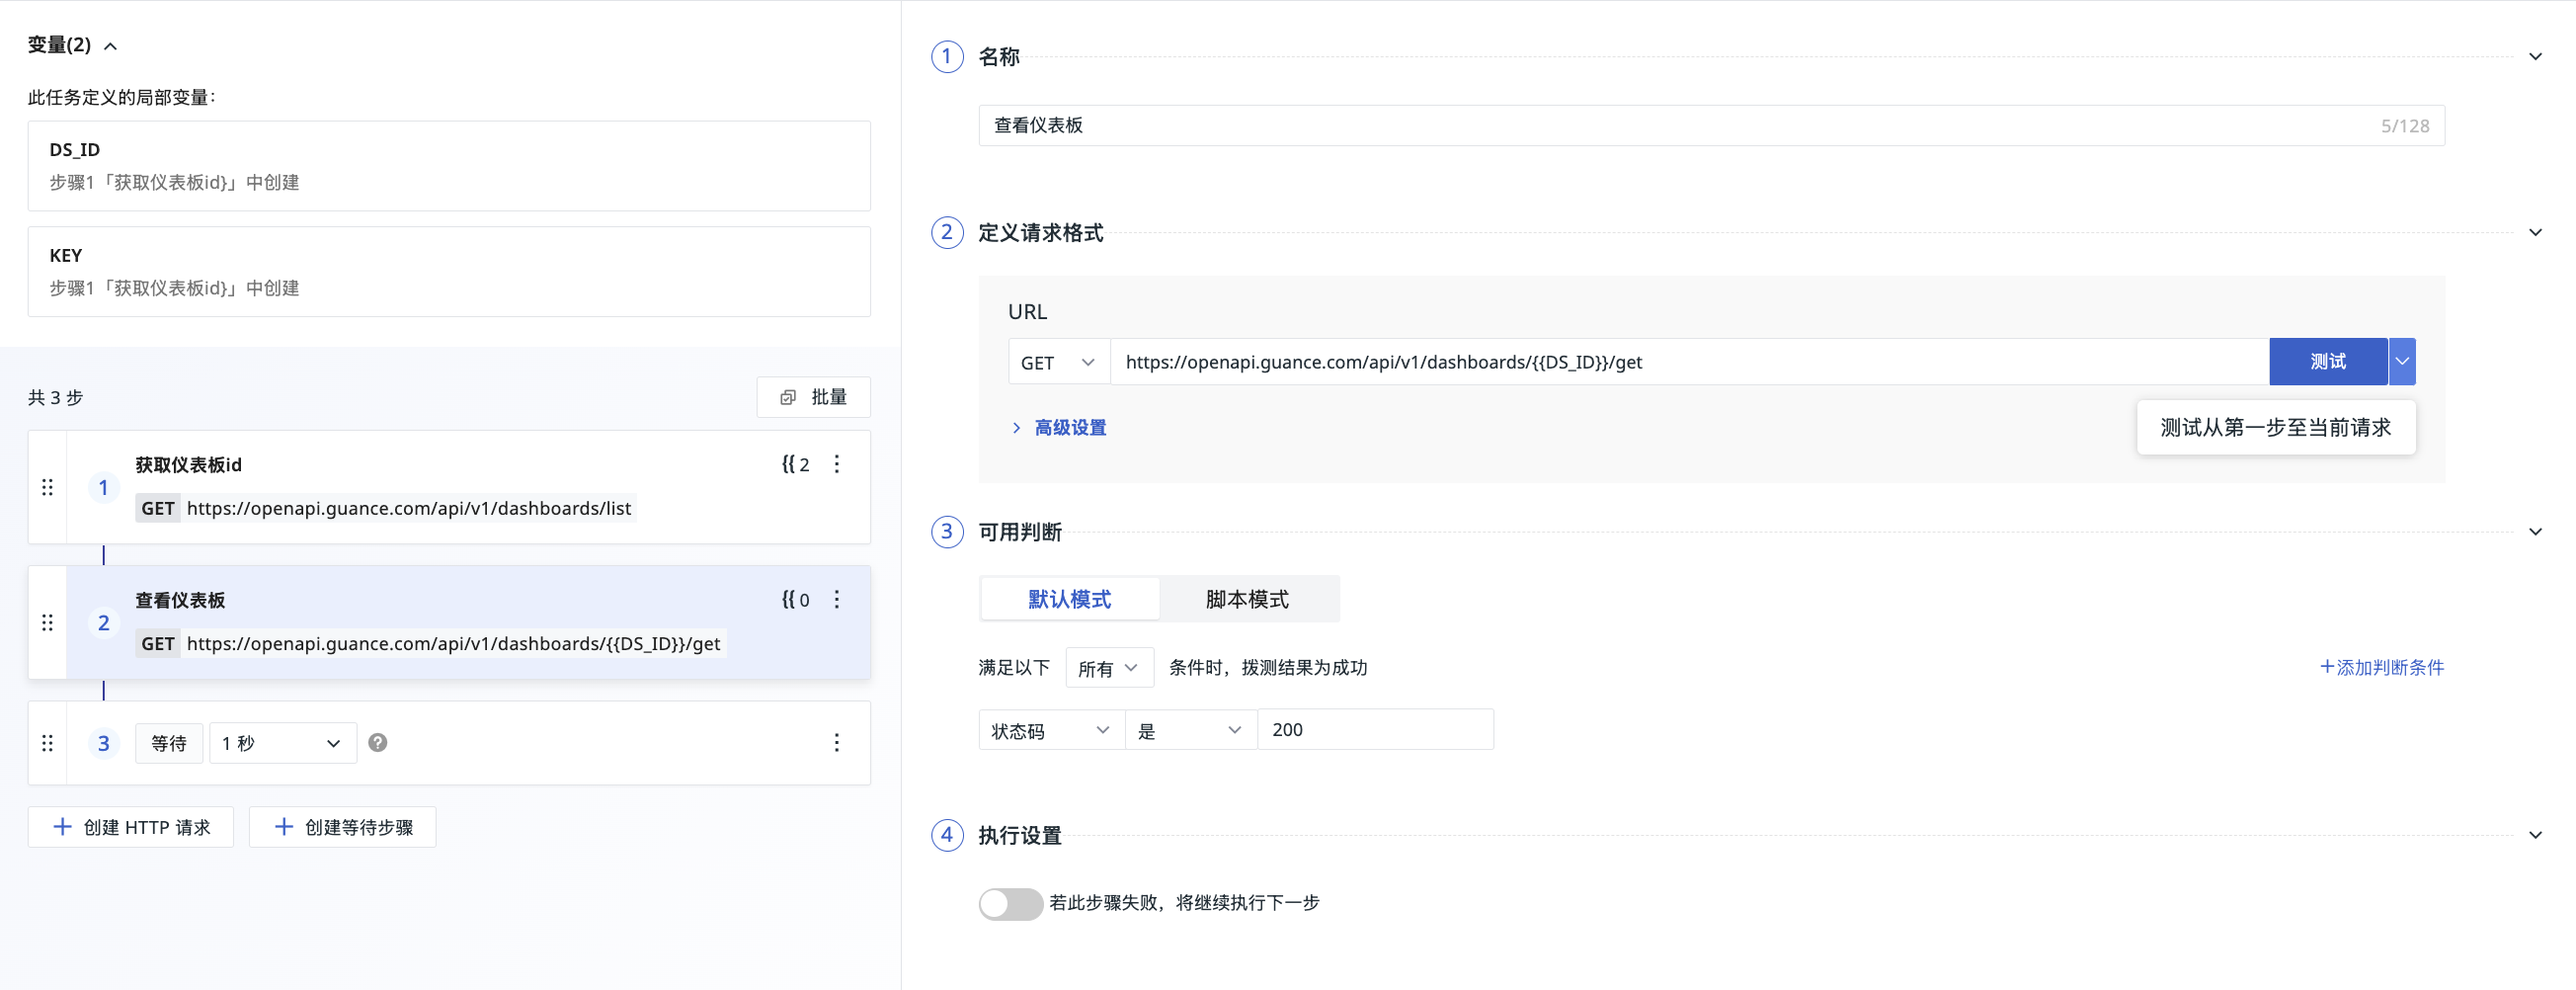
If the test fails, there may be unknown variables. Click the "Test from the first step to the current request" button to restart the test for troubleshooting.
Continue Creating Request Steps
After creating the first step of the synthetic test, you can continue to "Create HTTP Request" or "Create Wait Step".
Note
Up to 10 steps can be created (including HTTP requests and waits).
Wait Step
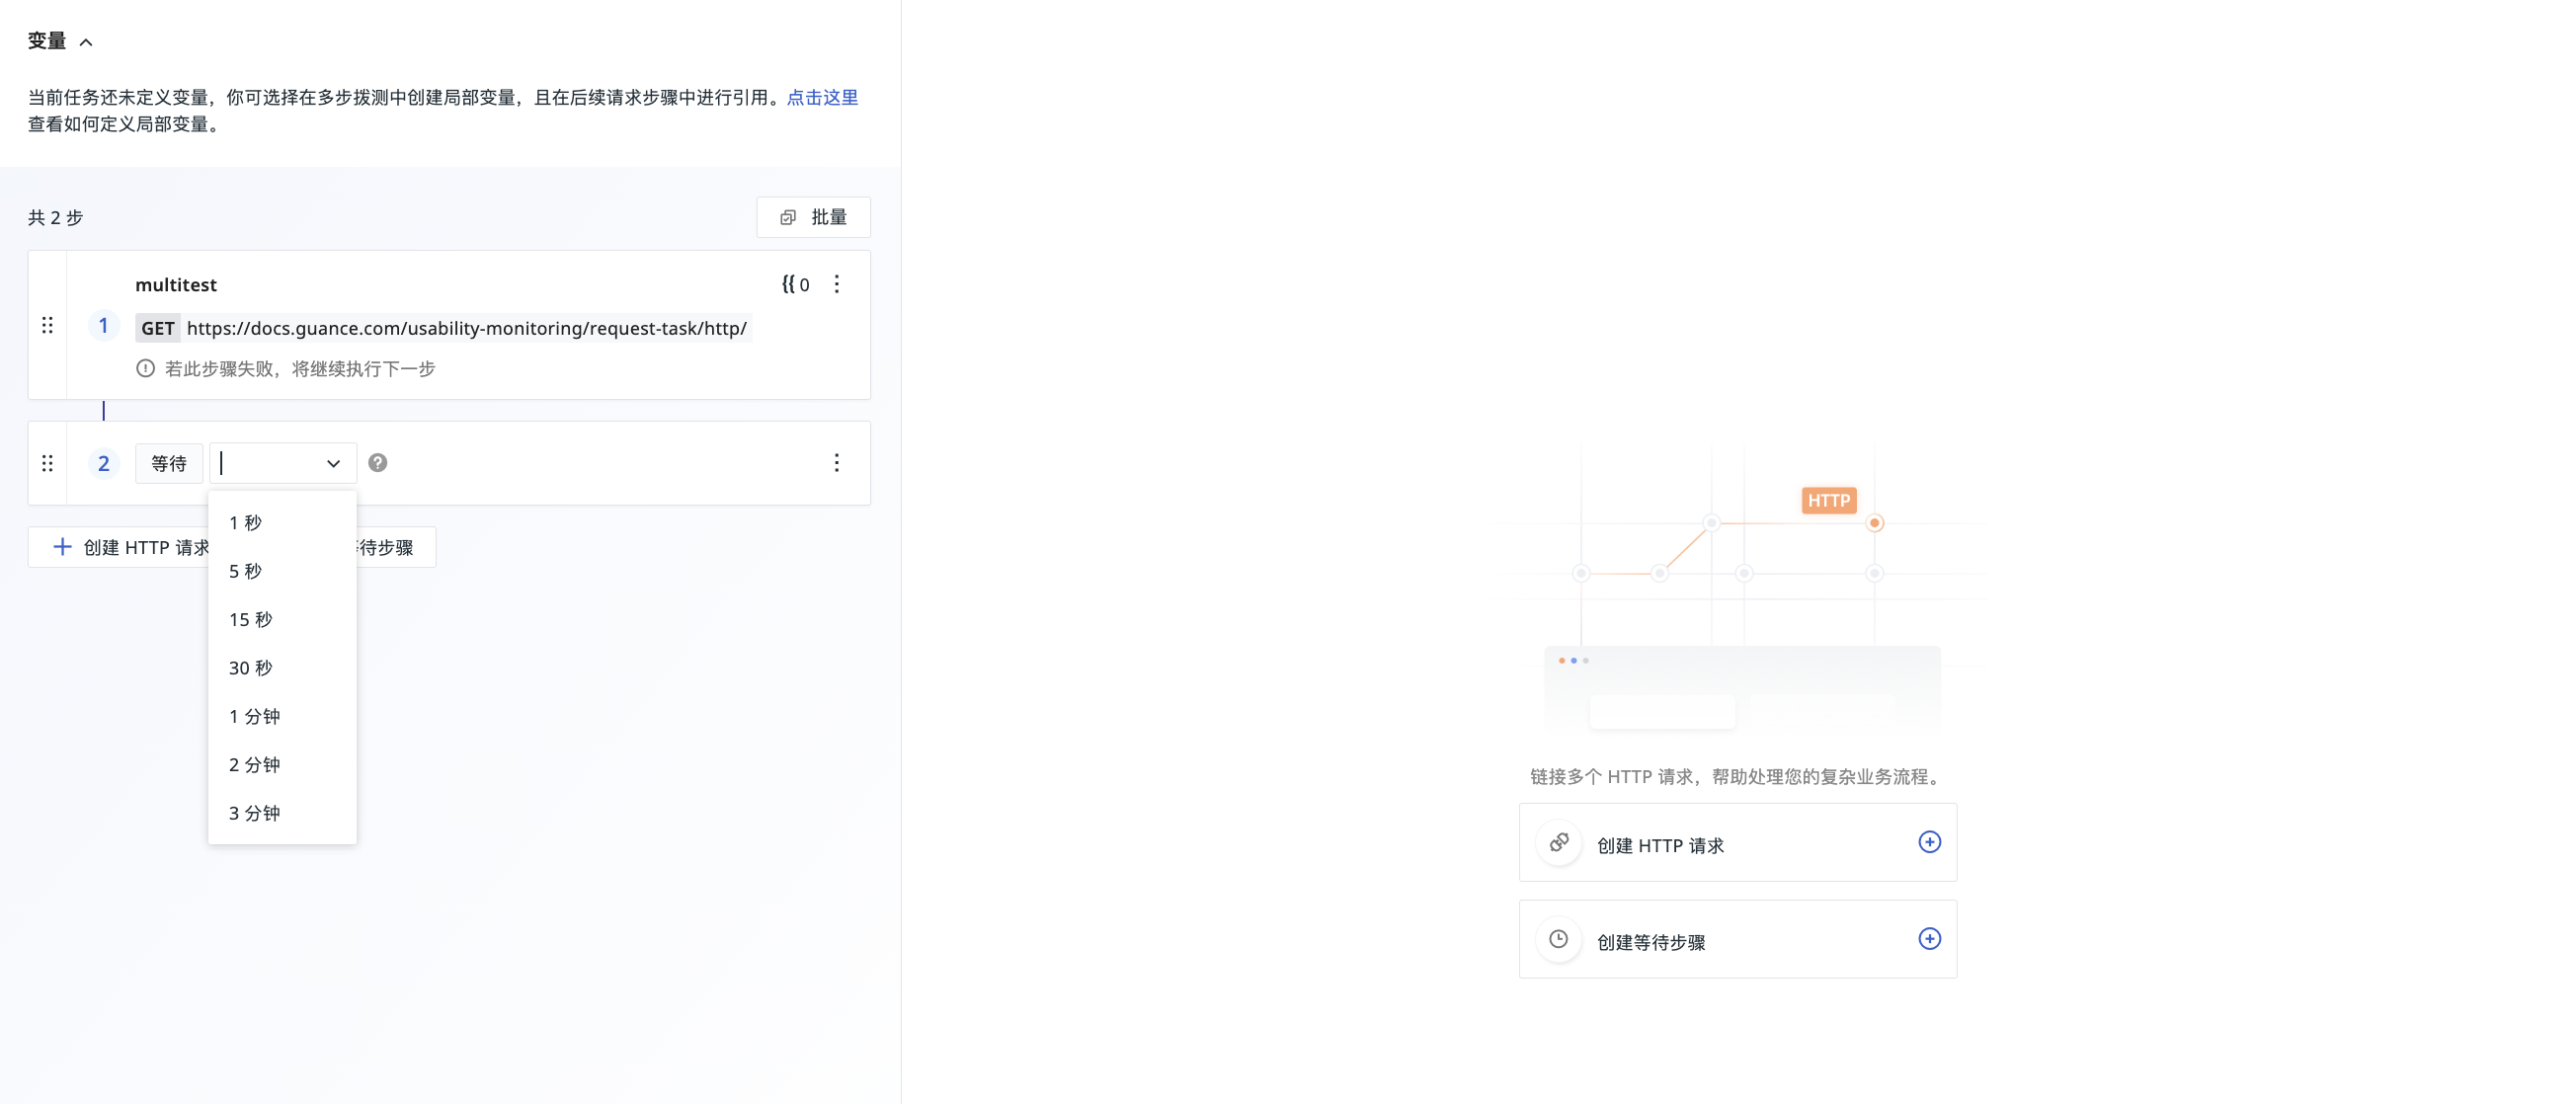
This means continuing to execute the next step after waiting for a specific duration. The duration can be 1 second, 5 seconds, 15 seconds, 30 seconds, 1 minute, 2 minutes, or 3 minutes.
Manage Tasks
After the request steps are created, click Save.
For created tasks, you can manage them through the following operations:
- Click the drag icon on the left side of the task to change the order of the steps;
- Click on the right side of the task to clone or delete the step;
- Click "Batch" to clone or delete tasks in batches.
Note
When cloning a request step, local variables cannot be cloned along with it.