Workspace Management
Workspaces are designed for multi-user scenarios and can isolate data from different units.
Create Workspace
In the workspace list, click Create Workspace in the upper right corner.
Workspace Information
- Enter the workspace name.
- Select the workspace language.
- Select the workspace owner: The owner has the highest operational permissions for the workspace.
- Optionally enter a description for this workspace.
Primary Storage Engine
The data storage engines are automatically listed.
If you do not select a data storage engine, data will be saved to the system's primary storage engine.
Data Retention Policy
This refers to the data retention period for the current workspace.
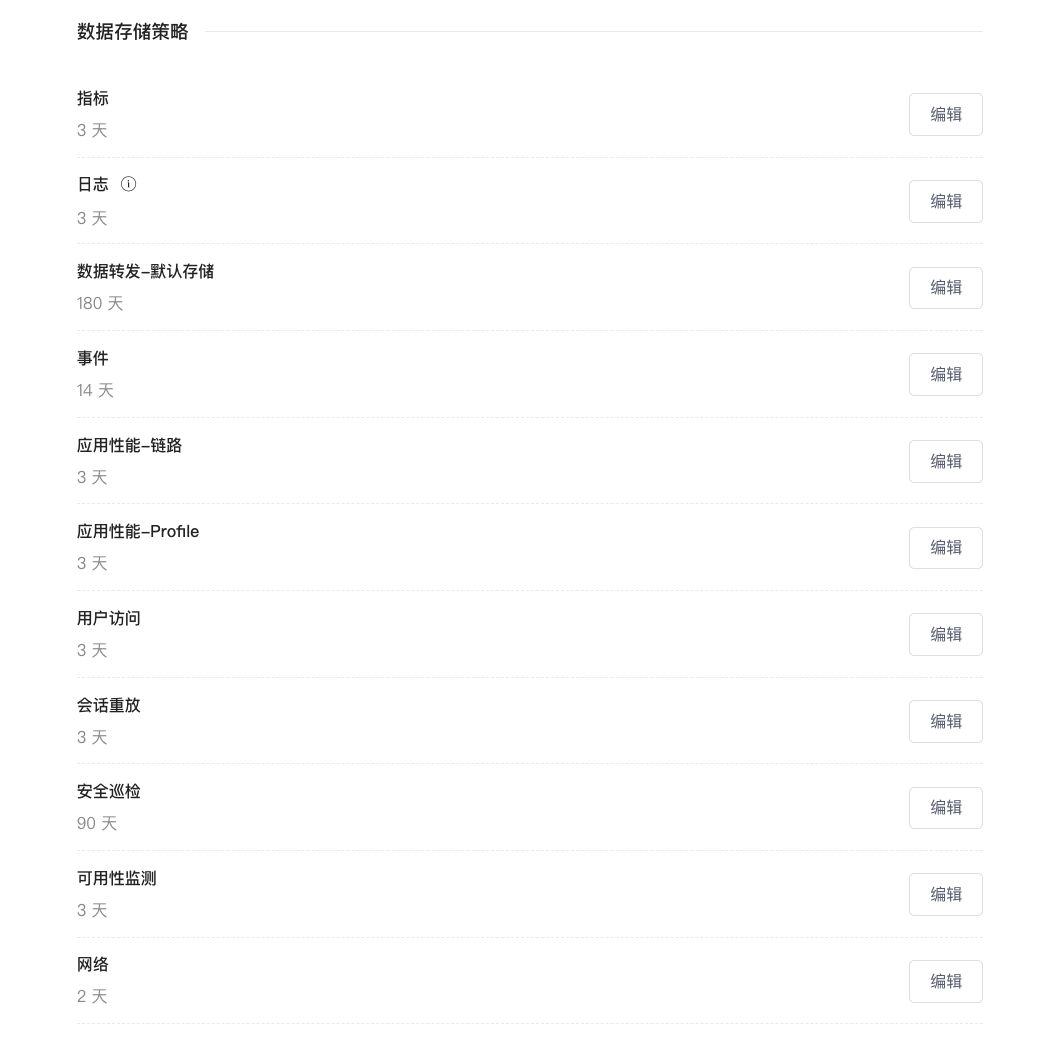
In addition to the storage duration for each data type, you can also choose to set a custom retention period (<= 1800 days).
Configure Extended Storage Duration
- When configuring extended data retention periods for OpenSearch or Elasticsearch clusters, you must estimate not only storage space usage but also the number of index shards.
- OpenSearch or Elasticsearch clusters have a default limit of 1000 shards per node. For example, for a 3-node cluster, the total number of shards should not exceed 3000.
- Example calculation of shard count: Assume a workspace's log index is configured with 2 replicas and 3 shards, with a maximum of 30GB per shard. The daily data volume is about 180GB (i.e., 2 indices), and the data retention is 200 days. The total shard count formula is: Number of index replicas × Number of daily indices × Number of shards per index × Data retention days = 2 × 2 × 3 × 200 = 2400 shards.
- If multiple workspaces exist, you need to sum the index shard counts from each workspace and also estimate the number of shards for other data type indices.
Others
- Left Star Query: Determines whether the newly created workspace supports left star queries.
-
Custom Mapping Rules: After enabling this configuration, the corresponding workspace can define custom mapping rules. The workspace's custom mapping rules take precedence over the mapping rules in the management backend.
Note
If you configure overlapping rules in the management backend and within the workspace, the member's role will be the union of the roles assigned in the management backend and the workspace.
-
Custom Log Index: When enabled, allows this workspace to create multiple index policies for saving logs.
- Large Log Counting Unit: Used to set the counting unit for large logs. Logs can be split and billed as multiple entries based on the set counting unit.
- Query Limit: Customizes the query limit for different users' workspaces to prevent low cluster query performance due to excessively large query data volumes, which could affect the product experience. After setting the query limit, exceeding it requires another query to obtain results.
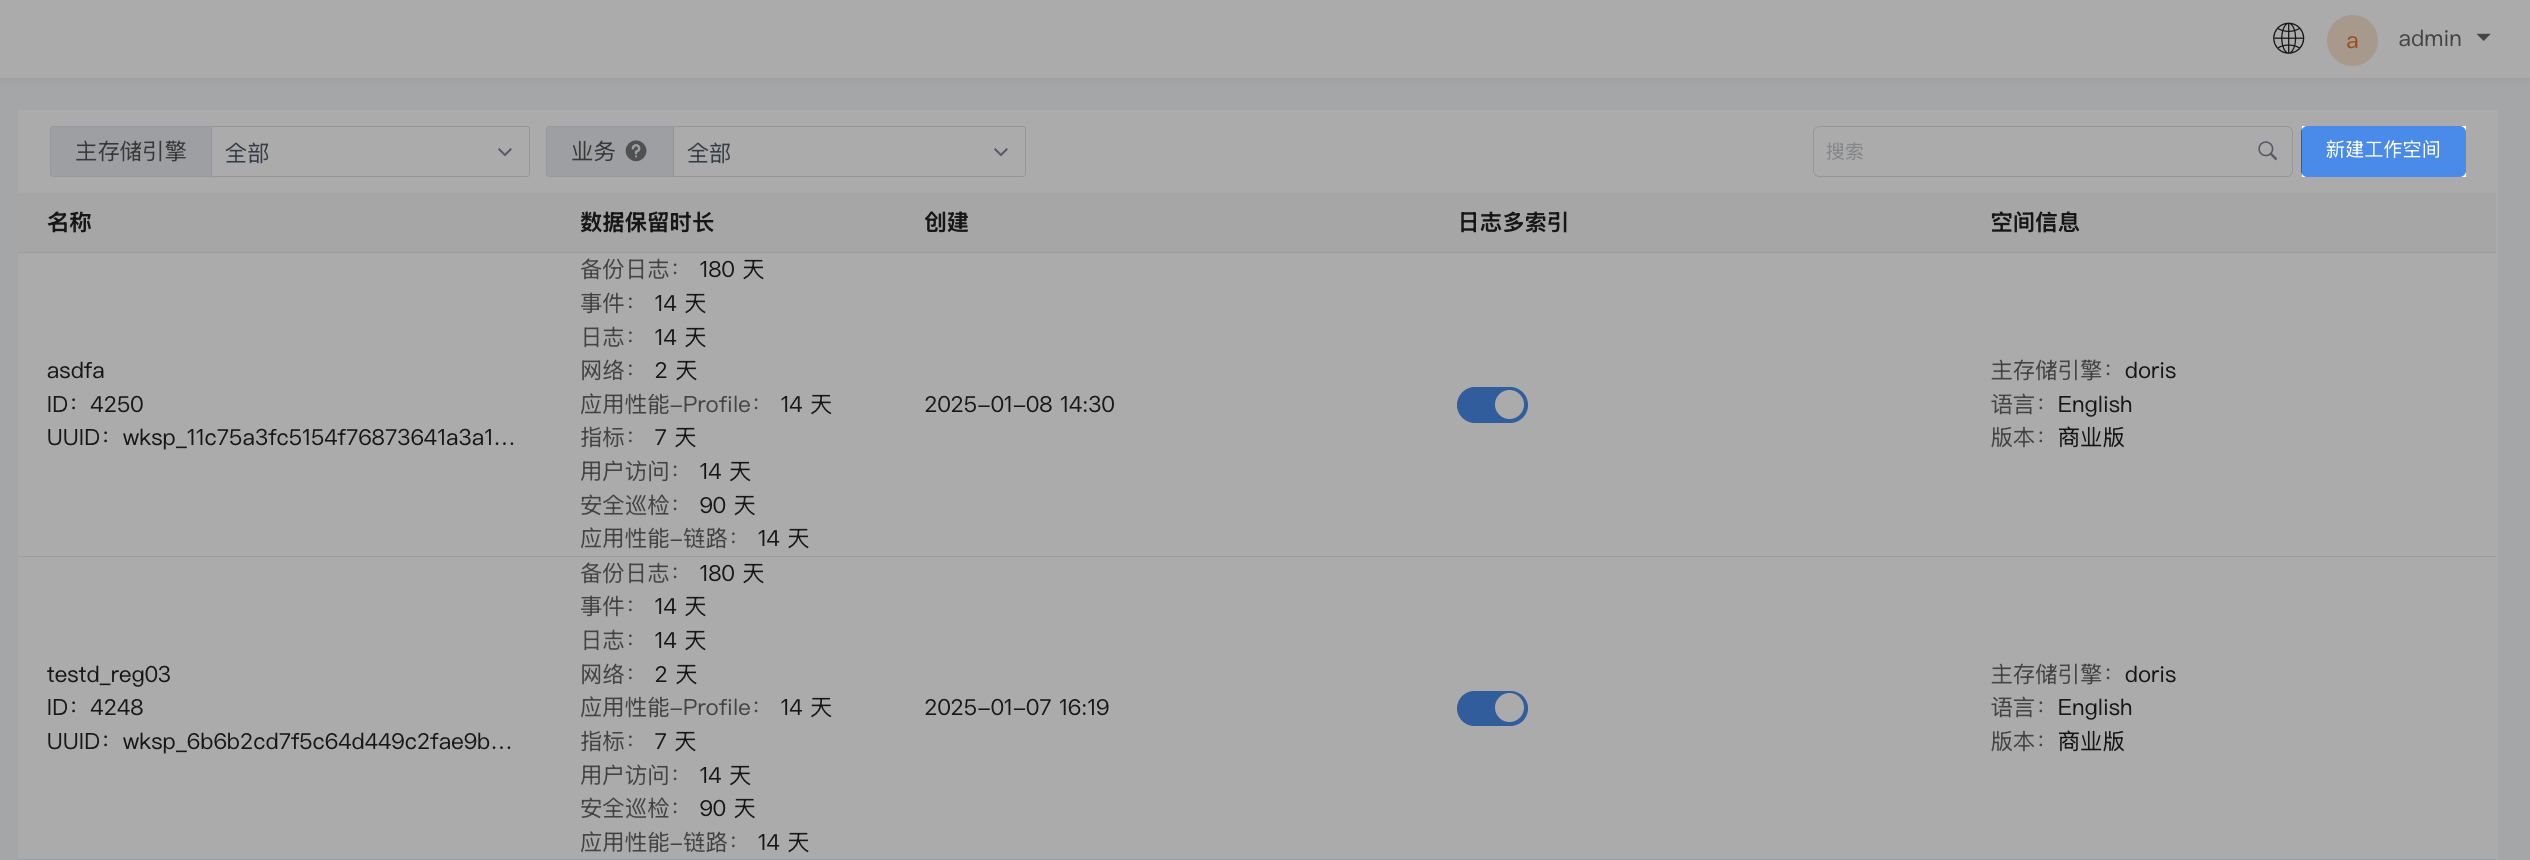
Manage Workspace
Filter
Quickly filter and locate workspaces using the Primary Storage Engine and Business filter options.
Search
The workspace list page displays basic information for all workspaces. You can search by workspace name keywords.
Index Configuration
This allows adjustment of Primary Shards, Shard Size, and Replica Shards for all index templates in the current workspace.
Click the Configure button next to a data type to customize the configuration for that data type's "Primary Shards", "Shard Size", "Hot Data Retention Period", enable/disable "Replicas", and "Advanced Configuration".
Among these, under the Volcengine infrastructure, the storage policies for APM, Logs, and Custom Log Index include:
- Standard Storage: Configure hot data.
- Infrequent Access Storage: Can be configured if the standard storage duration is 7 days or more.
- Archive Storage: Can be configured if the standard storage duration is 30 days or more.
Note
- After enabling replicas, a redundant copy of the index shards will be created by default.
- After enabling advanced configuration, you can modify the index mapping template configuration, including parameters related to tokenization.
Data Reporting Limits
To meet the needs of users with the same role within a workspace, data reporting limits can be configured. Based on a "daily" dimension, it determines whether a certain type of data triggers a threshold. Once the threshold is triggered, subsequently reported data will be discarded and cannot be written to the database, thereby saving resource usage costs.

As shown in the figure, you can configure limits for Metrics, Network (number of hosts), Log entries, APM Trace count, APM Profile entries, RUM PV count, and Synthetic Tests count.
Note
0means all corresponding data is discarded and not written, with no upper limit.- For Metrics and Network data, because the statistical dimensions are Time Series and Network, there is no quantity limit, only the modes of enabling data write limits or having no limits.
View Members
Click to enter the corresponding workspace members page to view basic information of all members in that workspace.
You can perform operations such as search, modify roles, and delete.
Note
A workspace can only have one owner. If you modify another member to be the owner, the original owner will be downgraded to administrator.
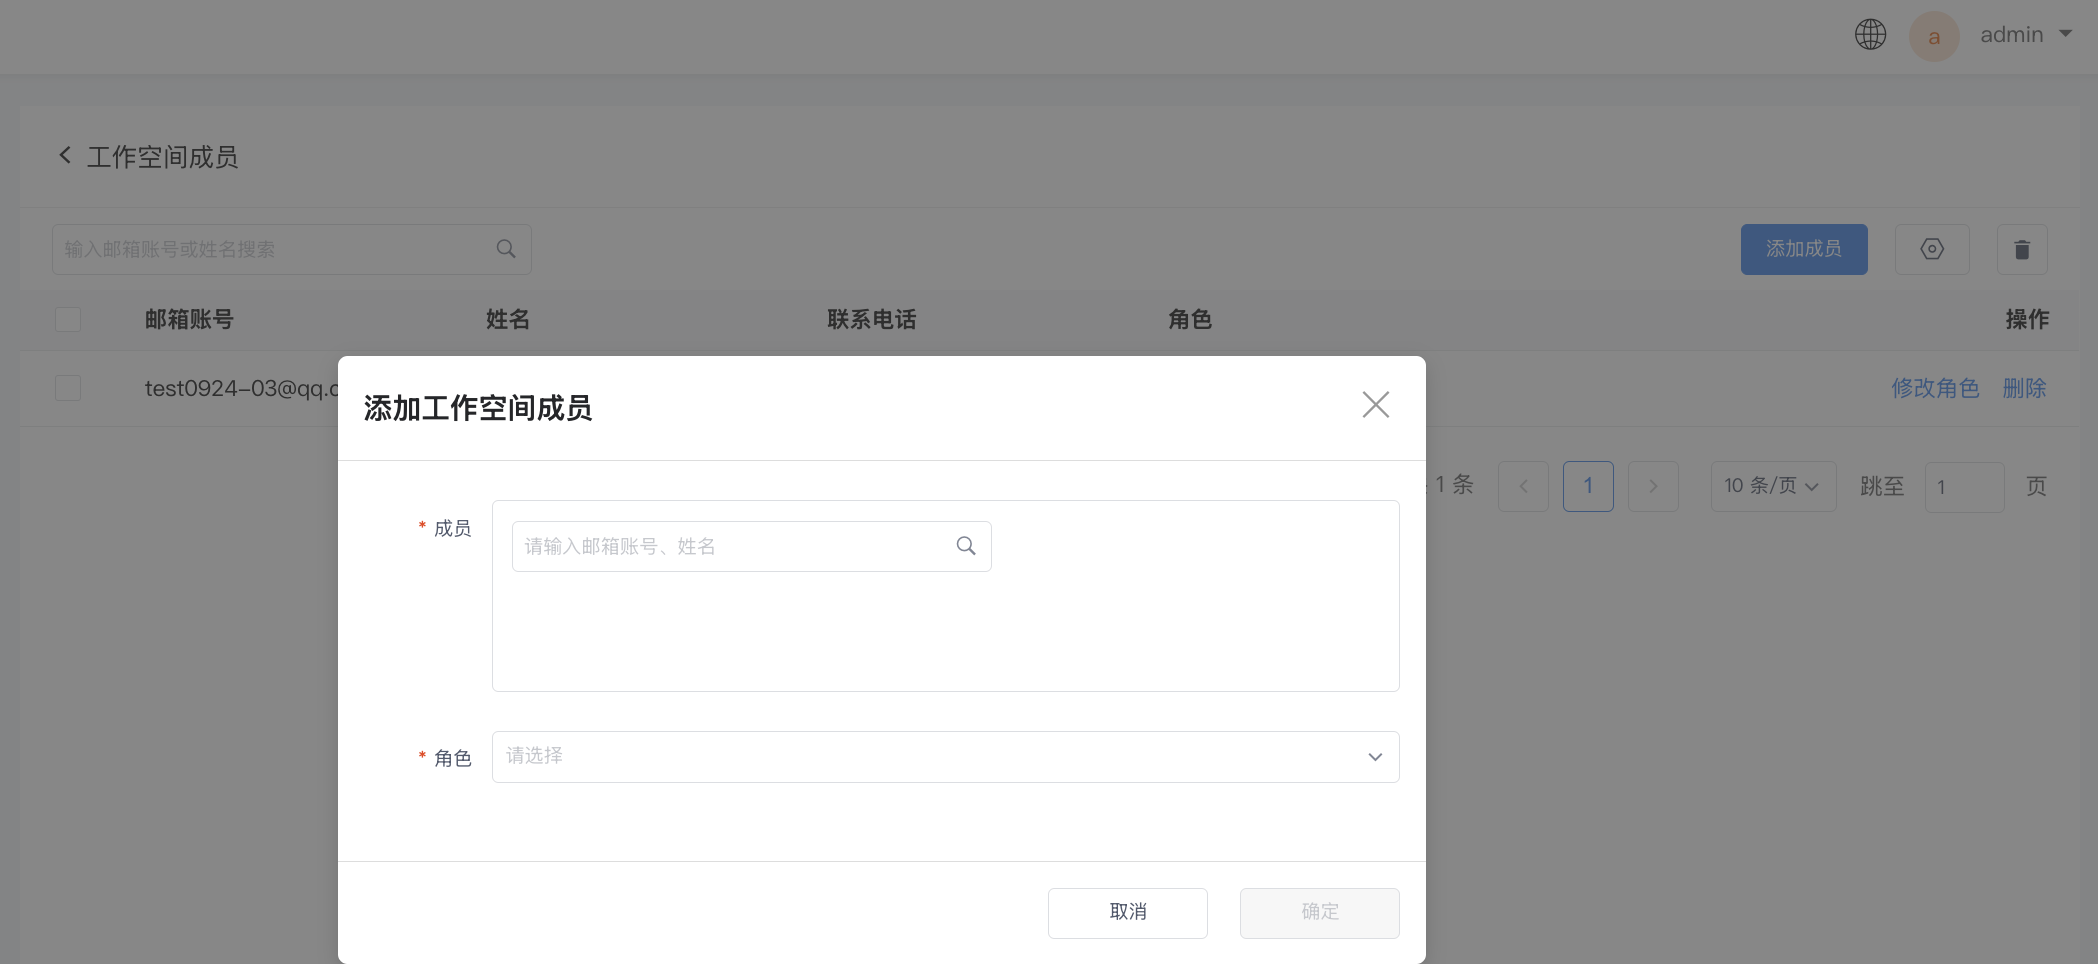
Add User
- Click to enter the add page.
- Select a member.
- Set role permissions.
- Click Confirm.
Note
You can add existing members from the system here. For new system members, you need to add them successfully on the User > Add User page first, then return here to perform the operation.
Modify/Delete Member
Click to modify the workspace configuration or directly delete the workspace.
Tenant Configuration Management
Note
This applies only to workspaces using the ScopeDB engine.
- Workgroup: The actual work group that executes queries. After configuration, all queries from this workspace will be executed by the specified work group and will not enter the cluster's default work group.
- Query Concurrency: Default is 50. The number of concurrent queries within the workspace. Queries exceeding this limit will queue and wait.
- Maximum Segment Time: The maximum time search range set for a single query. Once sufficient data is obtained within this range, the search will stop immediately.
- Sampling Threshold: Can be freely defined. When the volume of data scanned by a query reaches the preset configuration, sampling query is automatically enabled and data is returned.
- Default values: Dashboard queries (200 million), Explorer queries (100 million), Facet (5 million), Reports (500 million), other queries (200 million).
- Asynchronous Execution Timeout: Default is 2 minutes. Query timeout duration.
- Disable Streaming Aggregation: Default is off.
Delete Workspace
After clicking delete workspace, users will be unable to log in to that workspace, and data will no longer be reported.
The system will not immediately clean up the data and configurations; it will retain a seven-day buffer for you to avoid unnecessary trouble caused by accidental deletion.