Management
A workspace is the basic operational medium in Guance. Through Console > Management, you can view and configure basic workspace information, member permissions, data permissions, API Keys, notification targets, built-in views, chart and snapshot sharing, and other features.
Entering a Workspace
You can join one or more workspaces by creating them or being invited.
Self-Creation
Before joining a workspace in any way, you need to register an account first. After registration, the system will automatically create a workspace for you and grant you Owner permissions.
Within an existing workspace, you can create other workspaces from the following two entry points:
Click Account > Create Workspace in the bottom left corner:
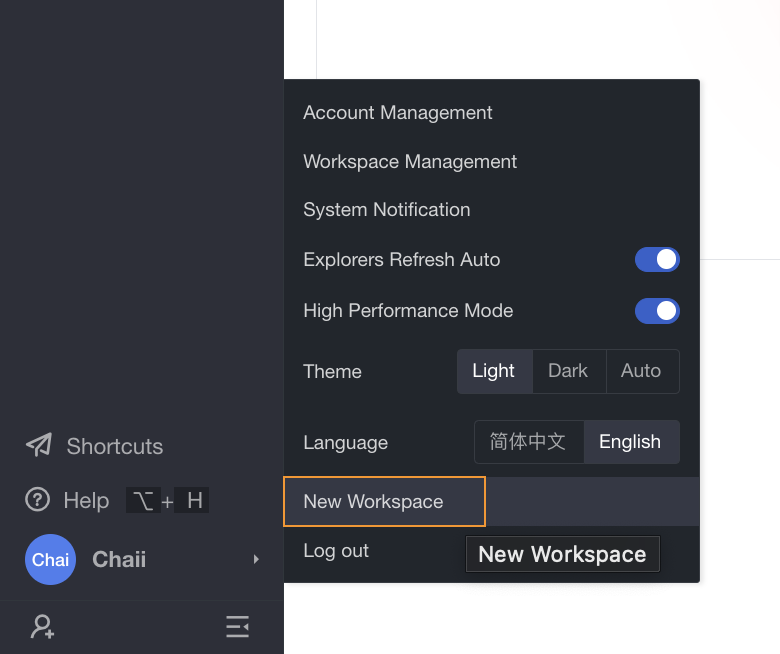
Click the Workspace Name in the top left corner > New Workspace:
Enter the Create Workspace window:
- Enter the workspace name.
- Select the language for this workspace.
- Optionally add a description for this workspace.
- Confirm creation.
SSO Account Login
In addition to logging in via a registered account, enterprise users are also supported to log in to the Console via SSO Single Sign-On.
Accounts logged in via SSO default to using the login retention time configured in SSO.
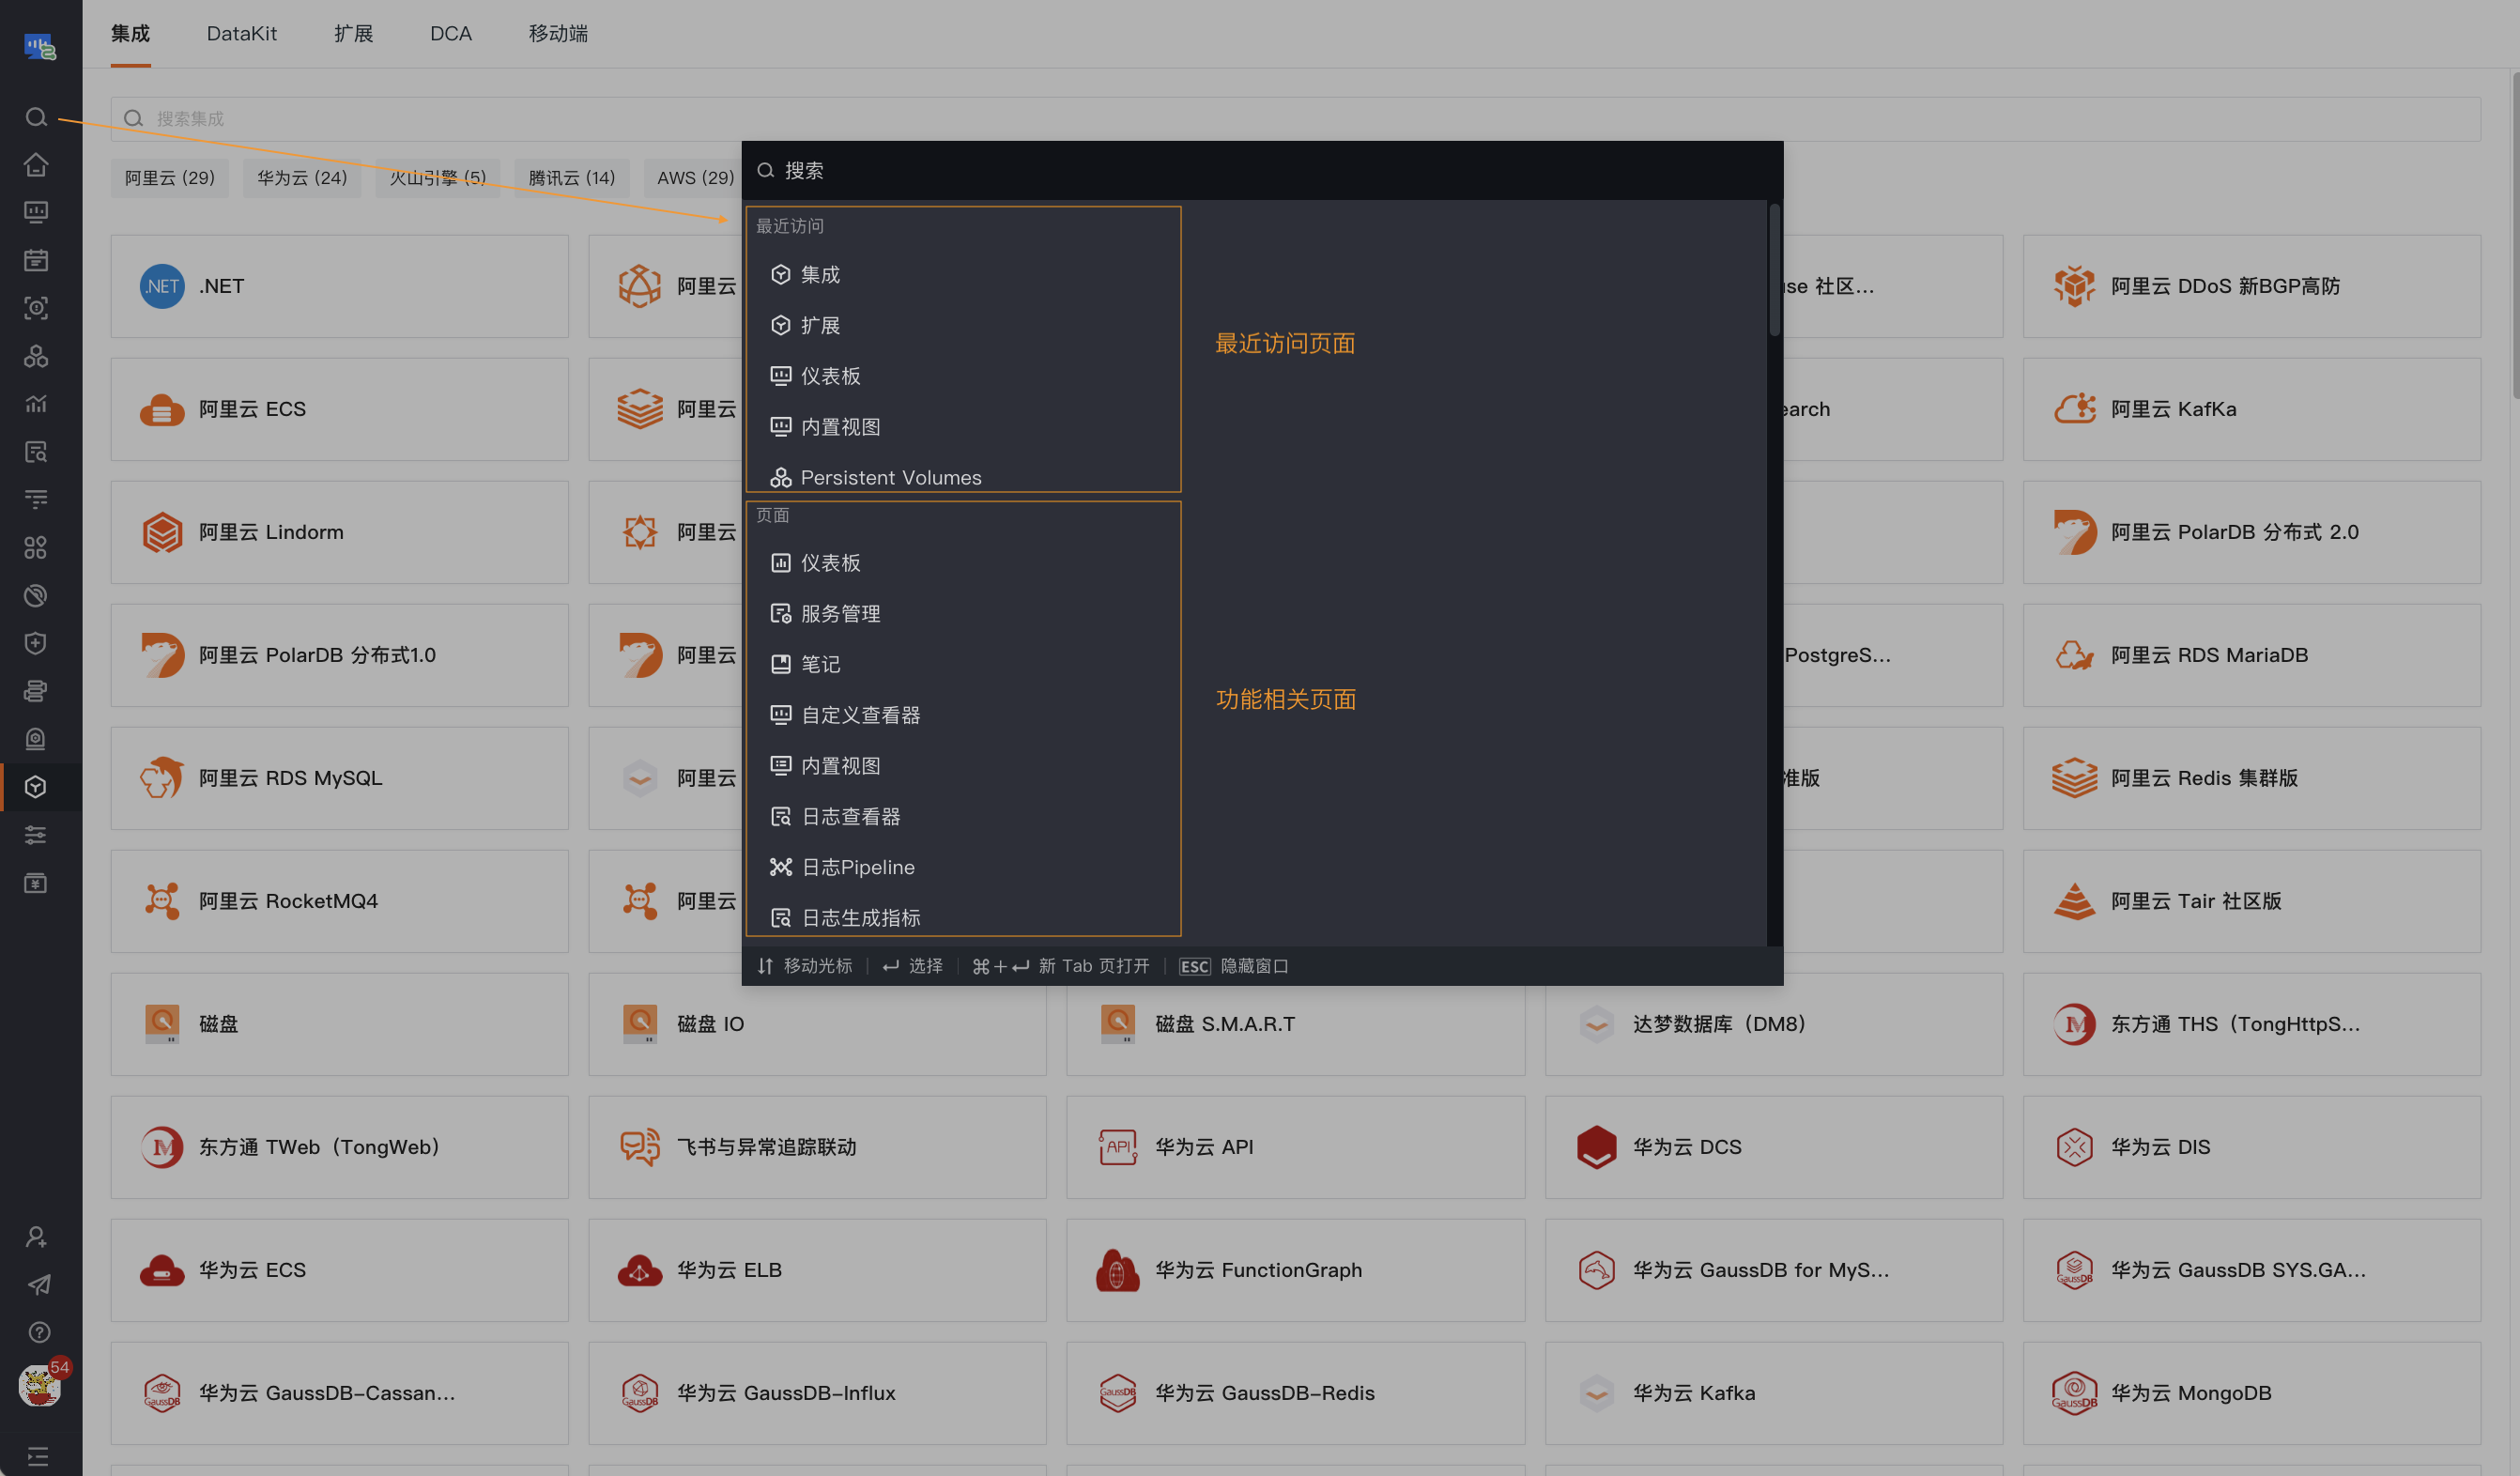
Quick Search
In the left navigation bar of the workspace > Quick Search, you can quickly view recently visited pages and other function-related pages within the current workspace:
Managing Workspaces
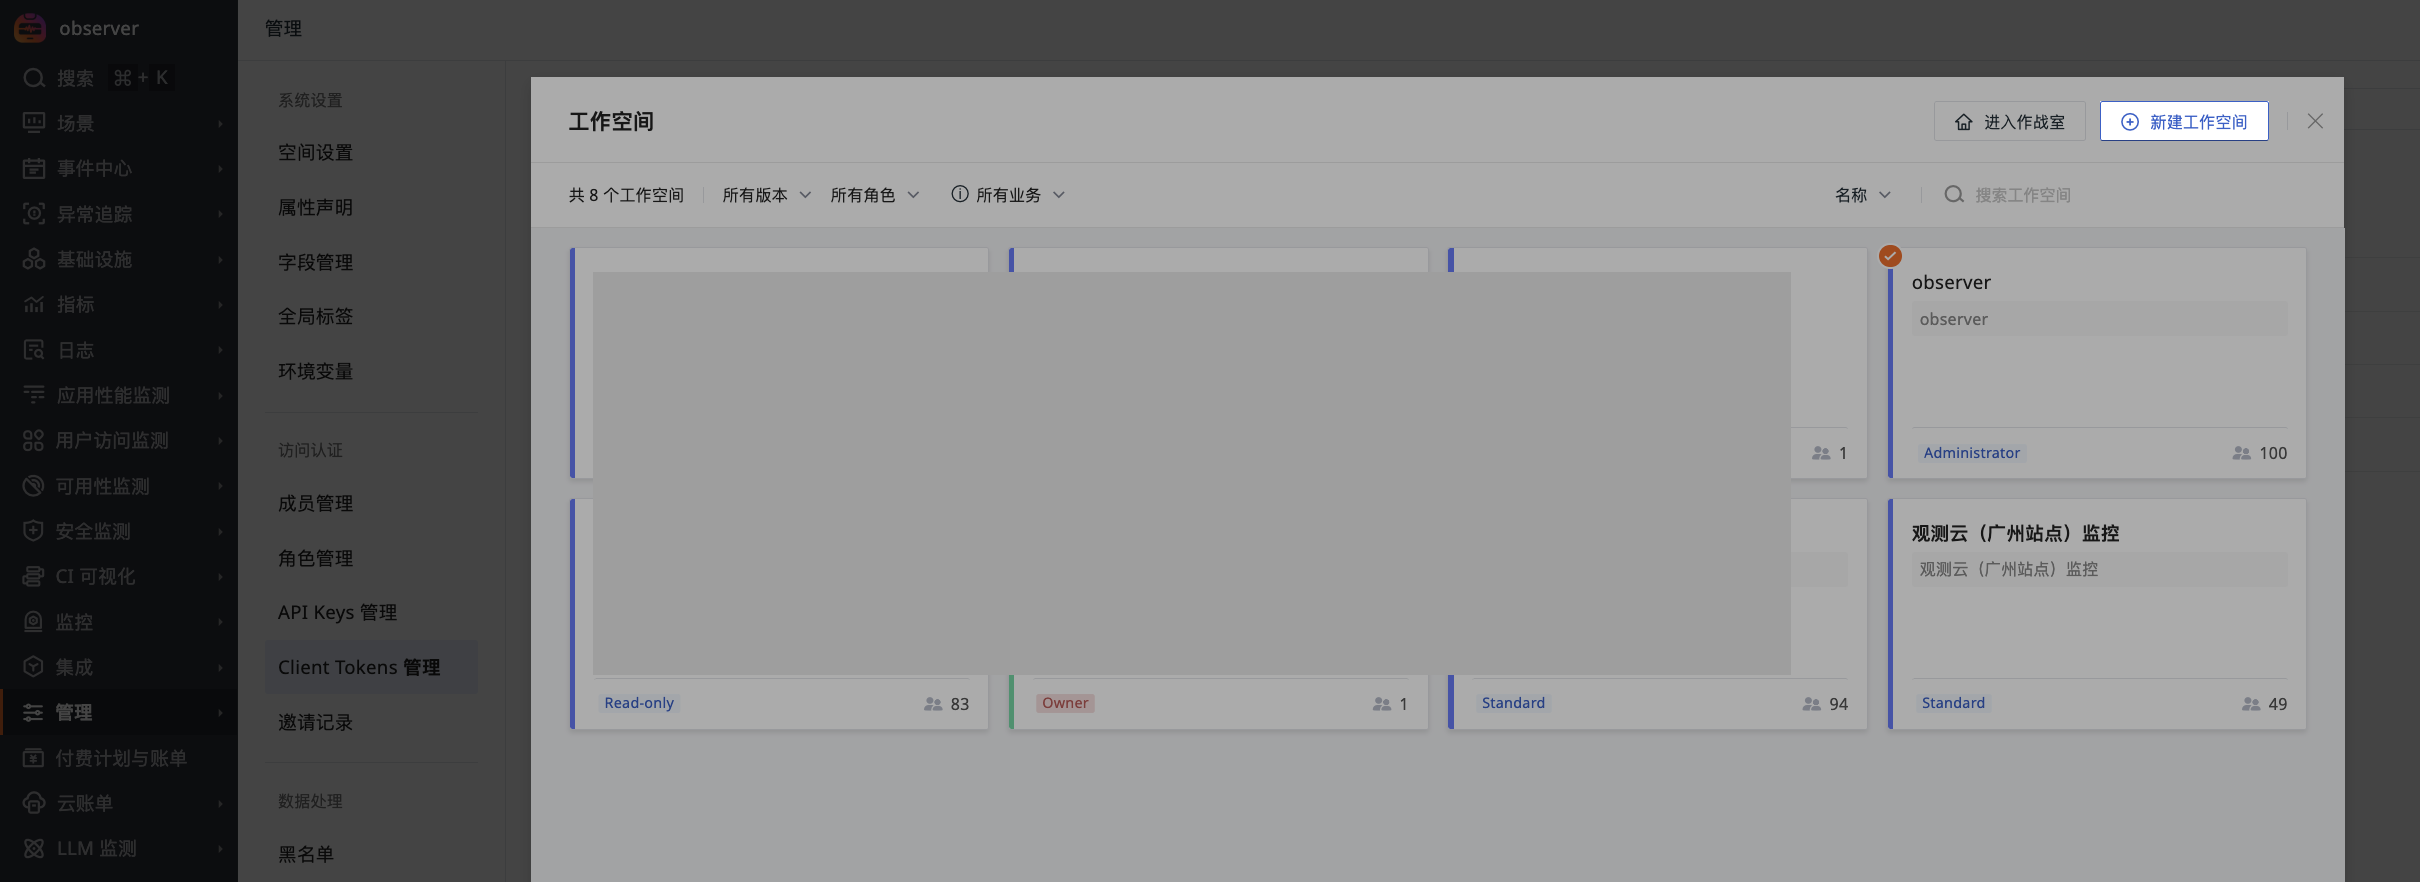
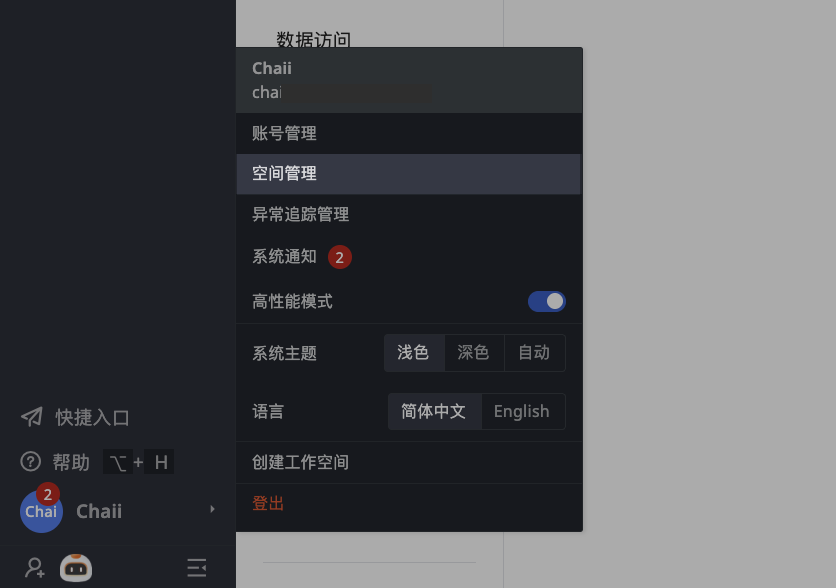
Click Account > Workspace Management, or directly click the workspace name in the top left corner of the Console, to view operations related to workspaces.
Window Operations
- Upon entering this page, you can view all workspaces associated with the current account.
- The workspace card directly displays your role permissions in that workspace and the number of members in that workspace.
- Filter by plan, role, or business.
- In the search bar, enter the workspace name or description to quickly search and locate.
Card Operations
Hover over a workspace card to perform the following operations:
- Click to view the creation time of that workspace.
- Click to set a note for the current workspace.
- Pin a workspace or set it as the default workspace (i.e., the workspace entered by default after successful login, applied only to the currently logged-in account).
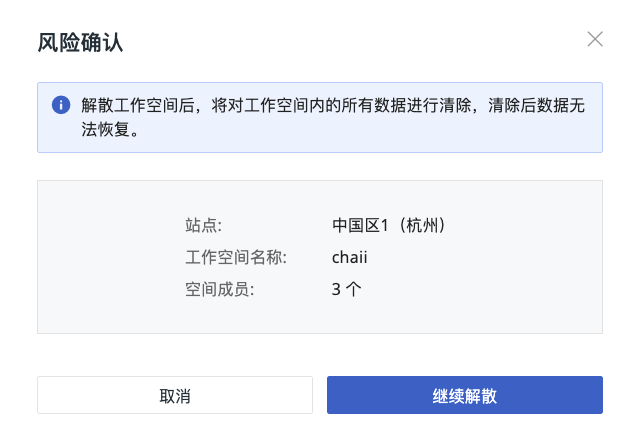
- Leave or dismiss the current workspace.
Important Notes on Dismissal
- Only the workspace Owner can dismiss the current workspace. Once dismissed, data cannot be recovered. Please operate with caution.
- After dismissal, the workspace will automatically be unbound from the Billing Center and deleted.
Workspace Risky Operations
For more details, refer to Workspace Lock/Unlock/Dismissal.