Configuring Keycloak Users and Mapping Rules
Overview
This article describes how to configure users and mapping rules in Keycloak. After configuration, you can use the mapping rules to achieve single sign-on (SSO) to Guance.
Configuring Keycloak Users
- In the created
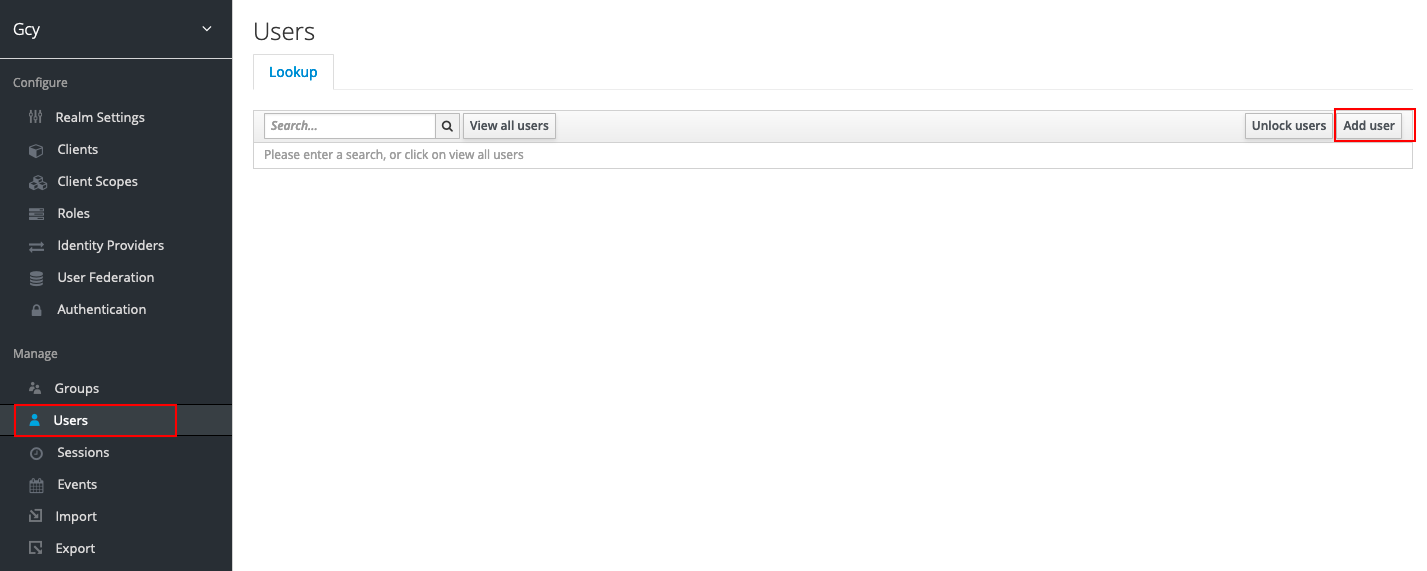
gcyrealm, click User and then click Add user.
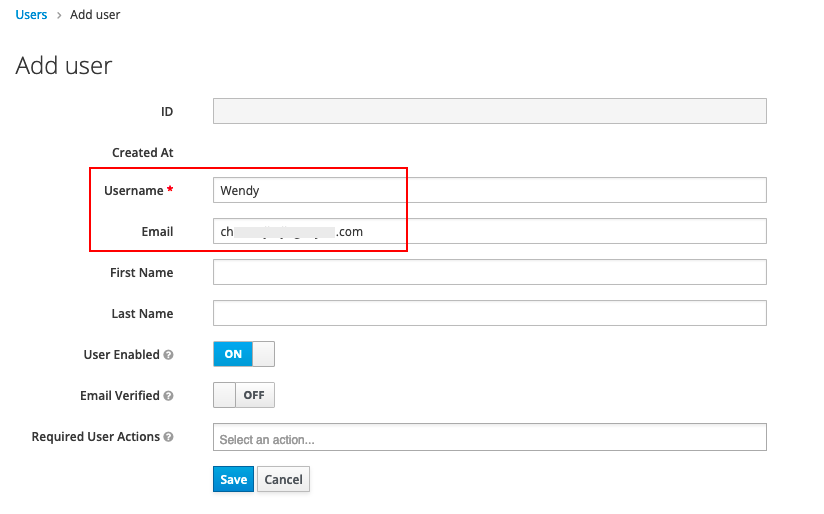
- Enter Username and Email. Email is required and must match the user email configured in the Guance admin console, so that the email mapping can be used for SSO login to Guance.
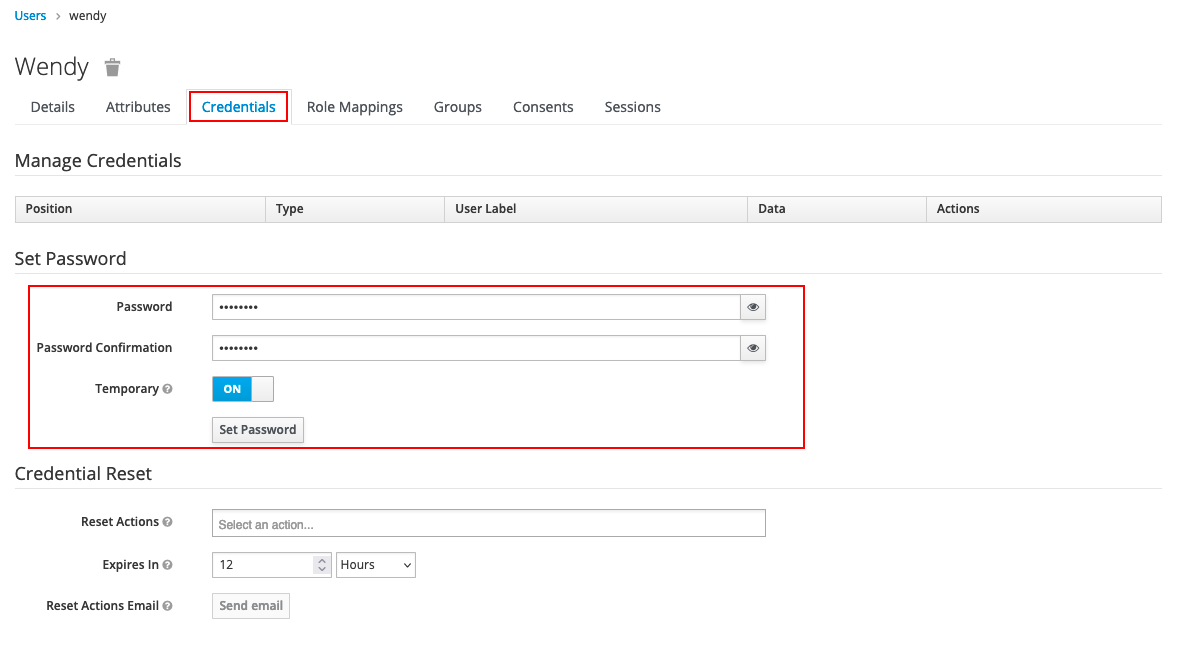
- After creating the user, set a password in Credentials.
Configuring Mapping Rules
After adding Keycloak users, there are two ways to configure mapping rules: add mapping rule attributes directly to the user or add the user to a user group and then add mapping rule attributes to the group.
Adding Mapping Rule Attributes to a User
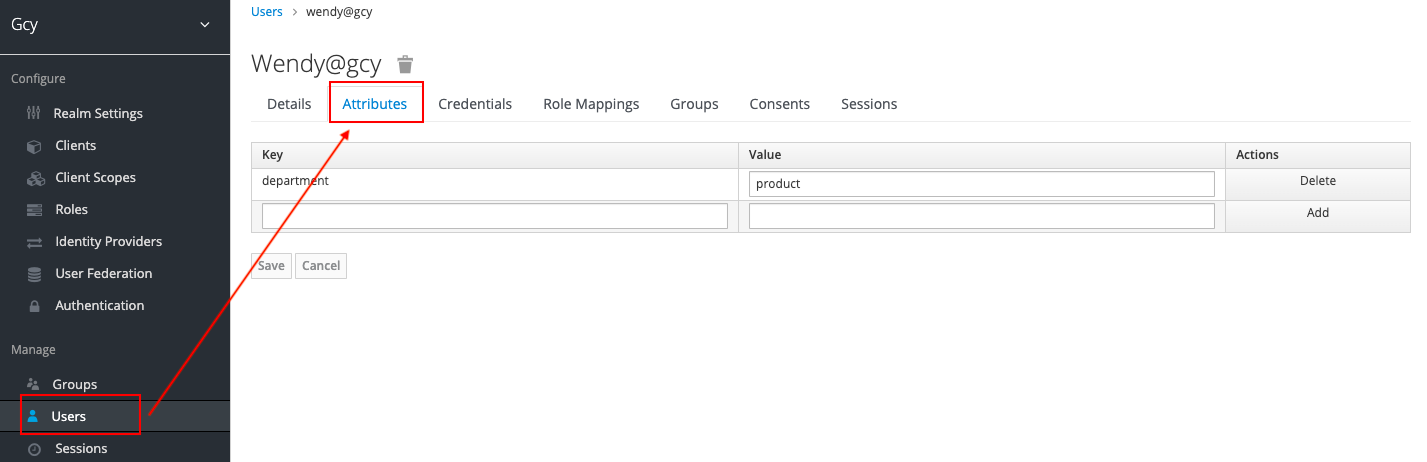
In the created gcy realm, click User and select the user to which you want to add mapping rules. In Attributes, click Add to add entries, for example:
- Key: department
- Value: product
Configuring Keycloak Mapping Fields
This step creates a Client Scope and configures mapping fields to bridge the mapping rules between Keycloak and Guance.
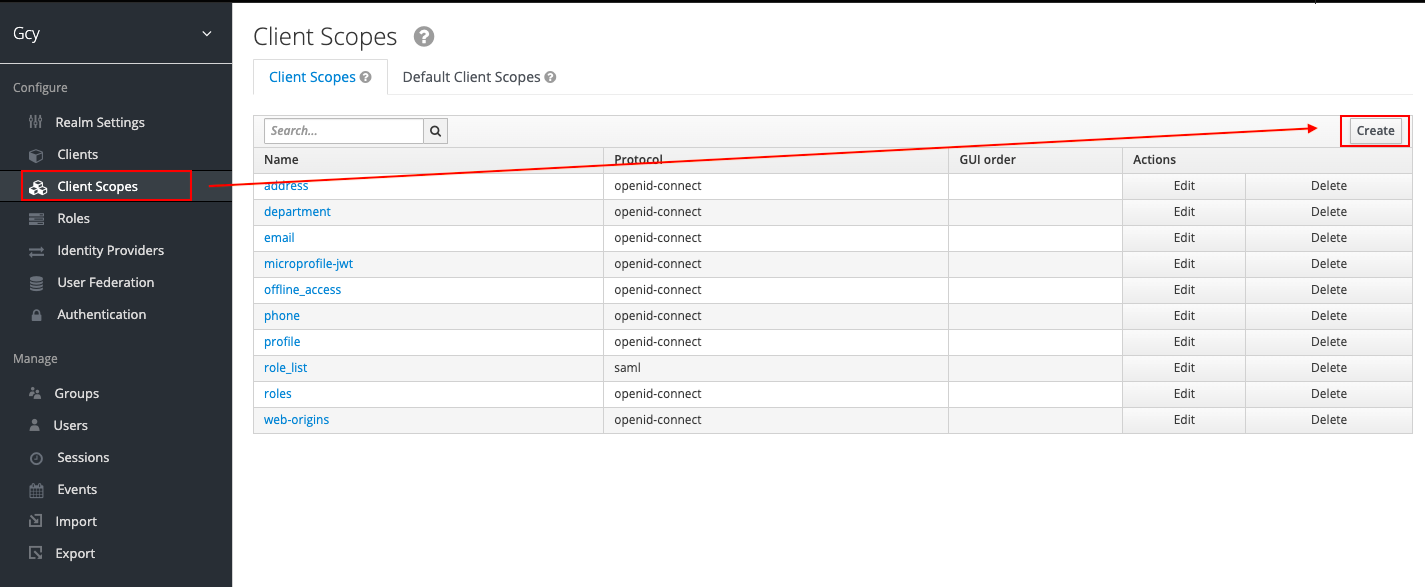
- In the created
gcyrealm, click Client Scopes and then click Create on the right.
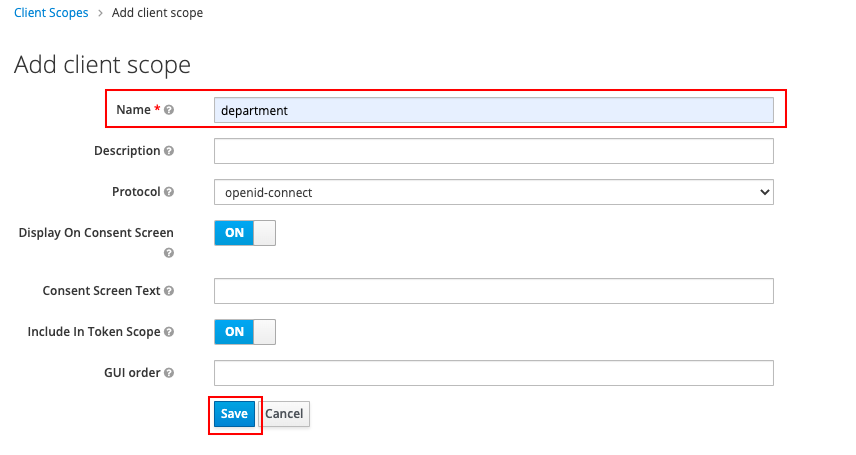
- In the Add client scope dialog, enter the attribute field to be mapped, for example
department, and click Save.
- Click the created key, e.g.
department. In the Mappers tab, click Create on the right to create a mapping.

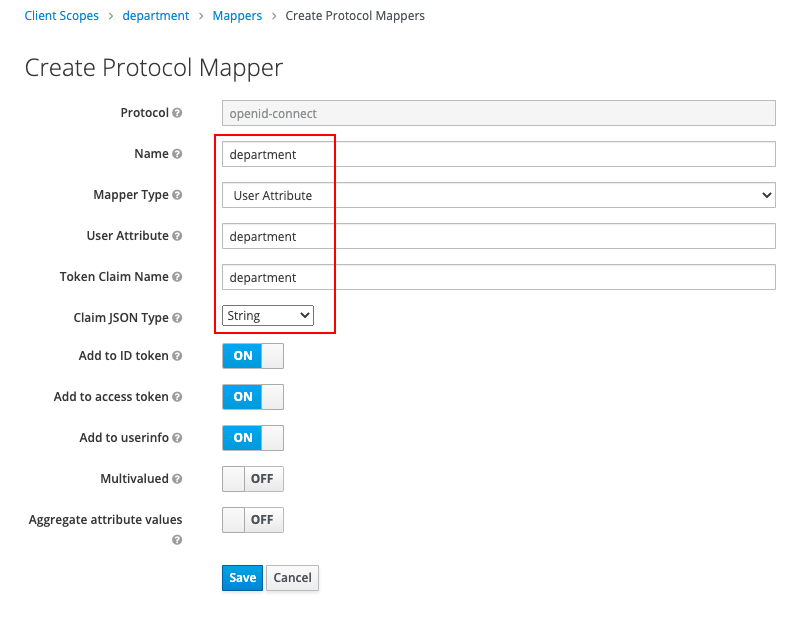
- In the Create Protocol Mappers window, fill in the following fields and click Save.
| Field | Description |
|---|---|
| Name | Enter the mapping attribute field, e.g. department. |
| Mapper Type | Select User Attribute. |
| User Attribute | Enter the mapping attribute field, e.g. department. |
| Token Claim Name | Enter the mapping attribute field, e.g. department. |
| Claim JSON Type | Select String. |
- In Client, click the created
Guanceclient.
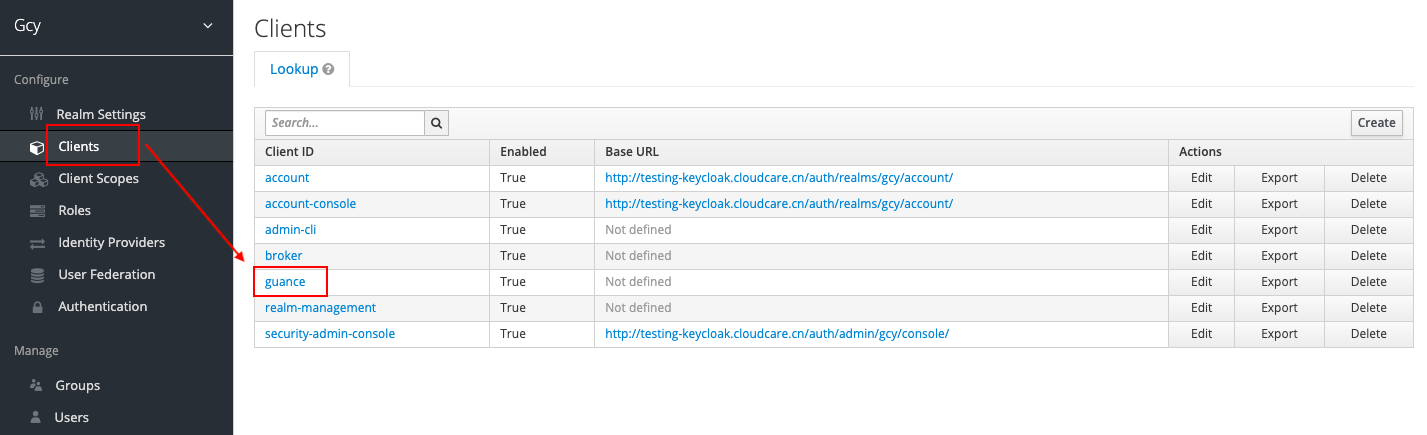
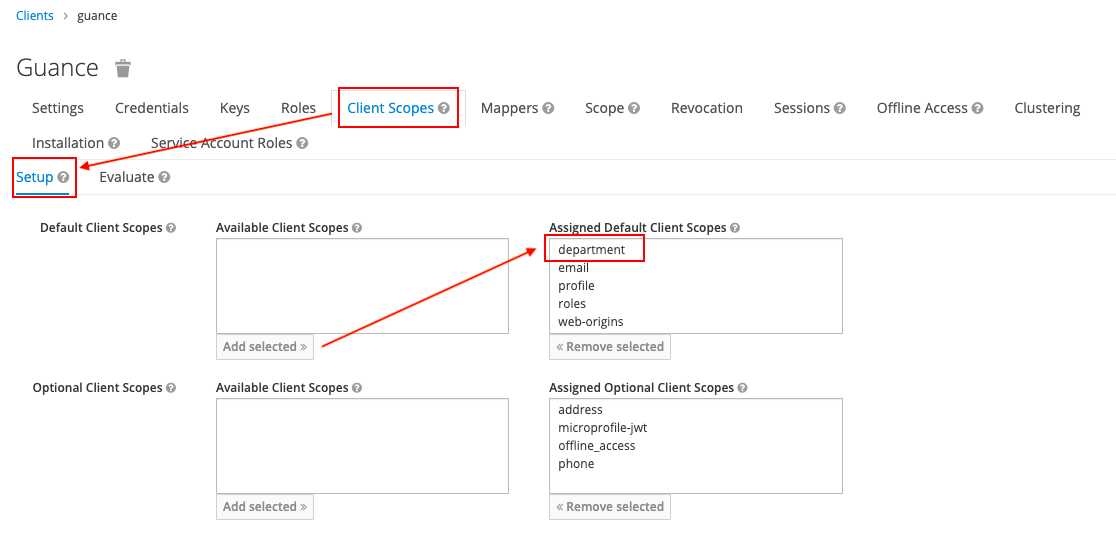
- Click into the client. In Client Scopes > Setup, add the created
departmentto the Assigned Default Client Scopes on the right.
Verifying the Mapping Rules
After completing the above steps, you can directly SSO to Guance via Keycloak and verify whether you have been added to the corresponding workspace and assigned the appropriate role.
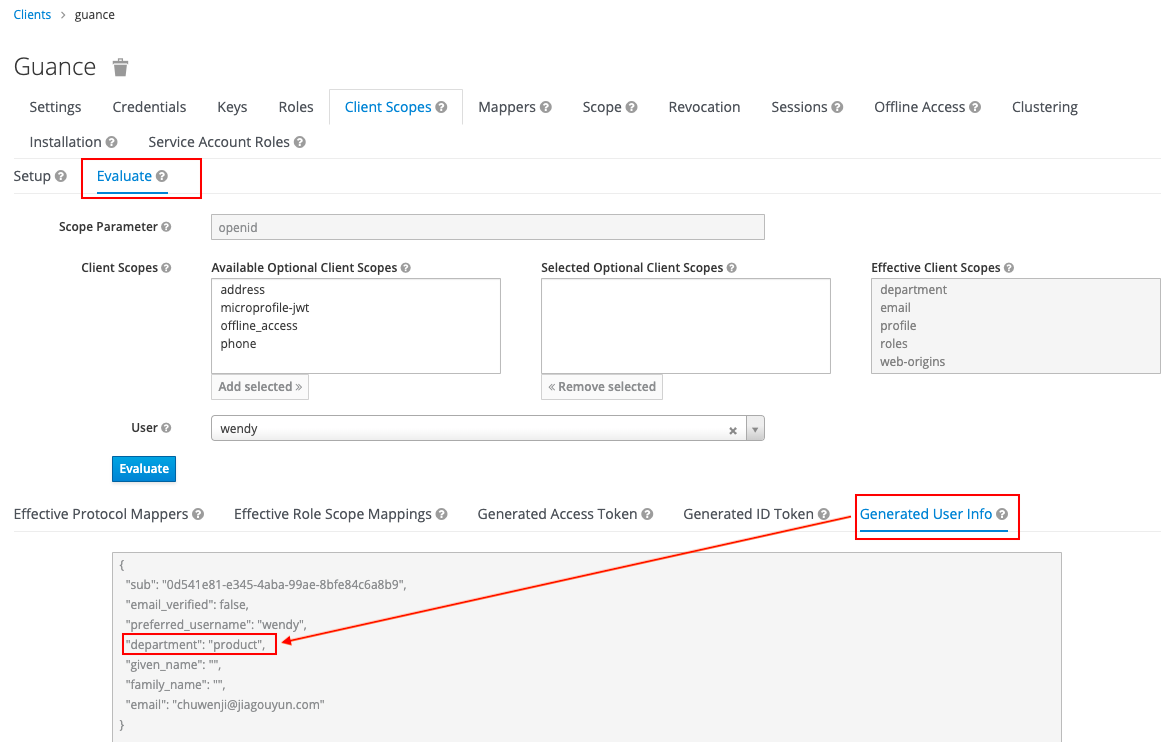
You can also verify the mapping rules in Keycloak:
After configuring the mapping rules, go to Client > Client Scopes > Evaluate > Generated User Info to see if the mapping rules are available. As shown in the figure below, if the configured mapping field (e.g., department) is present, it means that the field can be used for mapping login.
Configuring Mapping Rules in the Guance Admin Console
In addition to configuring the Keycloak SSO mapping rules, you must also configure the mapping rules in the admin console. The mapping rules take effect only after both configurations are completed.
Go to the Guance Deployment Plan Admin Console > Mapping Rules to configure. The matched account will be added to the workspace and assigned the corresponding role according to the rules.
Using a Keycloak Account for SSO to Guance
After all configurations are completed, you can SSO to Guance.
Adding Mapping Rule Attributes to a User Group
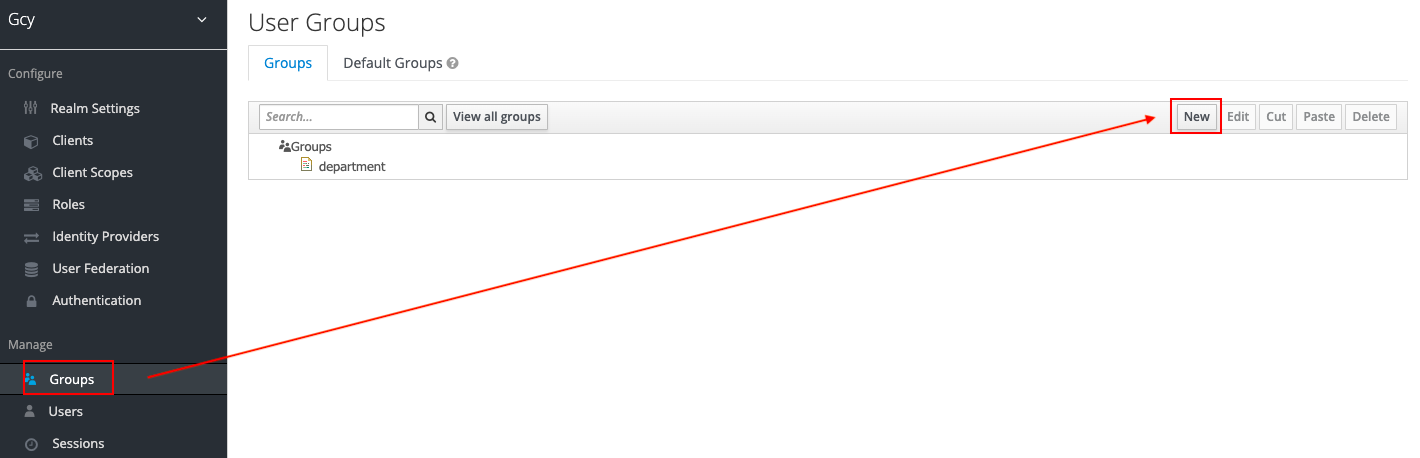
- In the created
gcyrealm, click Groups and then click New to create a new user group, for exampledepartment.
-
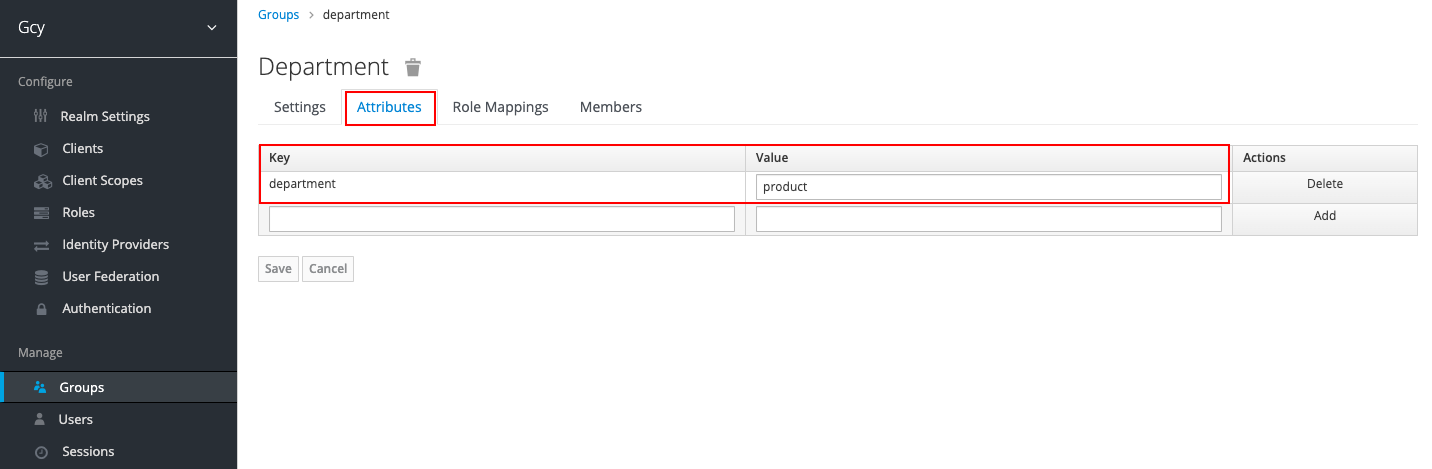
In Attributes, click Add to add entries, for example:
-
Key: department
- Value: product
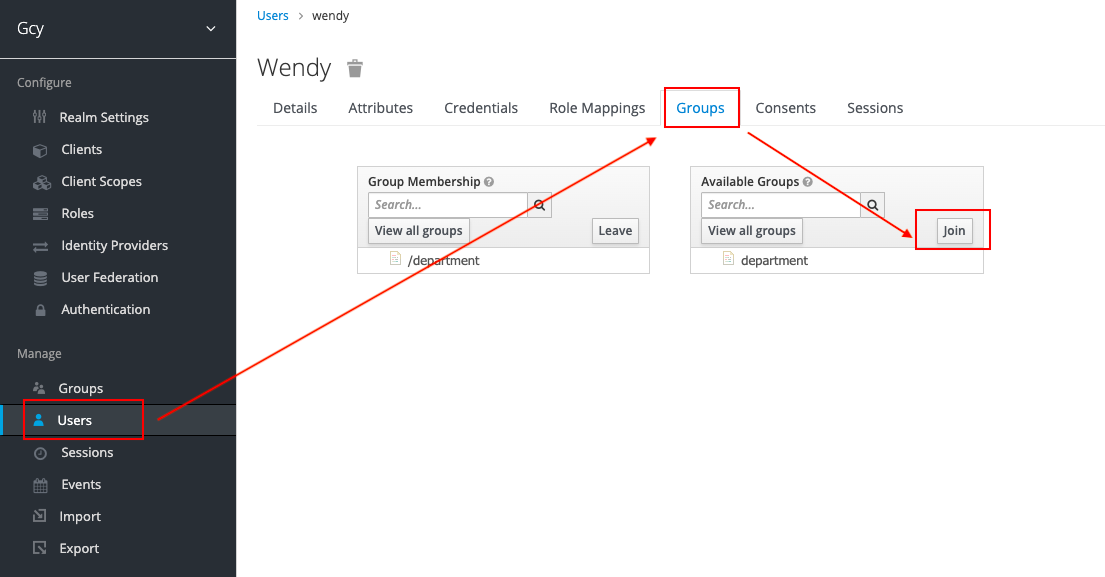
- In User > Groups, click Join to add the user to the user group.