Getting Started
After the Guance deployment is complete, you need to configure and activate it before use.
Prerequisites
You can refer to the documentation for Cloud Deployment, On-Premises Deployment, or Alibaba Cloud Computing Nest Deployment to deploy online or offline. After deployment, you can obtain the login methods for the following Guance related platforms:
- dataflux [User Console (Guance)]
- df-management [Management Console]
- df-openapi [OpenAPI]
Procedure
Step 1: Activate the Deployment Plan
Register a Deployment Plan Account
Open the Deployment Plan registration URL (https://boss.guance.com/index.html#/signup?type=private) and follow the prompts to register a Deployment Plan account.
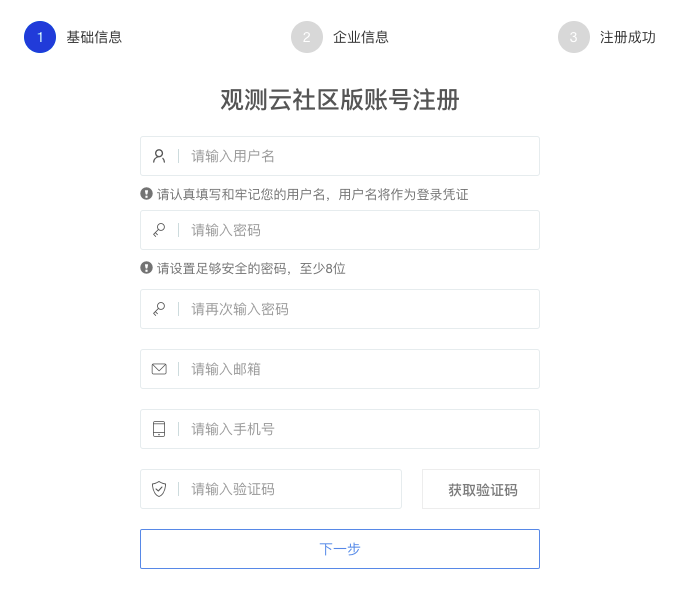
After registration, enter the Guance Deployment Plan Billing Center.
Obtain AK/SK
In the "AK Management" section of the Guance Deployment Plan Billing Center, click Create AK.
Obtain a License
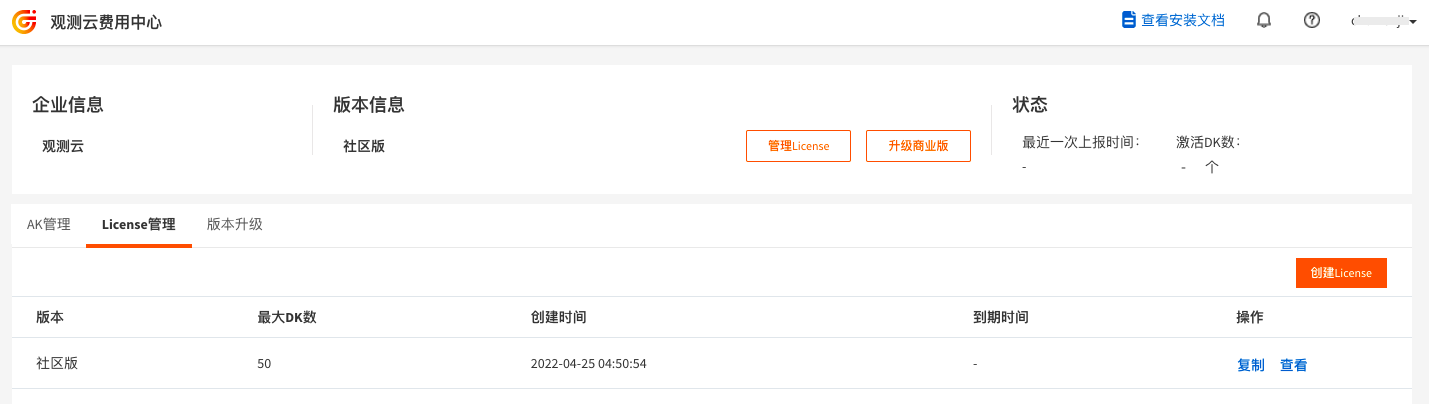
In the "License Management" section of the Guance Deployment Plan Billing Center, click Create License.
Activate the Deployment Plan
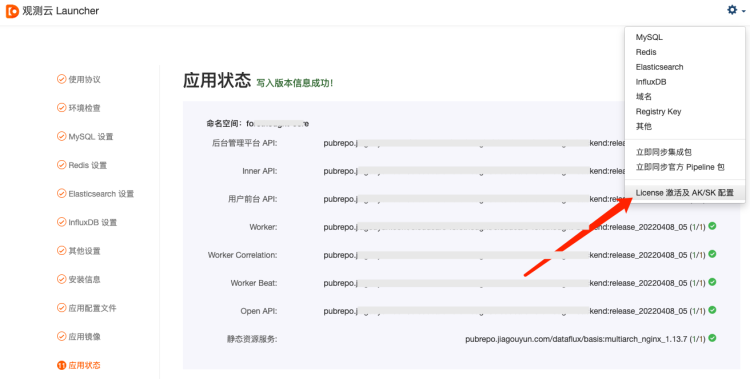
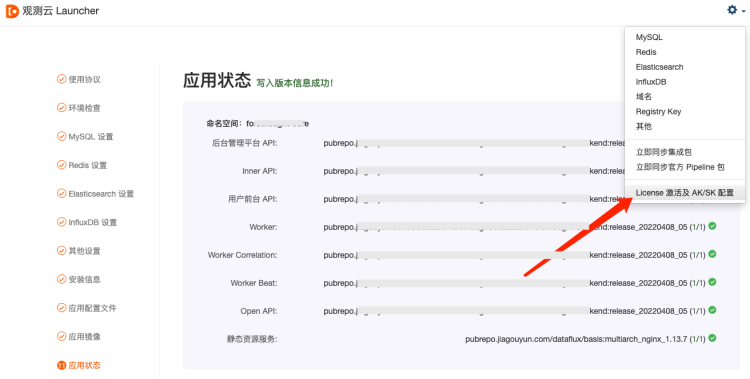
Open the Guance Launcher, go to the settings in the top-right corner, and click License Activation and AK/SK Configuration.
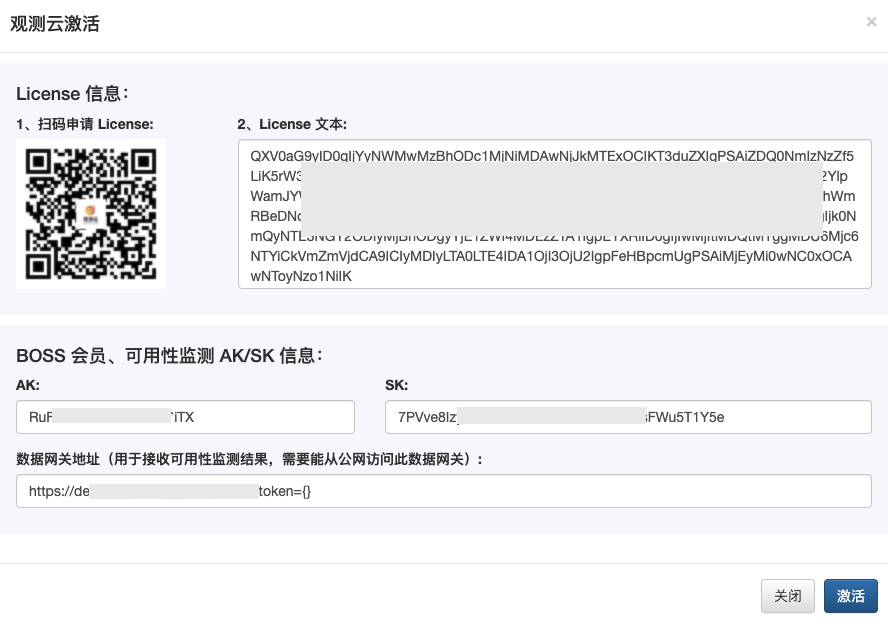
In the Guance Launcher's "Guance Activation" dialog, enter the AK/SK, License, and DataWay gateway address to complete the activation of the Deployment Plan.
Note: You can scan the QR code to follow the Guance service account and receive more official information about Guance.
Step 2: Deploy DataWay
After the Guance deployment is complete, you need to deploy DataWay before you can use it to report data to the Guance workspace. During this process, a DataWay gateway address will be provided for activating the Deployment Plan.
Create a New DataWay
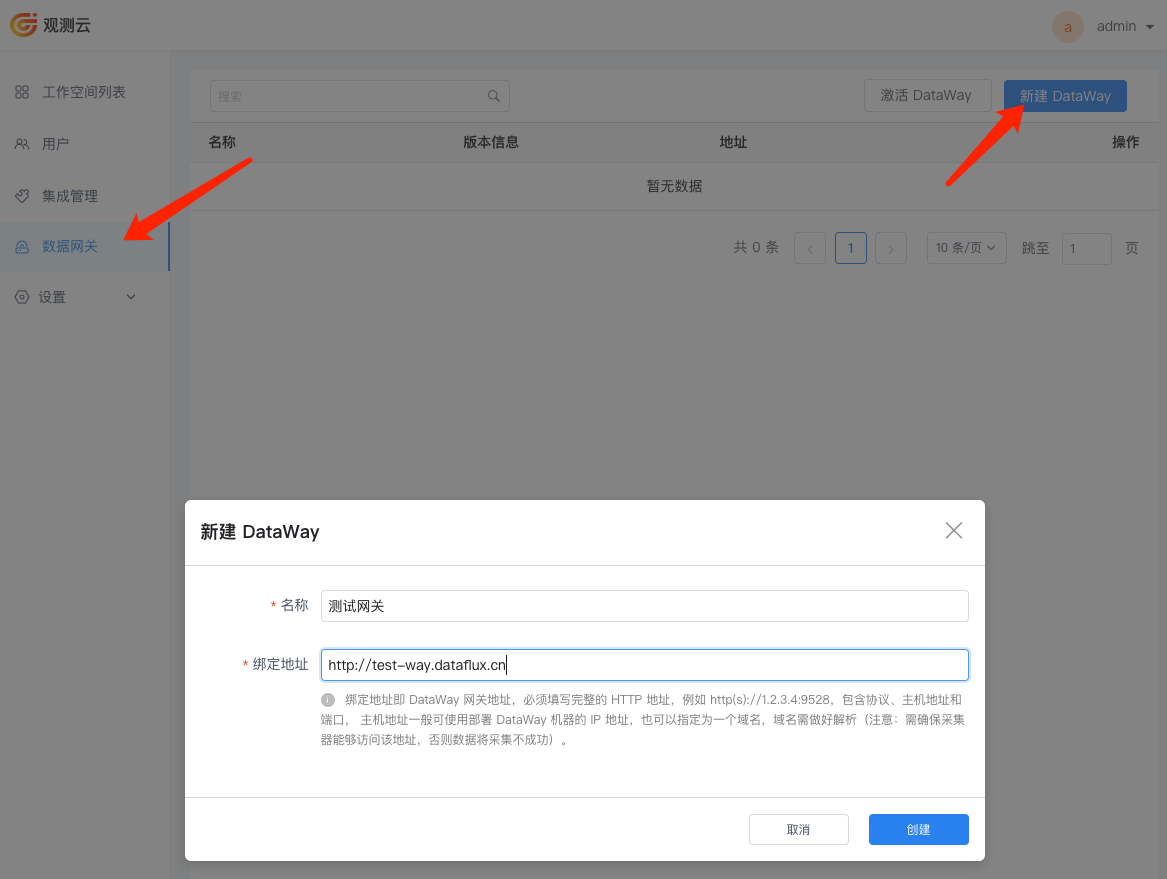
Log in as an administrator, go to the Data Gateway menu under the Guance Management Console, and click New DataWay to add a DataWay gateway.
- Name: Use a custom name.
- Binding Address: The access address of DataWay, used for data ingestion in DataKit. You can use
http://ip+端口.
Note: When configuring the DataWay binding address, ensure that the DataKit host can reach this DataWay address and that data can be reported through it.
Install DataWay
After adding the DataWay, you can obtain an installation script. Copy the script and run it on the host where DataWay will be deployed.
Note: Ensure that this host can access the kodo address configured earlier. It is recommended that DataWay connect to kodo via the internal network.
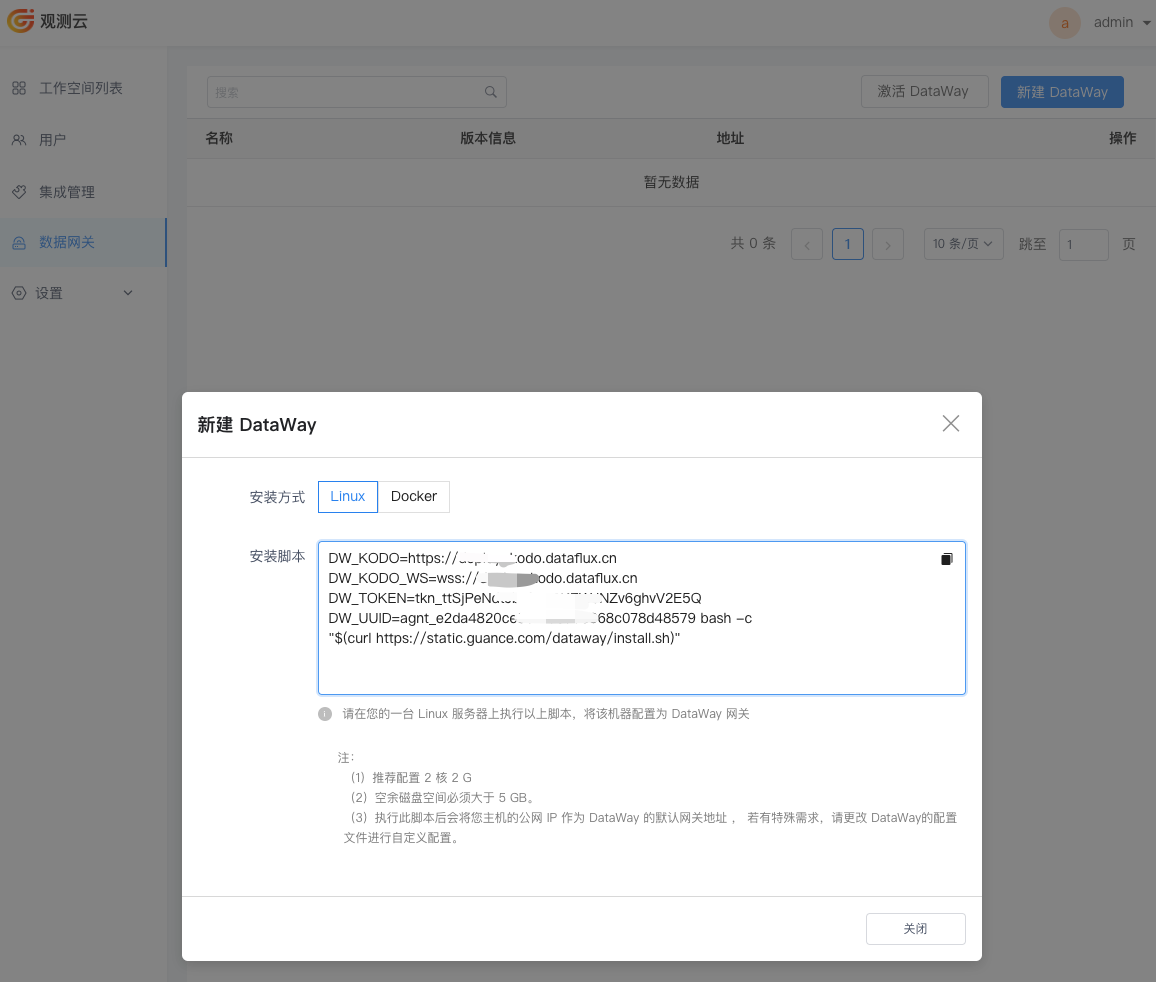
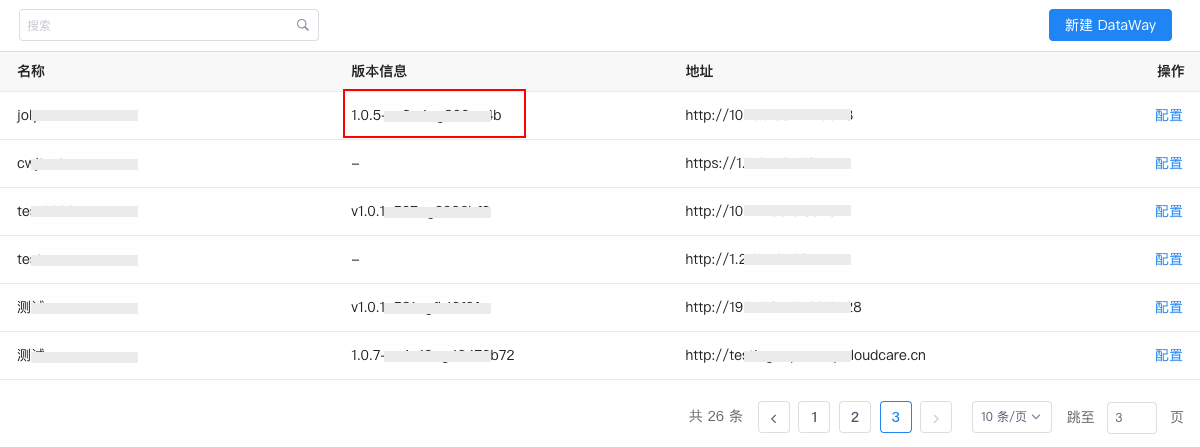
After installation, wait a moment and refresh the Data Gateway page. If you see a version number in the Version Information column of the newly added DataWay, it means the DataWay has successfully connected to the Guance center, and users can now use it to ingest data.
Step 3: Start Using Guance
Create Users
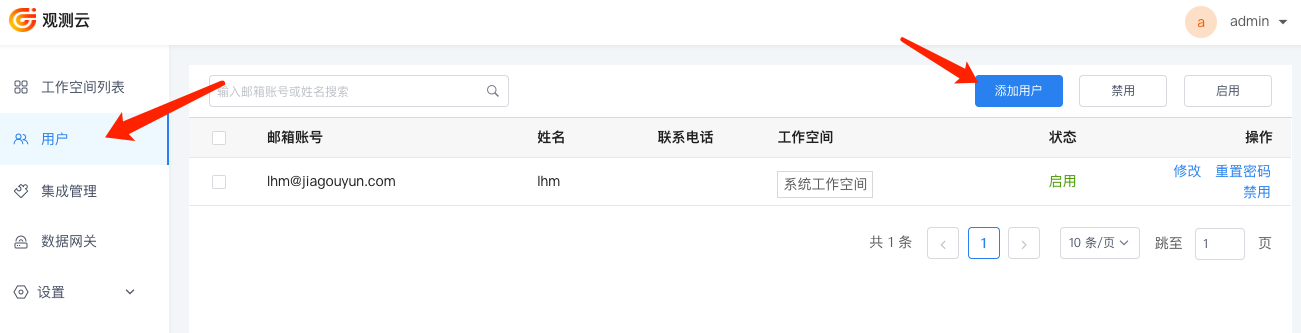
The Guance Deployment Plan does not provide user self-registration. You need to log in to the Guance Management Console, go to the Users menu, and click Add User to create users.
Create a Workspace
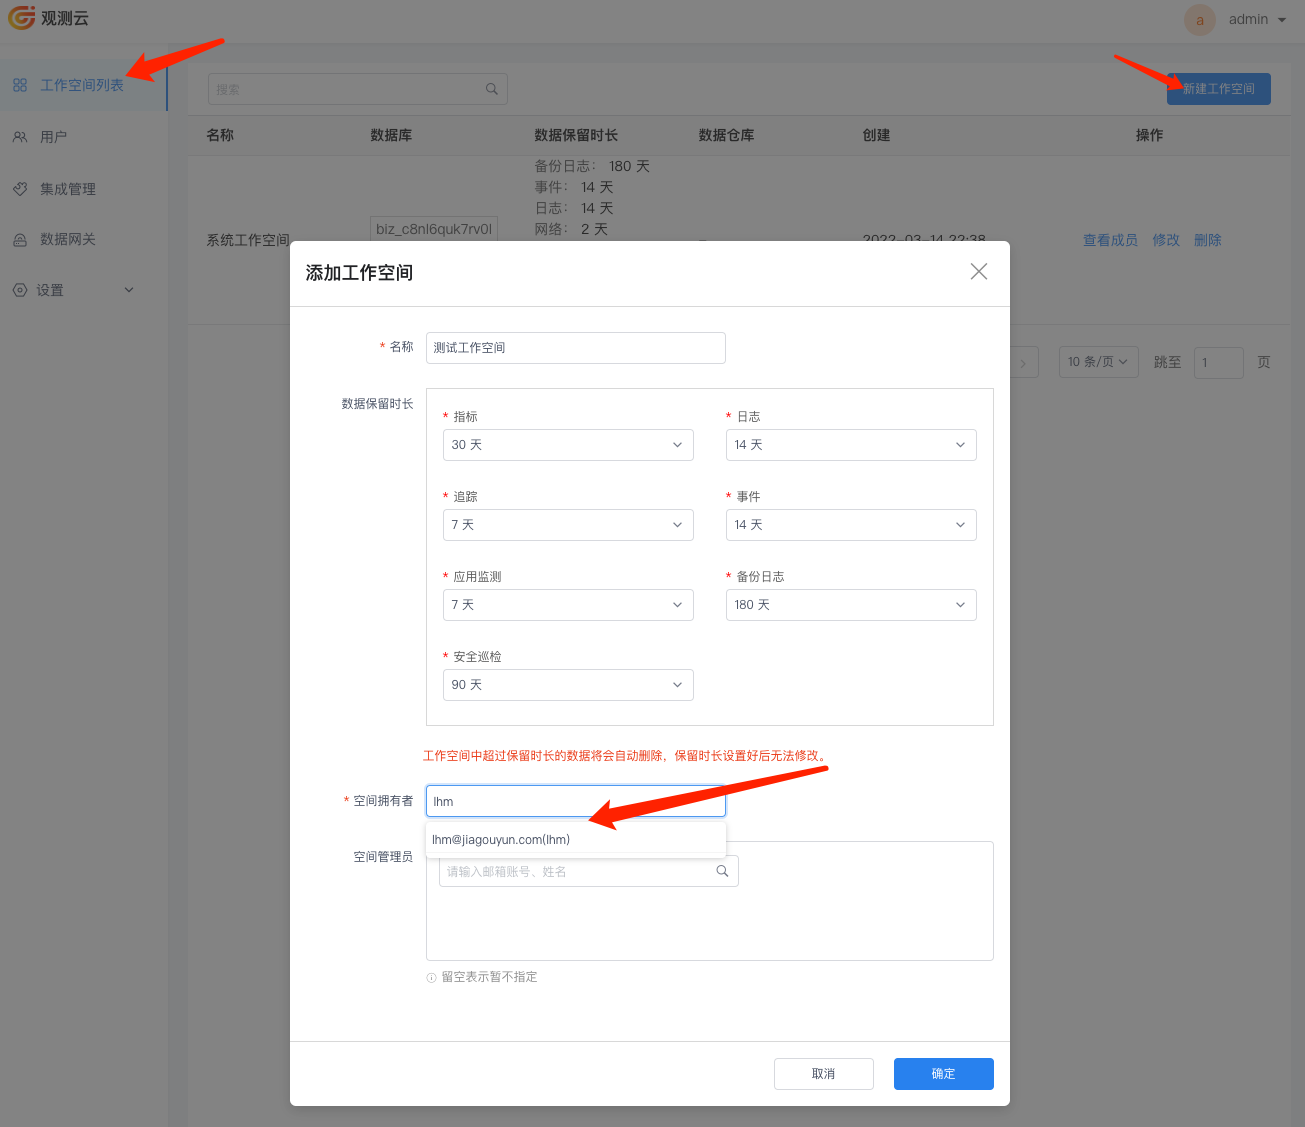
After adding users, go to the Workspace List menu under the Guance Management Console and click New Workspace to create a workspace.
Note: Do not use the default "System Workspace" for daily observability operations.
Add Workspace Members
After creating a workspace, click View Members to access the workspace's member page and view the basic information of all members in that workspace.
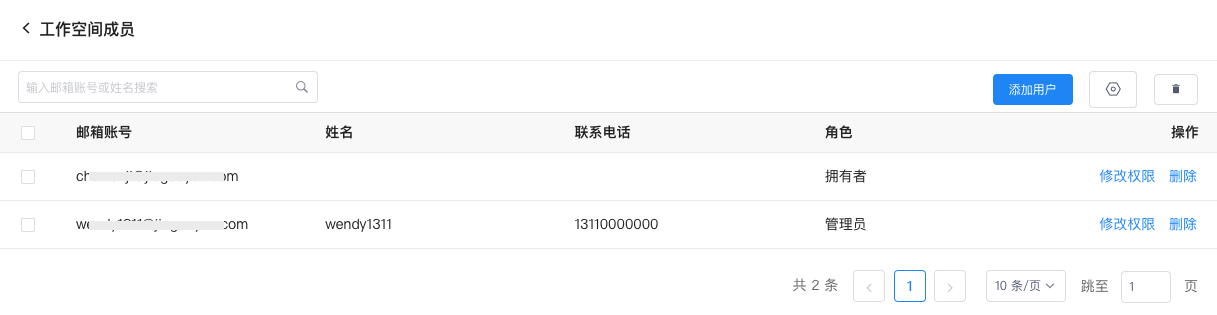
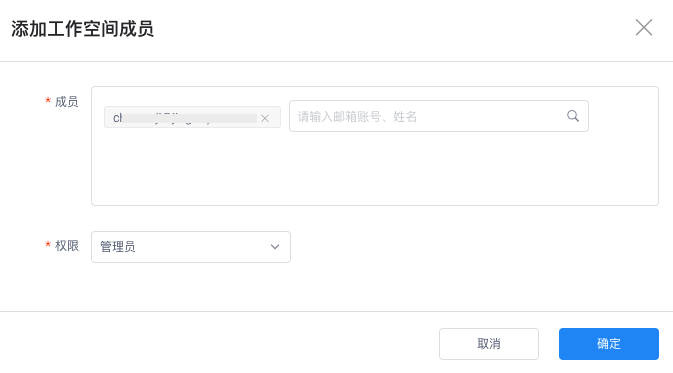
On the workspace member list, click Add User in the top-right corner, select the newly added user, set the appropriate permissions, and click OK to add the user to this workspace.
Log in to Guance
Open the Guance Deployment Plan access URL, and use the created user to log in to the corresponding workspace to start using all features of Guance. For detailed feature instructions, refer to the Guance Help Manual.