Schedules
With the Schedules feature, you can precisely set the send time and recipients for Issue notifications. By configuring specific notification targets for specific time points, you achieve more granular management of Issue content distribution.
Schedules can be linked with Notification Strategies. Combined with the notification time and notification targets configured in the schedule, you can visually view the Issue notification status at different times on the schedule calendar.
Create
- Enter the schedule name.
- Select the time zone for this schedule.
- Select the time period covered by this schedule. By setting the effective time (including start time and end time), you can precisely define the validity period of the current schedule.
- Select Notification Targets. If multiple notification targets need to be set, you can enable notification rotation. This will generate corresponding notification send times and targets based on the rotation cycle and the notification target list.
- Save, and the schedule will be created successfully.
Notification Rotation
Rotation Cycle |
Description |
|---|---|
| Daily | Rotates sending daily according to the order of the notification target list. |
| Each Workday (Monday to Friday) | Rotates daily within the range of workdays. |
| Each Non-Workday (Saturday, Sunday) | Rotates daily within the range of non-workdays. |
| Weekly | Uses the weekly range as the rotation unit. |
| Monthly | Uses the monthly range as the rotation unit. |
Example effect:
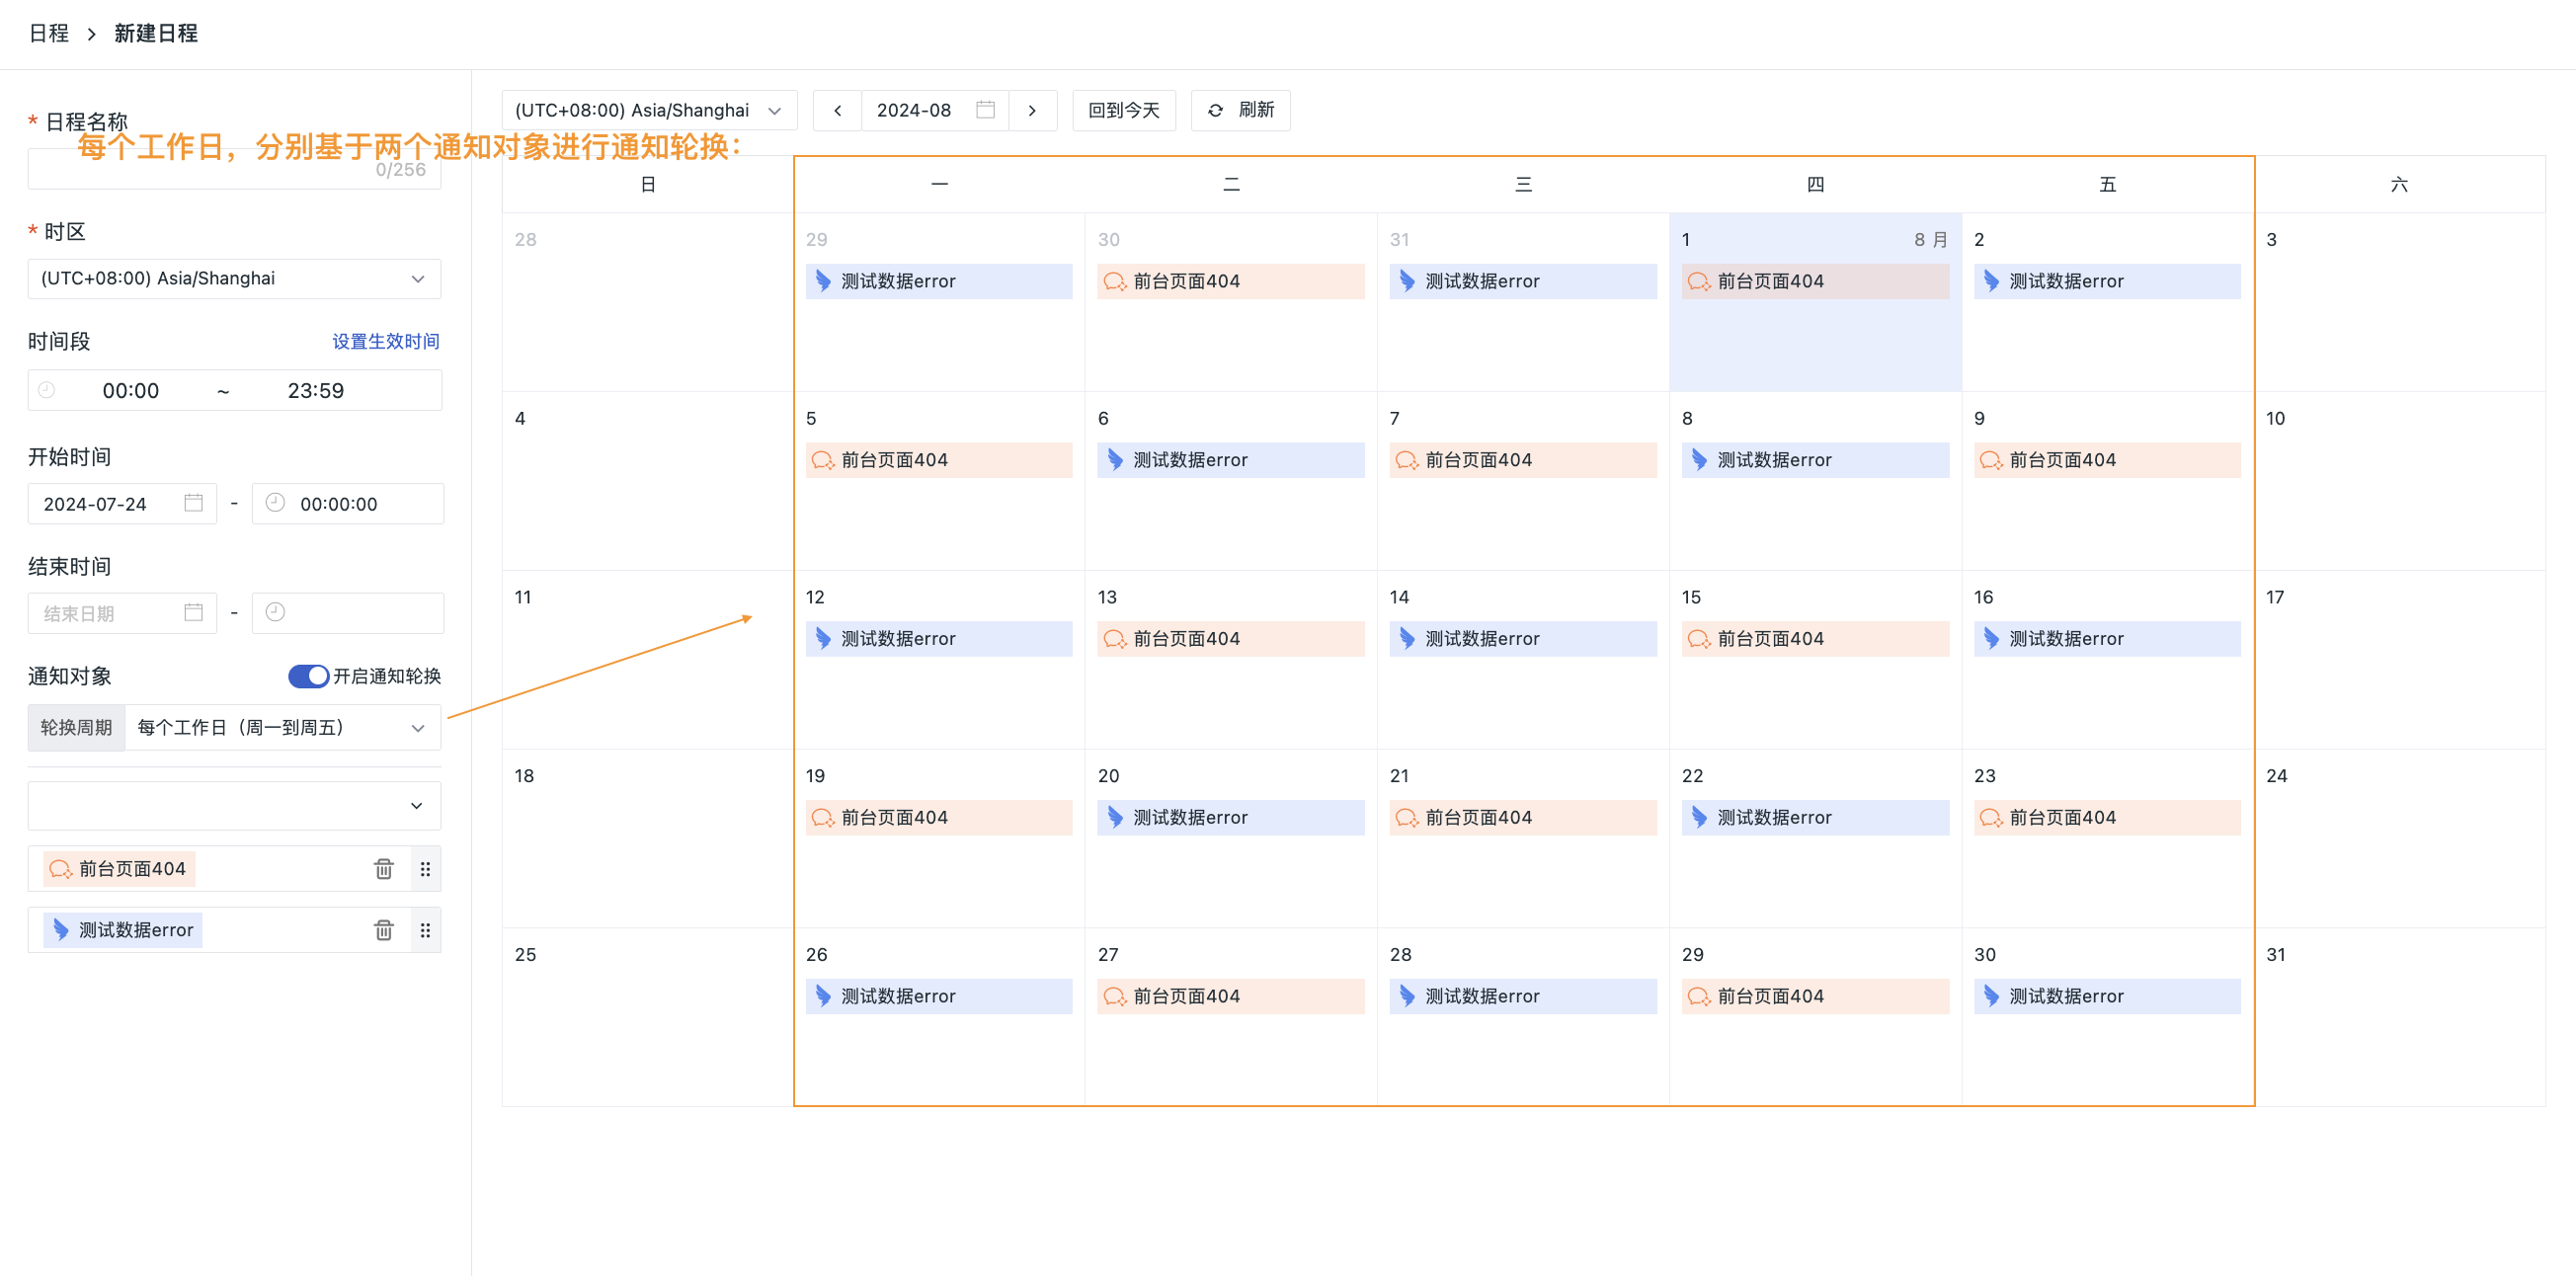
On the right side of the notification targets, you can drag to change the notification order or delete them as needed.
Schedule Calendar
Click Schedule Calendar. You can view all schedules in a calendar format. Click on an identifier to directly view its associated information. Hover over a notification target, schedule, or notification strategy to jump directly to the corresponding details page.
- You can view schedules for the corresponding time range based on the time zone and date controls. Click the time zone or date to select directly from the dropdown list.
- To avoid cumbersome operations, you can directly click Back to Today.
- Click Refresh to view the latest schedule settings.
Schedule Management
You can perform the following operations to manage the schedule list uniformly:
-
Filter
- Differentiate by schedule scope:
- My Schedules: Schedules related to the currently logged-in account.
- All Schedules: Lists all schedules in the current workspace.
- Quick Filter: Based on the schedules, notification strategies, and notification objects on the right, check the boxes as needed to filter and list the corresponding schedules on the right.
- Differentiate by schedule scope:
-
Search: Enter the schedule name in the search bar to directly search and locate.
- Click on a specific schedule on the right side of the page to edit or delete that schedule.
- Click the Batch button to select multiple schedules for batch export or deletion.