Cross-workspace Authorization
Guance isolates data by workspace to ensure the independence and security of data in each workspace. At the same time, it supports cross-workspace data authorization, allowing data from multiple workspaces to be authorized to the current workspace for querying and display through scenario dashboards, views, and other chart components. After configuring data authorization, you can view data from all authorized workspaces within one workspace.
Furthermore, the platform supports unified cross-workspace queries within the same site. After enabling this feature, you can directly query and aggregate data from all other workspaces under the same site within the current workspace, without the need to configure data authorization individually for each.
Note
Simultaneous multi-site queries are not supported.
Authorize To
Go to Manage > Cross-workspace Authorization > Authorize To. This page is used to manage the data authorization relationships between the current workspace and other workspaces. The page provides two operation entry points:
Add Authorization
If you want to authorize the data of the current workspace to be viewed by other workspaces, follow these steps:
- Click Add Authorization.
-
Select the authorization scope.
- Authorize within current site: Authorize data to other workspaces under the same site. It takes effect immediately after confirmation.
- Authorize across sites: Authorize data to workspaces in different sites. It requires generating an authorization package and having the other party import it to take effect.
-
Enter the Workspace ID to authorize.
- Define the data scope.
- Confirm and generate the authorization package.
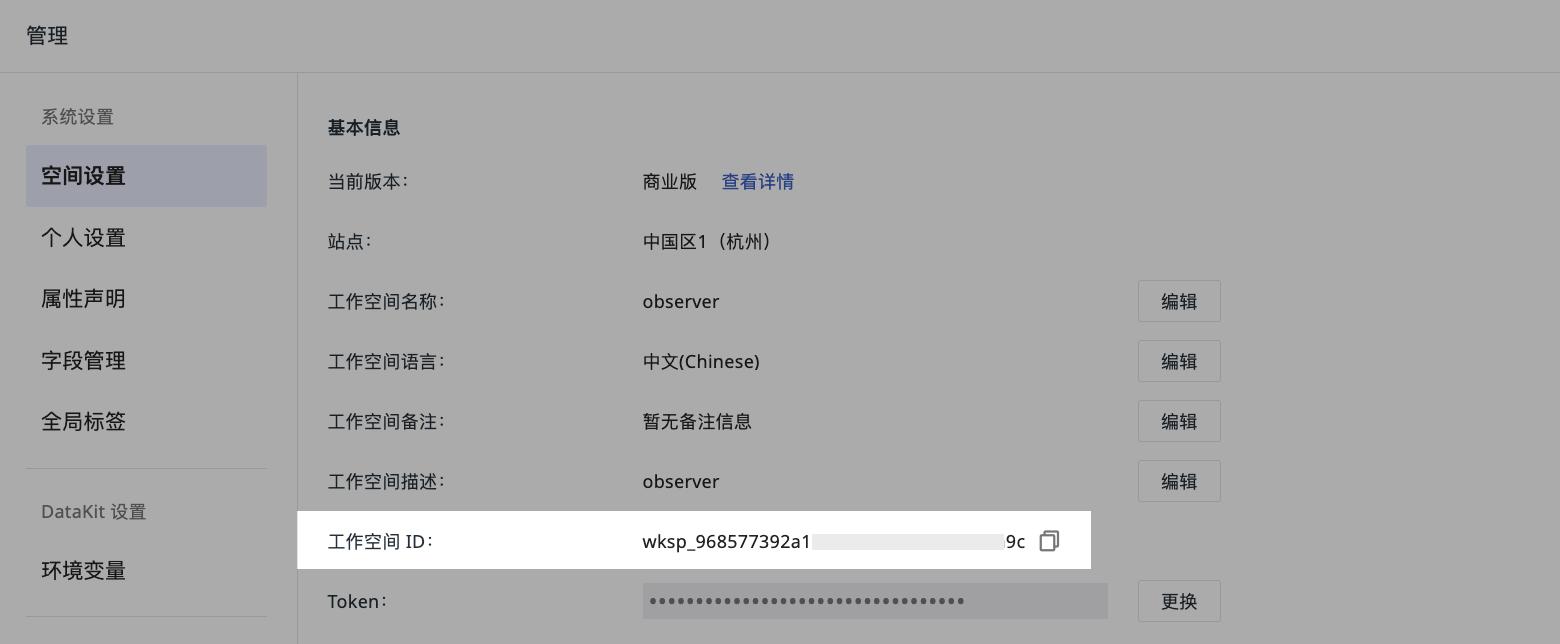
How to obtain the Workspace ID
Go to Manage > Workspace Settings > Workspace ID, click Copy to obtain the Workspace ID.
-
If you choose to authorize within the current site: After clicking Confirm, the authorization takes effect immediately. The authorized party can see this authorization in the Can View list within their workspace.
-
If you choose to authorize across sites: Click Generate Authorization Package, and the system will generate a
meta jsonauthorization package file. You need to provide this file to the authorized party. After they import it and the authentication is successful, the authorization officially takes effect.
Data Scope
Includes Synthetic Tests, Cloud Bills, LOG, APM, Metrics, Basic Objects, Resource Catalog, Events, RUM, Network, Profile, LLM. Multiple selections are supported.
-
LOG Indexes: If the selected data scope includes LOG data (i.e., "All" or "LOG" is selected), you can further select the indexes you need to authorize for viewing.
- The indexes here include default indexes and all LOG indexes. Does not include external indexes.
-
When the data scope selects "Metrics", you can refine the configuration of the Metrics authorization scope:
- Default option: The system displays "All". If the input box is left empty at this time, it means authorizing all Measurements under the current workspace.
- Custom filtering: Supports manually entering tag conditions for filtering. Multiple tag conditions are separated by English commas, in the format
key:value. For example, enteringhost:server, env:prodwill only authorize Metrics data that matches these tag conditions.
Import Authorization Package
Click Import Authorization Package to upload the meta json authorization package file provided by the authorizing party.
- Only
.jsonfile format is supported. - After import, the system will automatically identify the authorizing party's site, workspace, and data scope.
After successful authentication, the current workspace can see this authorization record in the Can View list.
Can View
Go to Manage > Cross-workspace Authorization > Can View. This page displays records of data permissions that other workspaces have authorized to the current workspace.
- If the other party directly authorized via Authorize within current site, the record will automatically appear in the list with the status Effective.
- If the other party generated an authorization package via Authorize across sites, you need to click Import Authorization Package and upload the
.jsonauthorization package file they provided. After import and successful authentication, the record will appear in the list, and its status will change to Effective.
Understanding Authorization Status
In the Authorize To or Can View list, each authorization record displays its current status:
| Status | Description |
|---|---|
| Pending Import | The authorization package has been generated, but the authorized workspace has not imported it or authentication is not complete. |
| Effective | The authorized workspace has imported the authorization package and authentication was successful. The authorization is officially effective. |
| Invalid | The authorization is unavailable, including being deleted, authentication failure, or deemed unavailable by the backend. |
Manage Authorization
In the Authorize To or Can View list, you can perform the following operations:
- Filter the list based on site.
- Search and locate by entering workspace name or ID.
- Delete data authorization for a specific workspace.
- Re-edit authorization rules via the edit button.
- When adding or deleting data authorization, the system will generate audit events and send email notifications to the owners and administrators of the corresponding workspaces.
Impact Scope
When editing or deleting authorization rules, if you reduce the data scope or LOG indexes.
After clicking confirm, a sliding window will pop up on the right side, displaying the impact scope of deleting data authorization for the currently authorized workspace, including the names of monitors and data access configurations.
Supports exporting this list as a CSV file.
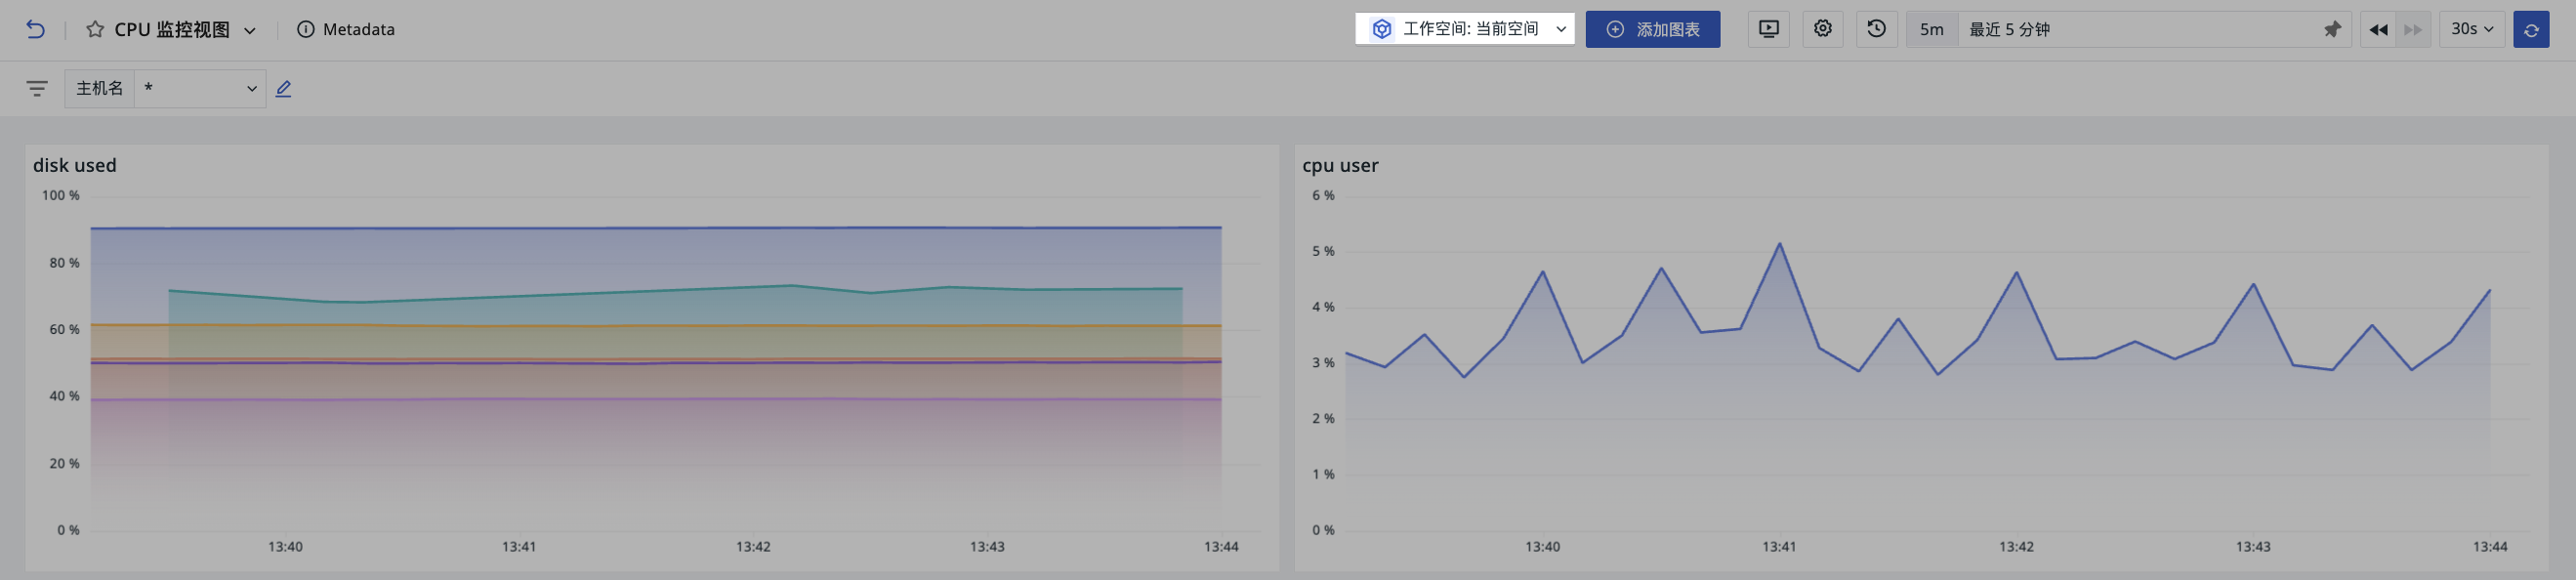
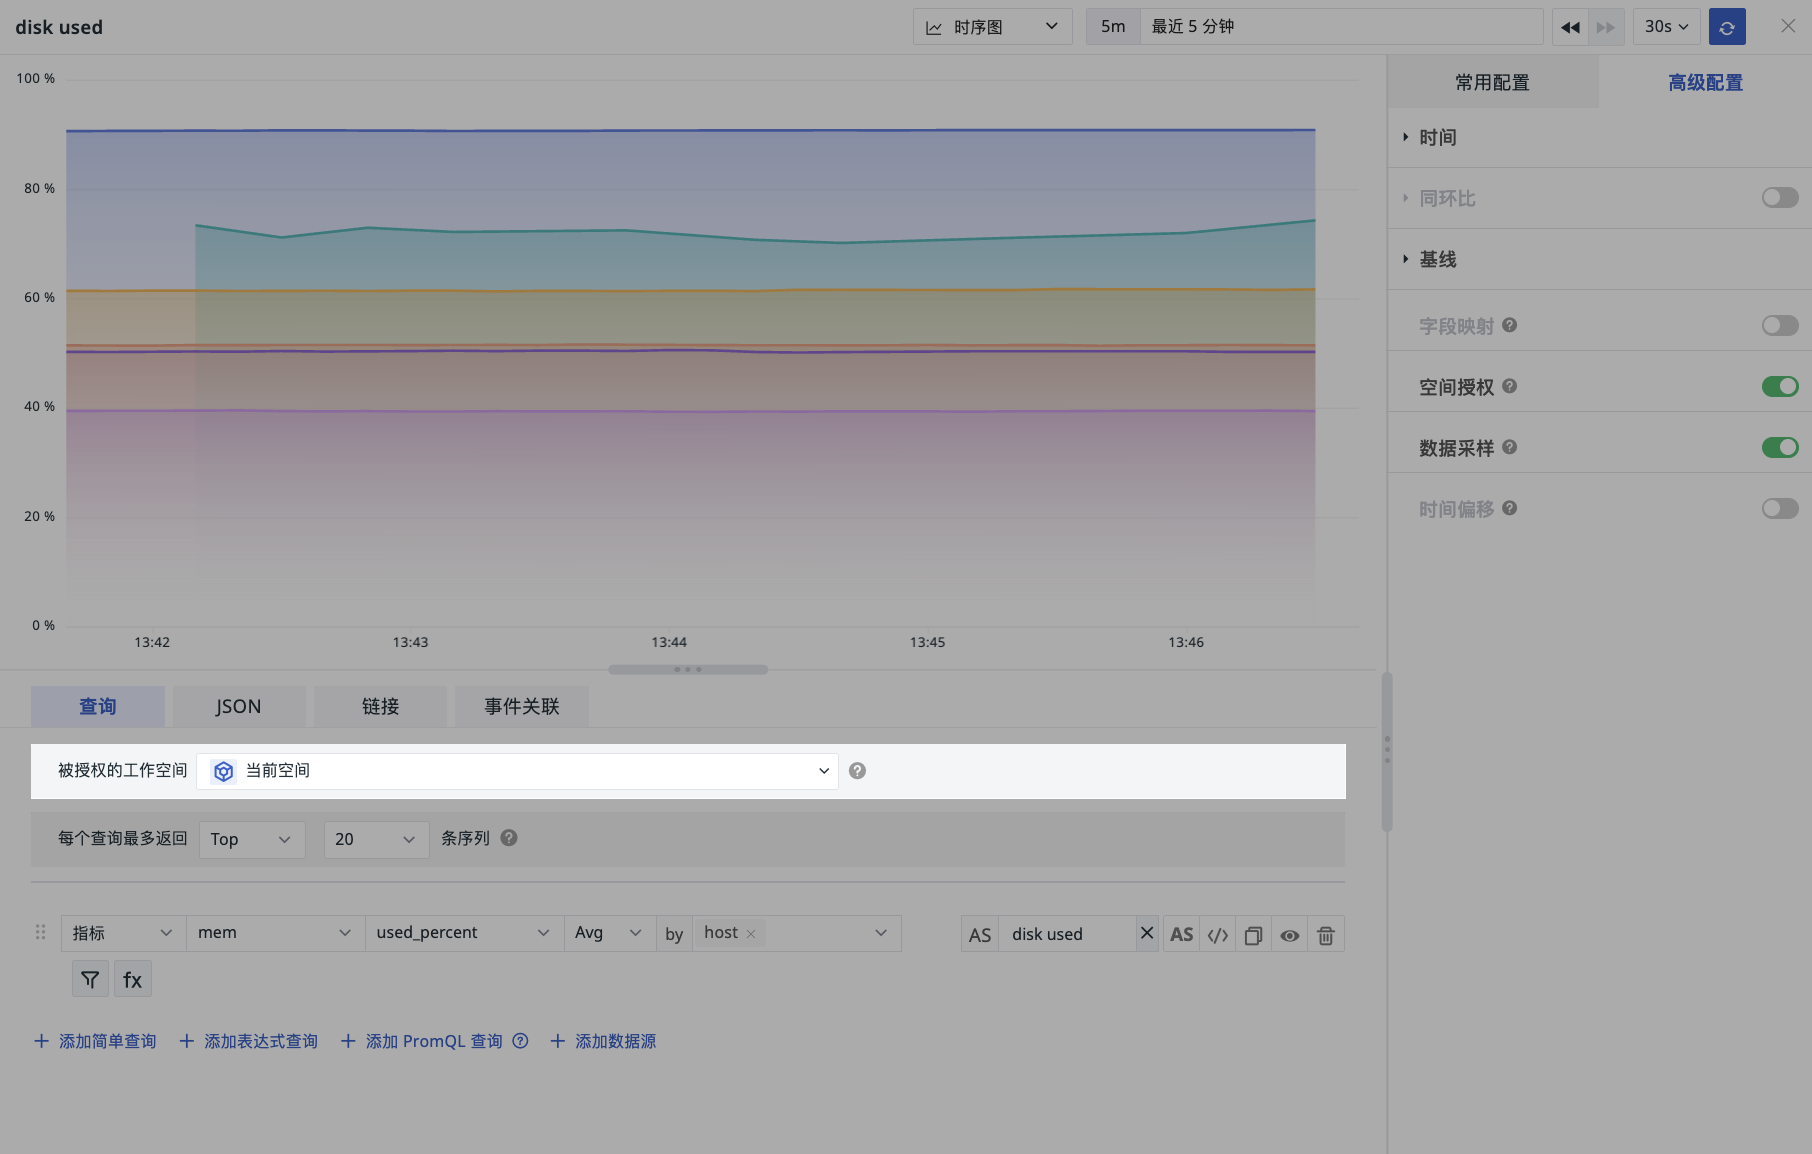
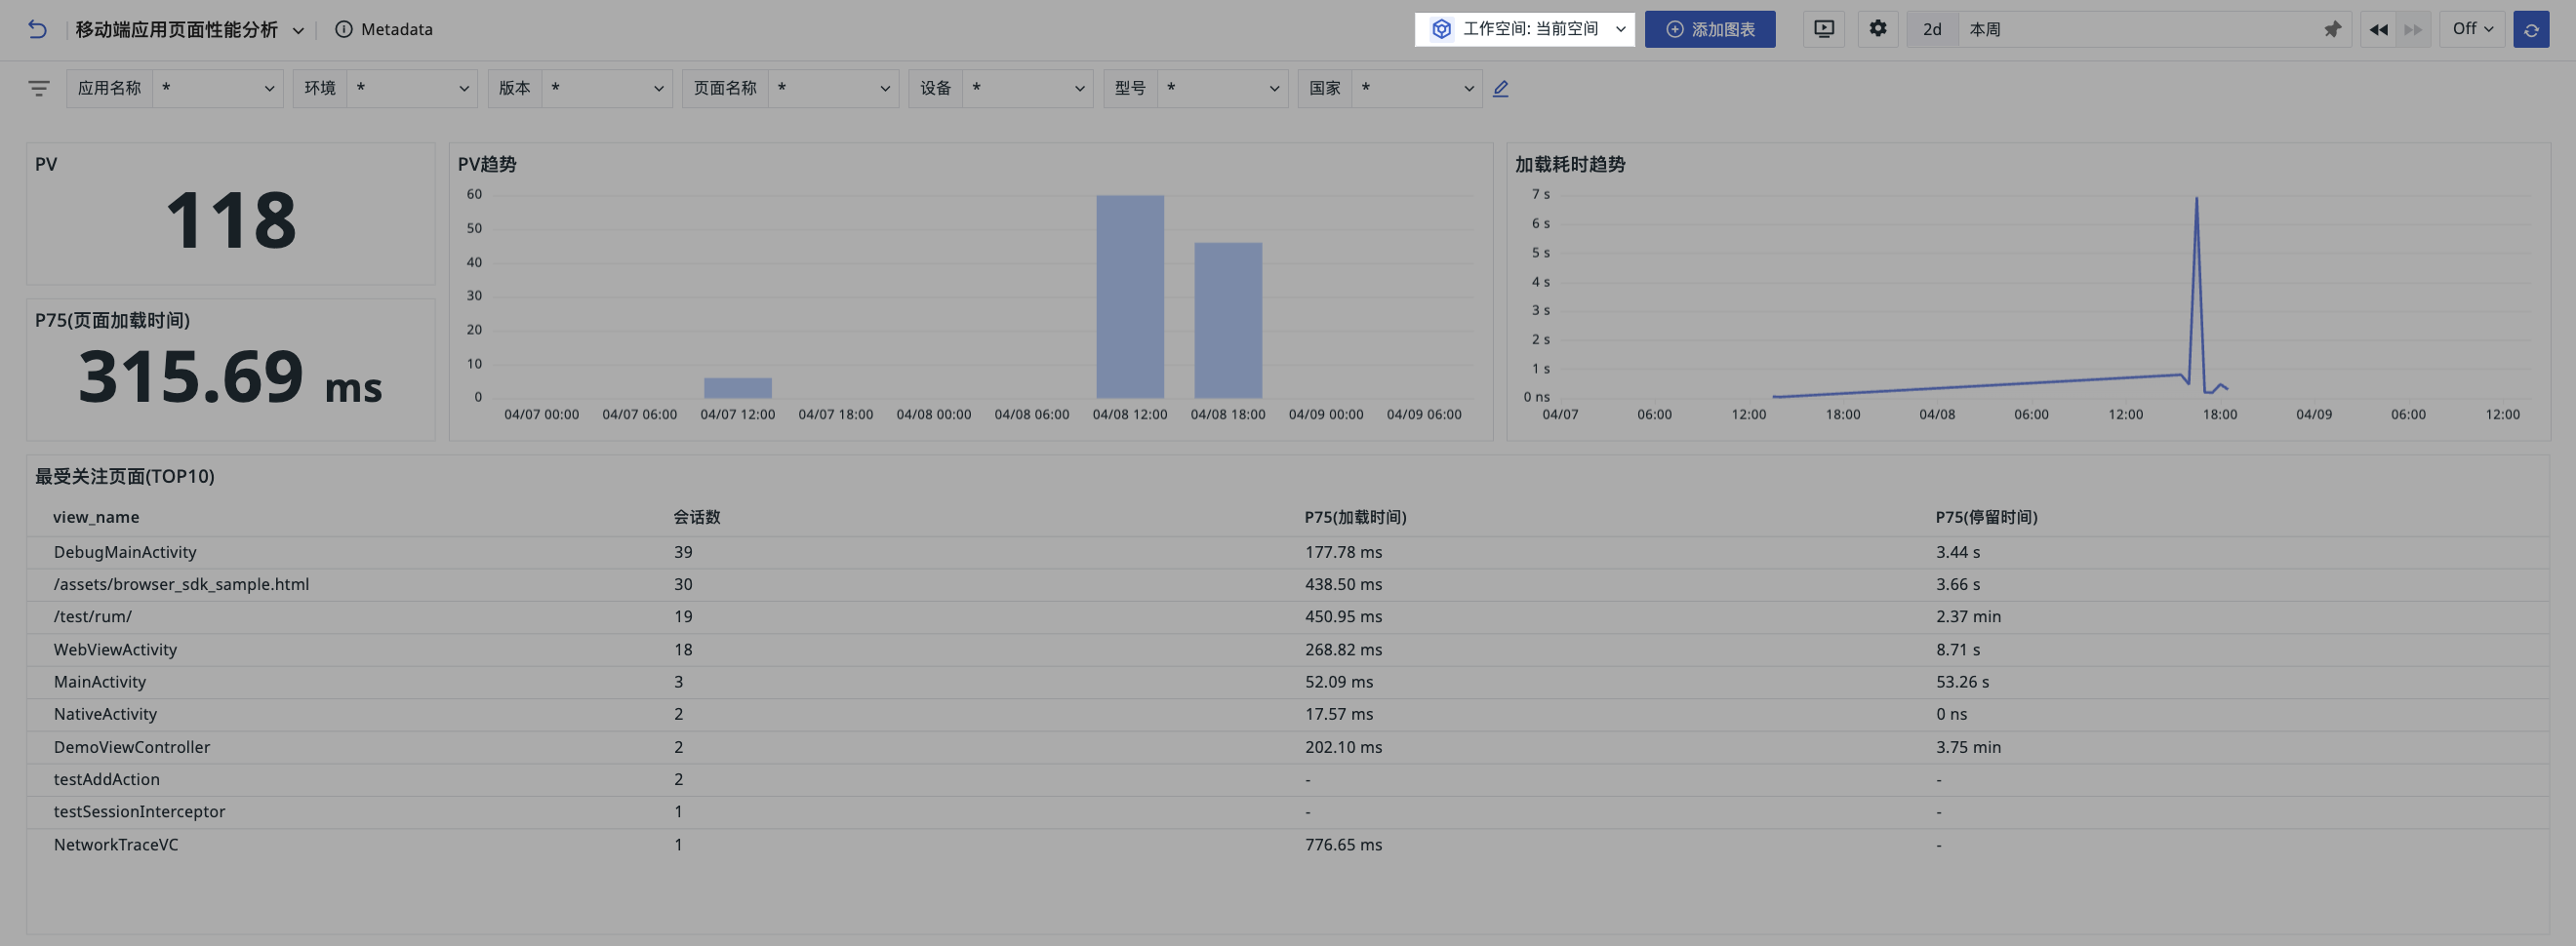
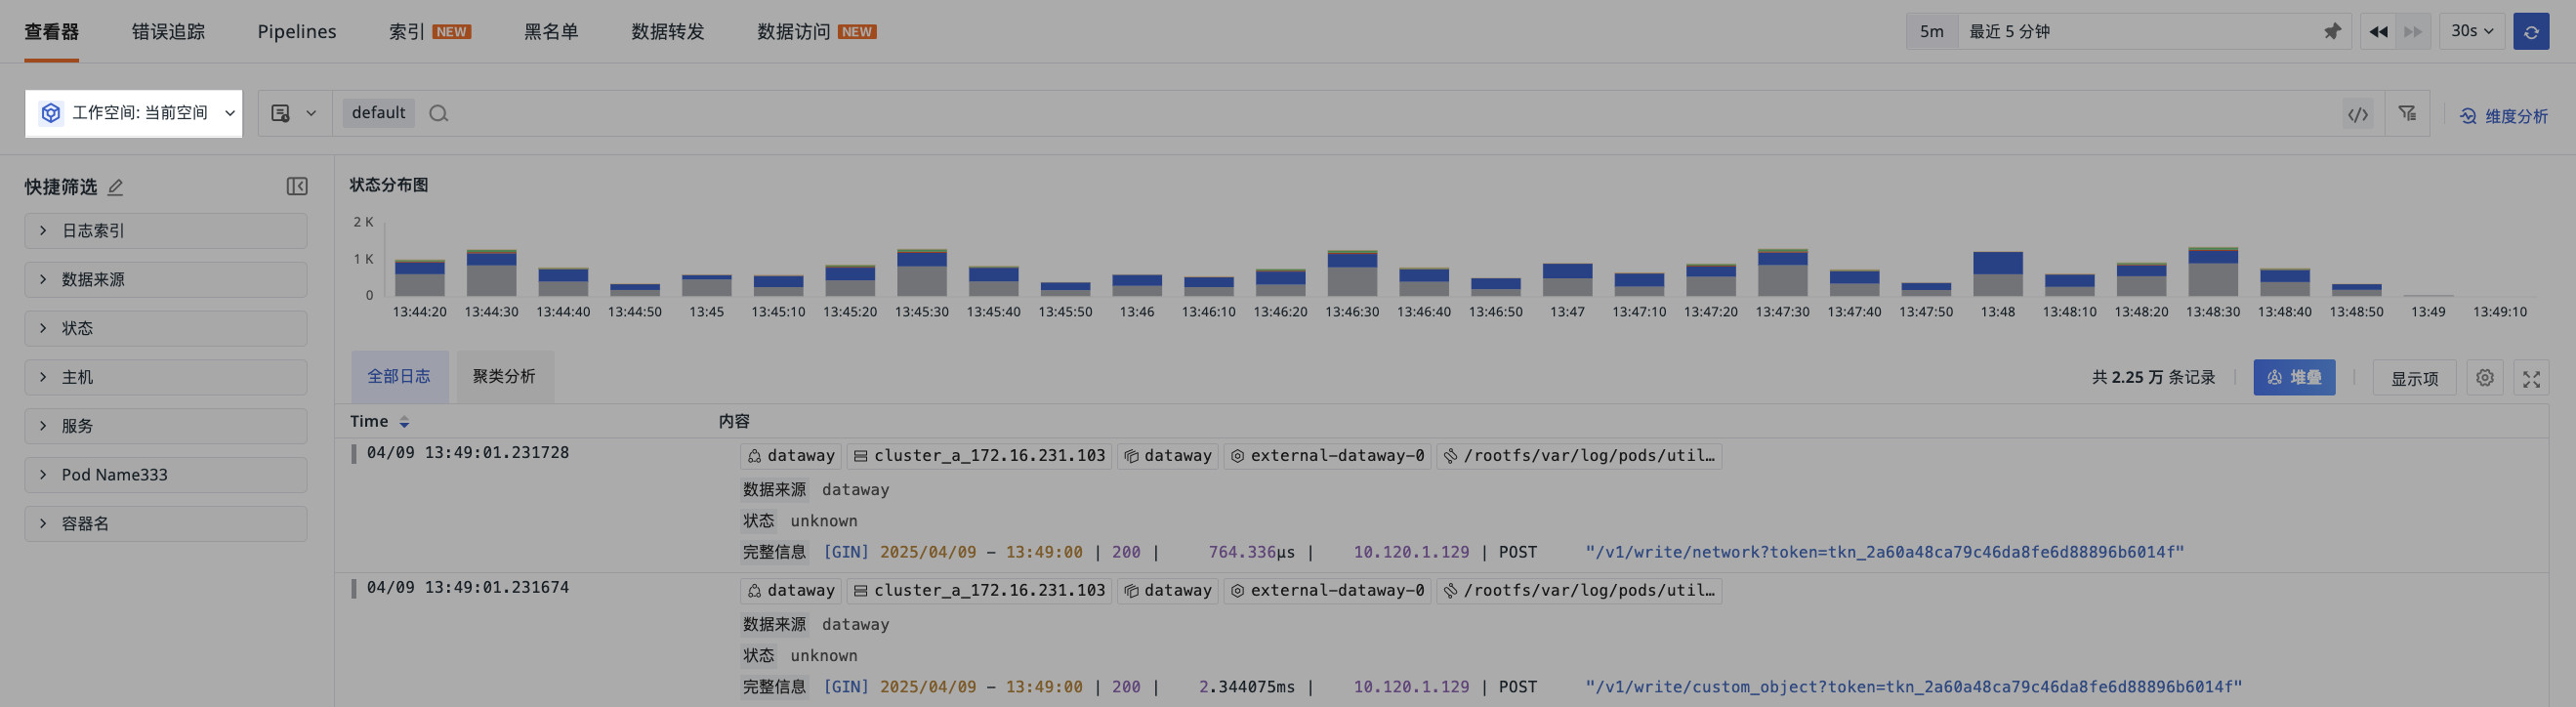
Use Cases
After successfully adding cross-workspace authorization, you can perform cross-space queries through the following entry points within the workspace.