Keycloak Single Sign-On Example
Keycloak is an open-source solution for identity and access management designed for modern applications and distributed services.
This article uses a built Keycloak server to demonstrate how to use the SAML 2.0 protocol to achieve Keycloak user SSO login to Guance Management Console.
For using OpenID Connect protocol to achieve Keycloak user SSO login to Guance Management Console, please refer to Keycloak Single Sign-On (Deployment Plan).
Prerequisites
A Keycloak server has been set up, and you can log in to the Keycloak server to perform configurations.
If there is no Keycloak environment, follow the steps below to set it up:
sudo yum update         # Update

sudo yum install -y java-1.8.0-openjdk java-1.8.0-openjdk-devel      # Install JDK

wget https://downloads.jboss.org/keycloak/11.0.2/keycloak-11.0.2.zip   # Download Keycloak

yum install unzip       # Install unzip utility

unzip keycloak-11.0.2.zip       # Extract downloaded Keycloak

cd keycloak-11.0.2/bin         # Enter bin directory

./add-user-keycloak.sh -r master -u admin -p admin     # Create server administrator login credentials

nohup bin/standalone.sh -b 0.0.0.0 &     # Return to bin directory and start Keycloak service in background
After the Keycloak environment is set up, input https://IP Address:8443/auth in the browser, click "Administration Console" to open the Keycloak management console.
Concepts
Below are explanations of basic concepts involved in the Keycloak configuration process:
| Field | Description |
|---|---|
| Realm | A domain, similar to a workspace, used to manage users, credentials, roles, and user groups; realms are isolated from each other. |
| Clients | Applications or services that can request Keycloak to authenticate users. |
| Users | User accounts that can log into the system, requiring configuration of login email and Credentials. |
| Credentials | Credentials used to verify user identity, which can be used to set the login password for user accounts. |
| Authentication | The process of identifying and verifying users. |
| Authorization | The process of granting users access permissions. |
| Roles | Used to identify types of user identities, such as administrators, regular users, etc. |
| User role mapping | Mapping relationship between users and roles, where one user can be associated with multiple roles. |
| Groups | Manage user groups, supporting mapping roles to groups. |
Procedure Steps
1. Create a Keycloak Realm
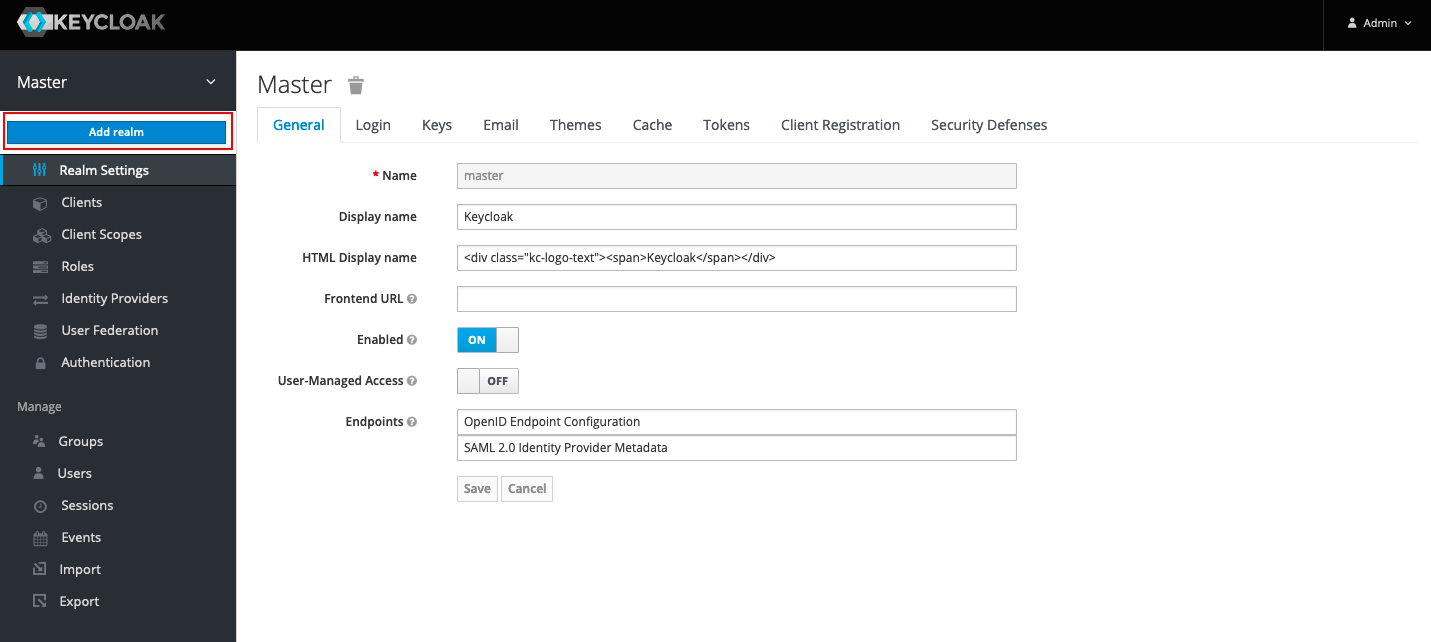
Note: Keycloak itself has a main realm (Master), we need to create a new realm (similar to a workspace).
1) In the Keycloak management console, click Master > Add realm.
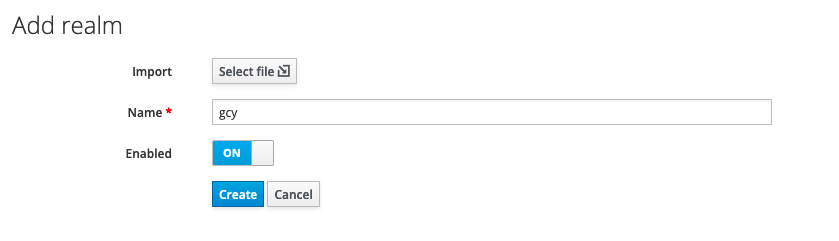
2) On the Add realm page, enter the realm name in the Name field, such as "gcy", then click Create, which will create a new realm.
2. Create Client and Configure SAML
Note: This step will create a Keycloak client and configure SAML to establish a trust relationship between Keycloak and Guance so they can trust each other.
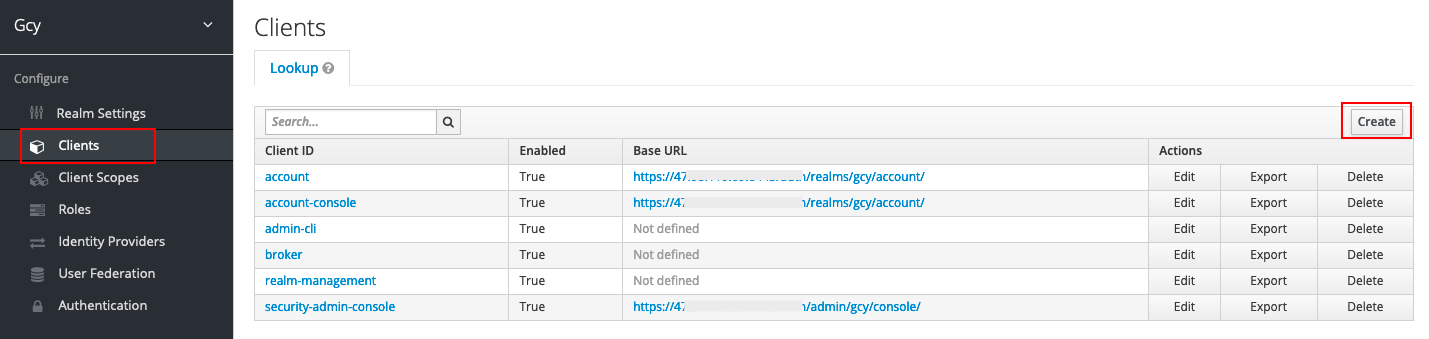
1) Under the newly created "gcy" realm, click Client, then click Create on the right side.
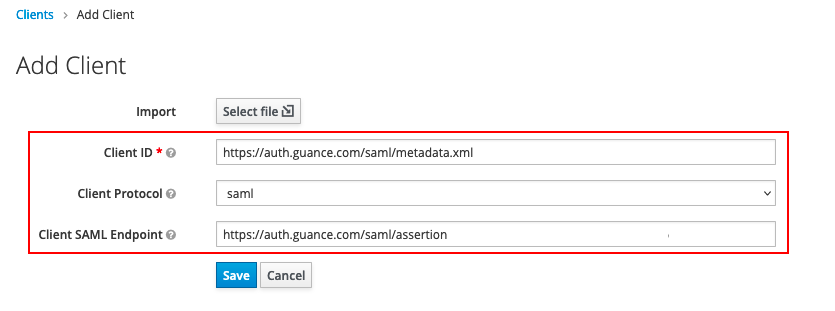
2) On the Add Client form, fill in the following content and then click Save.
- Client ID (Entity ID): https://auth.guance.com/saml/metadata.xml;
- Client Protocol: Select SAML;
- Client SAML Endpoint (Assertion URL), temporarily use: https://auth.guance.com/saml/assertion.
Note: This configuration is only used to obtain metadata documents for the next step. After enabling SSO single sign-on in Guance, you must replace these fields with the correct Entity ID and Assertion URL.
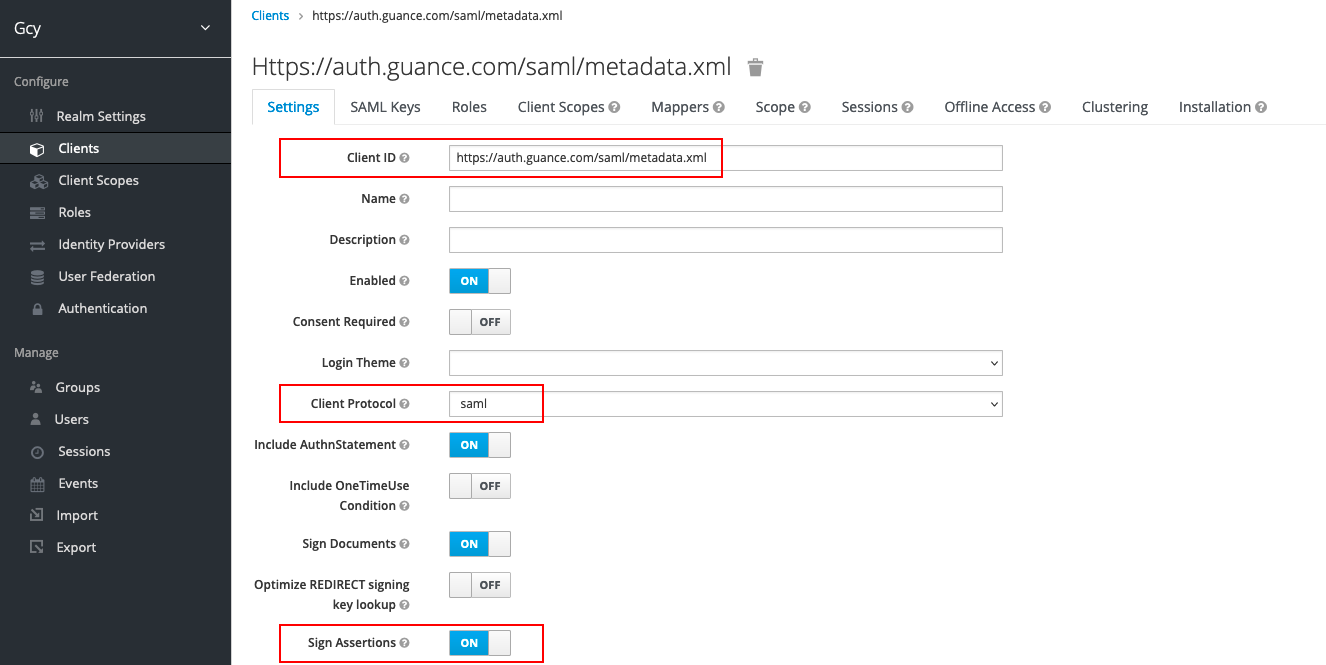
After creating the client, in Settings, you can see the Entity ID, protocol, and assertion address filled out in the previous step. Set the following parameters and save them.
- Sign Assertions: ON (Used to prevent data transmitted by IdP from being tampered with, ensuring the security of data transmitted from IdP to SP.)
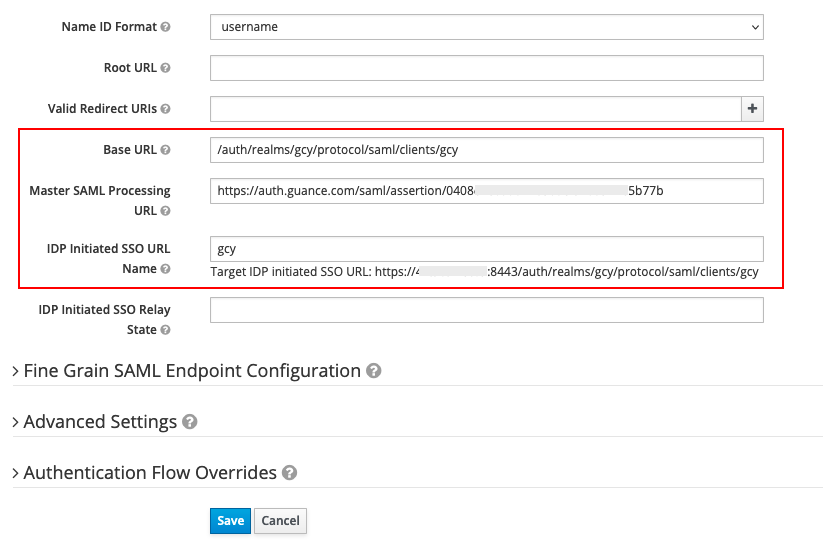
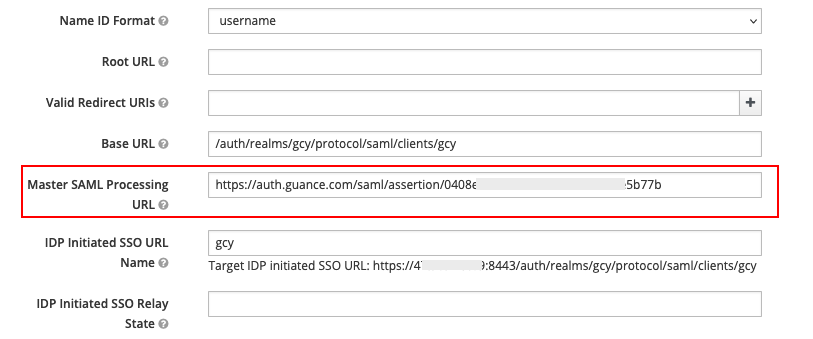
- IDP Initiated SSO URL Name: Can be filled arbitrarily, such as "gcy". After filling this, an SSO single sign-on URL will be generated, as shown in the figure below;
- Base URL: Fill in the SSO single sign-on URL generated by the above parameter, such as
/auth/realms/gcy/protocol/saml/clients/gcy. This is mainly used to generate direct access links in Keycloak clients for single sign-on to Guance.
3) In Mappers under Clients, click Create to create an email mapper. This part is mandatory, and if left unfilled, SSO single sign-on cannot be achieved.
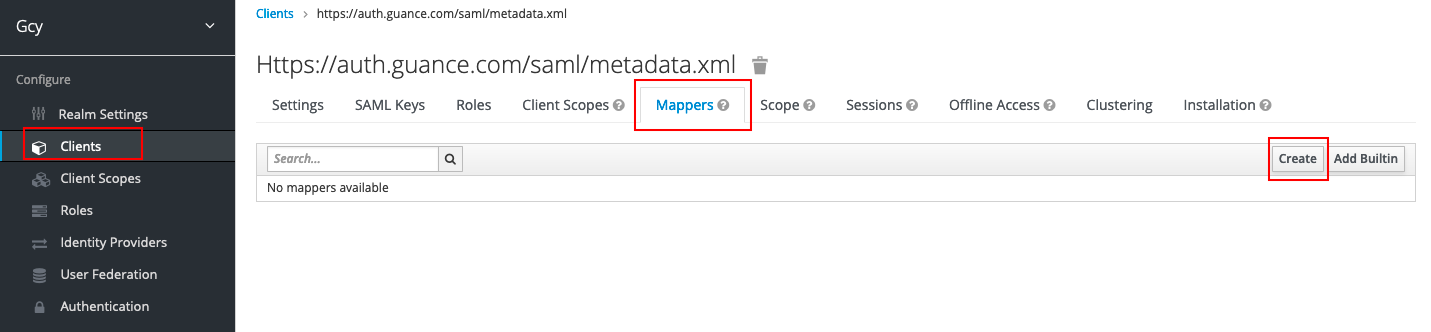
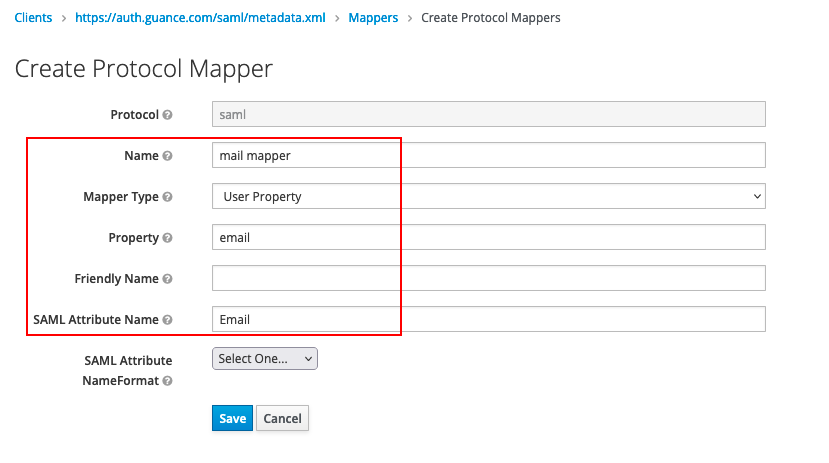
On the Create Protocol Mapper page, after entering the following content, save it.
- Name: Can be filled arbitrarily, such as "mail mapper";
- Mapper Type: Select "User Property";
- Property: Fill in Email according to the rules supported by the identity provider;
- SAML Attribute Name: Must fill in Email.
Note: Guance defines a mapped field that must be filled with Email to associate the user's email provided by the identity provider (i.e., the identity provider maps the logged-in user's email to Email).
3. Obtain KeyCloak Metadata Document
Note: This step allows obtaining the metadata document required to create an identity provider in Guance.
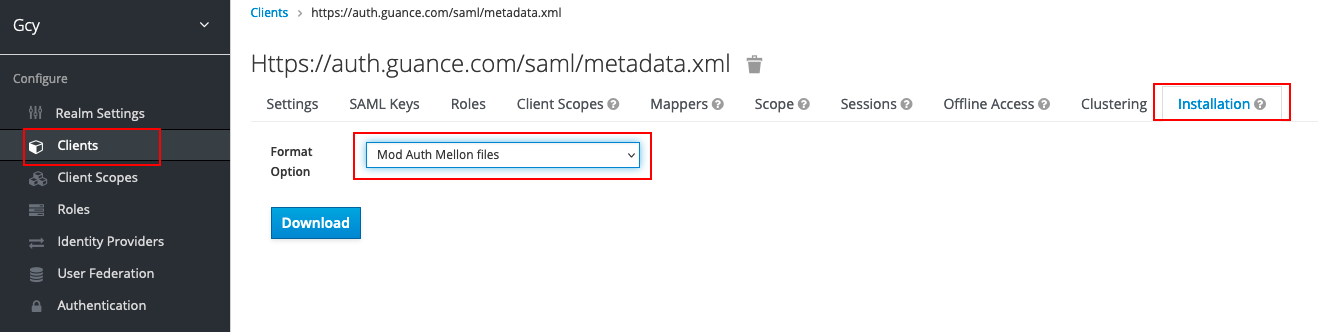
1) In Installation under Clients, select Mod Auth Mellon files, then click Download to download the metadata document.
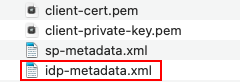
2) In the downloaded folder, select idp-metadata.xml.
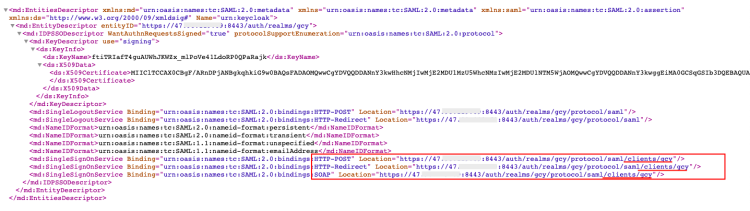
3) Since Keycloak's cloud data documents are at the Realm level, you need to add the client parameter /clients/<IDP Initiated SSO URL Name> to the access address in the metadata document idp-metadata.xml. As this document sets IDP Initiated SSO URL Name: gcy, fill in /clients/gcy in the XML file, as shown in the figure below. After adding, save the XML file.
4. Enable SSO Single Sign-On in Guance
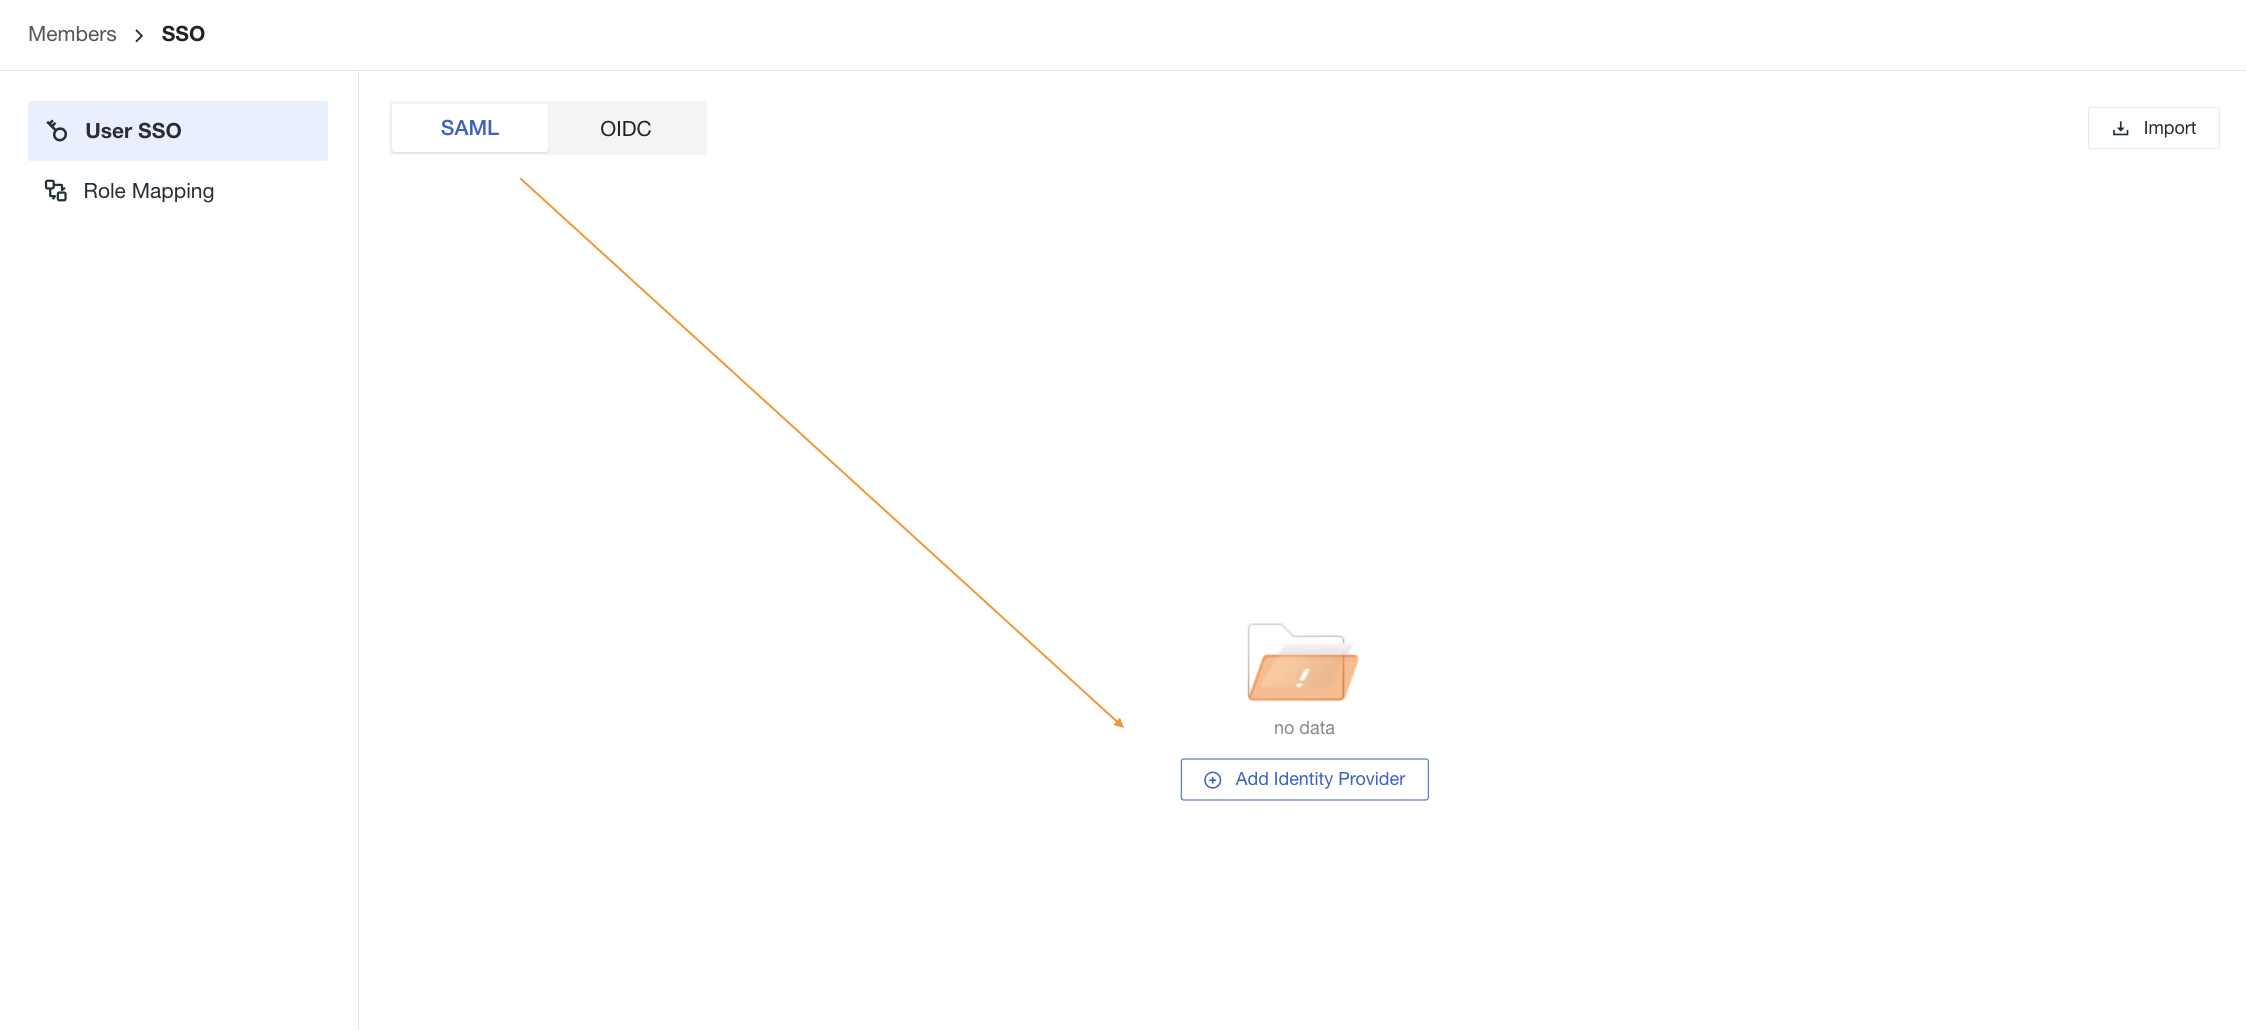
1) To enable SSO single sign-on, go to Guance workspace Management > Member Management > SSO Management, then click Enable.
Refer to the documentation Create SSO.
Note: For account security considerations, Guance supports configuring only one SSO per workspace. If you have already configured SAML 2.0 previously, the last updated SAML 2.0 configuration will be considered as the final single sign-on verification entry.
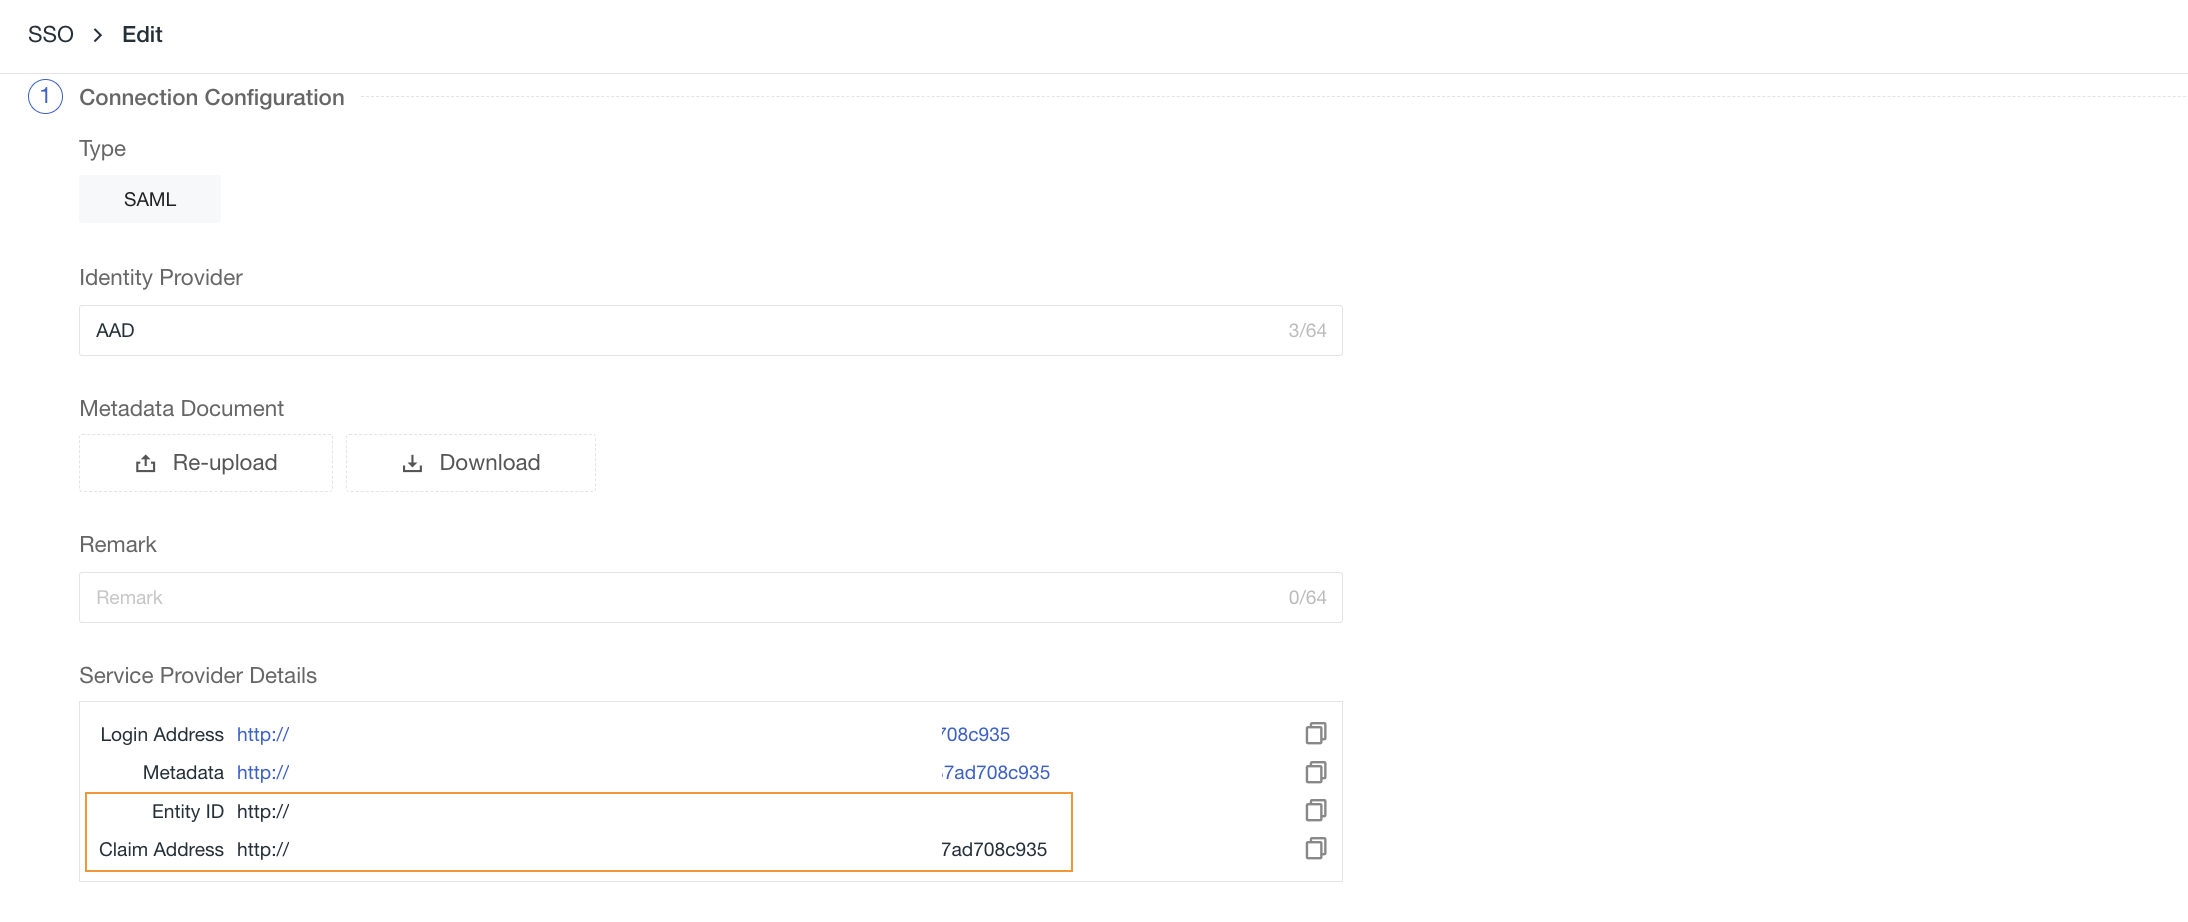
2) Upload the Metadata Document downloaded in Step 3, configure the Domain (email suffix domain), select the Role, then you can obtain the Entity ID and Assertion URL of the identity provider, supporting direct copying of the Login URL for login.
Note: The domain is used for email domain mapping between Guance and the identity provider to achieve single sign-on, i.e., the email suffix domain of the user must match the domain added in Guance.
5. Replace the SAML Assertion URL in KeyCloak
1) Return to Keycloak and update the Entity ID and Assertion URL in Step 2.
Note: When configuring single sign-on in Guance, the assertion URL configured in the identity provider's SAML must match that in Guance to achieve single sign-on.
6. Configure Keycloak Users
Note: This step configures authorized user email accounts for the identity provider created in Guance. Configured Keycloak user email accounts can be used for single sign-on to Guance platform.
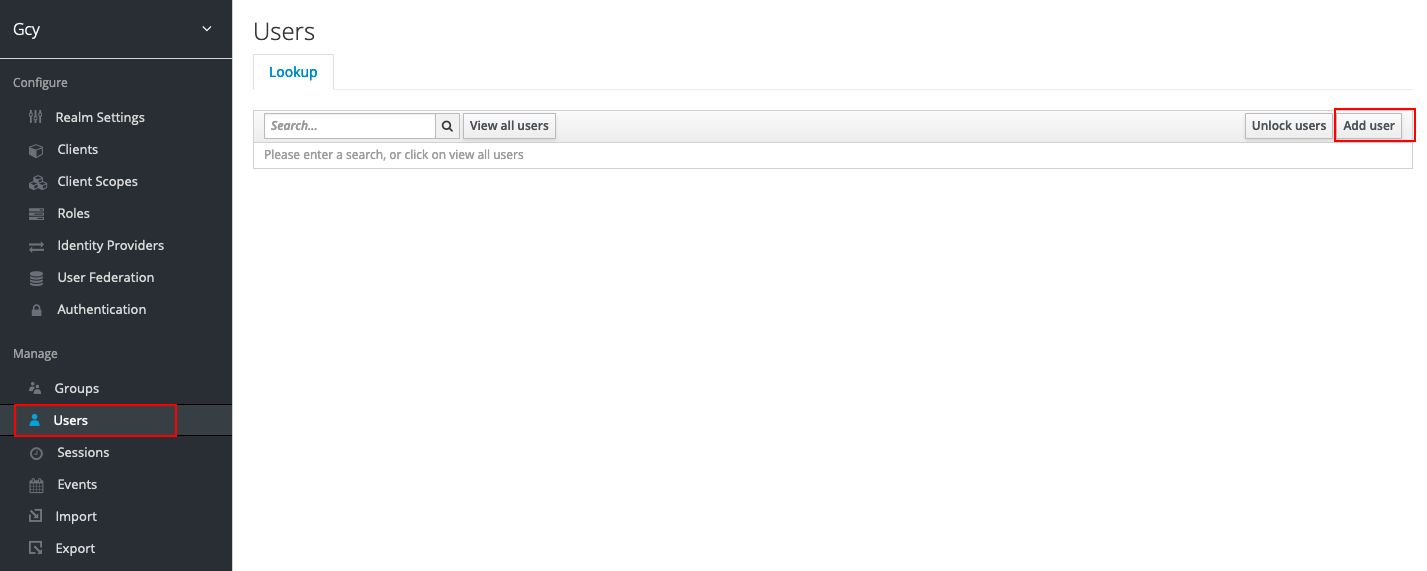
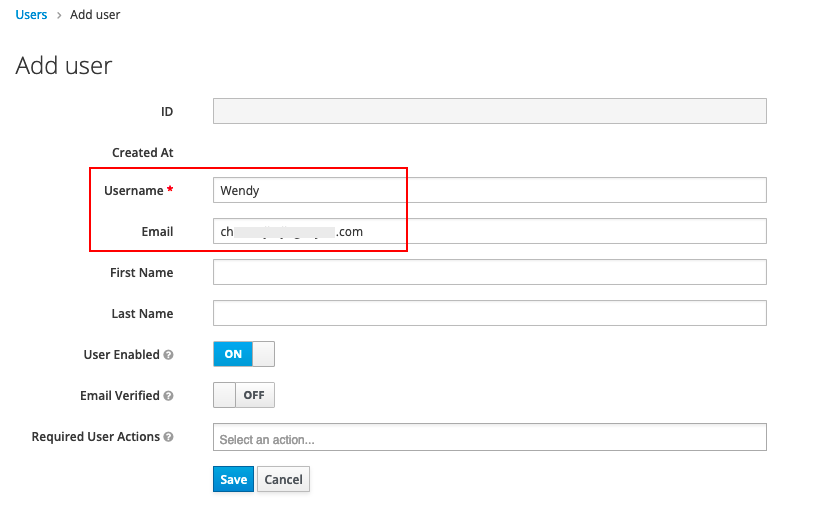
1) In the created gcy domain, click User, then click Add user.
2) Input Username and Email, where Email is a required field and must match the email whitelist configured in Guance's identity provider, used to map emails for logging into Guance.
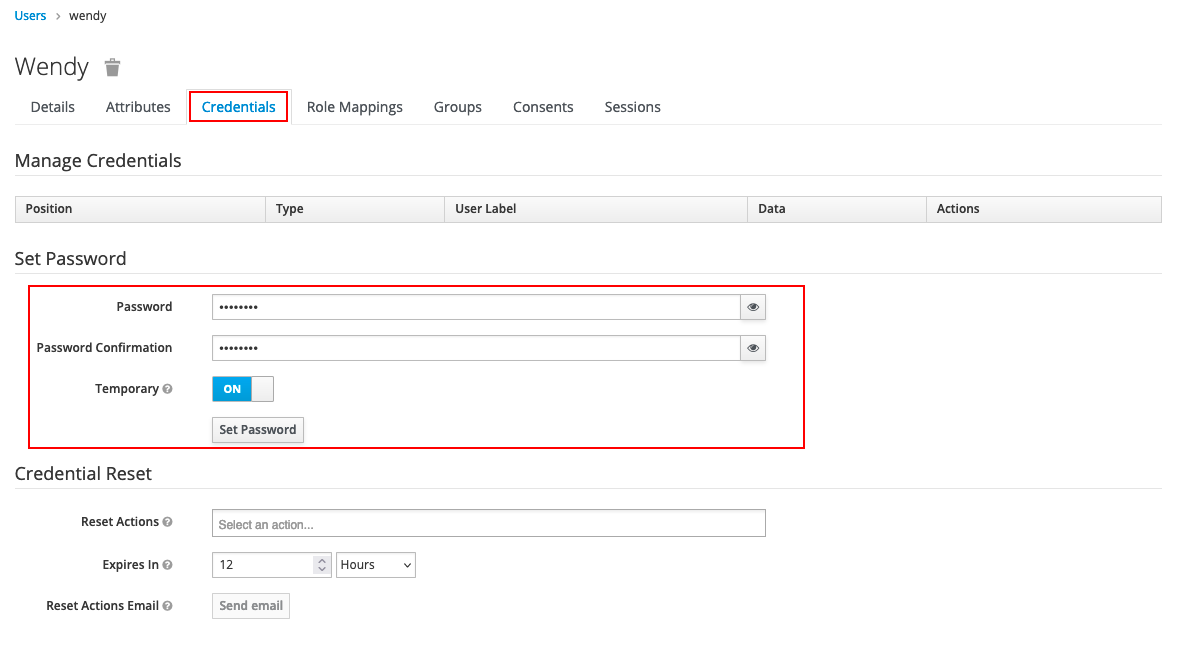
3) After creating the user, set the password for the user in Credentials.
7. Use Keycloak Account for Single Sign-On to Guance
After all configurations are completed, there are two ways to perform single sign-on to Guance.
Method One: Log in to Guance via Keycloak
1) In Keycloak's Clients, click the Base URL on the right side.

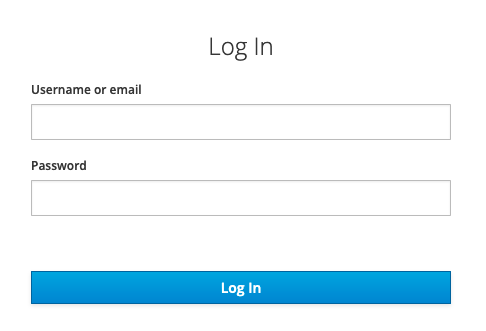
2) Enter the configured user email and password.
3) Log in to the corresponding workspace in Guance.
Note: If multiple workspaces are configured with the same identity provider SSO single sign-on, after logging in through SSO, users can click the workspace option in the top-left corner of Guance to switch between different workspaces to view data.

Method Two: Single Sign-On to Guance Using Keycloak Account
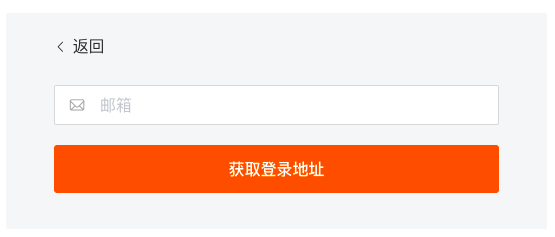
1) After SSO configuration is complete, log in through Guance Official Website or Guance Console, and select Single Sign-On on the login page.
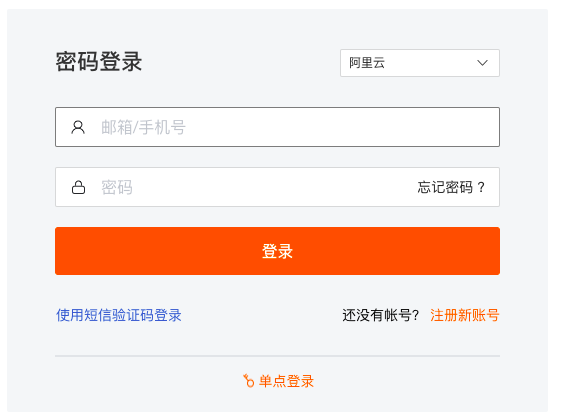
2) Enter the email address used during SSO creation and click Get Login URL.
3) Click Link to open the enterprise account login page.

4) Enter the enterprise universal email (the enterprise email address configured in Keycloak and Guance SSO Management) and password.

5) Log in to the corresponding workspace in Guance.
Note: If multiple workspaces are configured with the same identity provider SSO single sign-on, after logging in through SSO, users can click the workspace option in the top-left corner of Guance to switch between different workspaces to view data.