Keycloak Single Sign-On (Deployment Plan)
Introduction
Guance Deployment Plan supports single sign-on methods based on the OpenID Connect and OAuth 2.0 protocols. This article will use Keycloak login as an example for explanation.
Keycloak is an open-source solution for identity authentication and access control for modern applications and distributed services. Guance Deployment Plan, based on the OpenID Connect protocol, enables enterprise Keycloak accounts to log into the Guance platform to access corresponding workspace resources without needing to create separate Guance accounts for enterprises/teams.
Note: This article applies to users of the OpenID Connect protocol and Keycloak version 18.0.2 or lower.
Concepts
| Term | Explanation |
|---|---|
| Realm | A domain similar to a workspace used to manage users, credentials, roles, and user groups. Realms are isolated from each other. |
| Clients | Applications or services that can request Keycloak to authenticate users. |
| Users | User accounts that can log into the system, requiring configuration of login email and credentials. |
| Credentials | Credentials used to verify user identity, such as setting up login passwords for user accounts. |
| Authentication | The process of identifying and verifying users. |
| Authorization | The process of granting users access permissions. |
| Roles | Used to identify user types, such as administrators, regular users, etc. |
| User role mapping | The mapping relationship between users and roles, allowing one user to be associated with multiple roles. |
| Groups | Managing user groups, supporting role mappings to groups. |
Configuration Steps
1. Create a Keycloak Realm
Note: Keycloak has a master realm (Master). We need to create a new realm (similar to a workspace).
1) In the Keycloak admin console, click Master > Add realm.
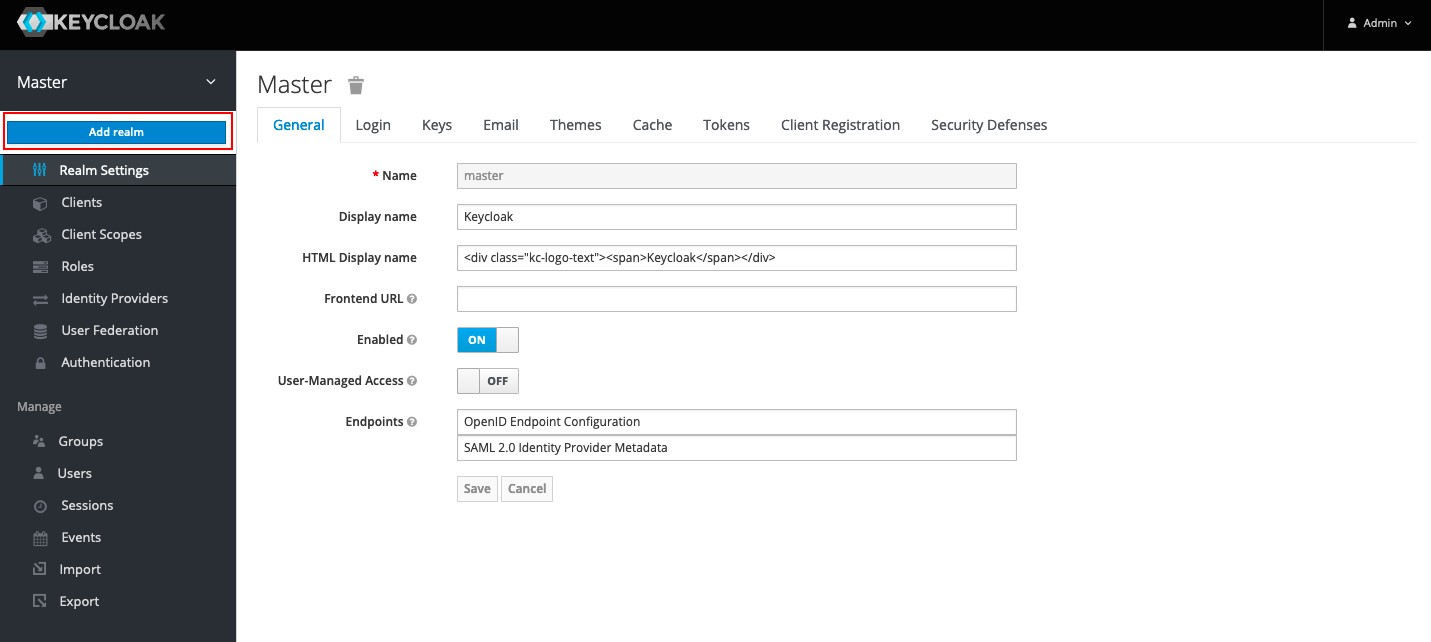
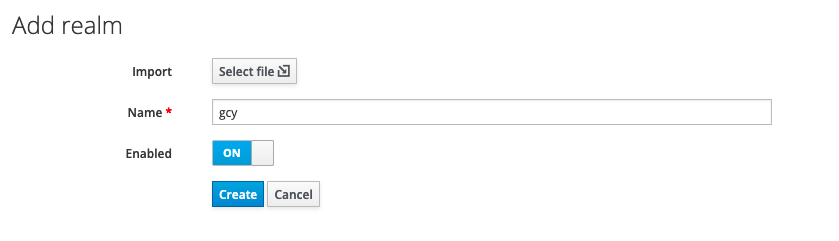
2) On the Add realm page, enter a realm name in the Name field, such as “gcy”, and click Create to create a new realm.
2. Create a Client and Configure openid-connect Protocol
Note: This step will create a Keycloak client and configure the openid-connect protocol to establish a trust relationship between Keycloak and Guance.
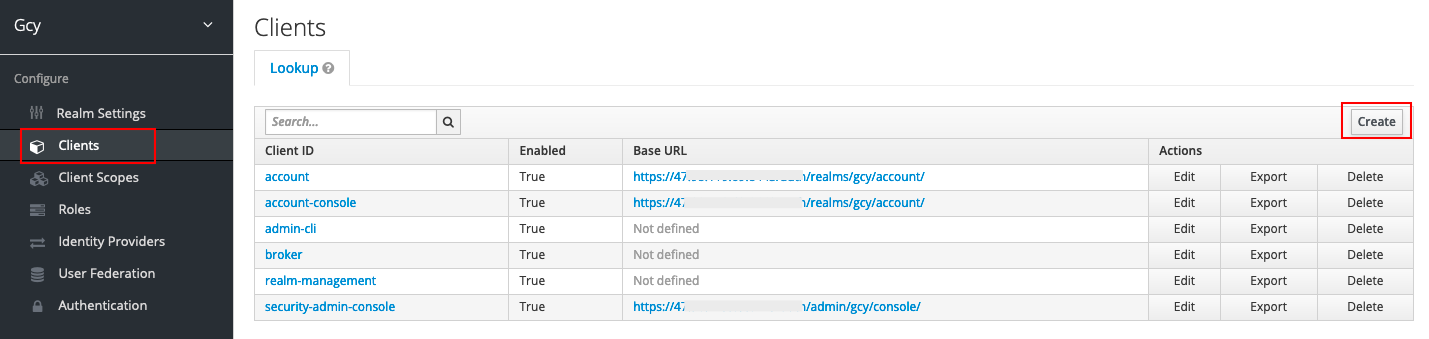
1) Under the newly created “gcy” realm, click Client, then click Create on the right side.
2) Fill out the Add Client form with the following details and click Save.
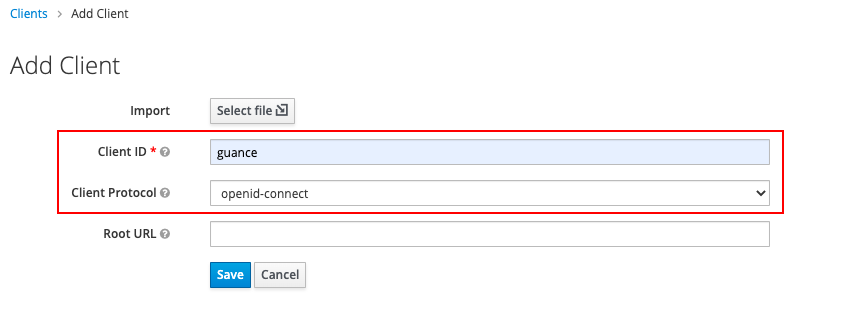
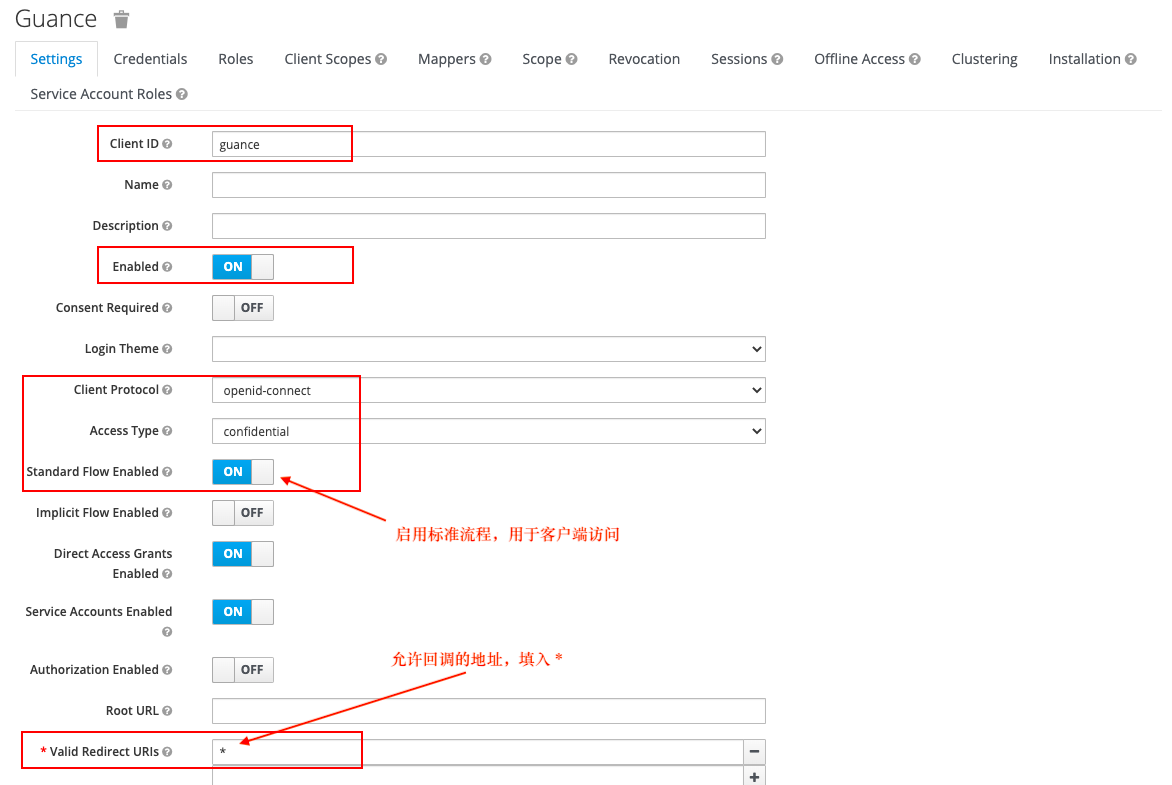
After creating the client, configure it according to the screenshot below and click Save:
- Client Protocol: openid-connect
- Access Type: confidential
- Standard Flow Enabled: ON
- Direct Access Grants Enabled: ON
- Service Accounts Enabled: ON
- Valid Redirect URIs: *
3. Configure Keycloak Users
4. Guance Launcher Configuration
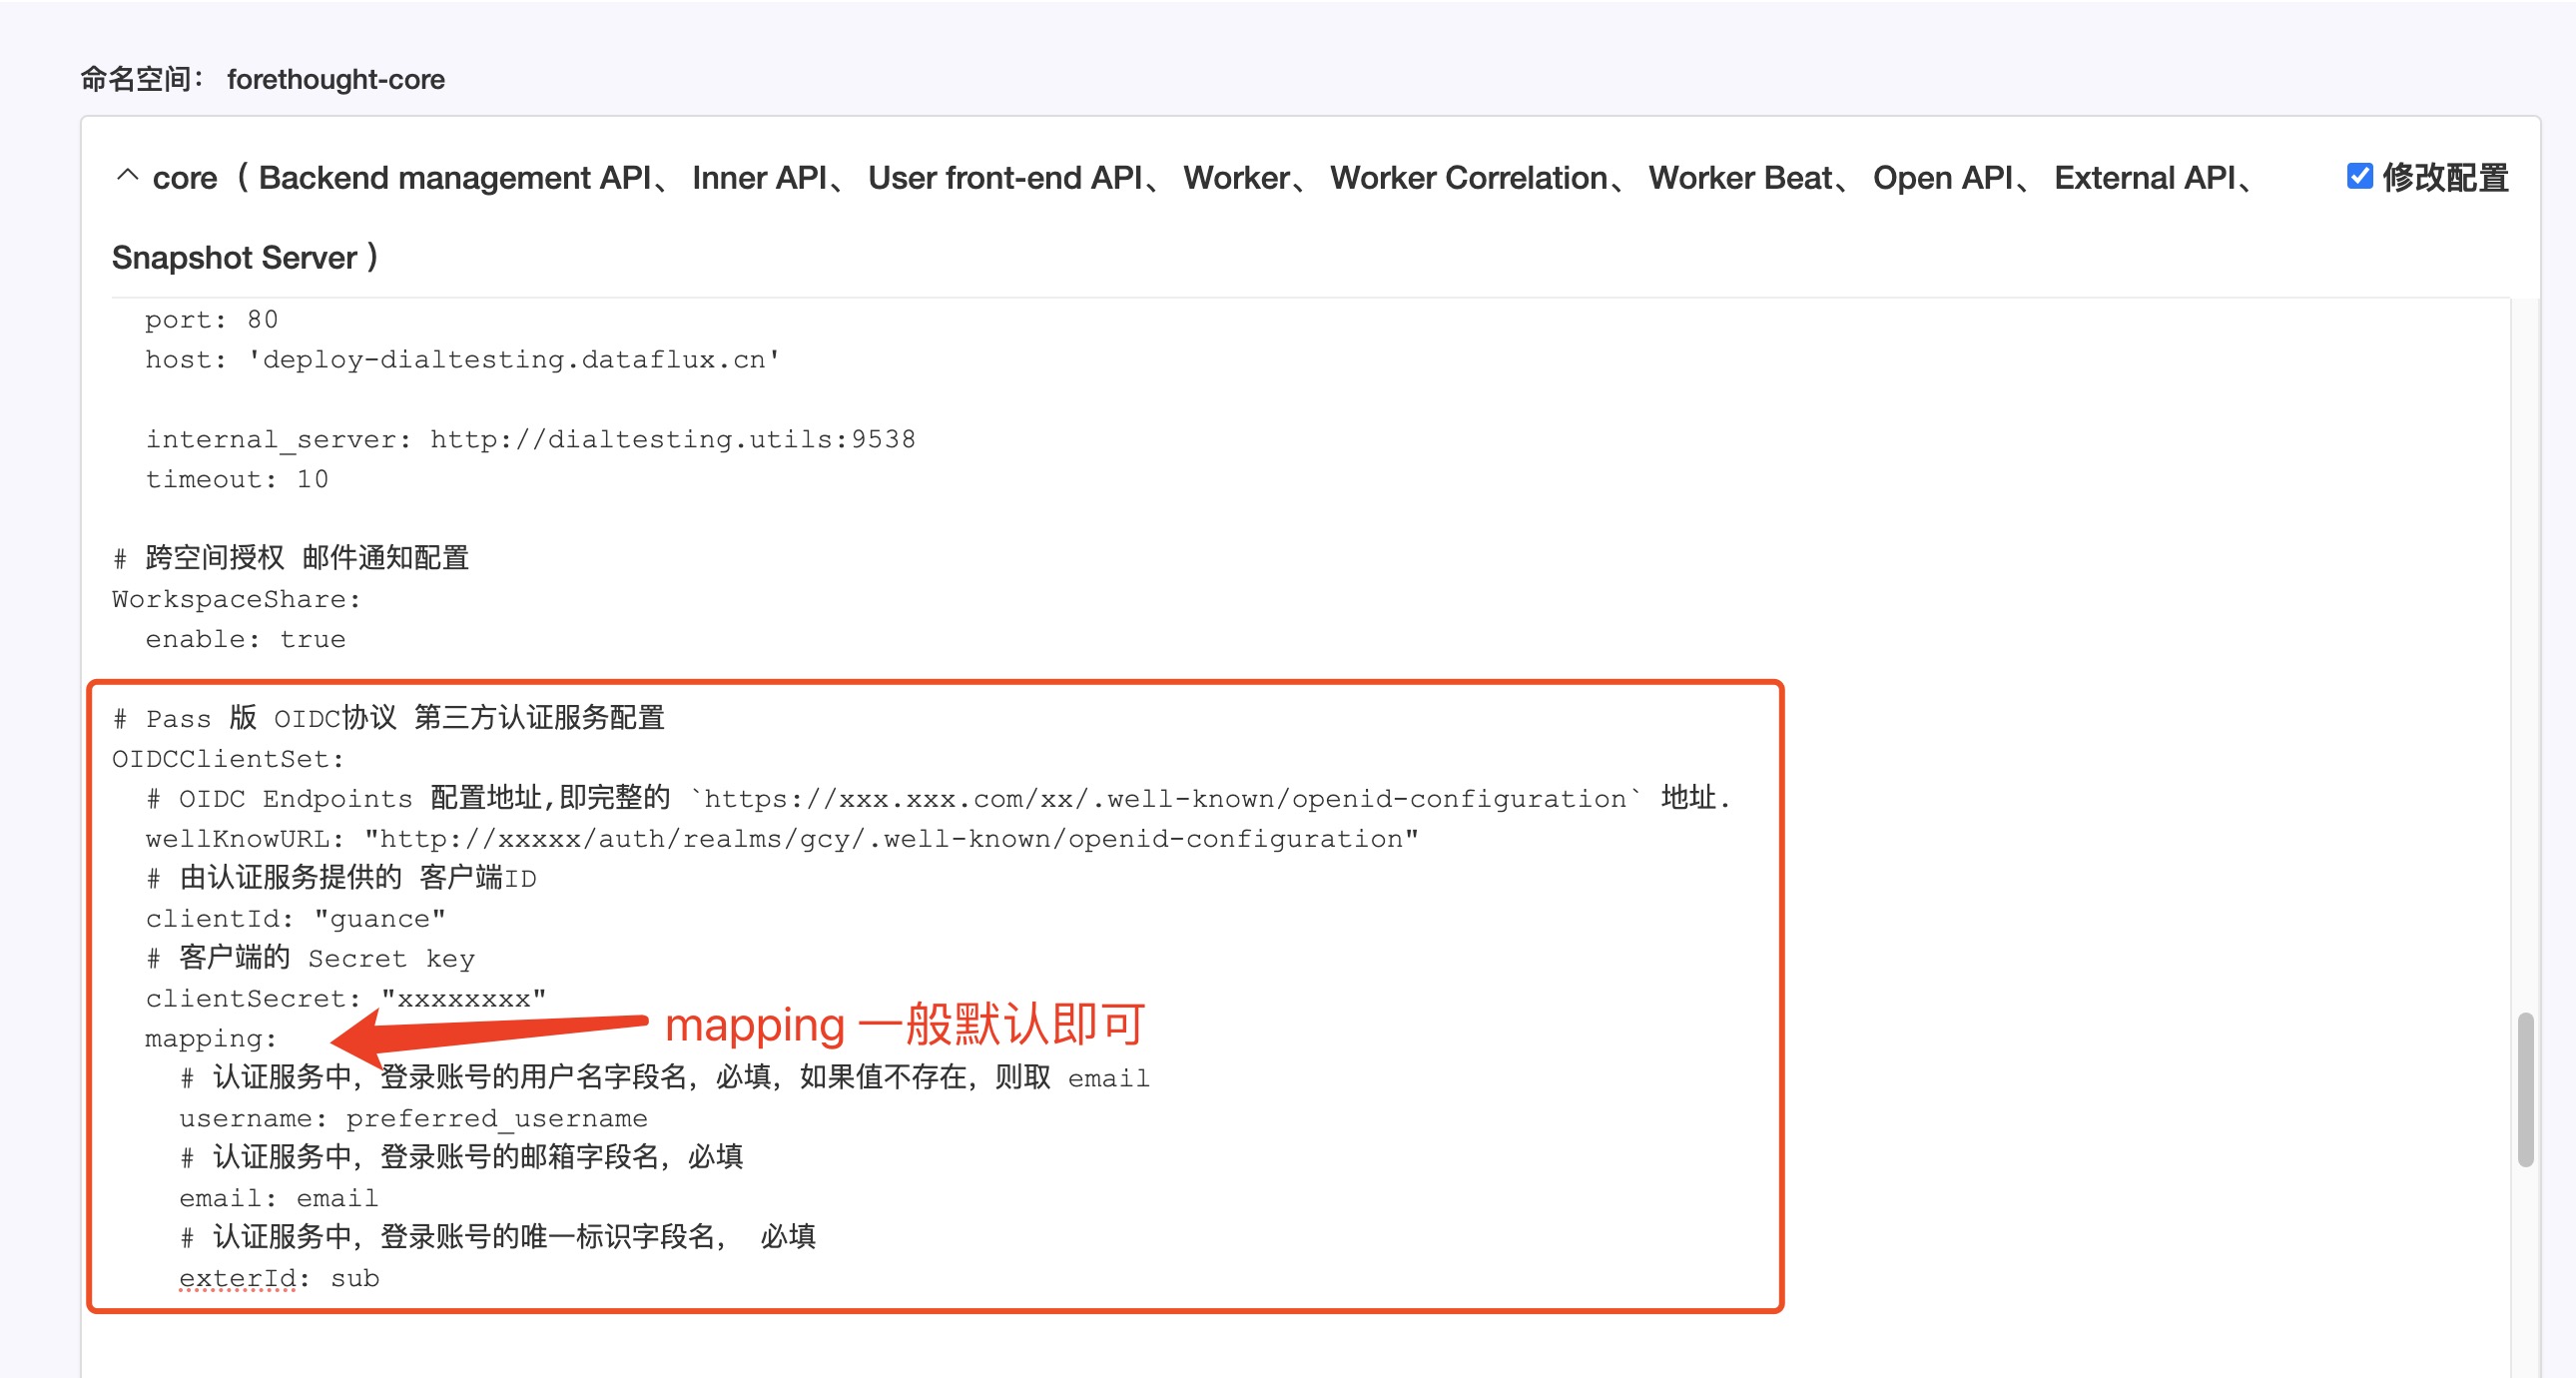
1) In the Guance Launcher namespace: forethought-core > core, configure the basic information of Keycloak.
# OIDC client configuration (if wellKnownURL is configured in this item, the KeyCloakPassSet configuration item automatically becomes invalid)
OIDCClientSet:
  # OIDC Endpoints configuration URL, i.e., the complete `https://xxx.xxx.com/xx/.well-known/openid-configuration` URL.
  wellKnowURL:
  # Client ID provided by the authentication service
  clientId:
  # Client's Secret key
  clientSecret:
  # Authentication method, currently only supports authorization_code
  grantType: authorization_code
  verify: false
  # Data access scope
  scope: "openid profile email address"
  # Callback URL after successful authentication by the authentication server
  innerUrl: "{}://{}/oidc/callback"
  # URL where the DF system redirects the user after obtaining user information from the authentication service
  frontUrl: "{}://{}/tomiddlepage?uuid={}"
  # Mapping configuration between account information obtained from the authentication service and DF system accounts, required fields include: username, email, exterId
  mapping:
    # Username of the login account from the authentication service, required; if not present, it defaults to email
    username: preferred_username
    # Email of the login account from the authentication service, required
    email: email
    # Phone number field name of the login account from the authentication service, optional
    mobile: phone_number
    # Unique identifier of the login account from the authentication service, required
    exterId: sub
Refer to the example image:
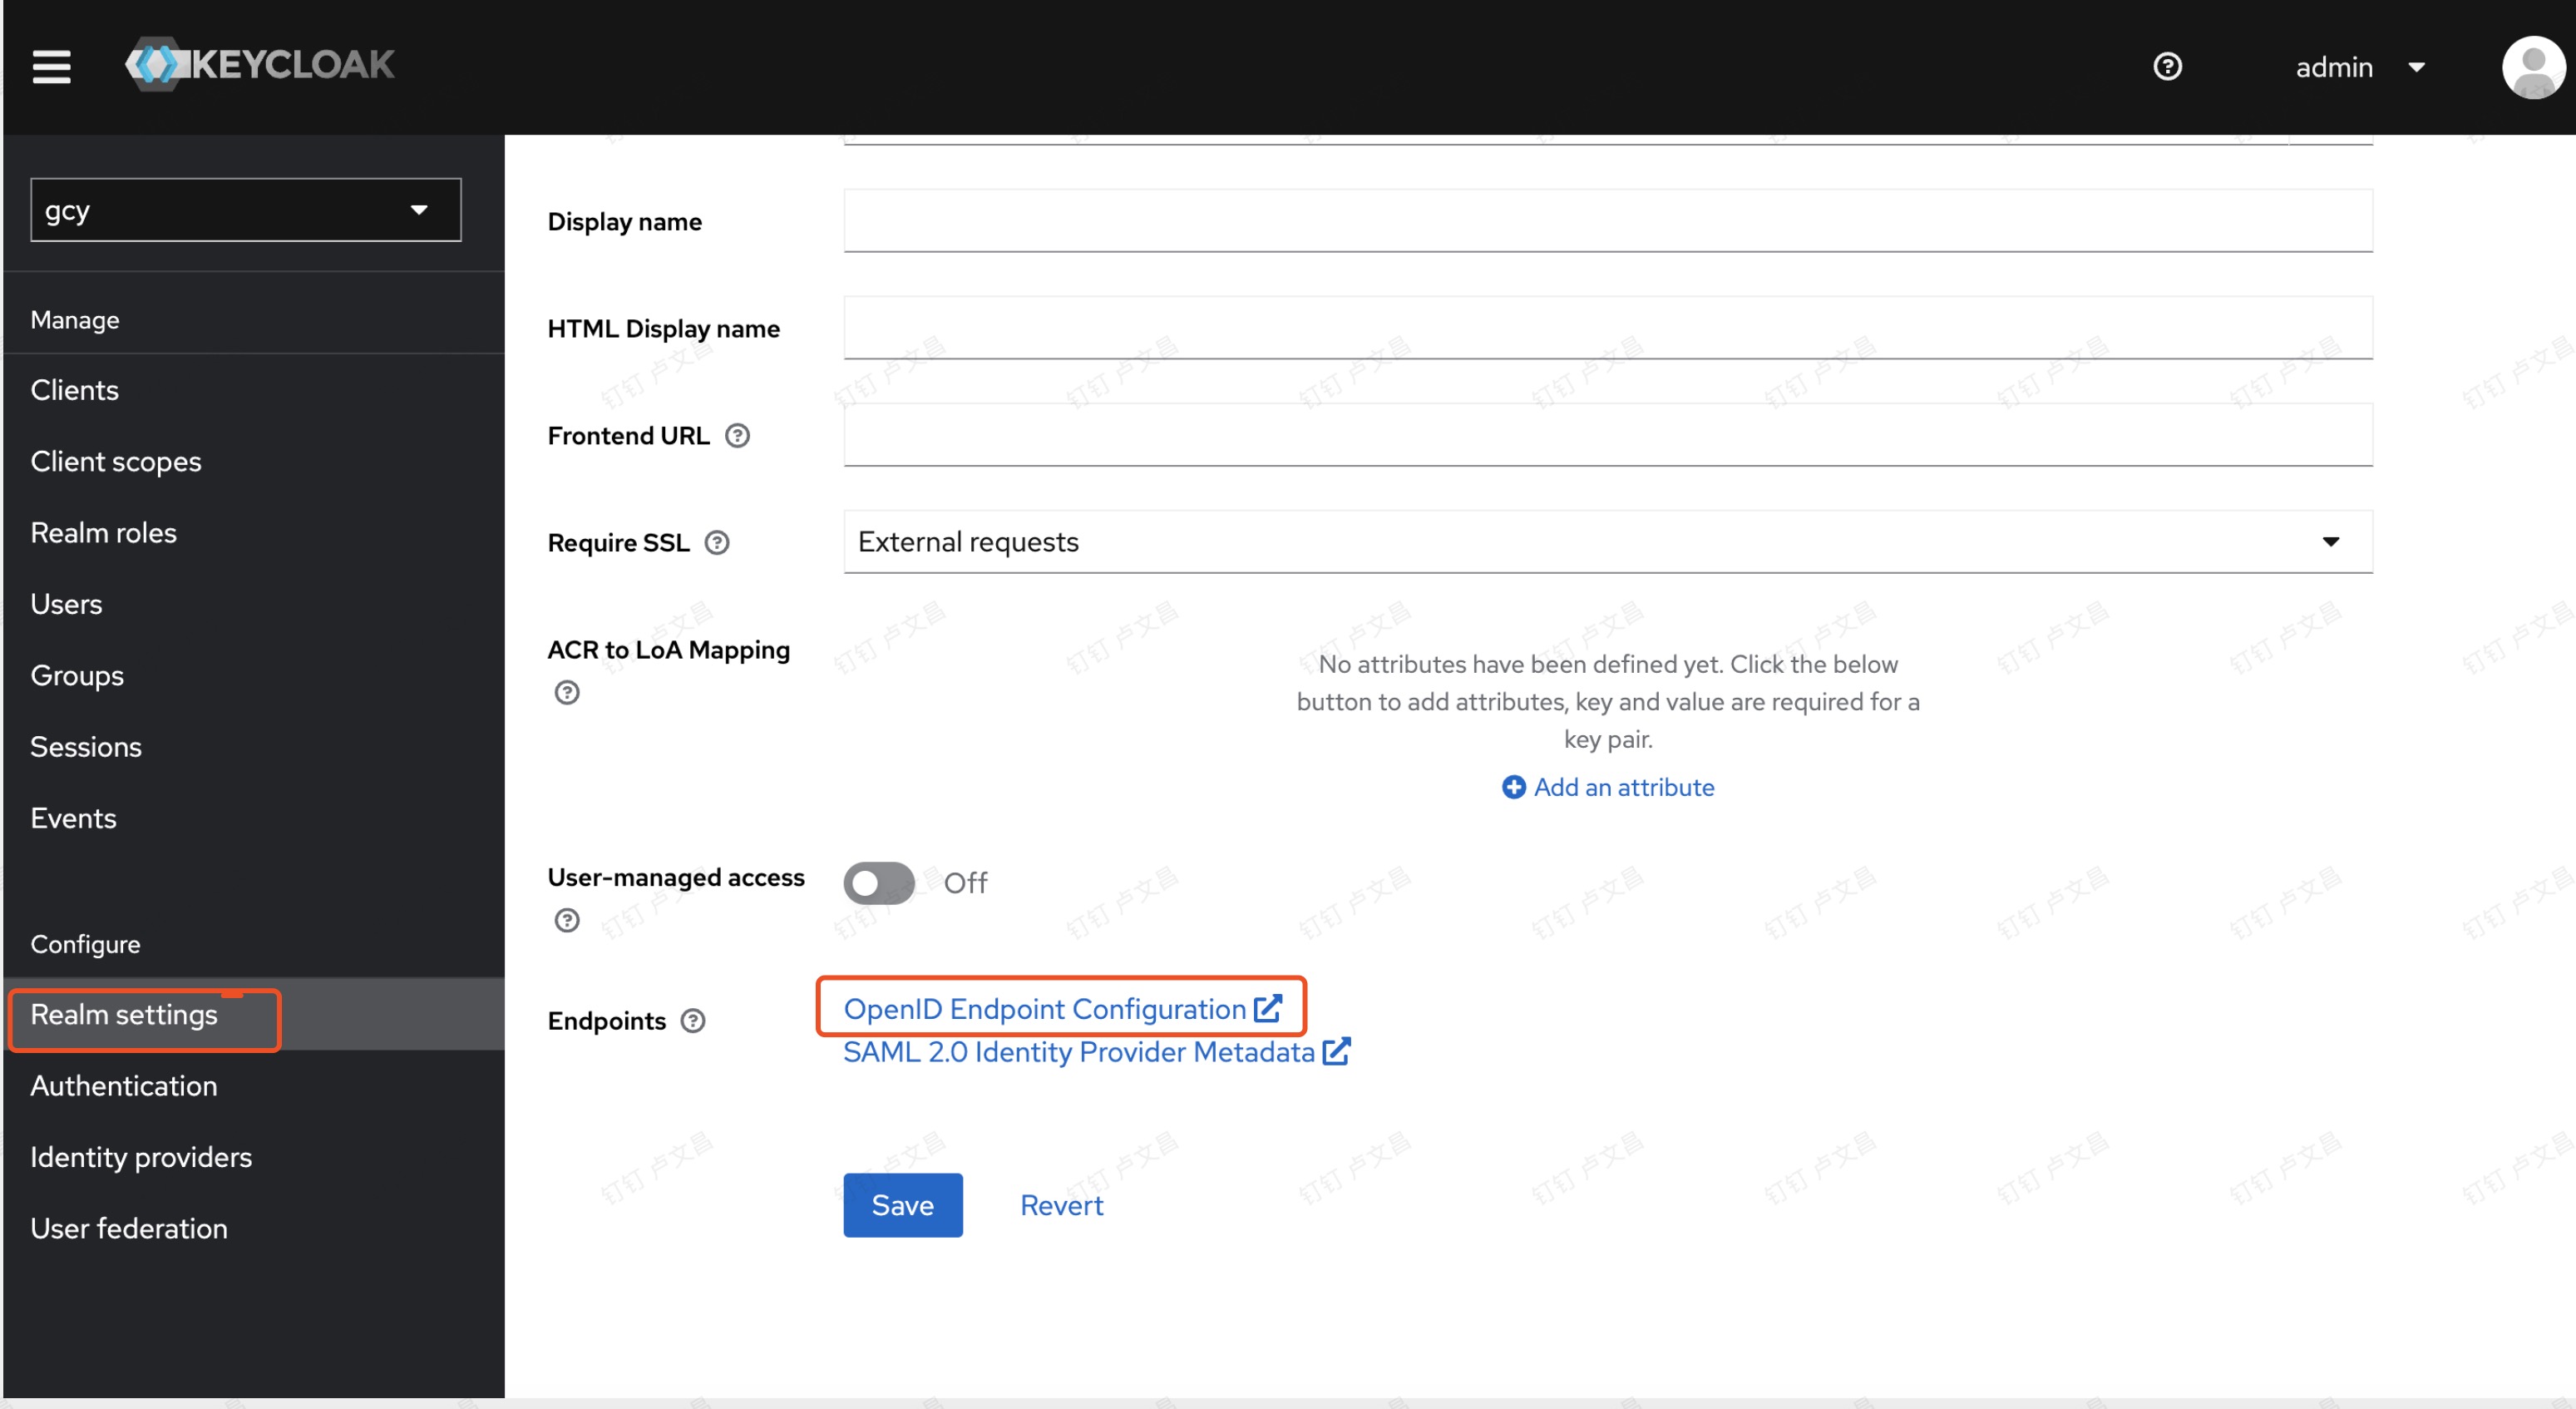
The “wellKnowURL:” in the above example image can be obtained from Realm Settings > General > Endpoints.
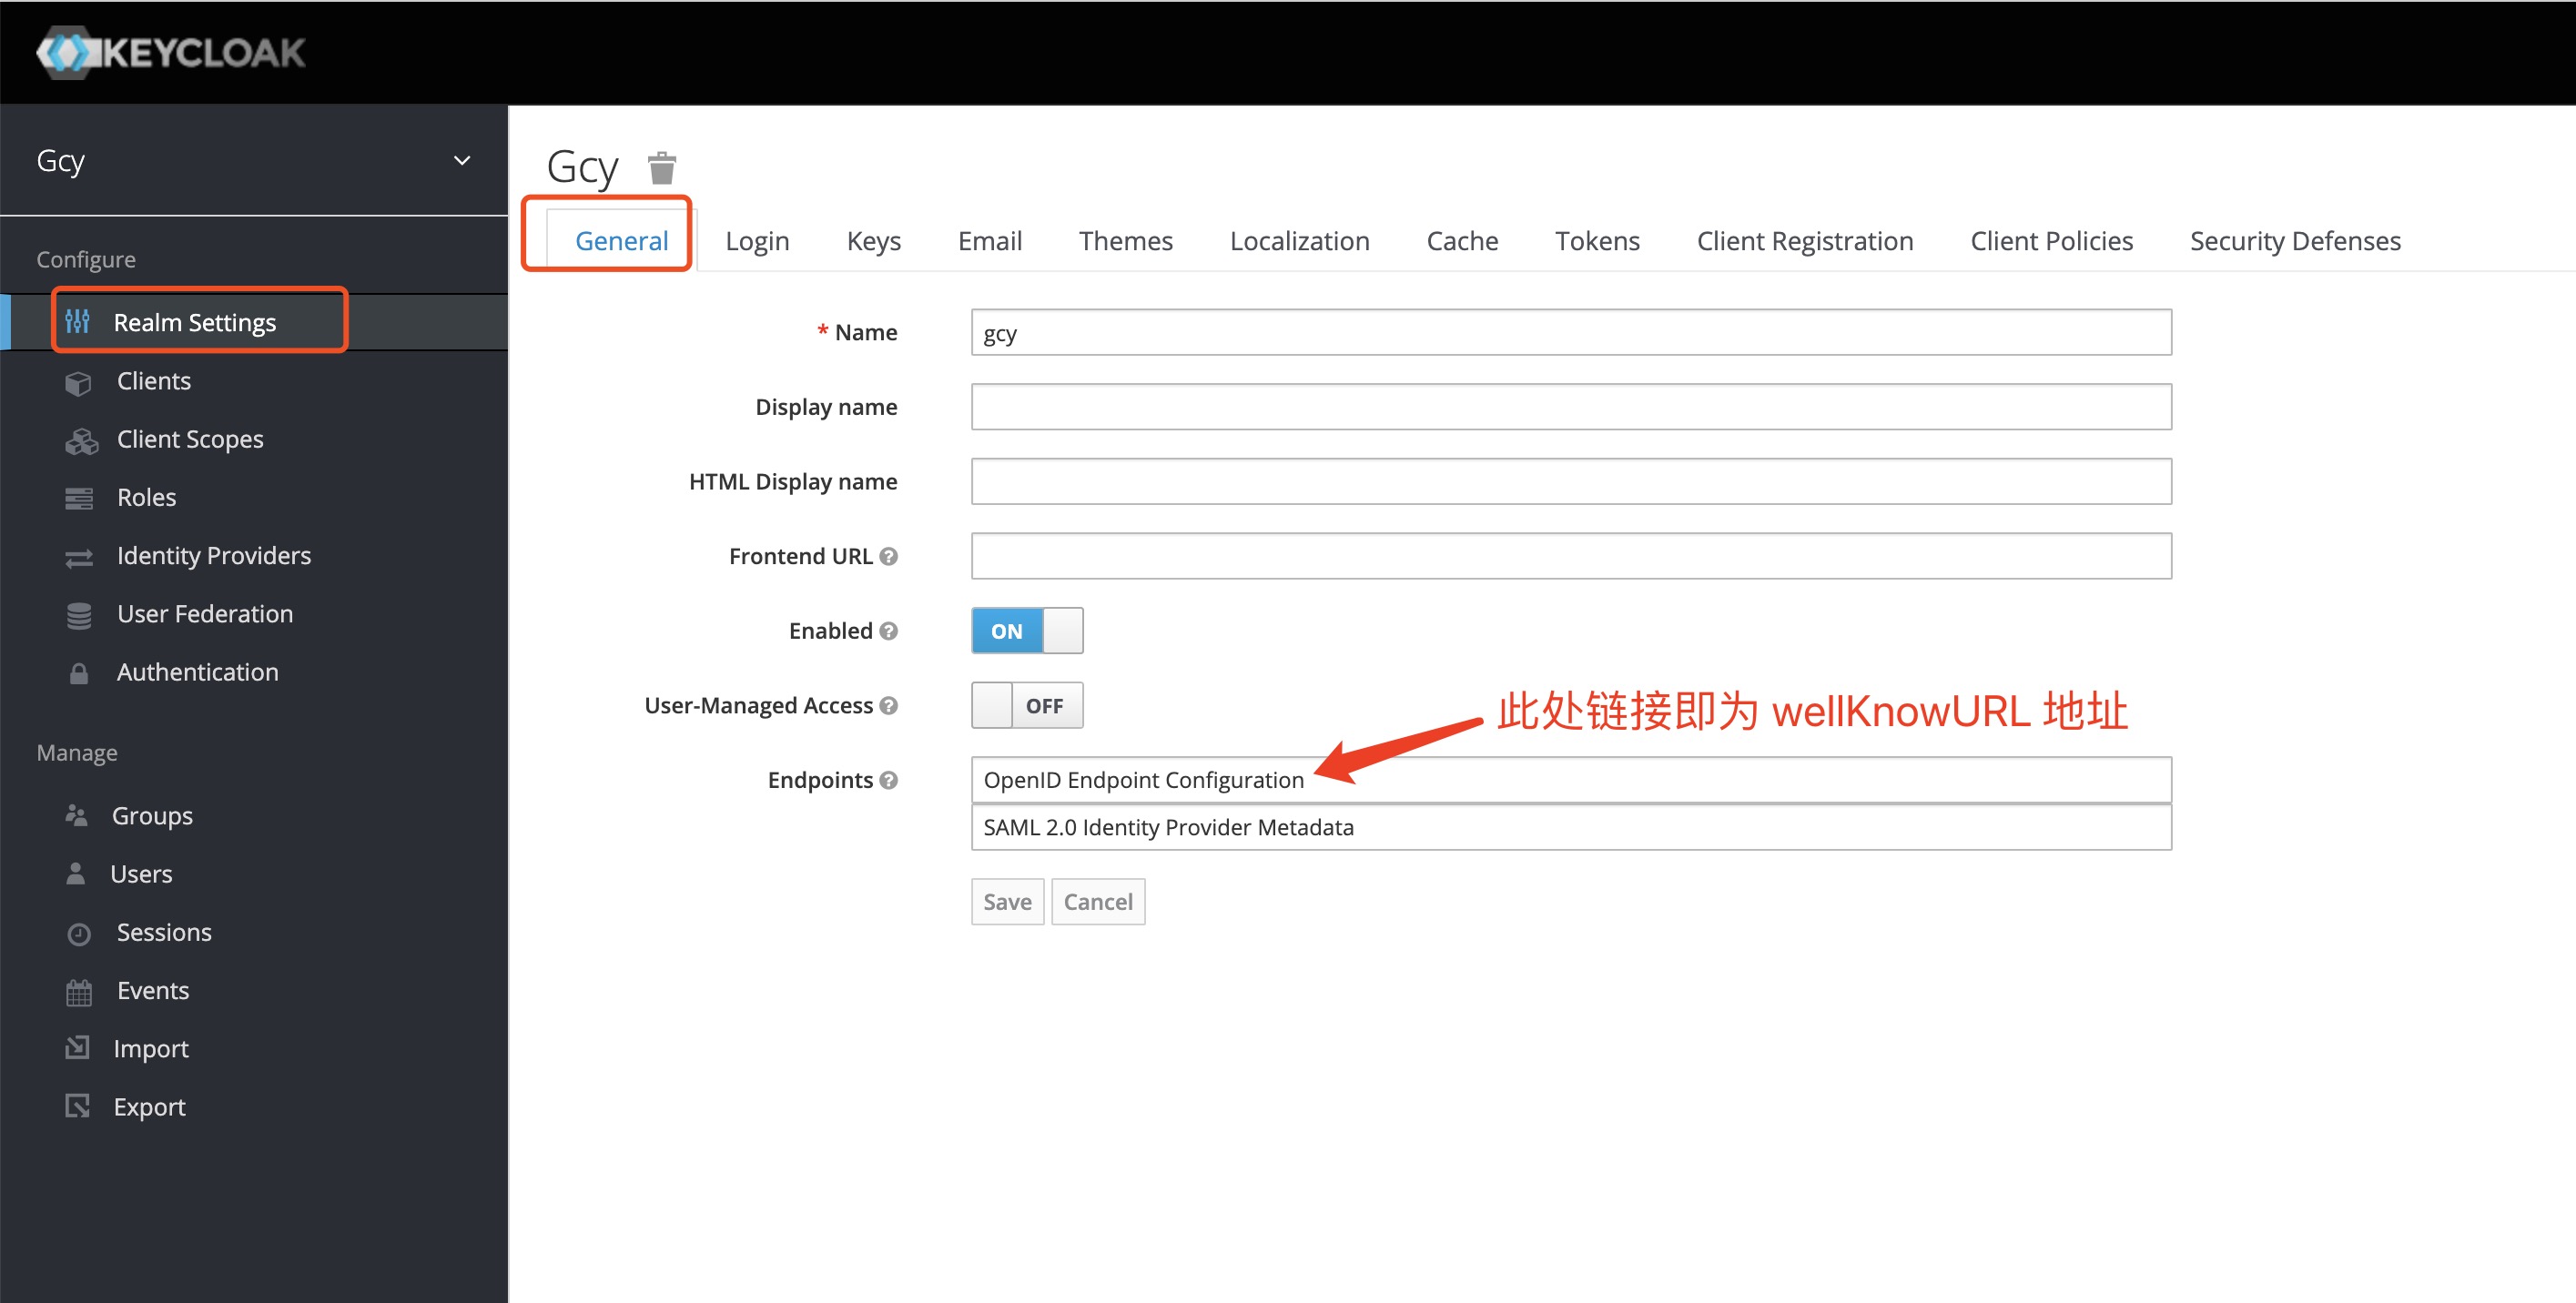 or
or
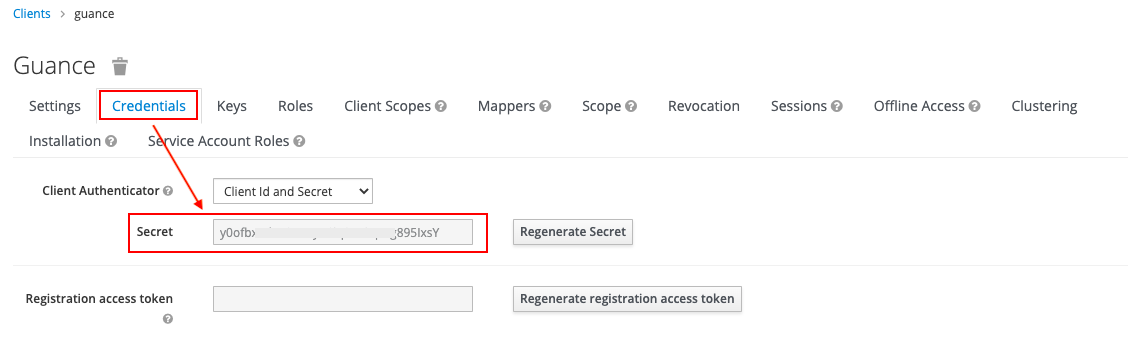
The “clientSecret:” in the example image can be obtained from Client > Client ID (e.g., Guance) > Credentials.
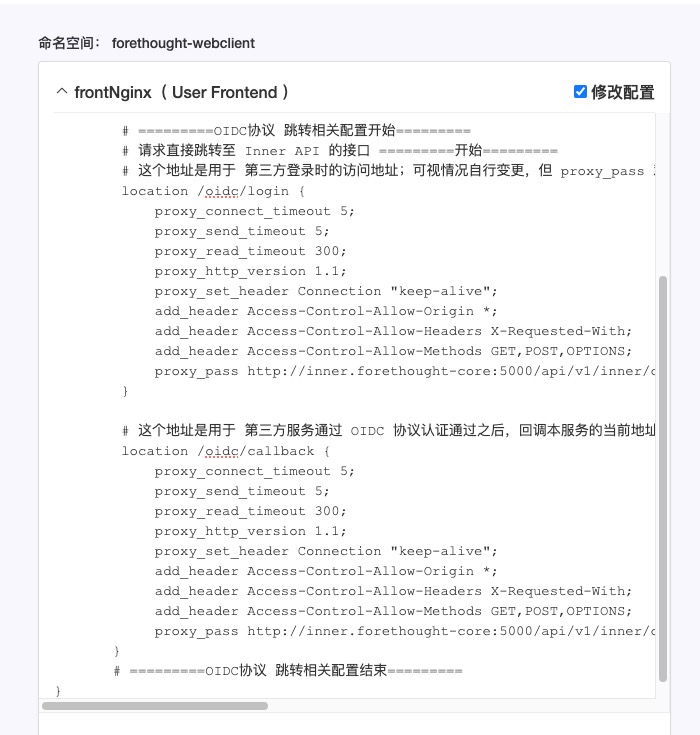
2) In the Guance Launcher namespace: forethought-webclient > frontNginx, configure the redirection information.
        # =========OIDC Protocol Redirection Configuration Start=========
        # Request directly redirected to Inner API endpoint ==========Start=========
        # This address is used for third-party login access; adjust as needed, but do not change the proxy_pass route address
        location /oidc/login {
            proxy_connect_timeout 5;
            proxy_send_timeout 5;
            proxy_read_timeout 300;
            proxy_http_version 1.1;
            proxy_set_header Connection "keep-alive";
            add_header Access-Control-Allow-Origin *;
            add_header Access-Control-Allow-Headers X-Requested-With;
            add_header Access-Control-Allow-Methods GET,POST,OPTIONS;
            proxy_pass http://inner.forethought-core:5000/api/v1/inner/oidc/login;
        }

        # This address is used for callback after successful OIDC protocol authentication by third-party services; this address should be synchronized with the innerUrl configuration under OIDCClientSet in [3.2.1]; do not change the proxy_pass value
        location /oidc/callback {
            proxy_connect_timeout 5;
            proxy_send_timeout 5;
            proxy_read_timeout 300;
            proxy_http_version 1.1;
            proxy_set_header Connection "keep-alive";
            add_header Access-Control-Allow-Origin *;
            add_header Access-Control-Allow-Headers X-Requested-With;
            add_header Access-Control-Allow-Methods GET,POST,OPTIONS;
            proxy_pass http://inner.forethought-core:5000/api/v1/inner/oidc/callback;
       }
       # =========OIDC Protocol Redirection Configuration End=========
Refer to the example image:
3) In the Guance Launcher namespace: forethought-webclient > frontWeb, configure the entry URL for Keycloak users to log into Guance Deployment Plan.
window.DEPLOYCONFIG = {

    ......

    paasCustomLoginInfo:[
        {url:"http://Guance deployment domain/oidc/login", label:"Keycloak Login"}
    ],
    paasCustomLoginUrl: "https://<customer-provided logout URL>?redirect_url=https://Guance Web login domain/oidc/login"


    ......

};
Refer to the example image:

4) After completing the configuration, check the updated Modify Configuration option and confirm the restart.

5. Use Keycloak Account for Single Sign-On to Guance
After all configurations are completed, you can use single sign-on to Guance.
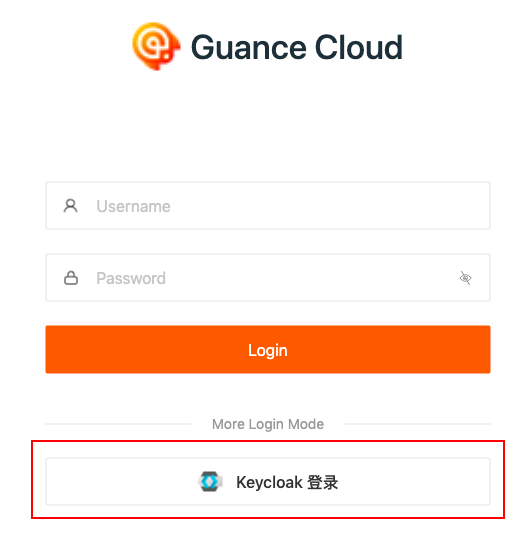
1) Open the Guance Deployment Plan login URL, and select Keycloak Single Sign-On on the login page.
2) Enter the email address configured in Keycloak.
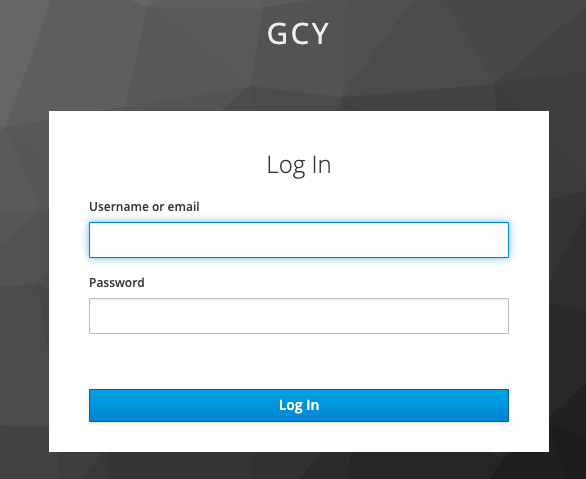
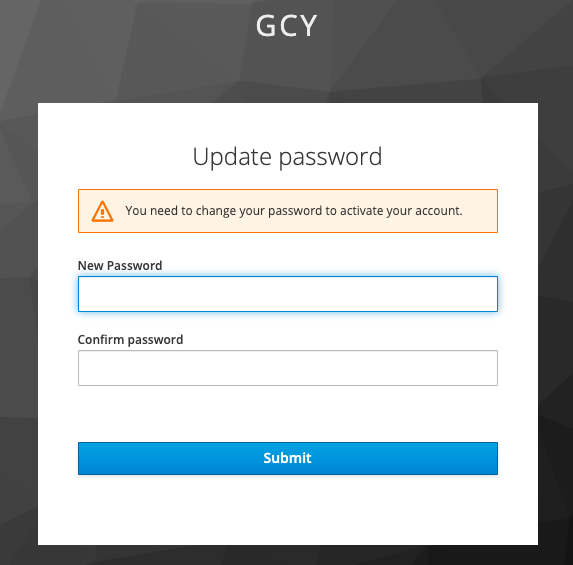
3) Update the login password.
4) Log in to the corresponding workspace in Guance.
Warning
- If prompted with "This account is not part of any workspace, please go to the management backend to add this account to a workspace.", you need to log into the Guance management backend to add the user to a workspace.
For more details, refer to the documentation Workspace Management for Deployment Plan.

After adding the workspace for the user in the Guance management backend, the user can start using Guance.
