Cloud Account Management
Enterprises often need to use multiple cloud service accounts to meet different business needs during day-to-day operations. However, when these cloud services experience failures, scattered management approaches can reduce efficiency and increase operational costs.
The Cloud Account Management feature centralizes all of your enterprise's cloud service accounts for unified management, and distinguishes accounts based on the uniqueness of certain configurations under each account. By configuring integration collectors, cloud services under each account can be managed independently, enabling fine-grained control over business data.
This management approach not only simplifies the cloud service management process, but also helps quickly locate and resolve service failures, significantly reducing management costs and improving failure response speed.
Note
Currently, this feature only supports configuration by Workspace Owners and Admins.
Add Authorization
The following cloud account types are currently supported for authorization.
Account Tags
All cloud account types support account tags. You can add them as needed when creating or editing a cloud account. Not configuring tags does not affect cloud account authorization.
Account tags are used to add custom tags to the data collected for the cloud account, making it easy to filter, group, and analyze data by dimensions such as environment and business.
- In the Account Tags area, enter the tag name and value, for example, name
envand valueproduction; - Click Add to add the tag to the current cloud account configuration;
- To add more tags, repeat the above steps;
- After completing the account information configuration, click Test. Once the test passes, click Save.
Tag entry rules:
- The name and value of each tag cannot be empty;
- Names can only contain English letters, numbers, and underscores, and cannot start with a double underscore
__.
Manage Authorization
All successfully created cloud accounts are displayed on the Integrations > Cloud Account Management page. You can perform the following operations:
- Use the upper-right corner to quickly filter by type;
- Enter the cloud account alias directly in the search bar to locate it;
- Use the settings button to delete the account directly;
- Click an account entry to edit it again.
Configure Integrations
Once the cloud account is created, the authorization to Guance is complete. You can install integrations under the account as needed to start data collection.
Prerequisites
DataFlux Func (Automata) is enabled.
Note
Different integrations require authorization for different resources. Grant the corresponding permissions to the cloud account as required by the Integrations documentation. Otherwise, the integration may install successfully, but data collection may fail.
Configure from Cloud Account Information
Click into the cloud account details page > Integrations to view all related integrations under the current account.
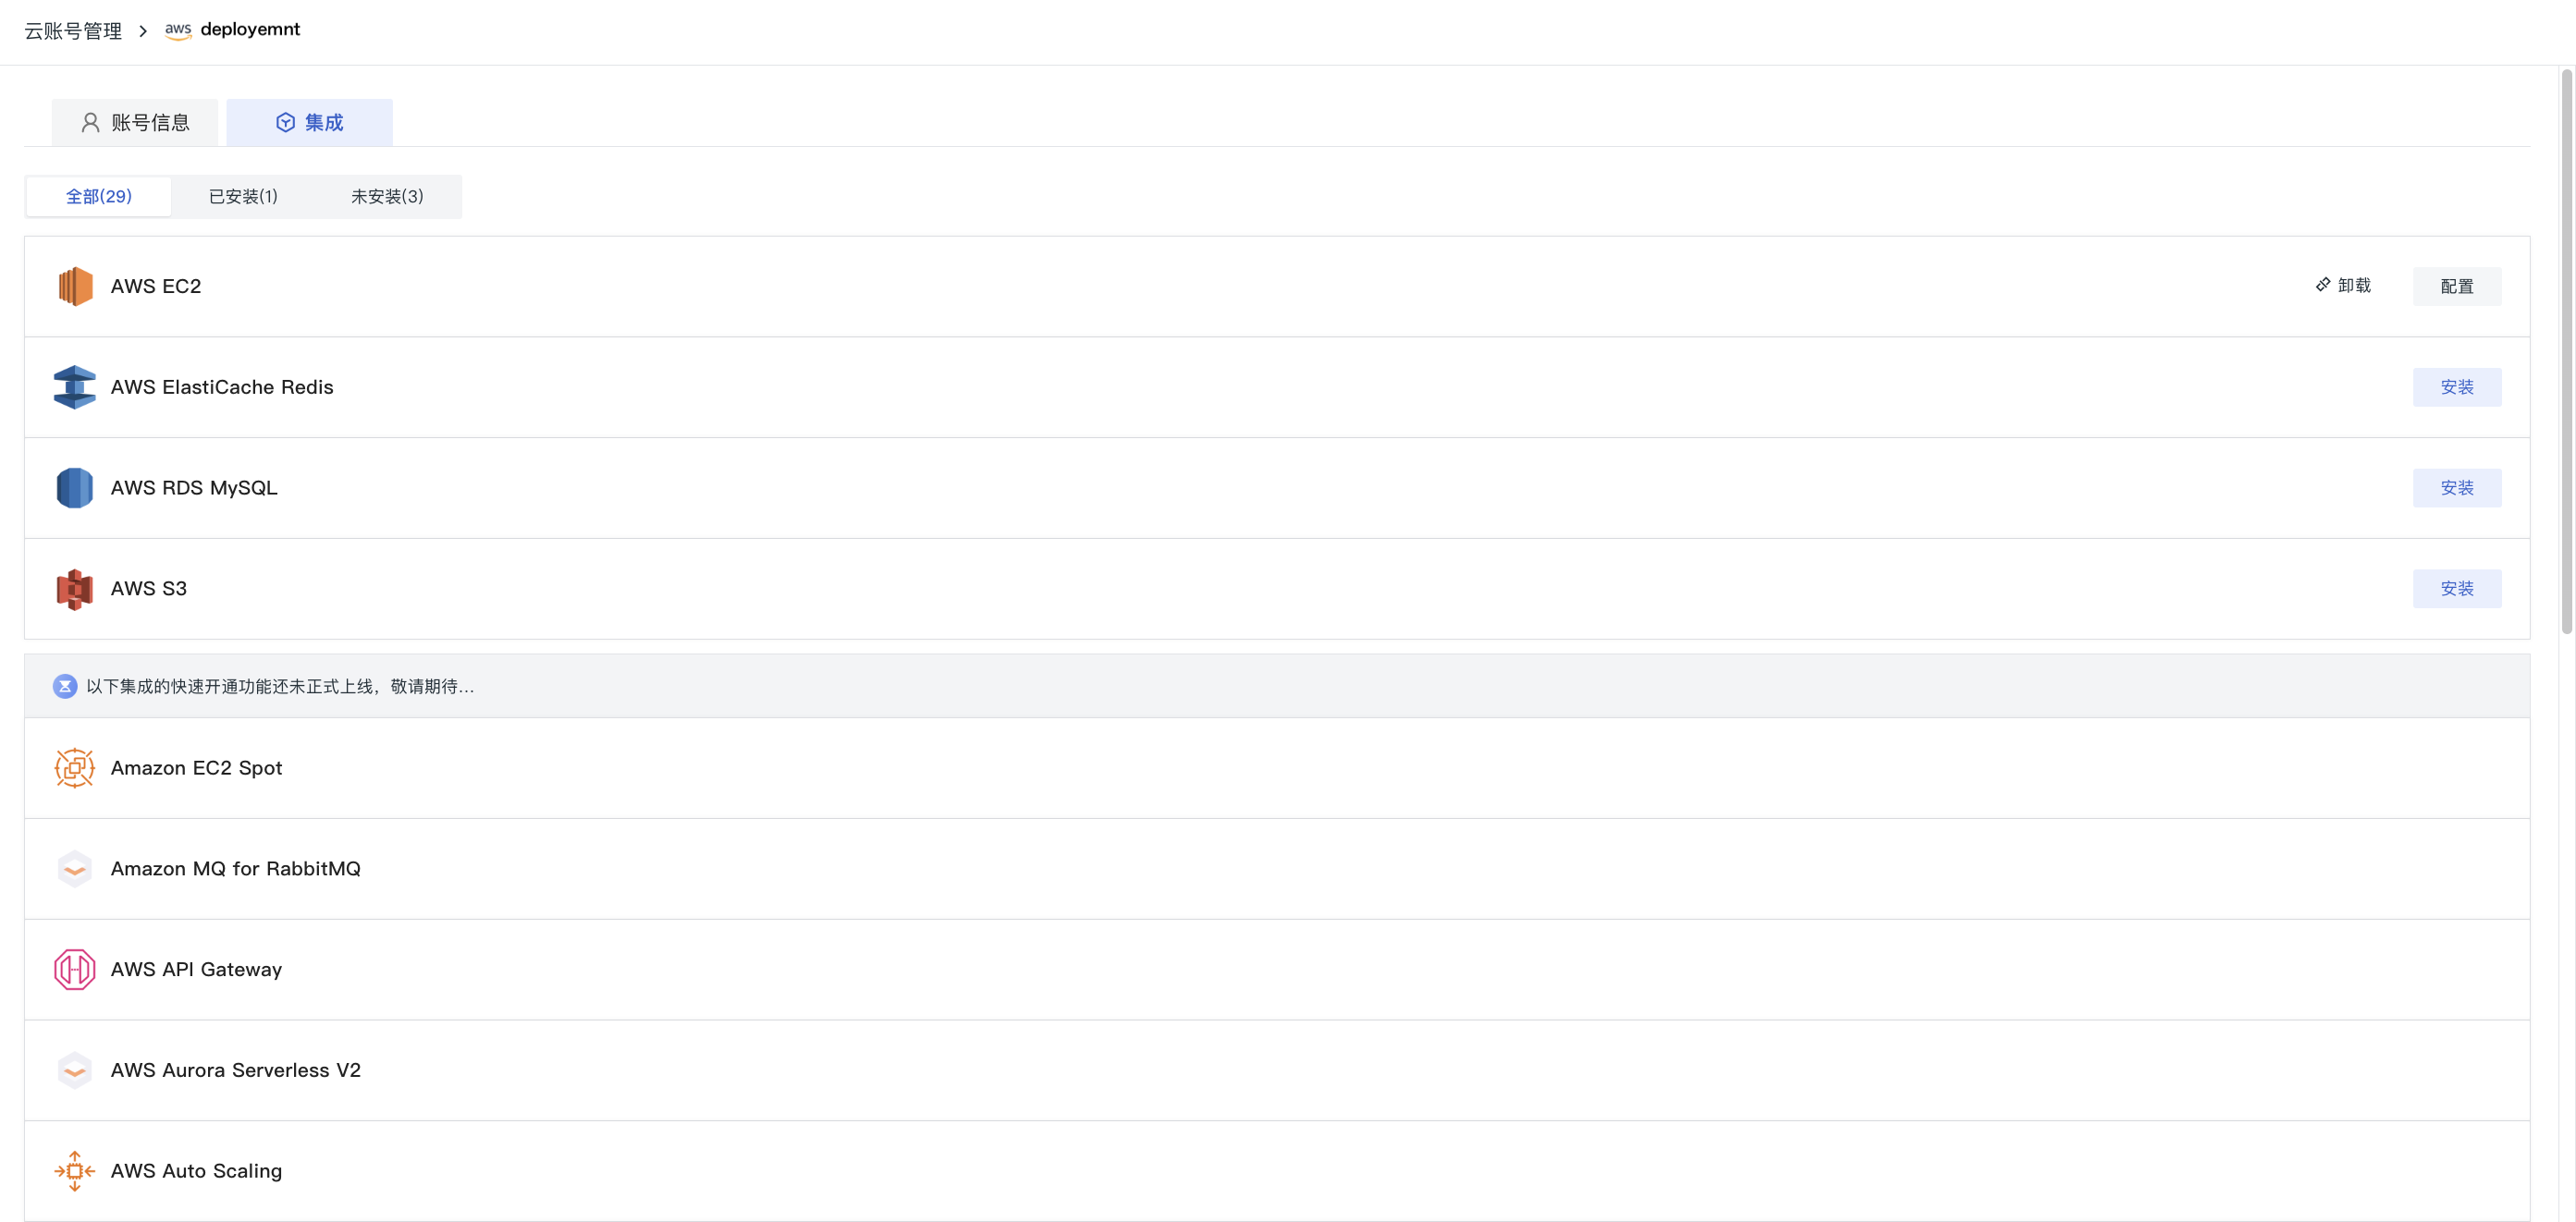
Click Install on the right to enter the automatic installation page:
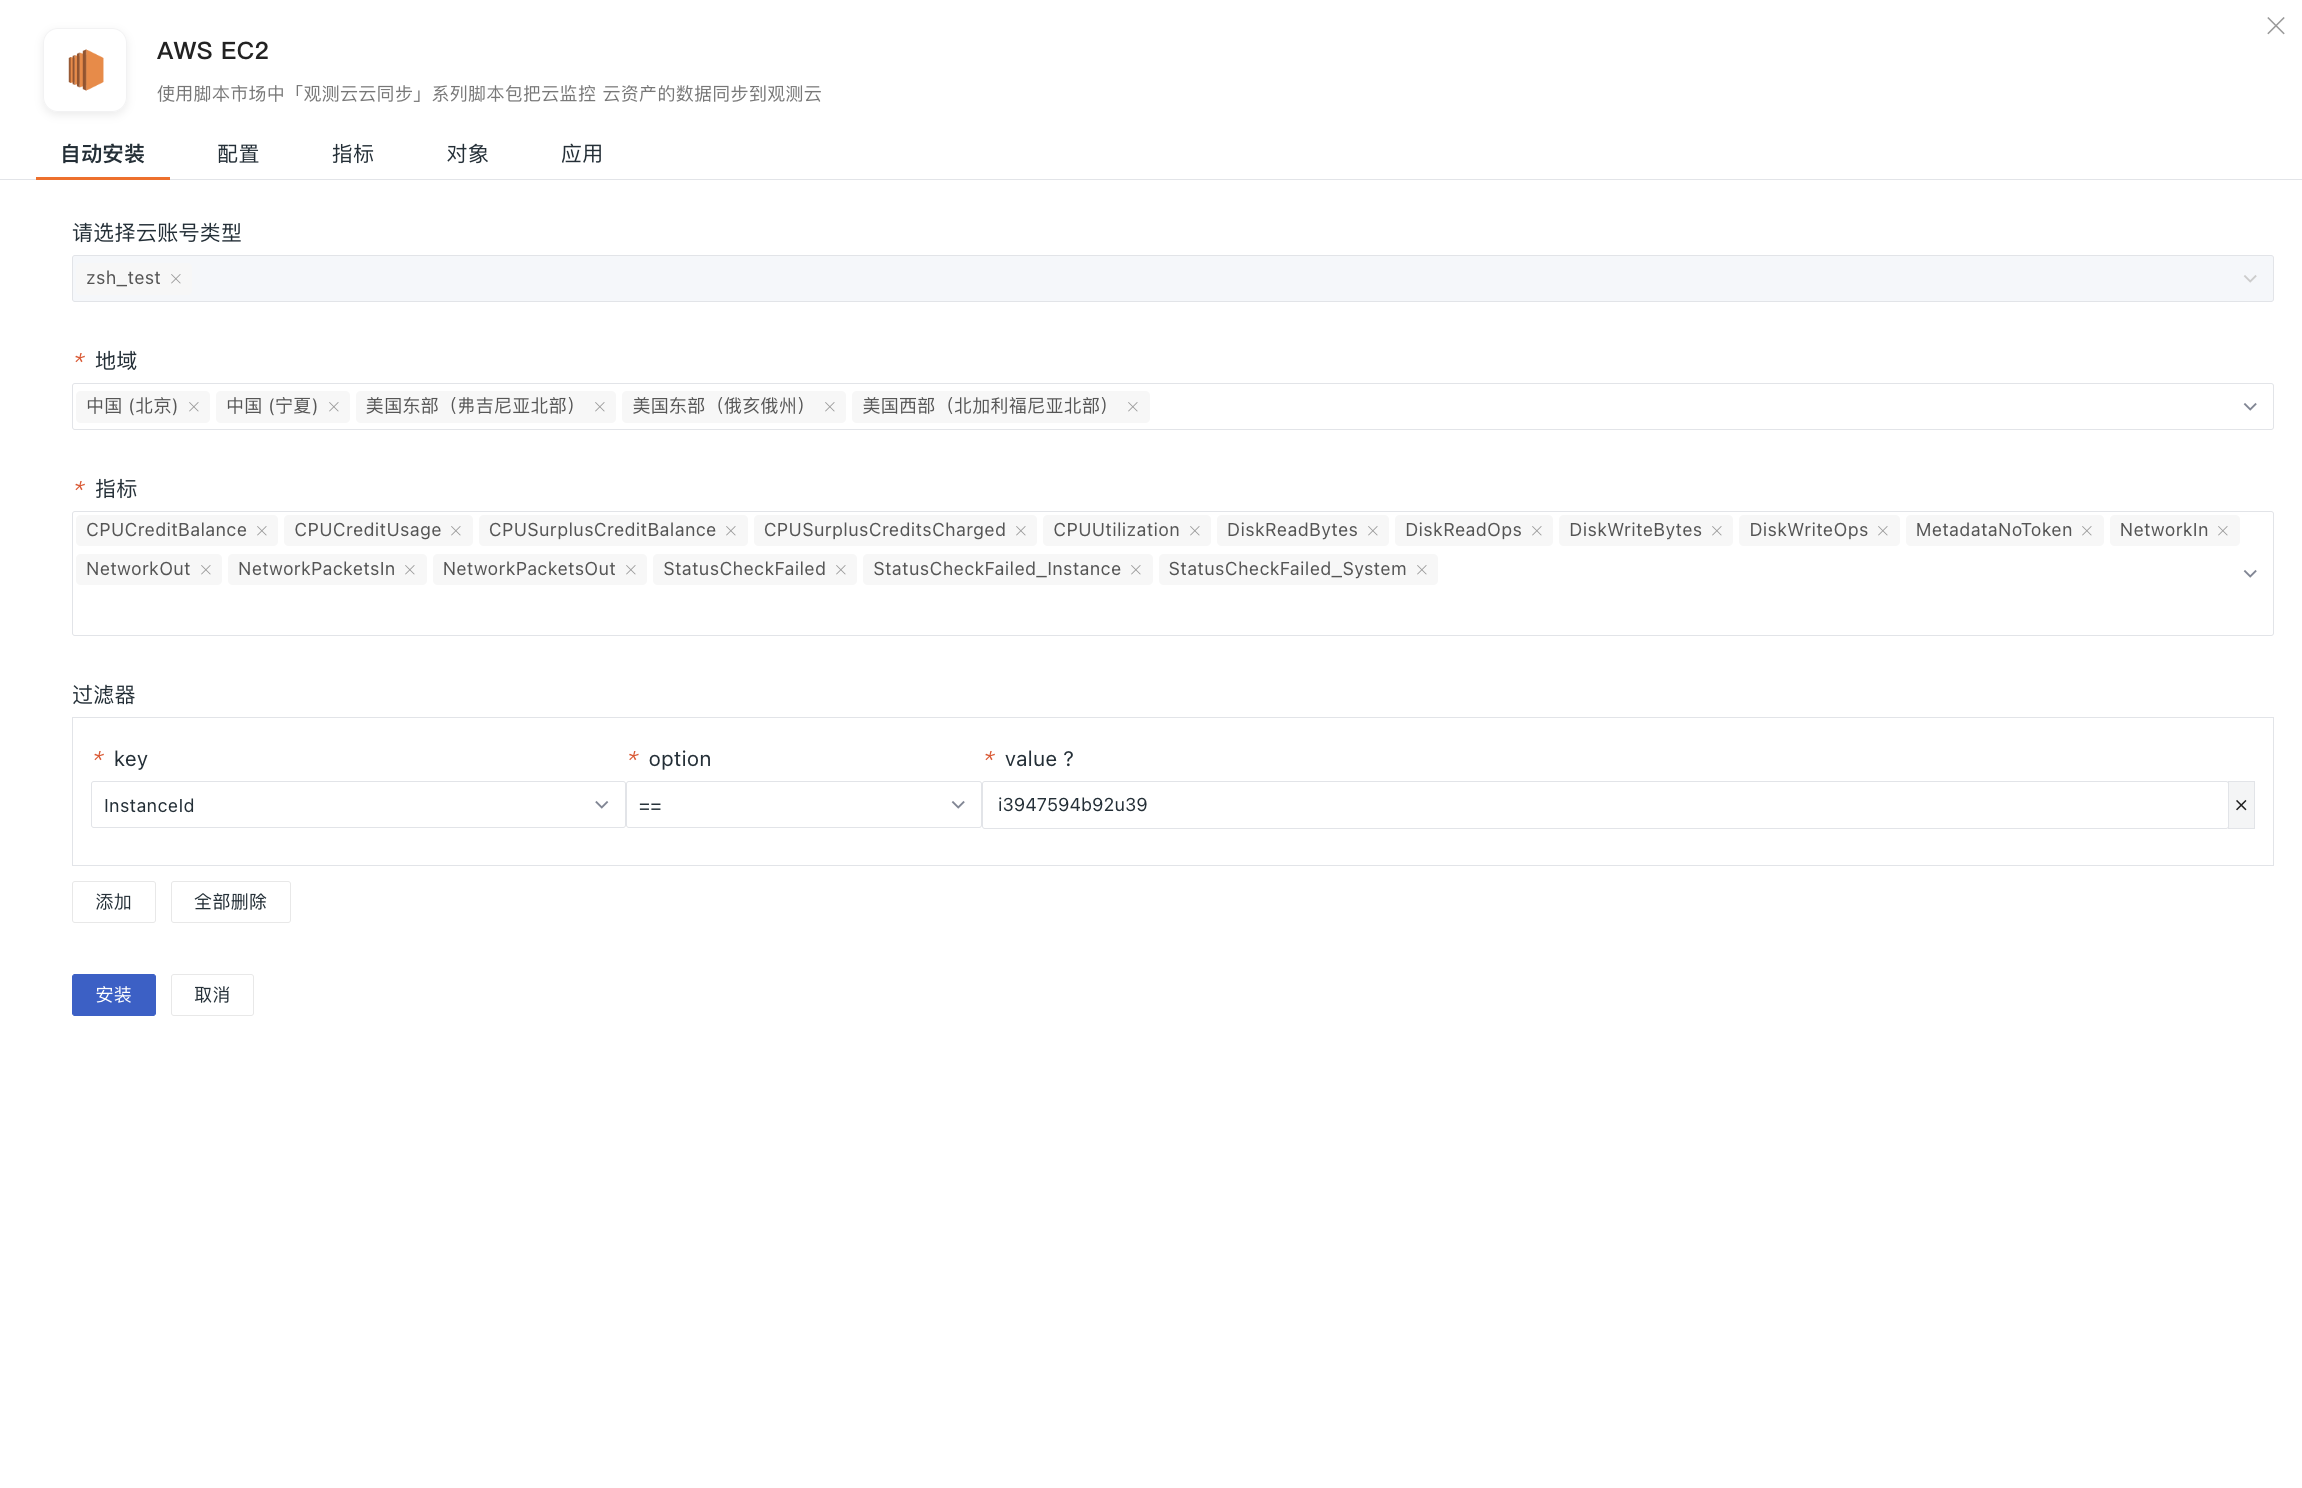
- The cloud account is automatically populated;
- Select the applicable region type as needed;
- The system automatically identifies the metrics included in the current integration script; you can add or remove metrics as needed;
- Filters currently support
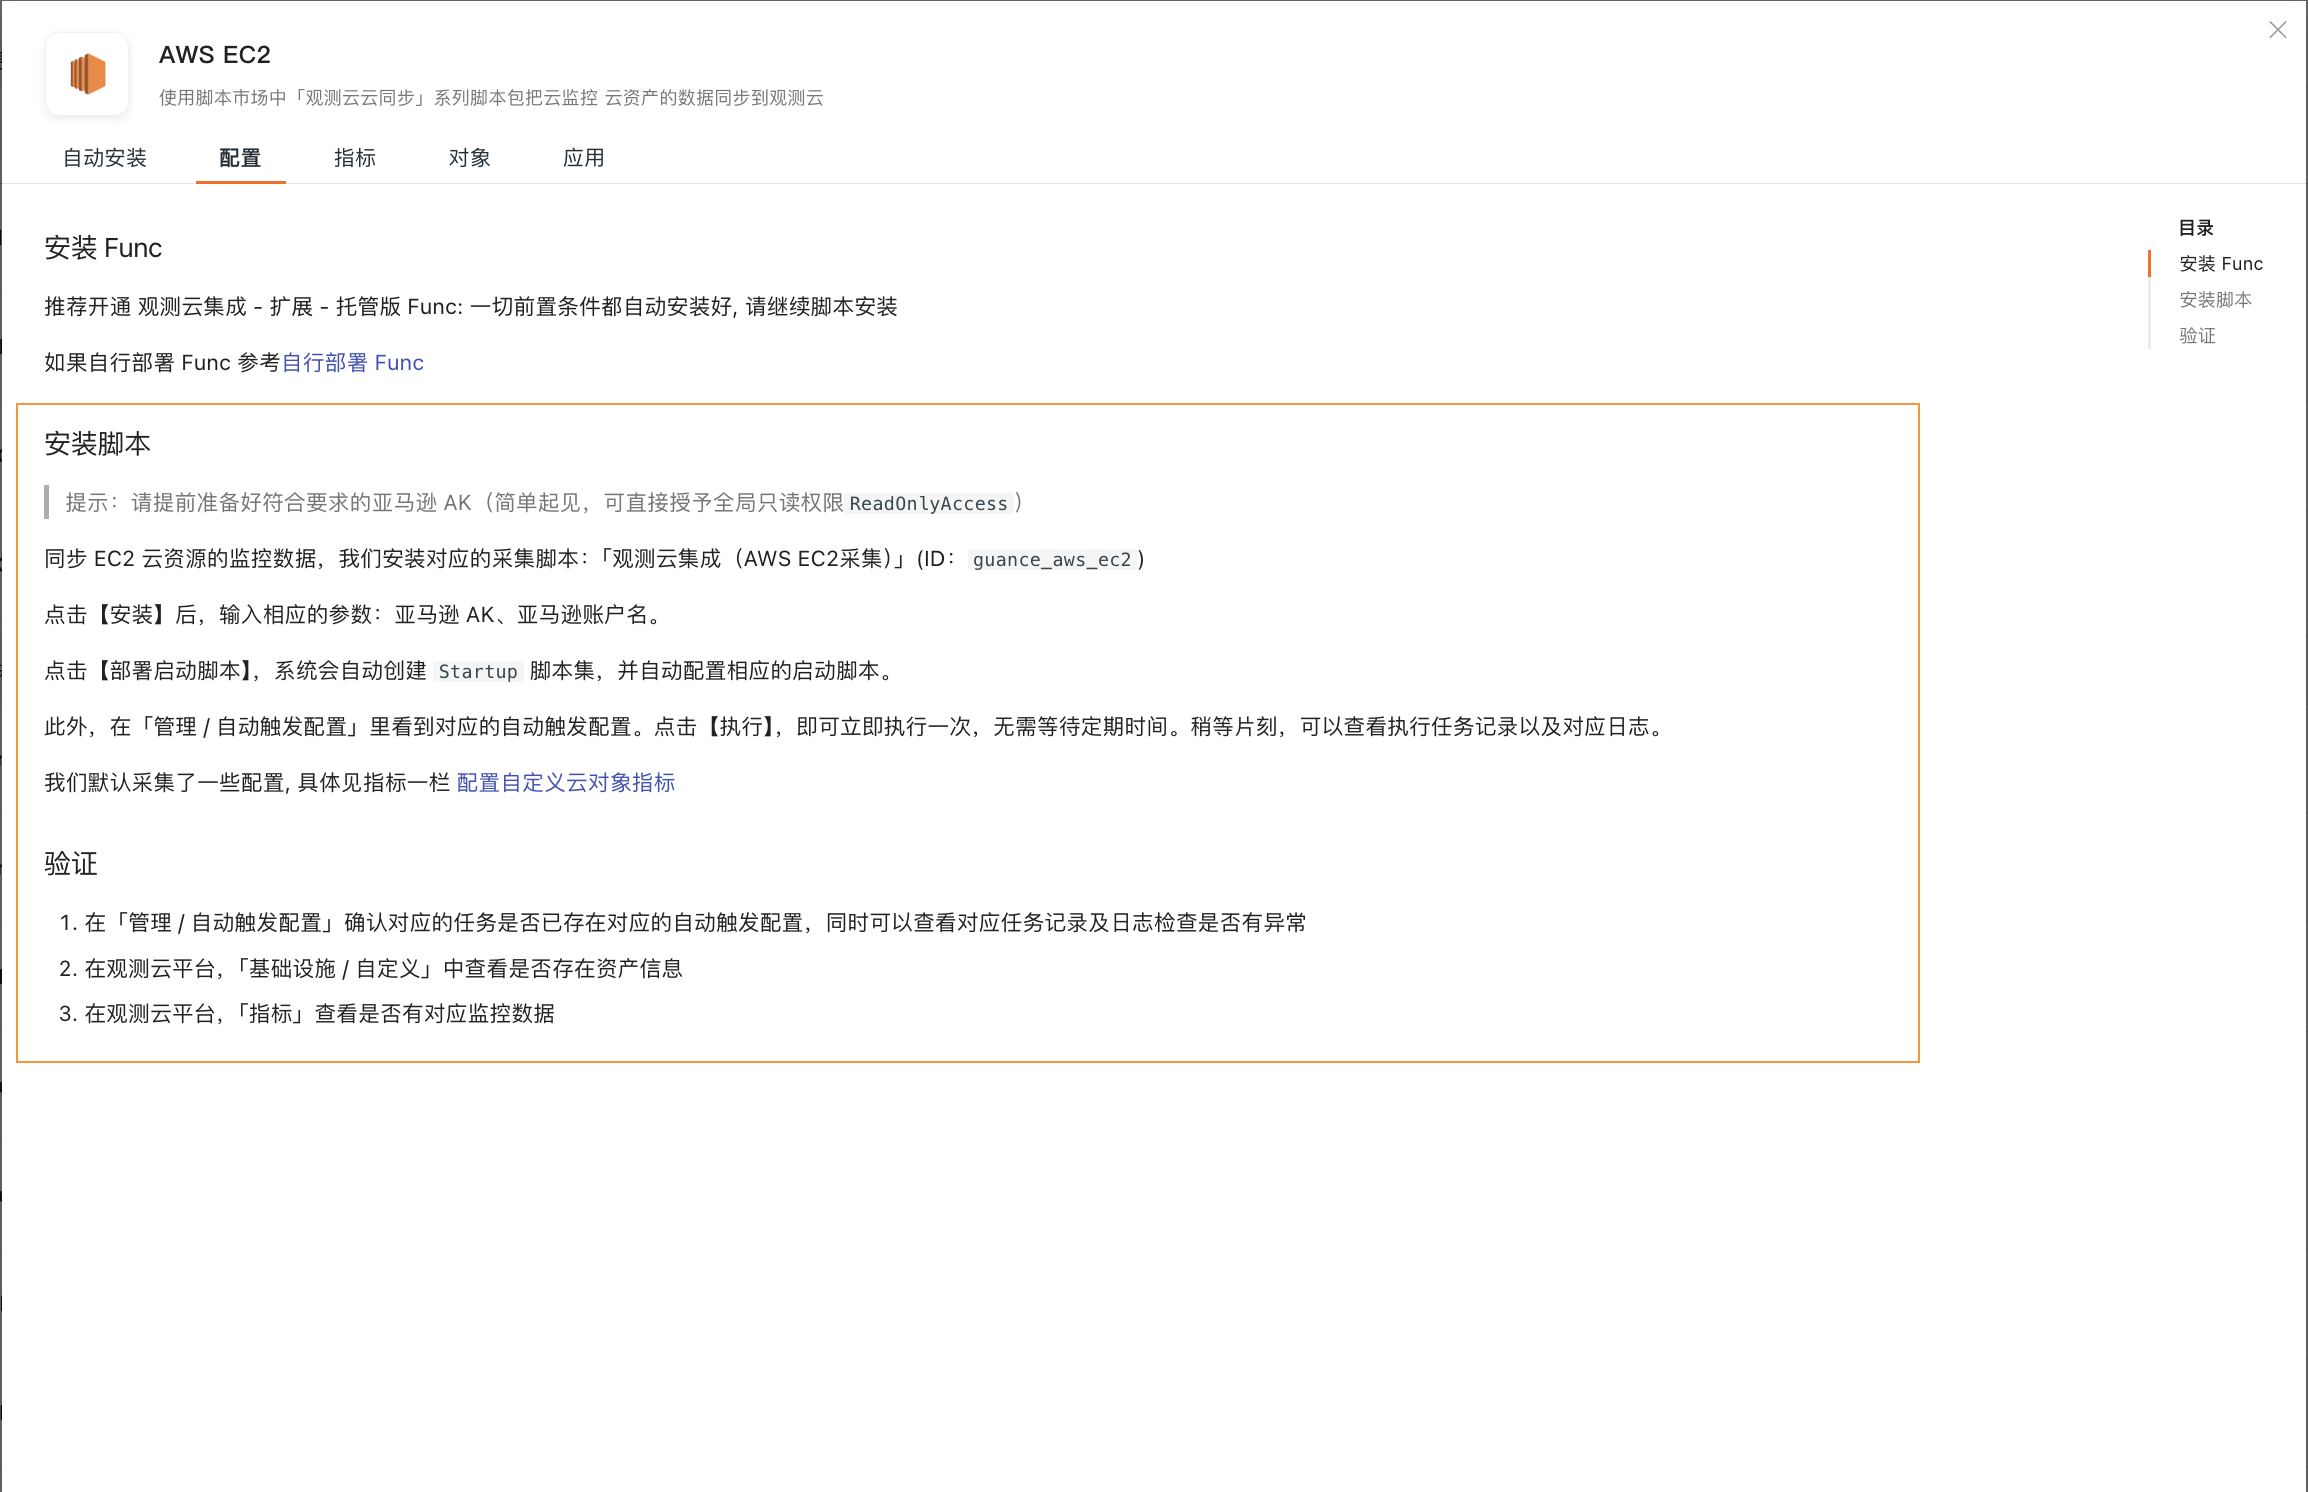
=andinoperations; - After a successful installation, proceed with the script installation.
Configure Directly from Integrations
Prerequisites
- Enable DataFlux Func (Automata);
- Cloud account authorization is configured in Management.
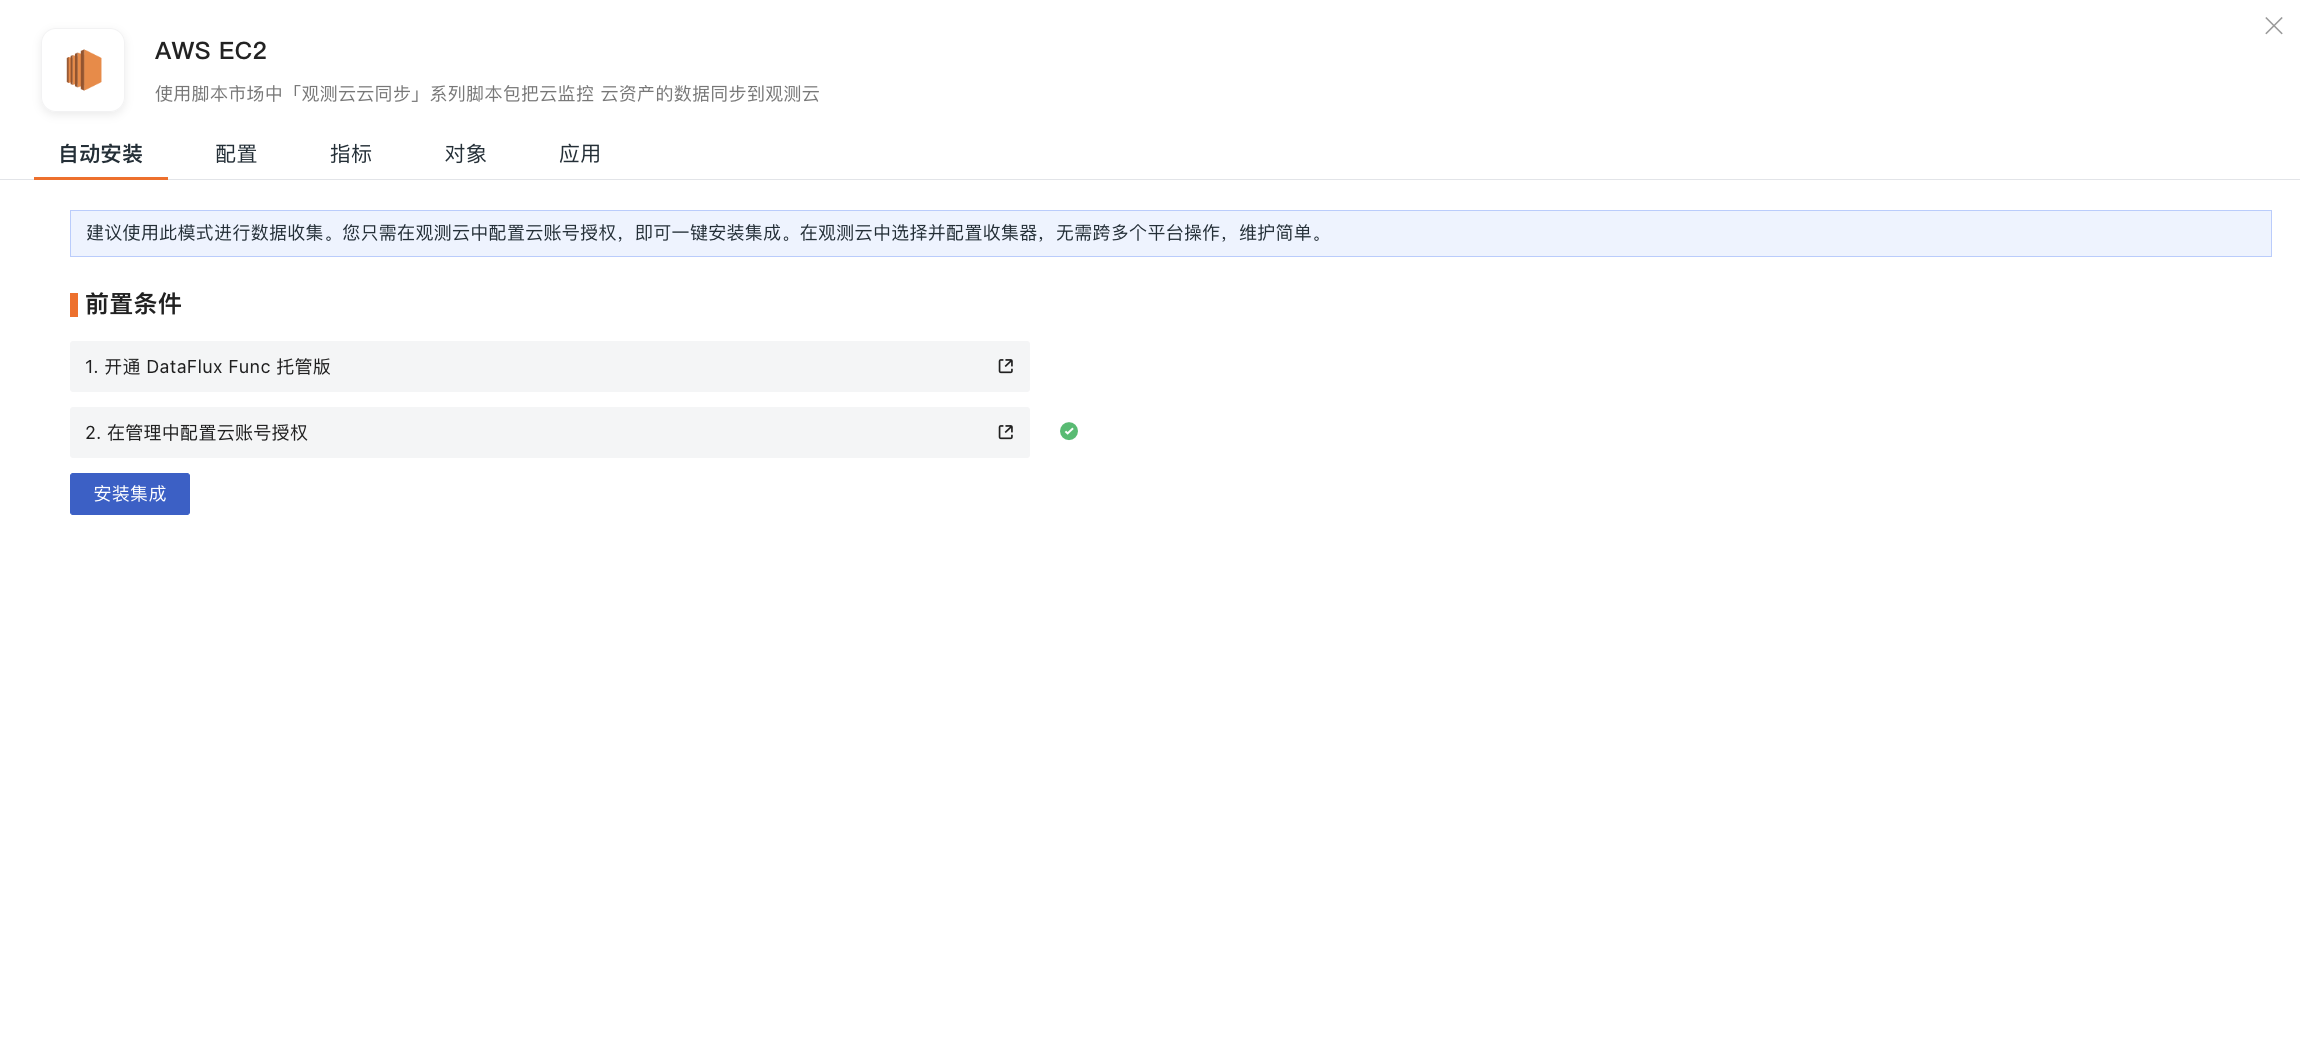
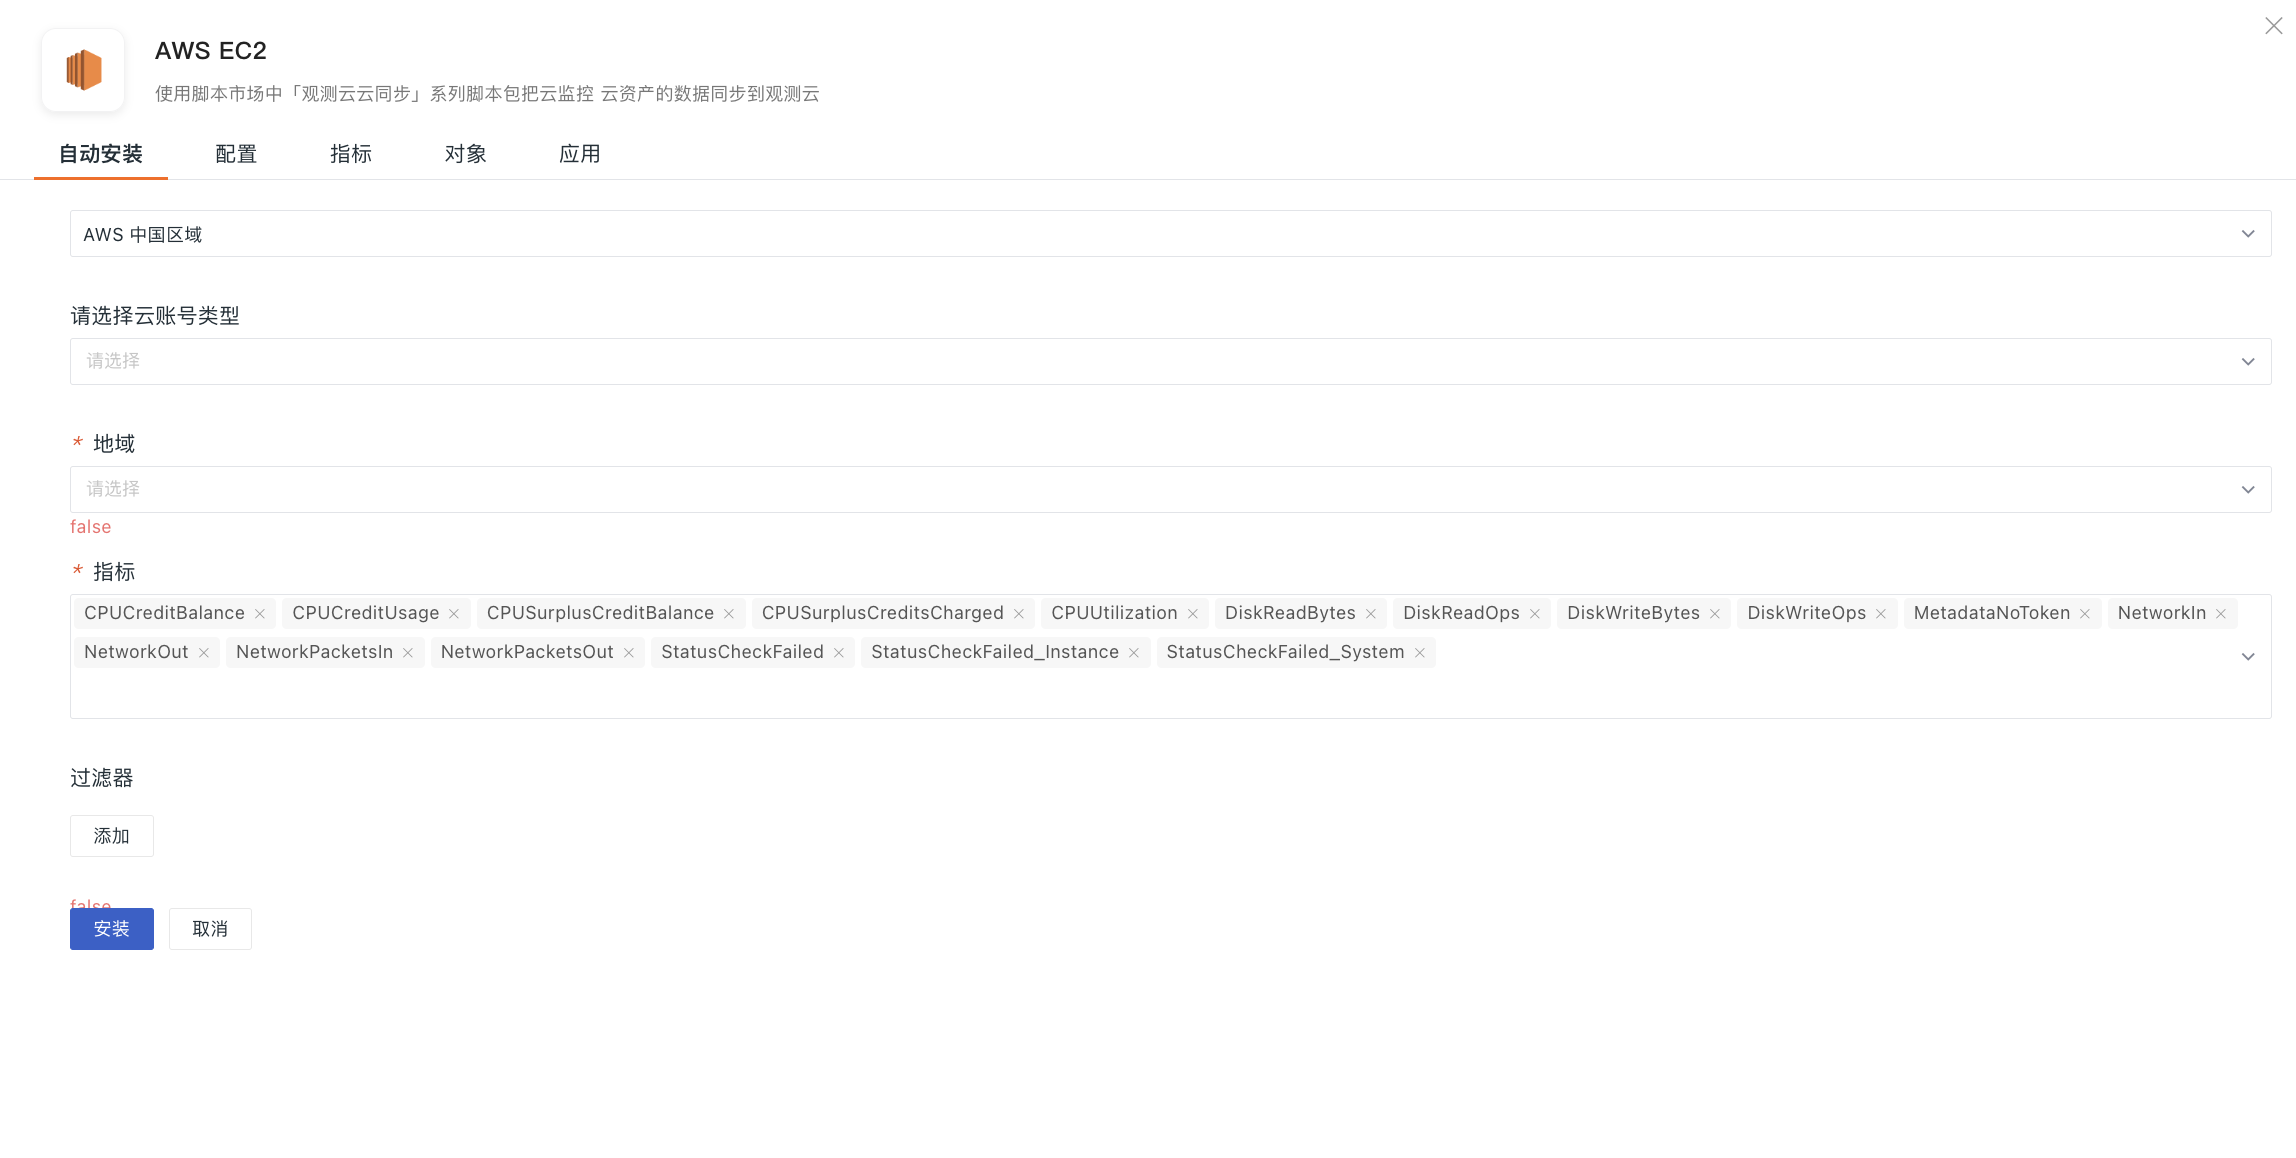
- Go to Integrations and install directly. On a single integration installation page, you can configure multiple cloud accounts;
- Click Add Cloud Account;
- Select other cloud accounts that need configuration, and configure regions, metrics, and filters;
- Click Install; the cloud account will be overwritten and updated to the latest configuration.
Delete/Uninstall Integrations
-
On the Cloud Account Management list page, click the settings icon to delete the cloud account. After deletion, data collection for all configured integrations under the cloud account will stop, but the data already collected will not be affected;
-
On the Integrations tab of the cloud account details page, click the Uninstall button to stop data collection for a specific integration without affecting the data already collected;
-
After clicking Uninstall on the Integrations side, all AWS cloud accounts will stop collecting data for that integration. If you only need to stop data collection for a specific cloud account, you can do so in the cloud account configuration.