Service Mesh Microservice Architecture: Full-Lifecycle Best Practices from Development to Canary Release (Part 2)
Introduction
This section covers the overall scenario of canary release, using Guance to observe the metrics, traces, and logs of microservices. The following operations on Rancher are all performed in the k8s-solution-cluster cluster, and this will not be repeated.
Canary Release
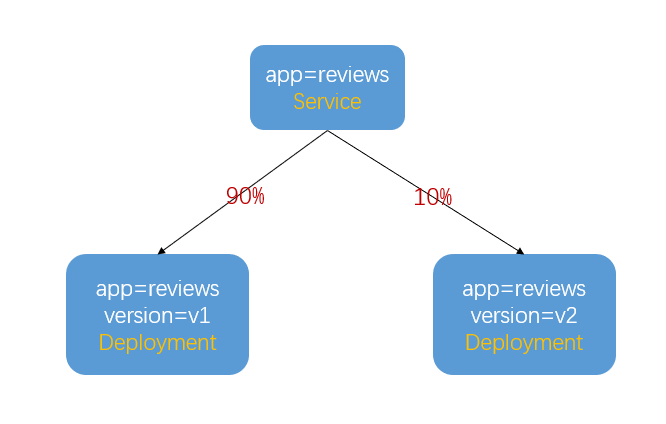
To implement a canary release, add the label app=reviews to the Deployment of the microservice to distinguish the microservice name. For the first deployment, add the label version=v1; for the second deployment, add the label version=v2. This allows you to control the traffic ratio for each version based on the labels. For example, after deploying v2, direct 90% of traffic to v1 and 10% to v2. Once verified, fully switch traffic to v2 and decommission v1. The release is then complete.
Step 1: Delete reviews
In the first part, to demonstrate GitLab CI automated deployment, three versions of reviews were deployed. Before proceeding, you need to delete these three deployment versions. Log in to Rancher, navigate to Workload → Deployments in the cluster, find reviews-v1, and select Delete on the right. Then delete reviews-v2 and reviews-v3 in the same way.

Step 2: Deploy reviews-v1
Log in to GitLab, locate the bookinfo-views project, modify the APP_VERSION value in the .gitlab-ci.yml file to "v1", and commit the code. Log in to Rancher, navigate to Workload → Deployments in the cluster, and you should see reviews-v1 deployed.

Step 3: Create DestinationRule
Define the destination address and create subsets for the reviews Service: v1 and v2. To deploy this resource using kubectl, save the following content to a file named destination-rule-reviews.yaml.
apiVersion: networking.istio.io/v1alpha3
kind: DestinationRule
metadata:
  name: reviews
  namespace: prod
spec:
  host: reviews
  subsets:
  - name: v1
    labels:
      version: v1
  - name: v2
    labels:
      version: v2
Step 4: Create VirtualService
Before deploying v2, first route all traffic to v1. Save the following content to a file named virtual-service-reviews.yaml.
apiVersion: networking.istio.io/v1alpha3
kind: VirtualService
metadata:
  name: reviews
  namespace: prod
spec:
  hosts:
    - reviews
  http:
  - route:
    - destination:
        host: reviews
        subset: v1
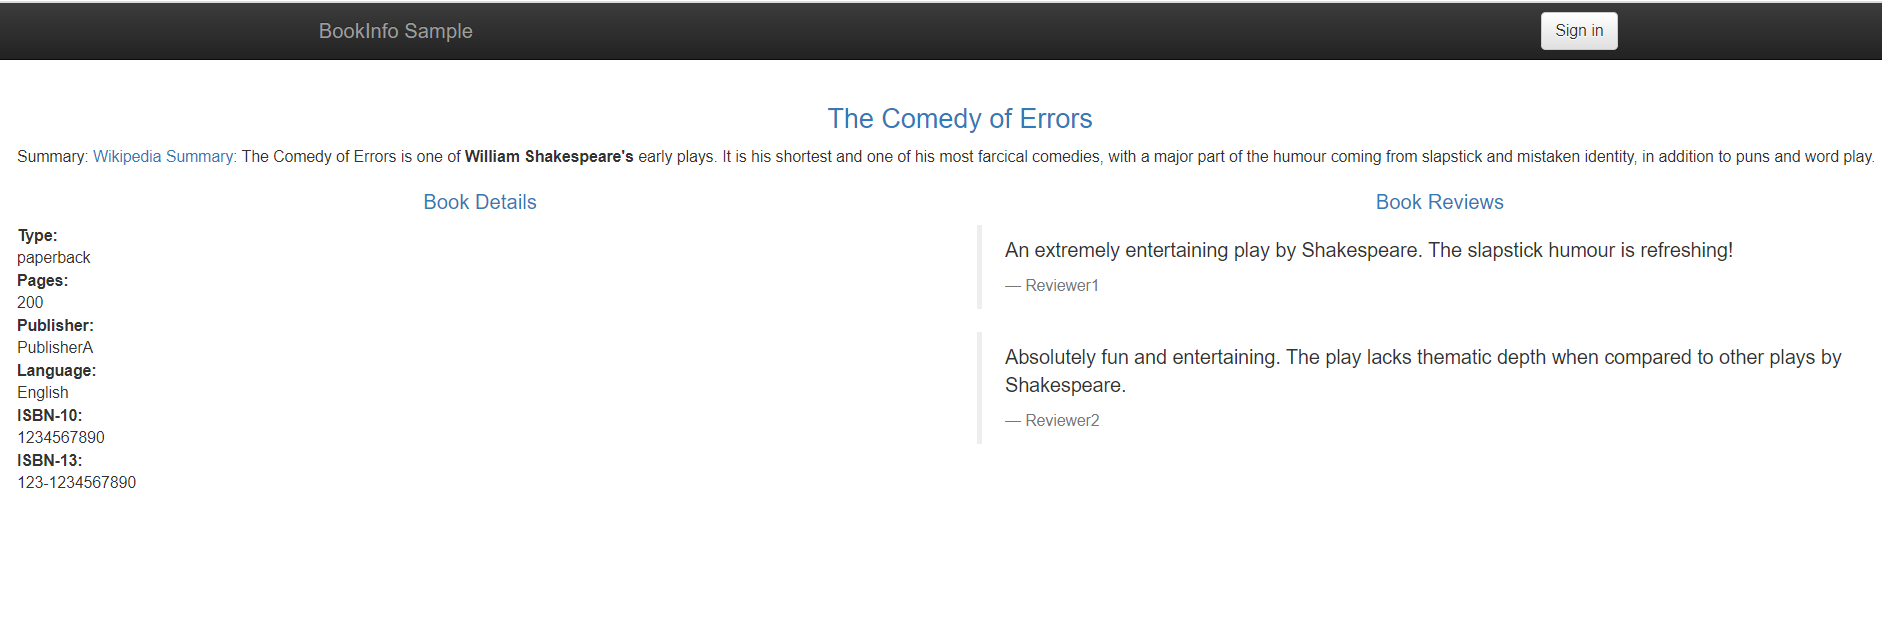
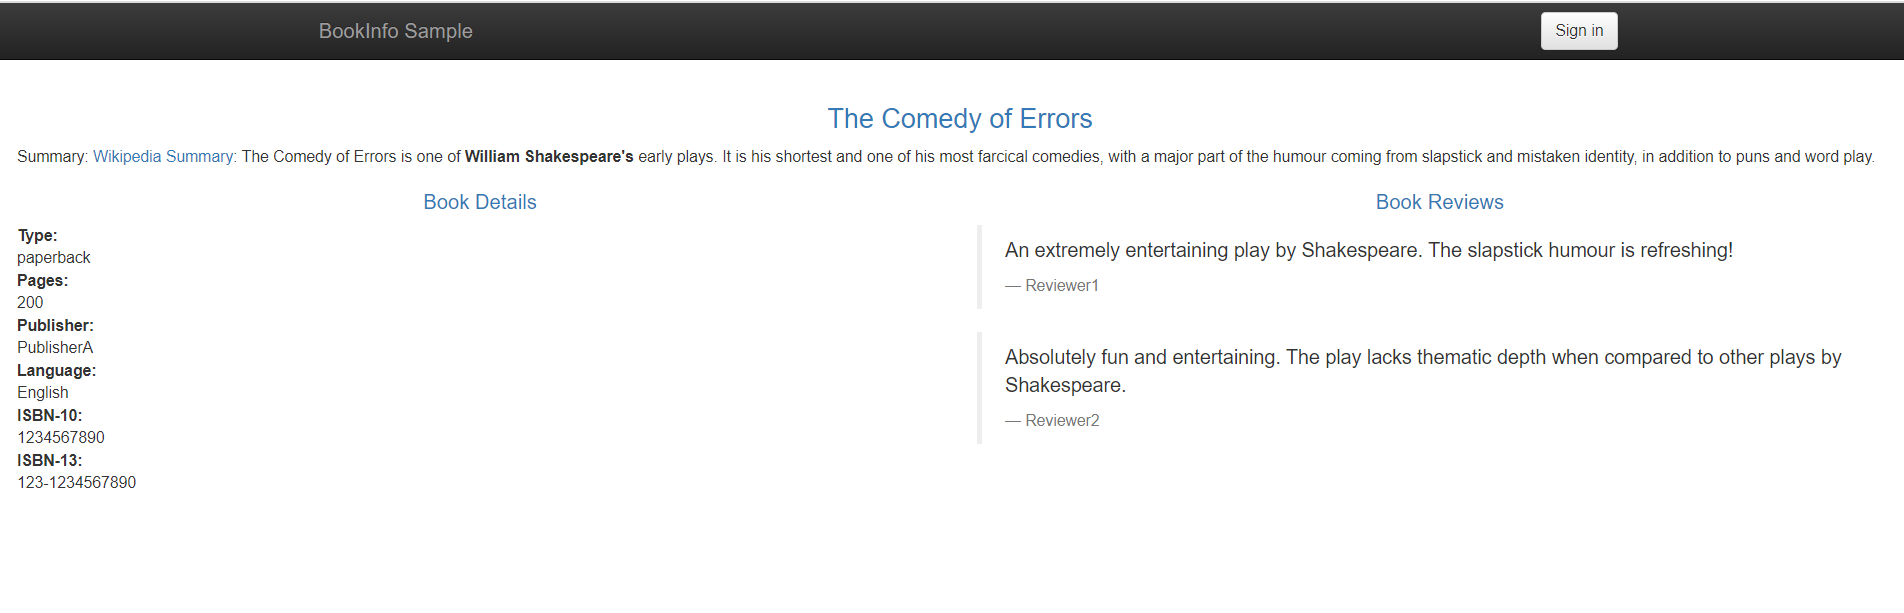
Visit http://8.136.193.105:32156/productpage.
Step 5: Deploy reviews-v2
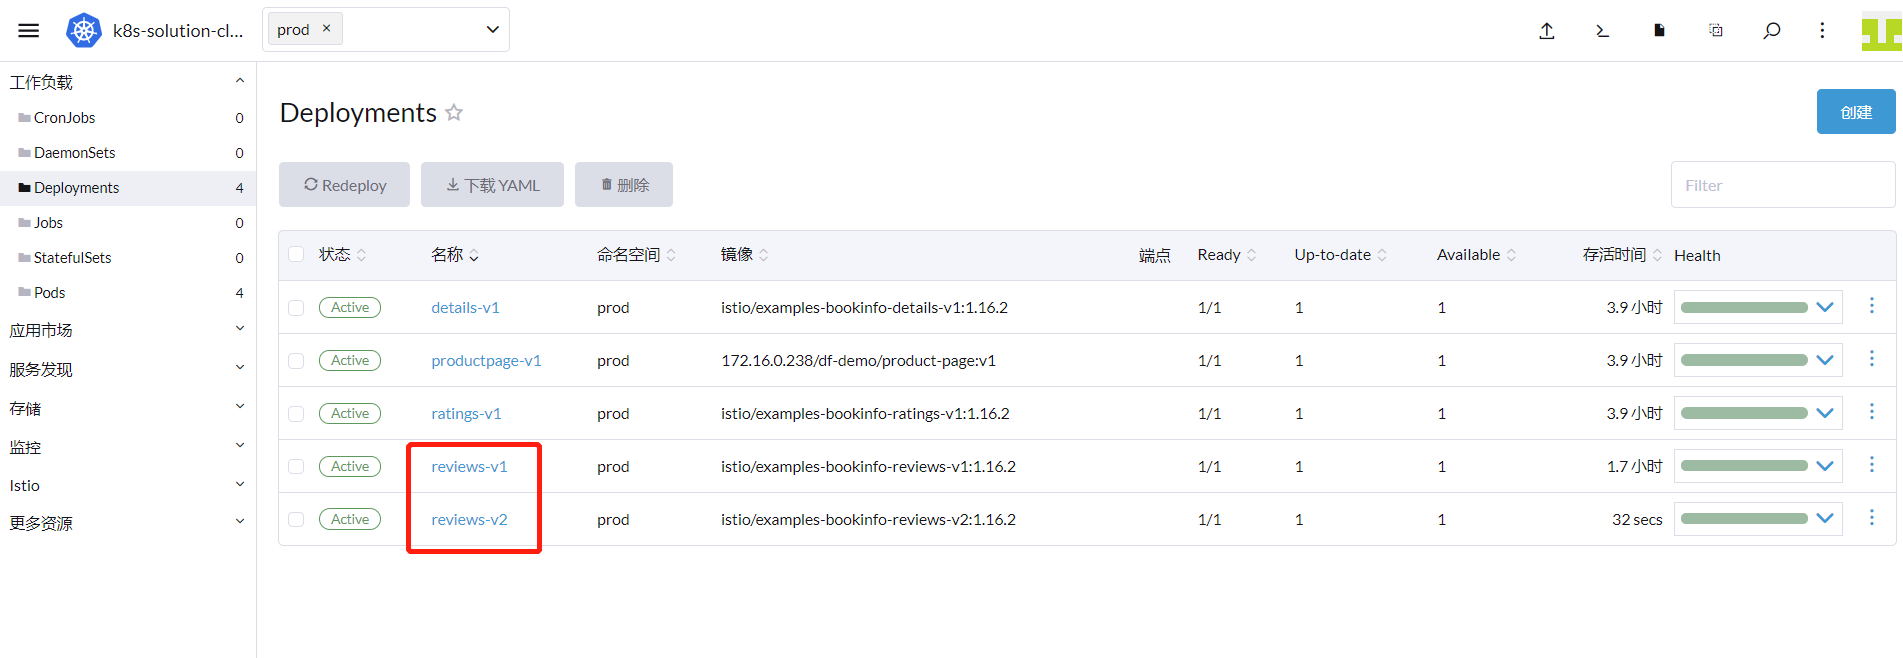
Log in to GitLab, locate the bookinfo-views project, modify the APP_VERSION value in the .gitlab-ci.yml file to "v2", and commit the code. Log in to Rancher, navigate to Workload → Deployments in the cluster, and you should see reviews-v2 deployed. Even though v2 is deployed, when you visit http://8.136.193.105:32156/productpage, the reviews microservice will only route requests to v1.
Step 6: Switch 10% of Traffic to reviews-v2
Modify the virtual-service-reviews.yaml file with the following content:
apiVersion: networking.istio.io/v1alpha3
kind: VirtualService
metadata:
  name: reviews
  namespace: prod
spec:
  hosts:
    - reviews
  http:
  - route:
    - destination:
        host: reviews
        subset: v1
      weight: 90
    - destination:
        host: reviews
        subset: v2
      weight: 10
Re-deploy:
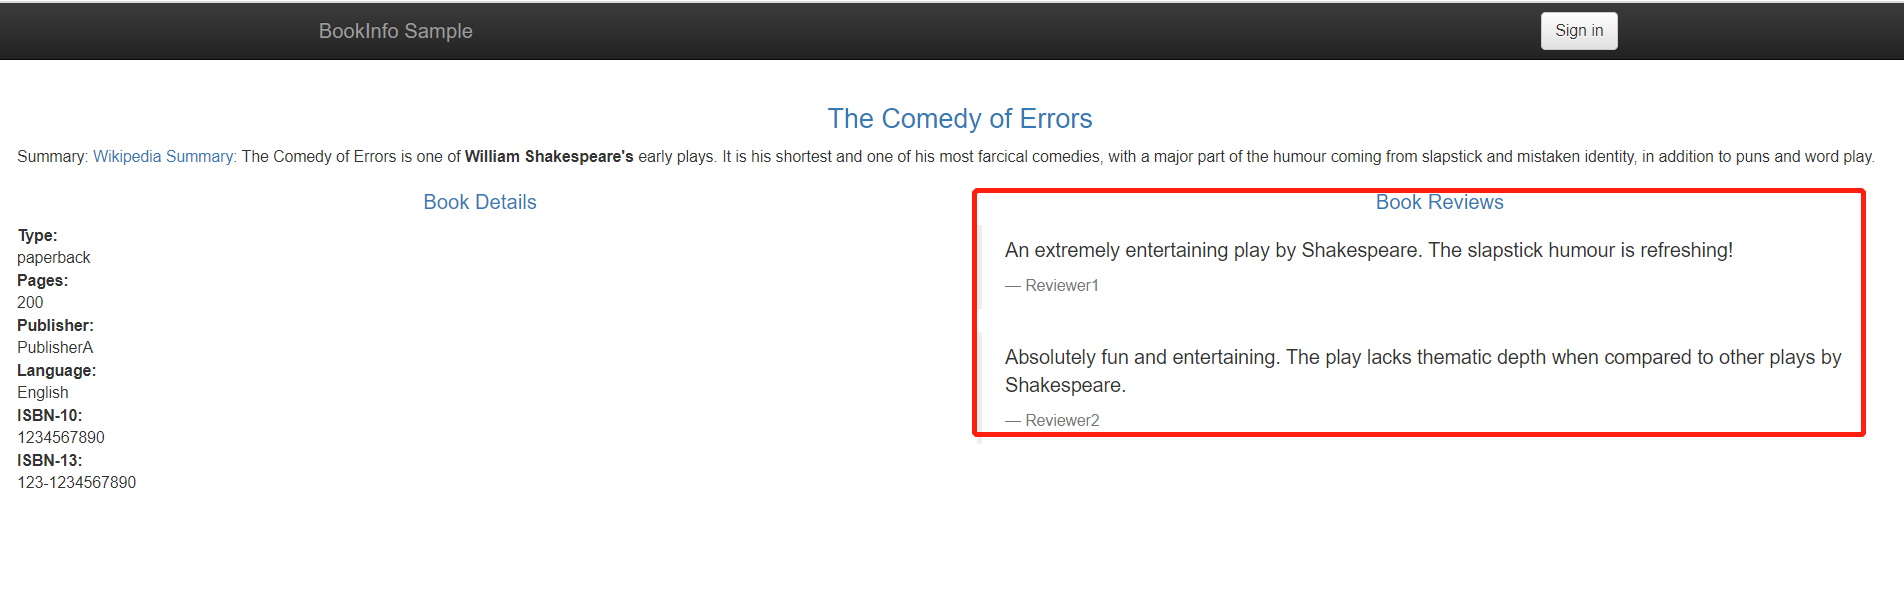
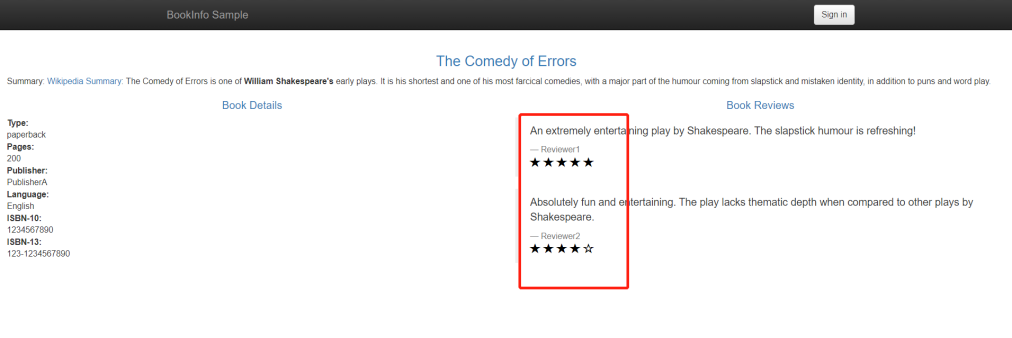
Visit http://8.136.193.105:32156/productpage multiple times. The v1 and v2 versions of the reviews microservice will receive 90% and 10% of the traffic respectively.
Step 7: Observe reviews-v2
1. Application Performance Monitoring (APM)
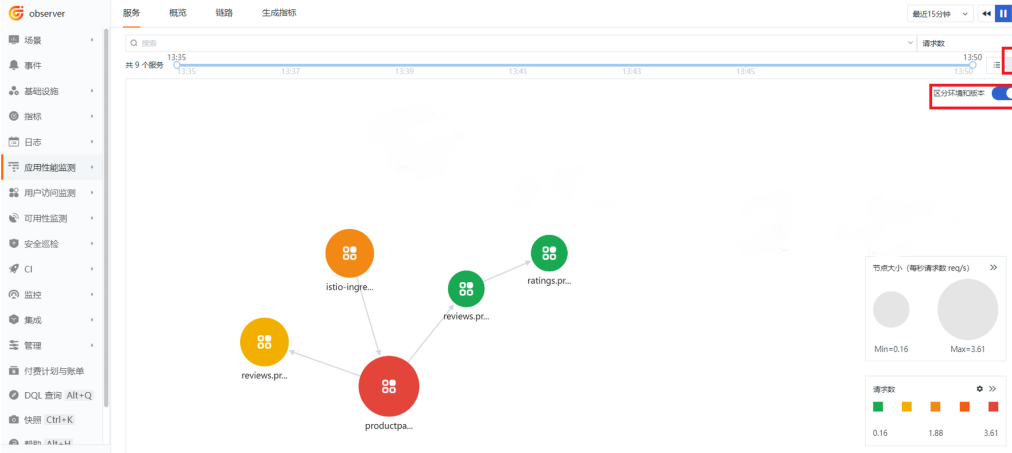
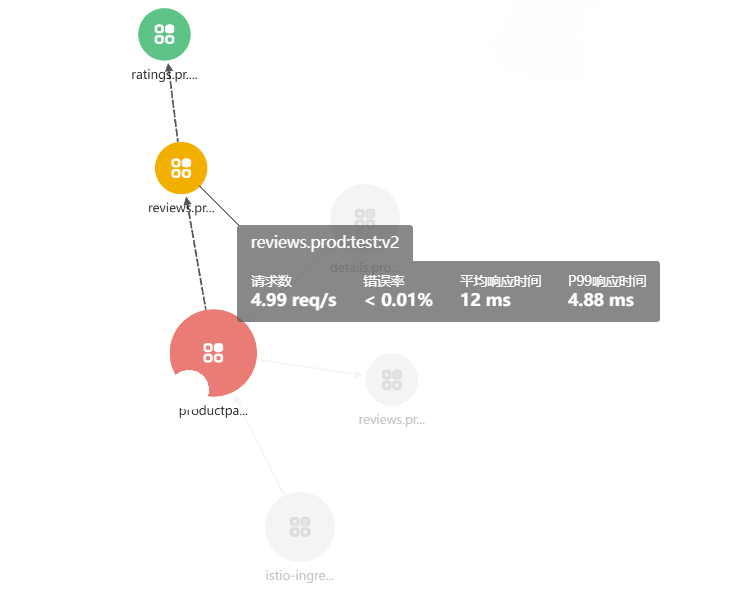
Log in to Guance → APM → click the topology icon in the upper right corner. Enable the environment and version toggle. The reviews service has two versions, and reviews:test:v2 calls the ratings service.
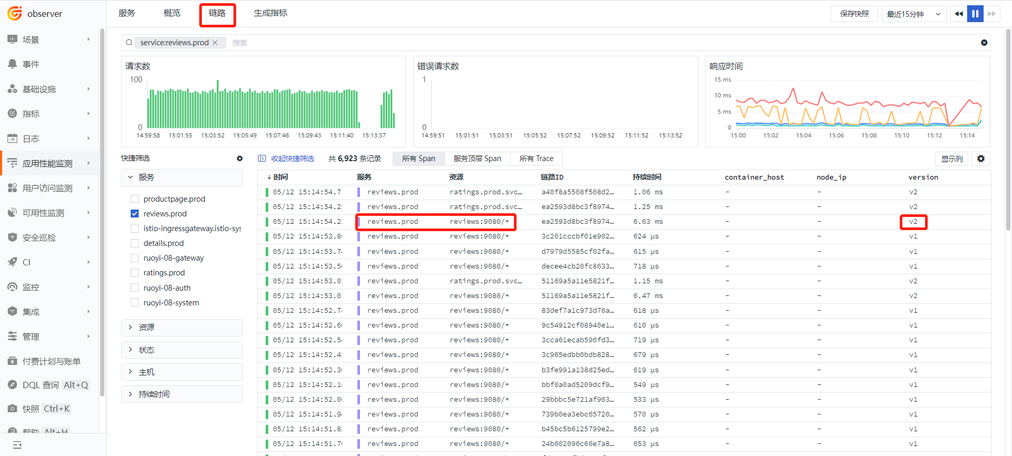
Click Traces at the top. Use the Search by Resource functionality, select reviews.prod, find a trace with reviews version v2, and click into it.
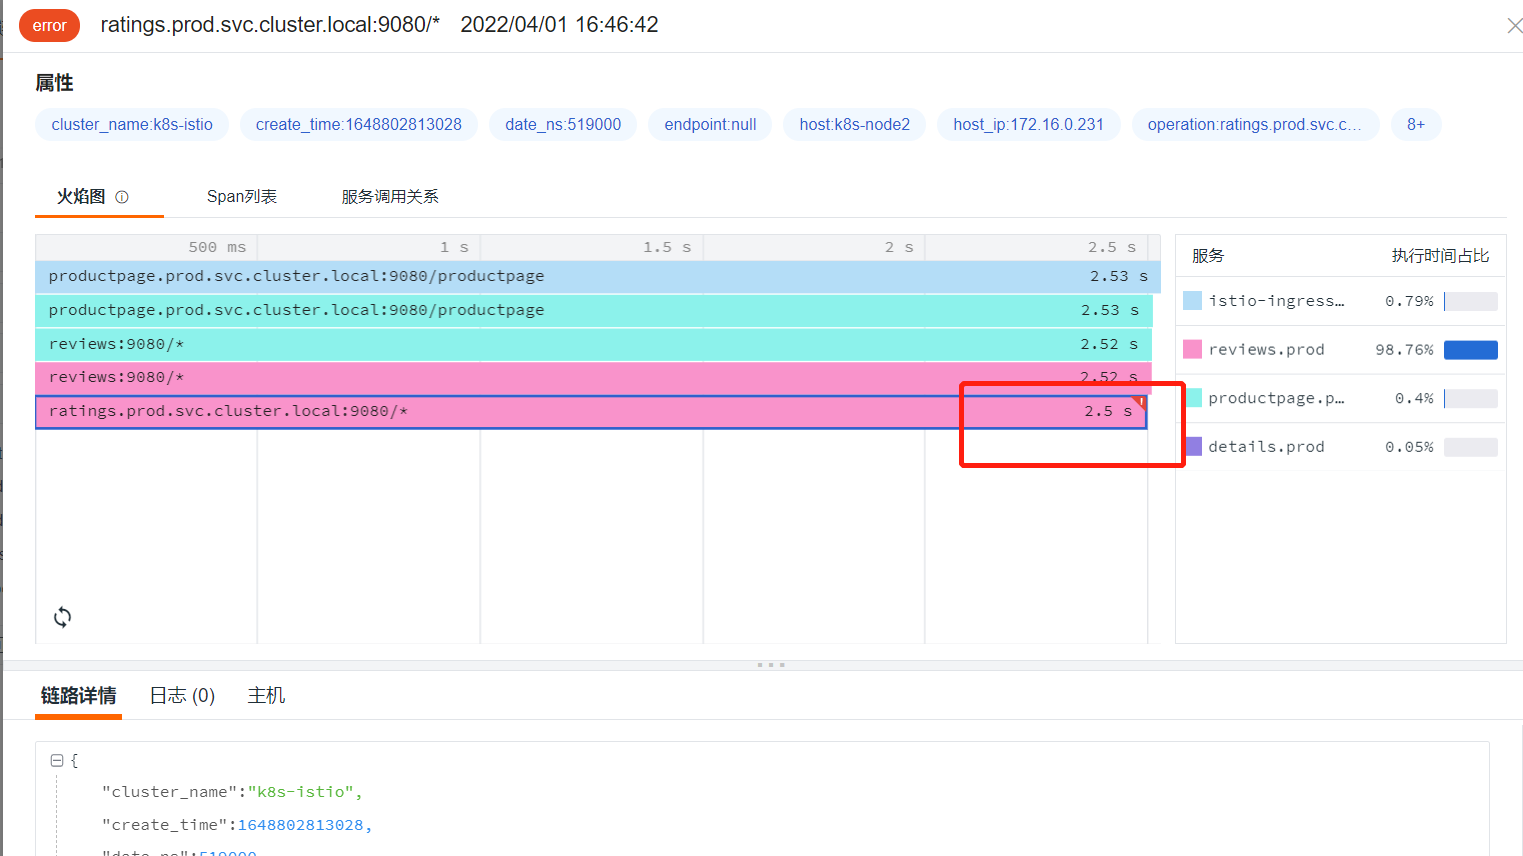
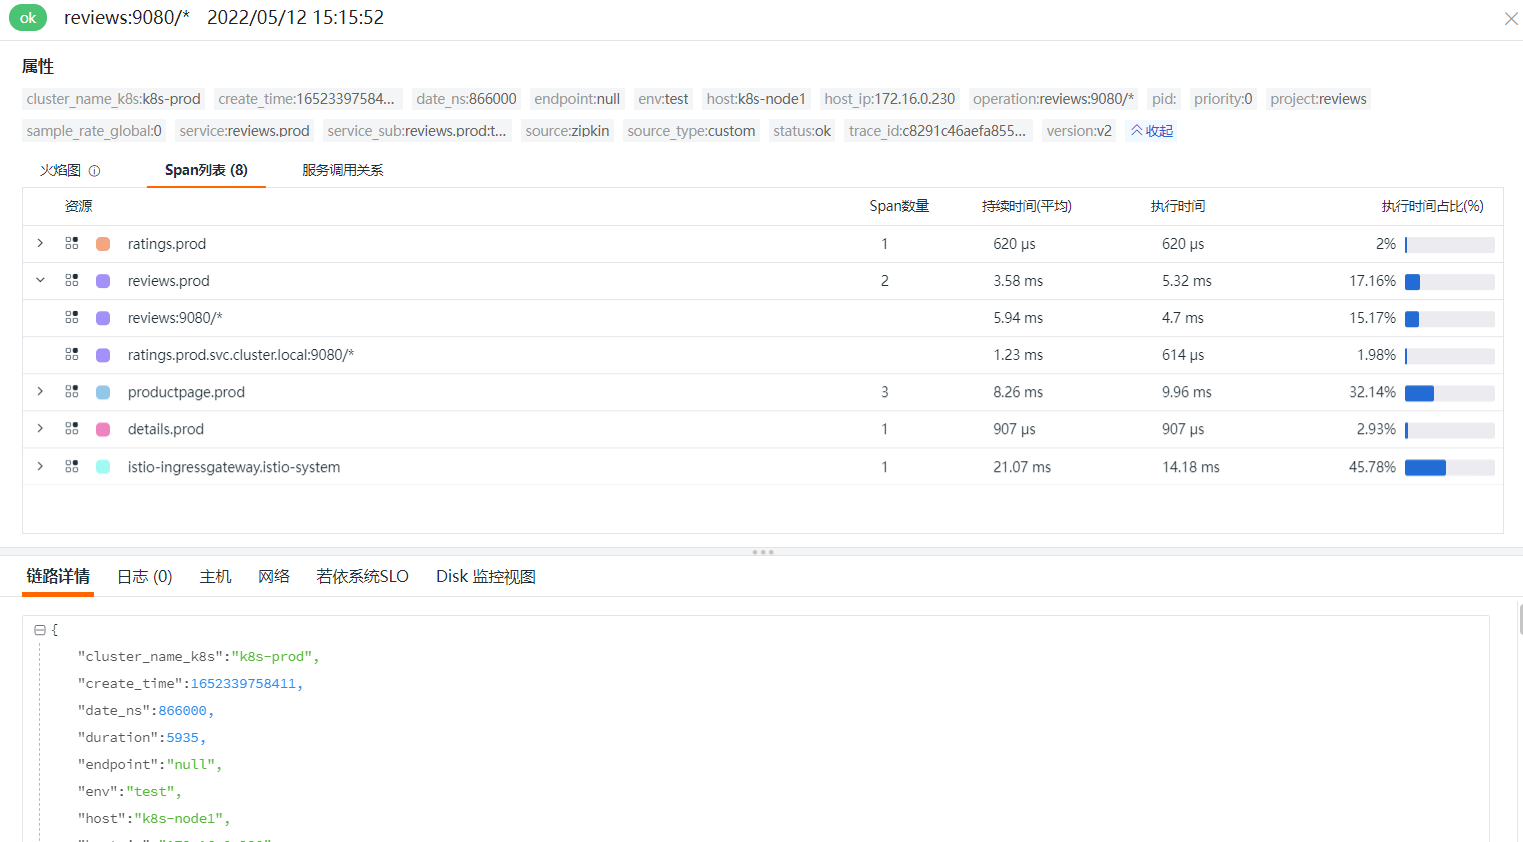
In the detail view, observe the flame graph. Any trace call errors, timeouts, or other issues will be clearly visible here. The project, version, and env tags are defined in the annotations of the deployment.yaml file in the bookinfo-views project in GitLab.

View the execution time of each span in the Span List.
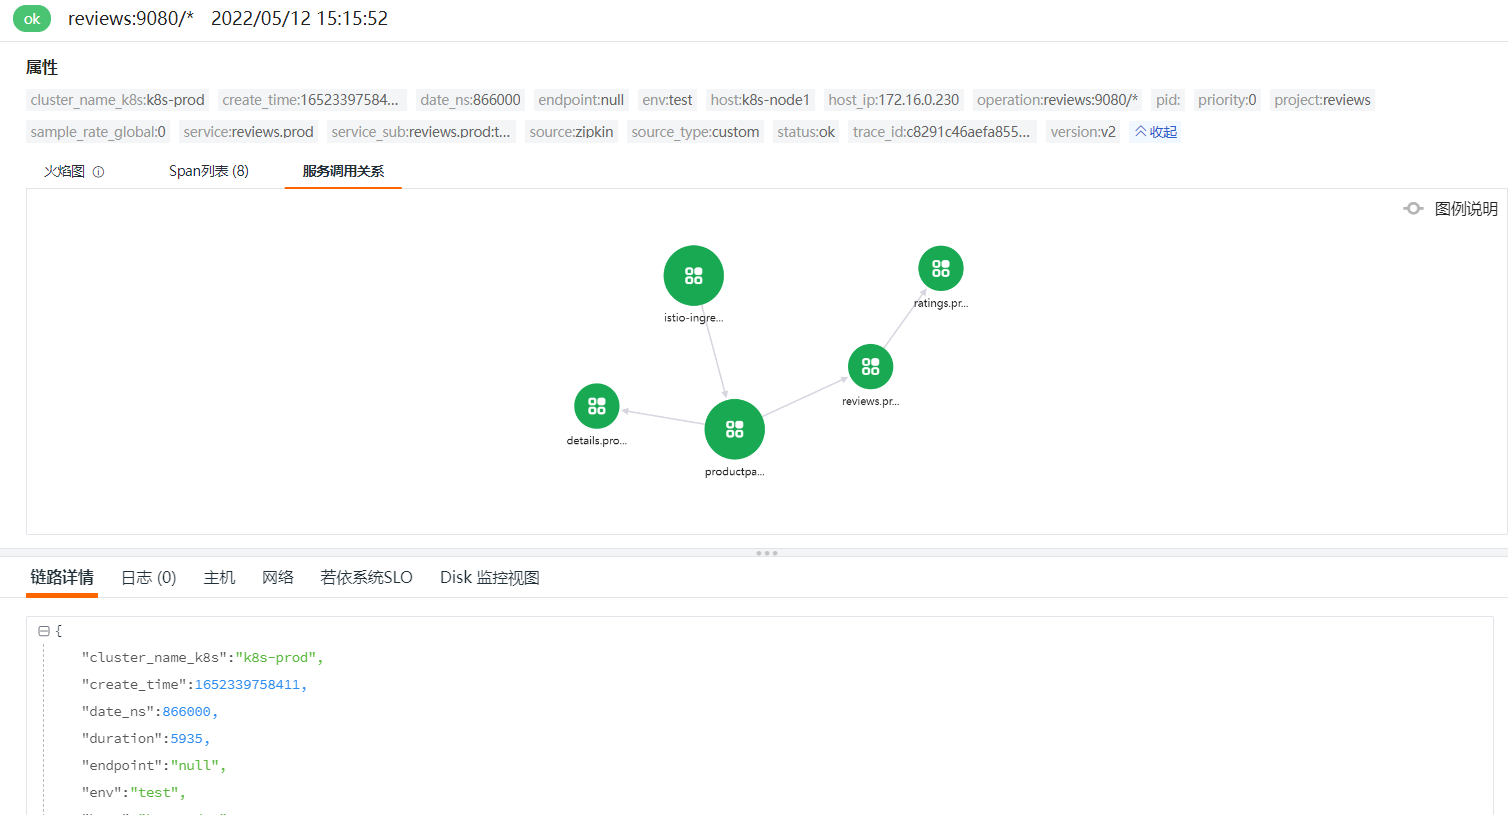
In the service call relationships, you can see a clear topology.
2. Istio Mesh Monitoring View
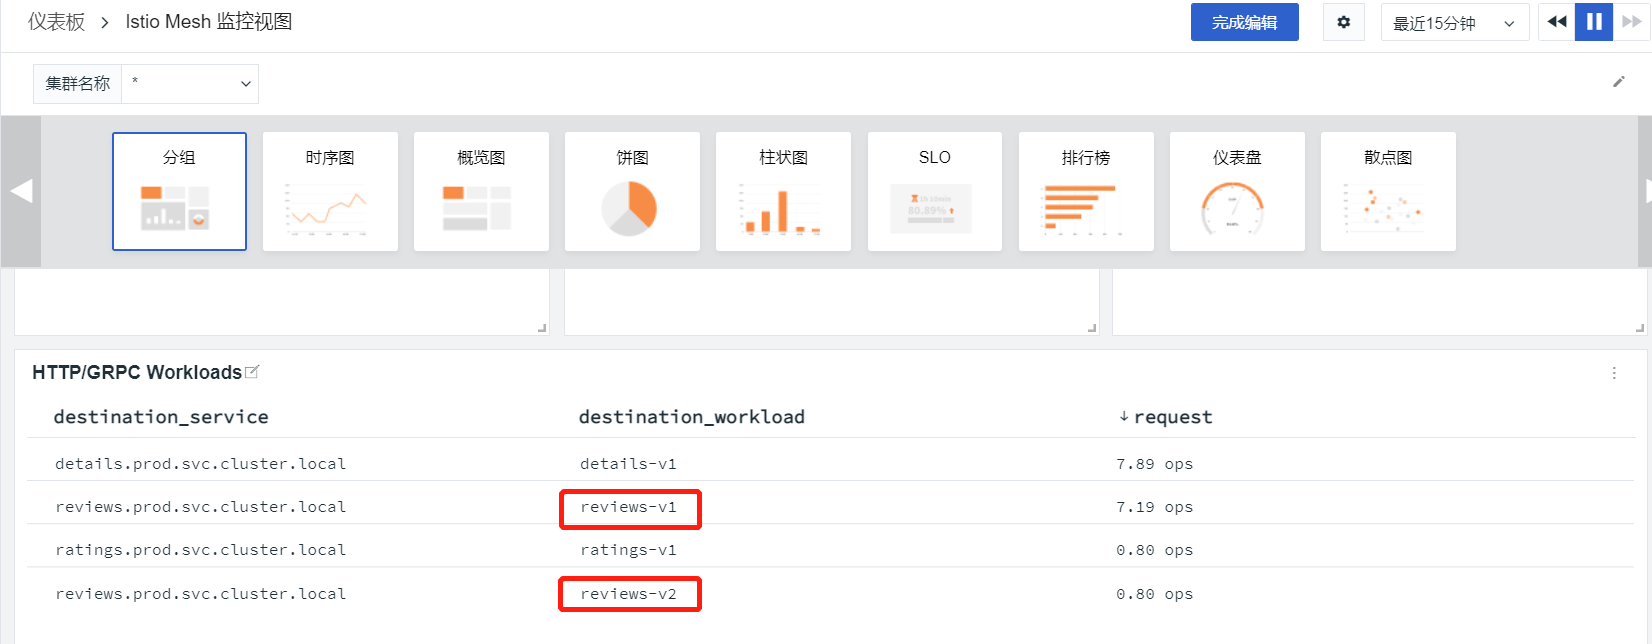
Log in to Guance, click Scenes → Create Dashboard, and select Istio Mesh Monitoring View. In this view, you can see that the call ratio between reviews-v1 and reviews-v2 is approximately 9:1.
Step 8: Complete the Release
After the reviews-v2 version microservice has been verified as normal, fully switch traffic to v2. Modify the virtual-service-reviews.yaml file with the following content:
apiVersion: networking.istio.io/v1alpha3
kind: VirtualService
metadata:
  name: reviews
  namespace: prod
spec:
  hosts:
    - reviews
  http:
  - route:
    - destination:
        host: reviews
        subset: v2
Re-deploy:
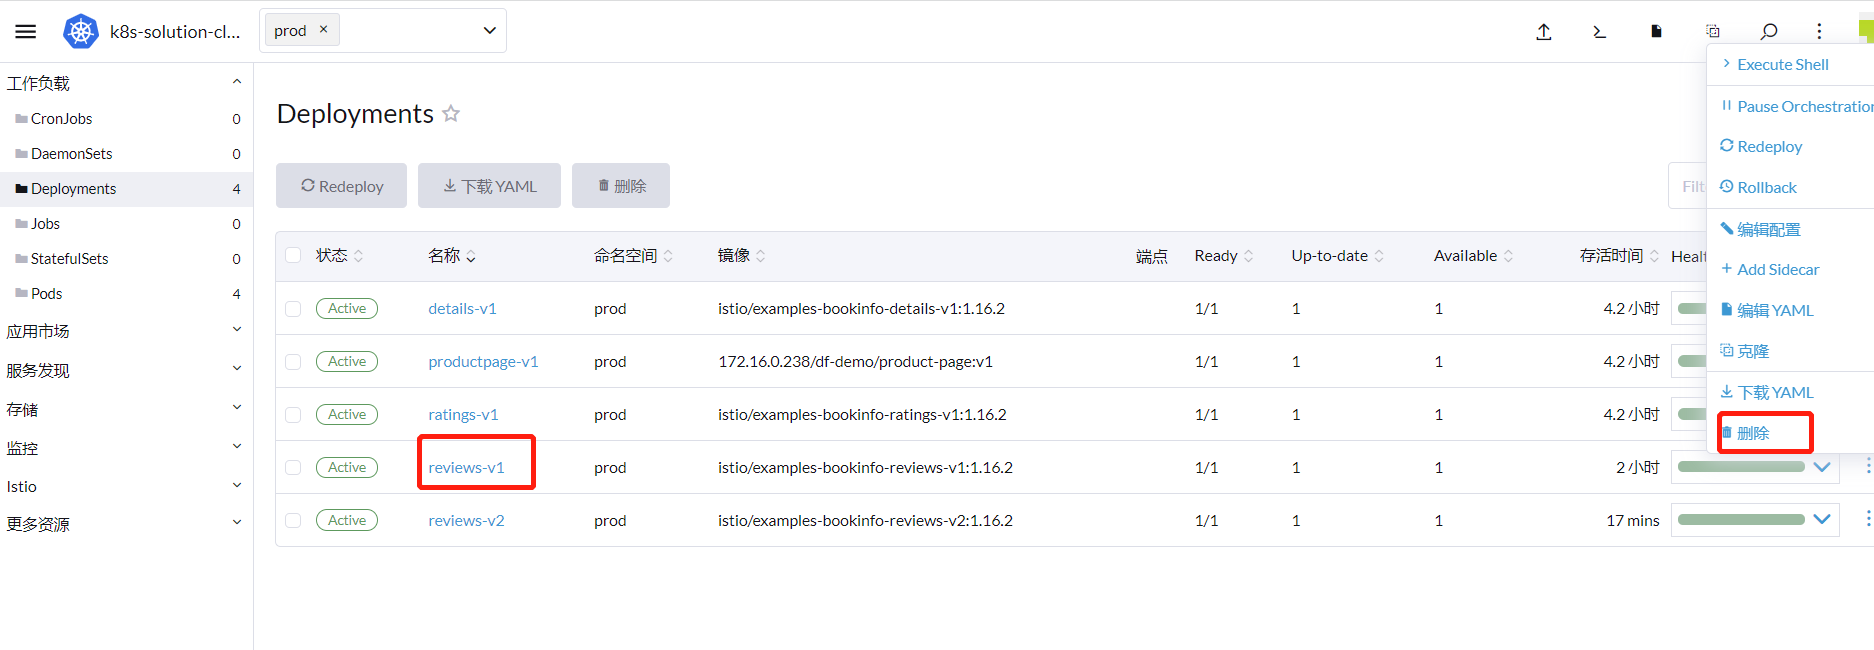
Note: If the reviews-v2 version has issues, log in to Guance and refer to the Trace Timeout Analysis section at the end of this chapter to analyze the problem. Then, following Step 6, switch all traffic back to reviews-v1. After the issue is fixed, re-deploy.
Metrics
When deploying Bookinfo, the Pod annotations configuration included measurement_name = "istio_prom". This collects metrics into the istio_prom measurement. Log in to Guance → Metrics to view the istio_prom measurement.

Using these metrics, you can create custom dashboards such as the Istio Mesh Monitoring View described in the previous section.
Traces
RUM
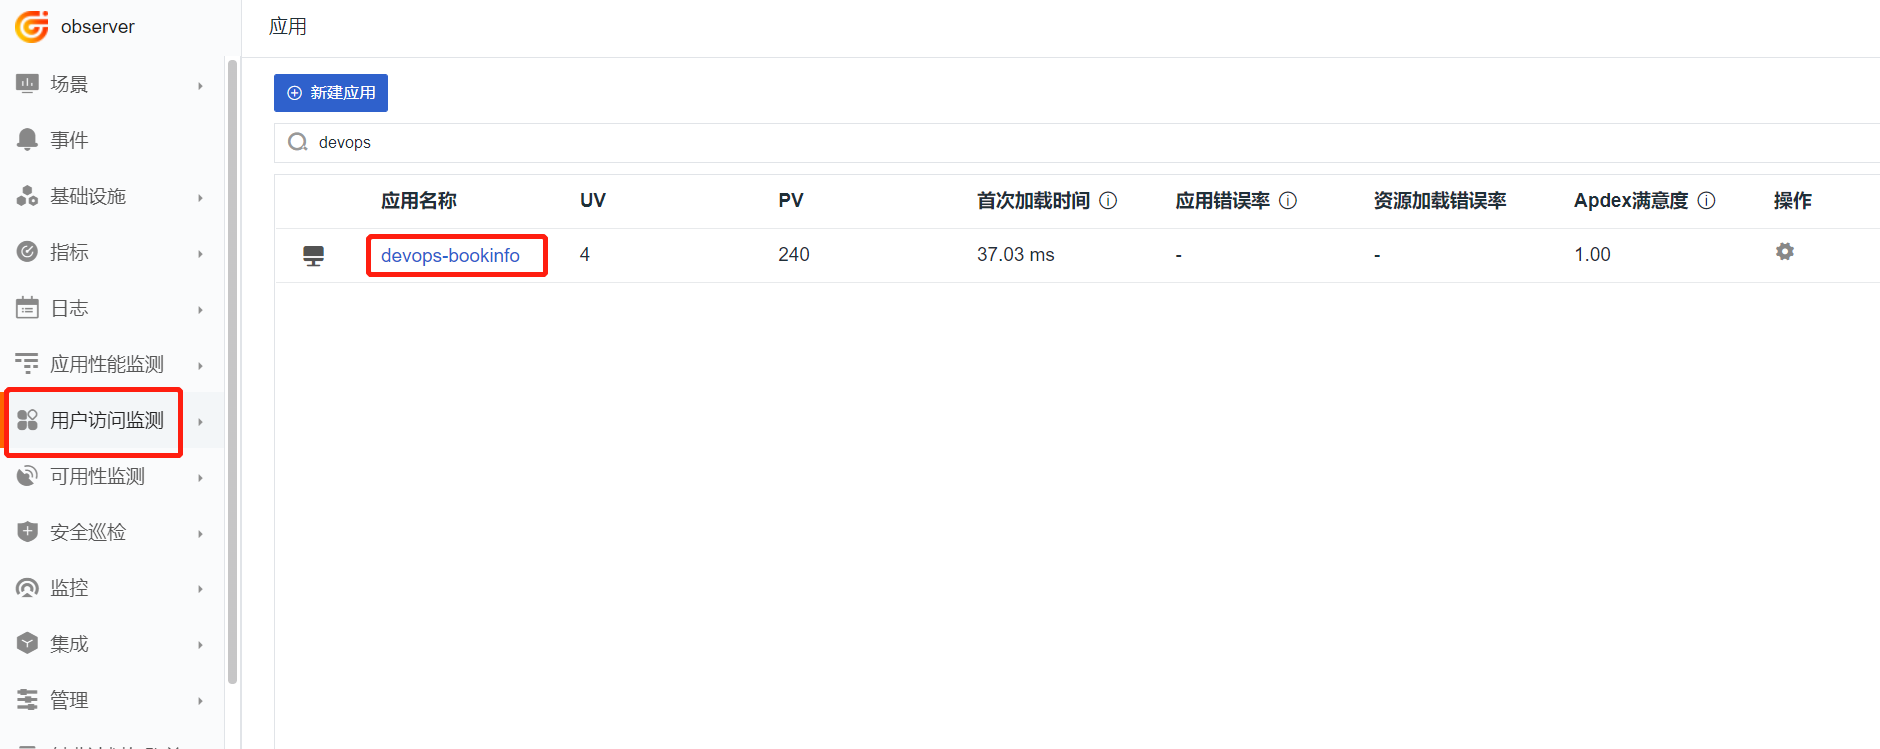
Log in to Guance, navigate to RUM, find the devops-bookinfo application, and click into it.
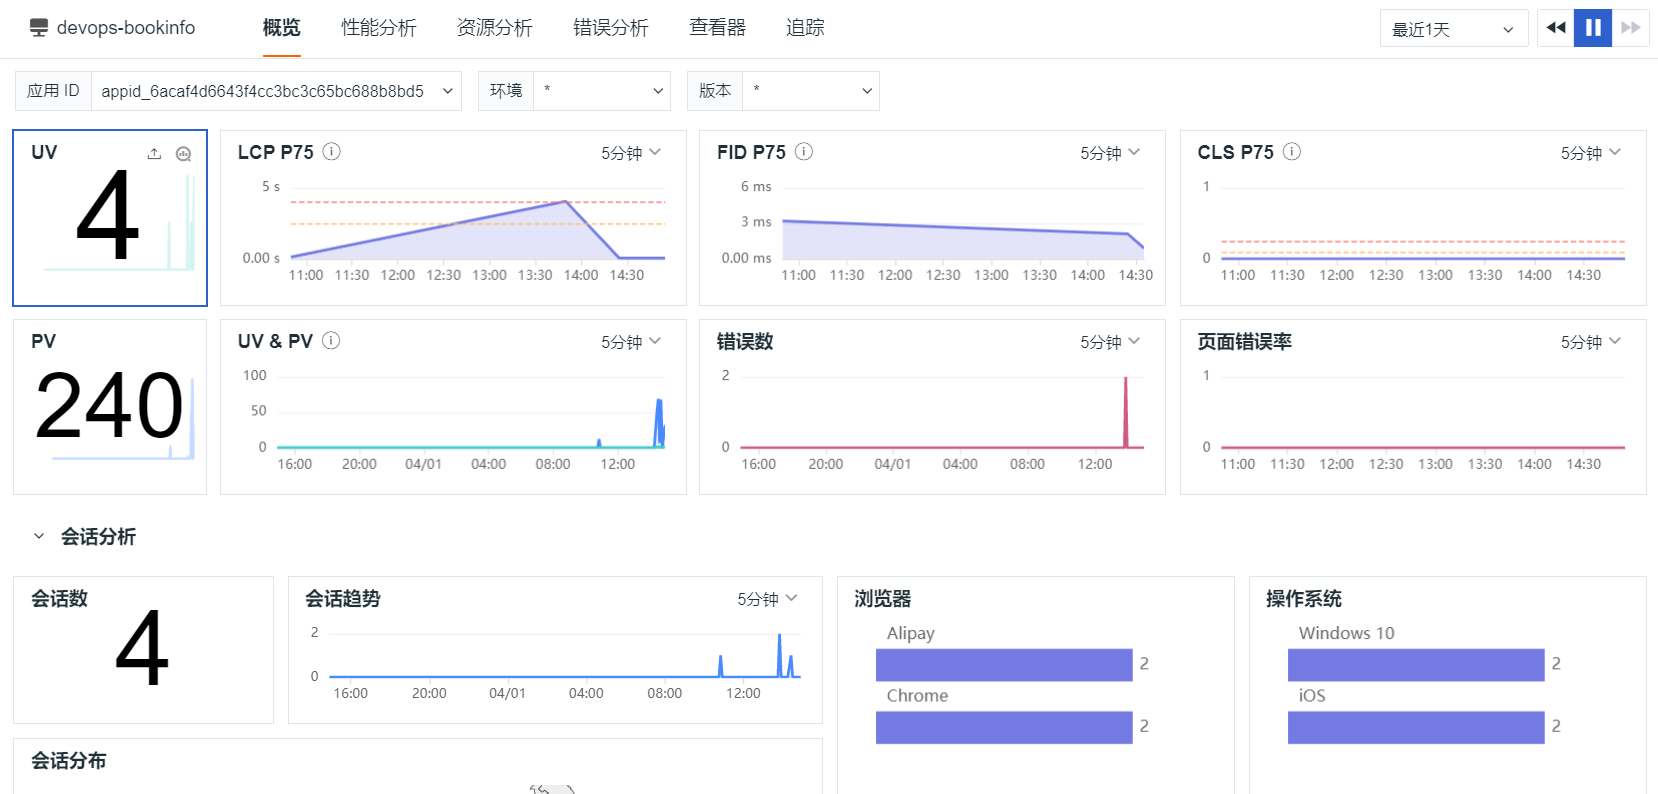
View UV, PV, session count, and visited pages.
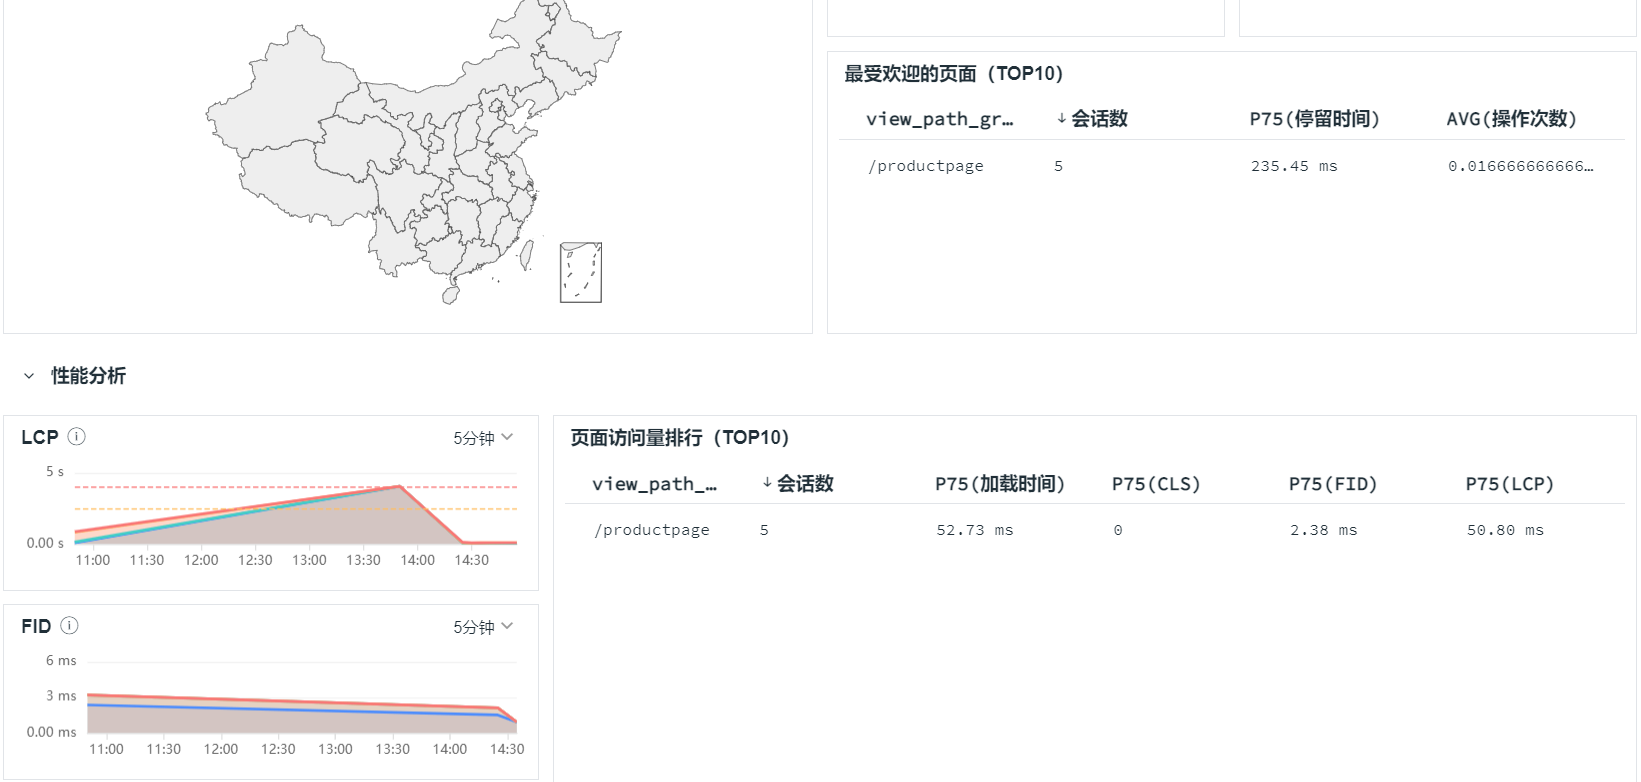
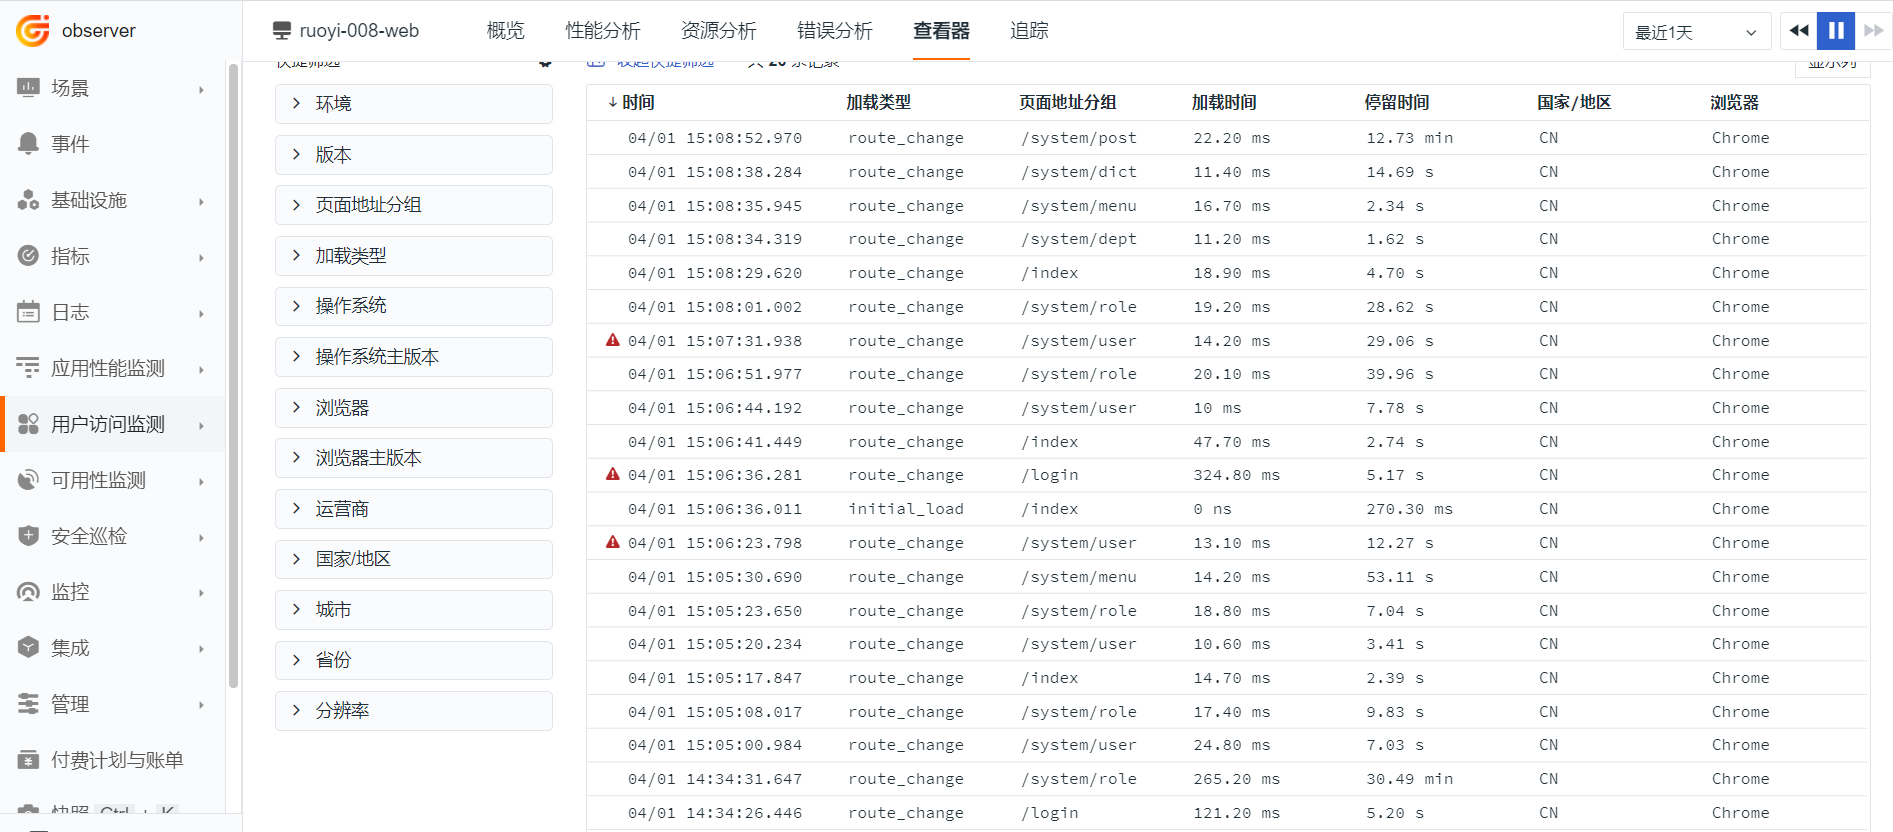
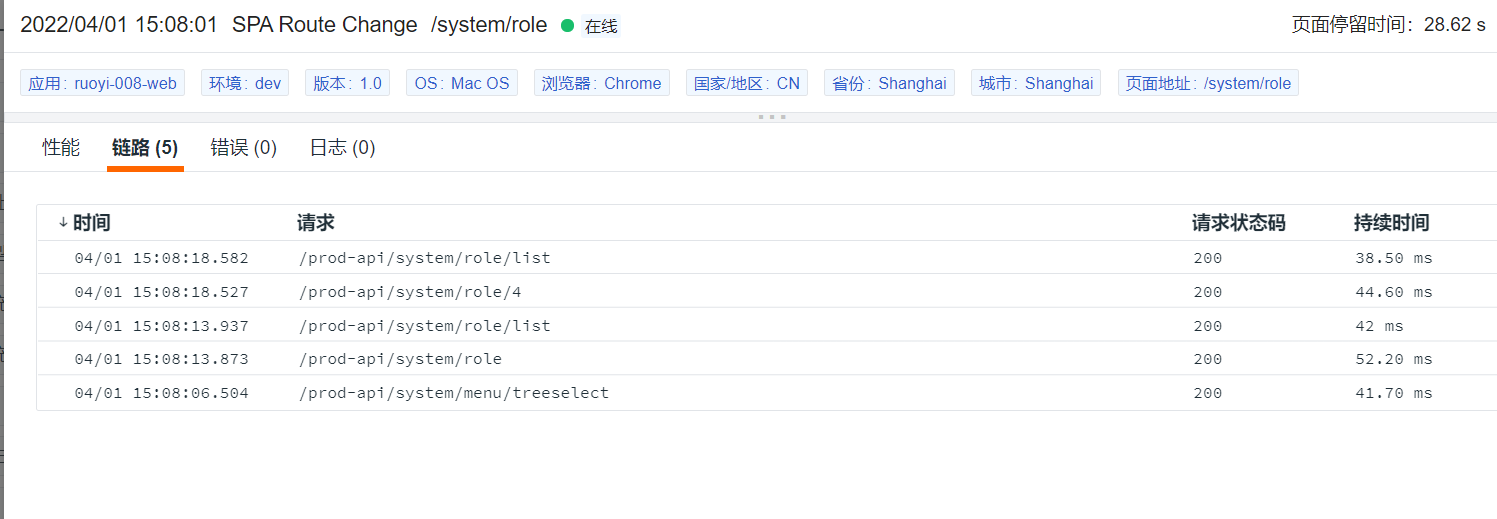
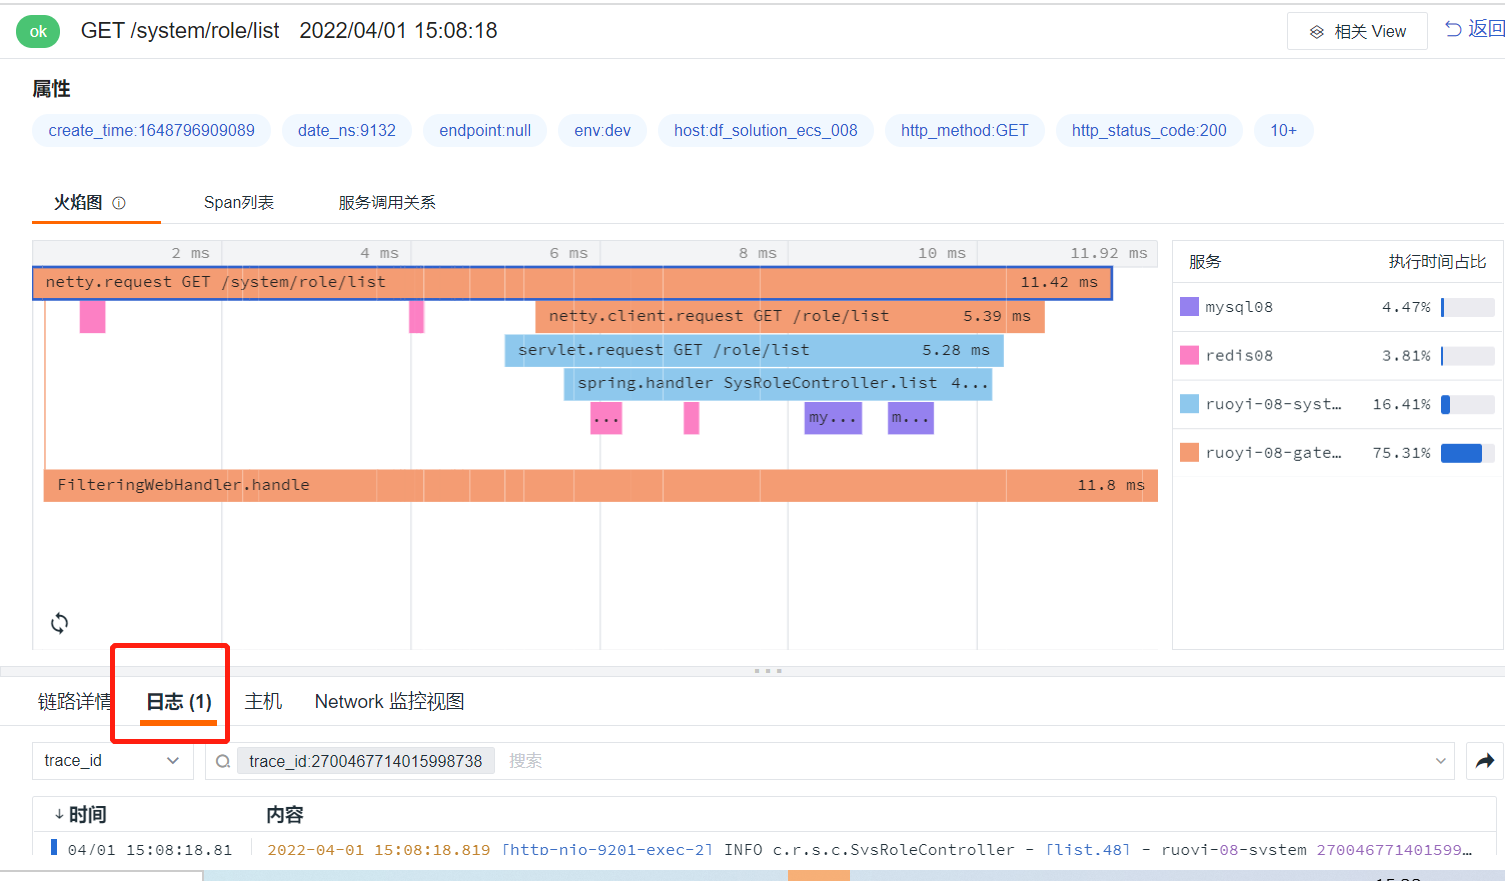
Tip: For projects with separate frontend and backend, you can correlate traces and logs with the backend in the Explorer. For detailed steps, refer to Kubernetes Application RUM-APM-LOG Correlation Analysis.
APM
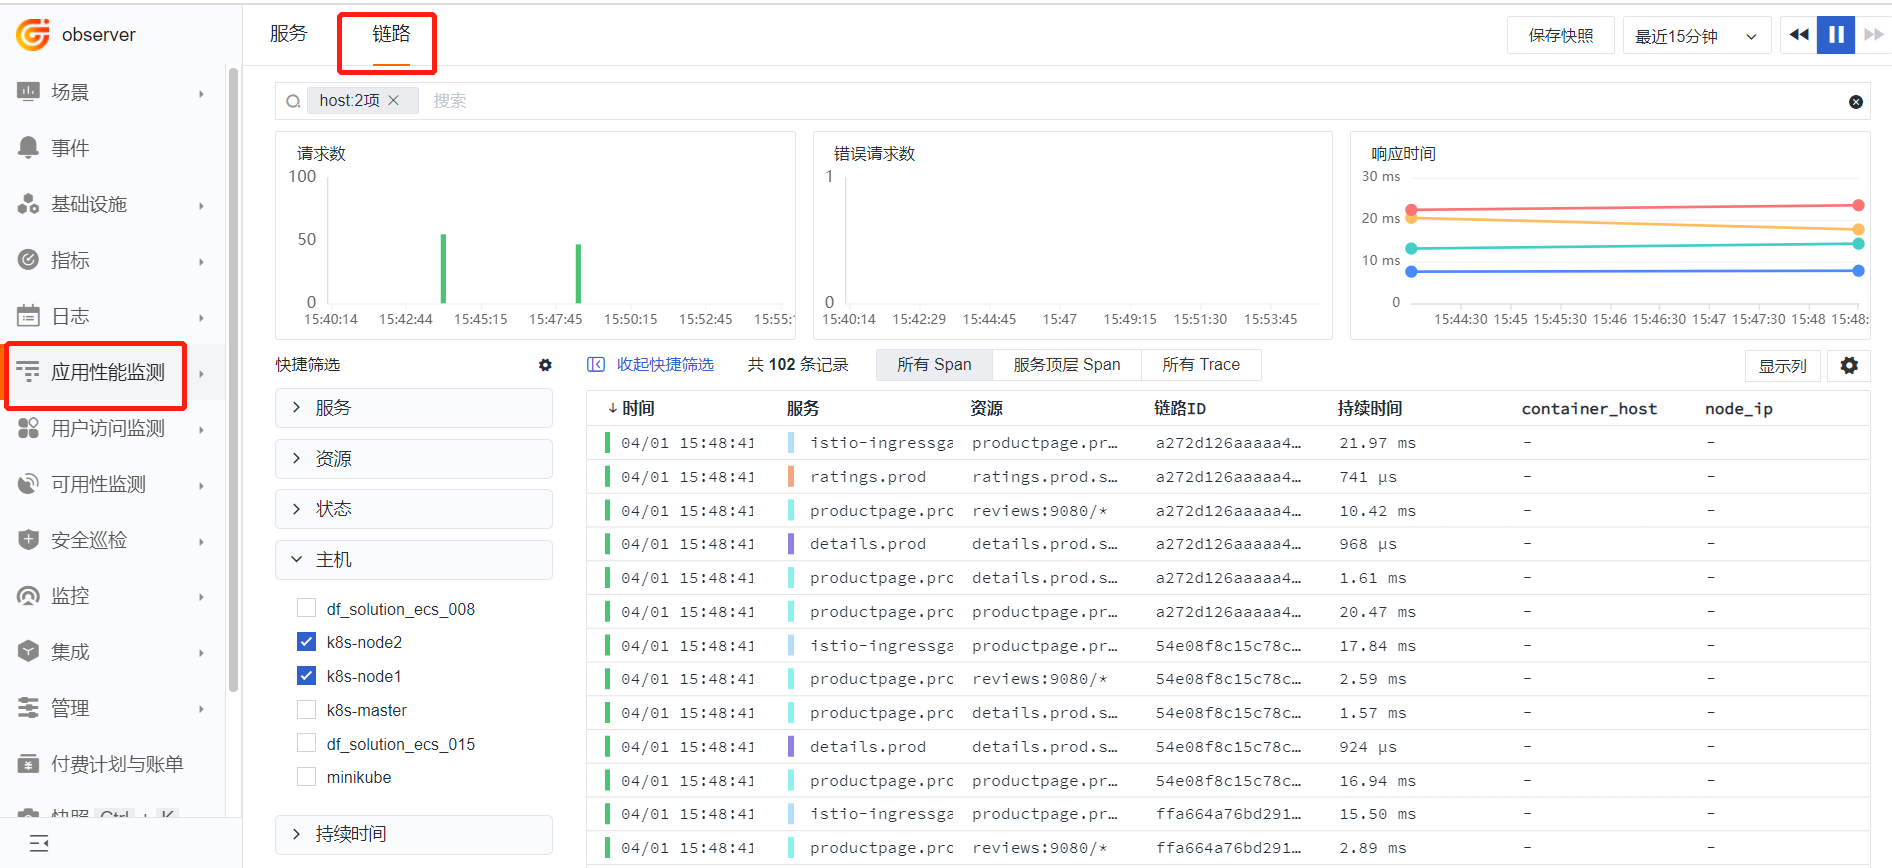
Log in to Guance, navigate to APM. Use APM to view trace data.

Logs
stdout
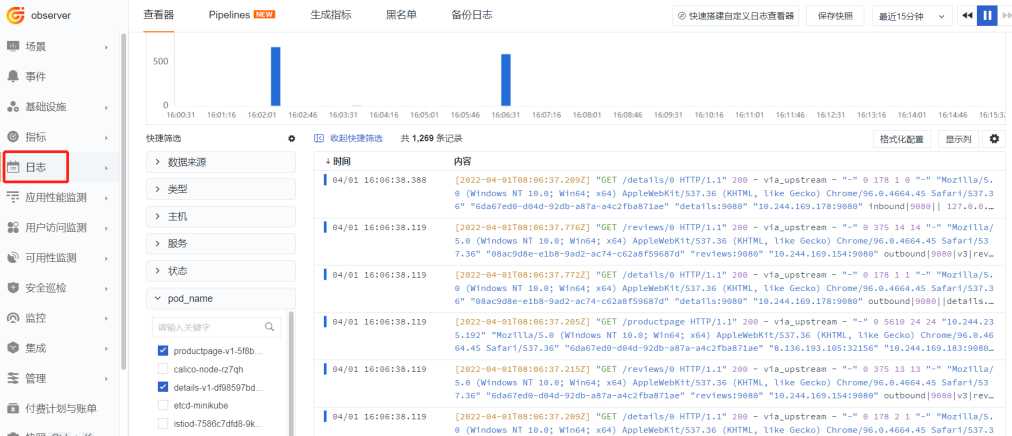
According to the configuration when deploying DataKit, logs output to /dev/stdout are collected by default. Log in to Guance, navigate to Logs, and view log information.
Tip: For more log collection methods, refer to:
Pod Log Collection Best Practices
Several Ways to Collect Logs in Kubernetes Clusters
Trace Timeout Analysis
The Bookinfo project includes a demo timeout example. When logging in as user jason, the ratings service will time out. Create a file named virtual-service-ratings-test-delay.yaml with the following content:
apiVersion: networking.istio.io/v1alpha3
kind: VirtualService
metadata:
  name: ratings
  namespace: prod
spec:
  hosts:
  - ratings
  http:
  - match:
    - headers:
        end-user:
          exact: jason
    fault:
      delay:
        percentage:
          value: 100.0
        fixedDelay: 7s
    route:
    - destination:
        host: ratings
        subset: v1
  - route:
    - destination:
        host: ratings
        subset: v1
Create the resource:
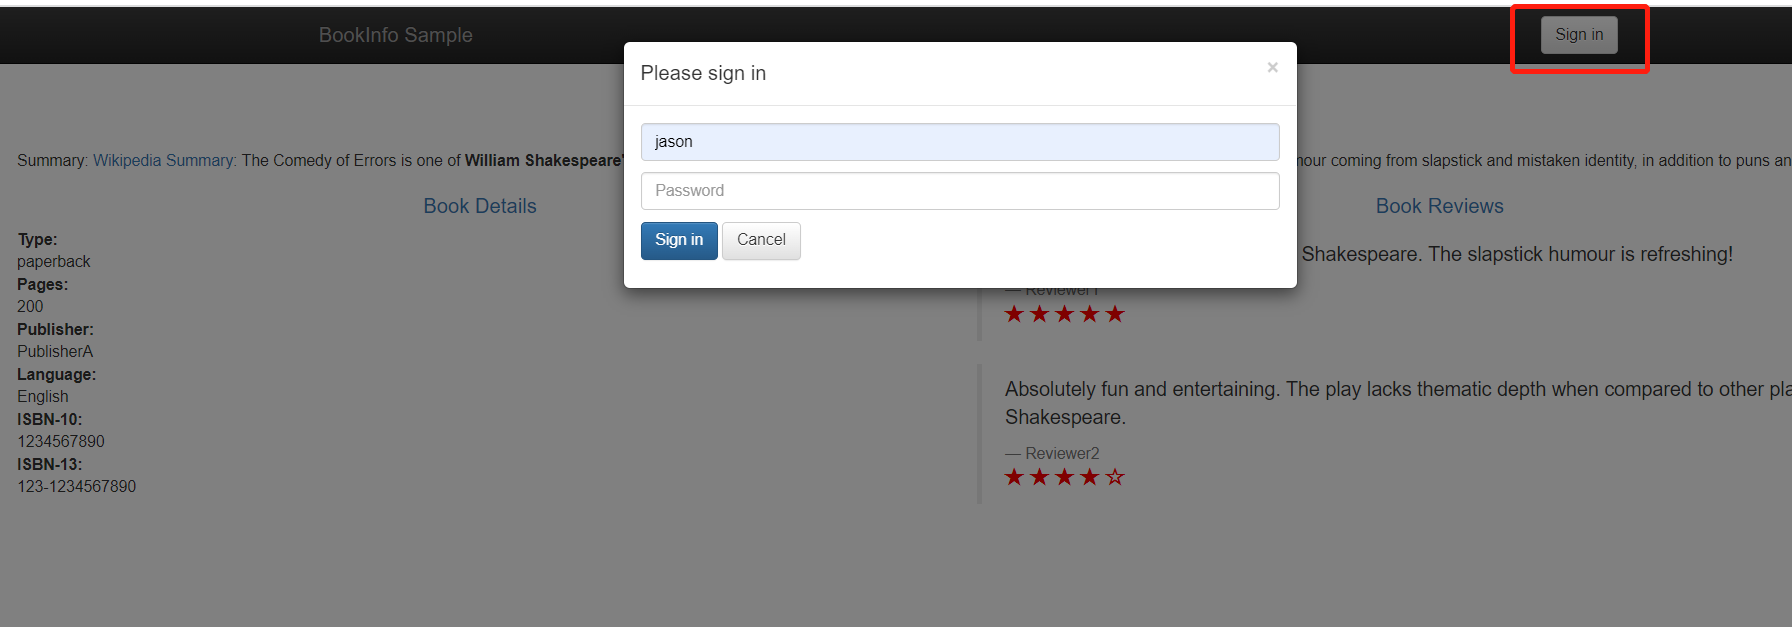
Log in as jason (password is empty).
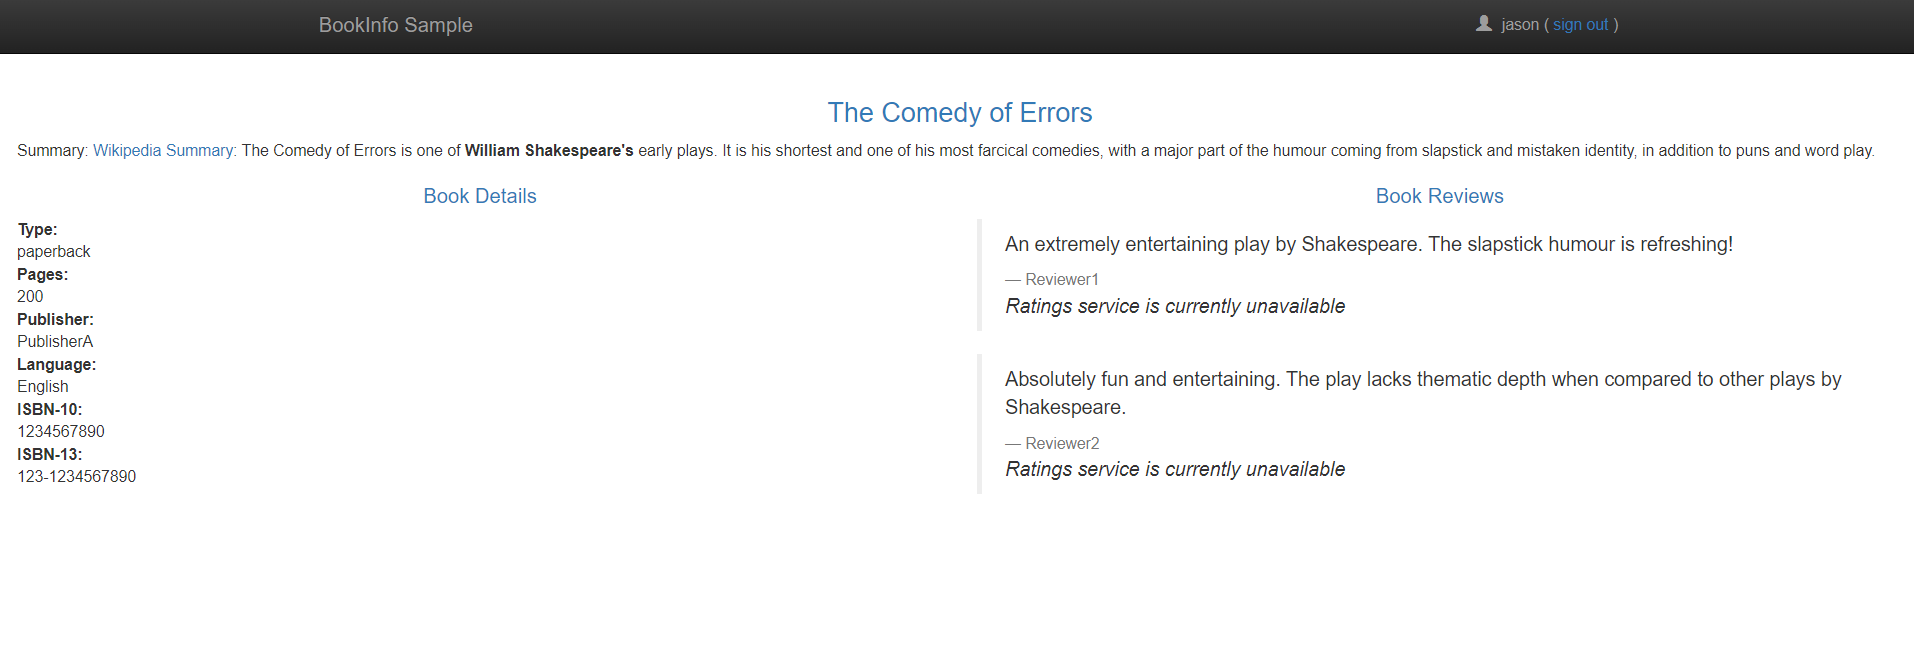
Visit http://8.136.193.105:32156/productpage. At this point, the ratings service is unreachable.
Log in to Guance, navigate to APM. Click on the timed-out trace.
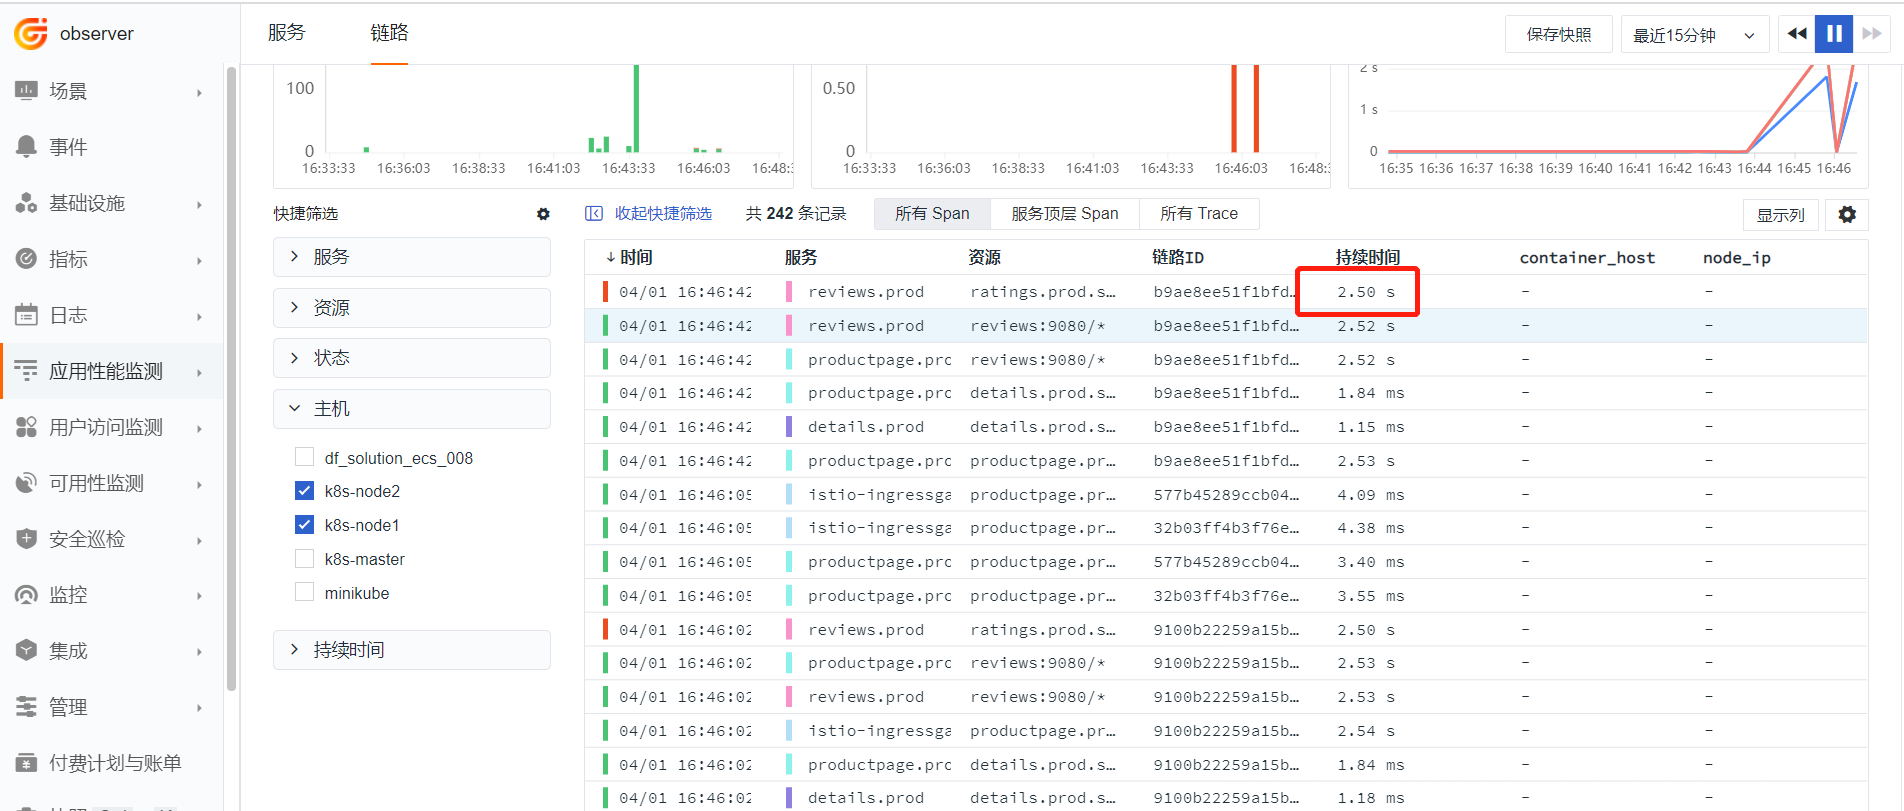
Observe the flame graph to identify the timeout call.