Deploy DataKit on EKS
Introduction
Amazon Elastic Kubernetes Service (Amazon EKS) is a managed Kubernetes service provided by Amazon. It allows users to deploy containerized applications without needing to install, operate, or maintain the Kubernetes control plane or nodes.
There are two ways to deploy DataKit on EKS:
- Method 1: Use kubectl to apply
datakit.yaml - Method 2: Install Helm and deploy DataKit with Helm
This document describes how to deploy kubectl and eksctl on an EC2 instance to connect to an EKS cluster, then install Helm on the same EC2 instance and use Helm to deploy DataKit.
Prerequisites
- You need to create a Guance account.
- You need to create an AWS account.
- An EKS cluster must be installed.
- An EC2 instance (Amazon Linux 2 AMI image).
Steps
Warning
The version information used in this example is: DataKit 1.5.2, Kubernetes 1.24, kubectl v1.23.6, Helm v3.8.2.
1 Install kubectl
Run the following commands to install kubectl.
wget https://dl.k8s.io/release/v1.23.6/bin/linux/amd64/kubectl
chmod +x kubectl
mv kubectl /bin/kubectl
Check the kubectl version.

2 Connect to EKS
2.1 Configure the Amazon CLI
This example uses an AMI image that already has the Amazon CLI installed by default.
If you are using a non-Amazon CLI image, you need to install it. Refer to Installing the Amazon CLI.

Log in to EC2, run aws configure, and follow the prompts to enter the Access Key ID, Access Key, and region from the AWS account used to create the EKS cluster. For Default output format, enter json.

2.2 Install eksctl
Run the following commands to install eksctl.
curl --silent --location "https://github.com/weaveworks/eksctl/releases/latest/download/eksctl_$(uname -s)_amd64.tar.gz" | tar xz -C /tmp
mv /tmp/eksctl /bin
chmod +x /bin/eksctl
Check the eksctl version.

2.3 Configure the EKS Cluster
Go to the AWS EKS console and check the cluster name.
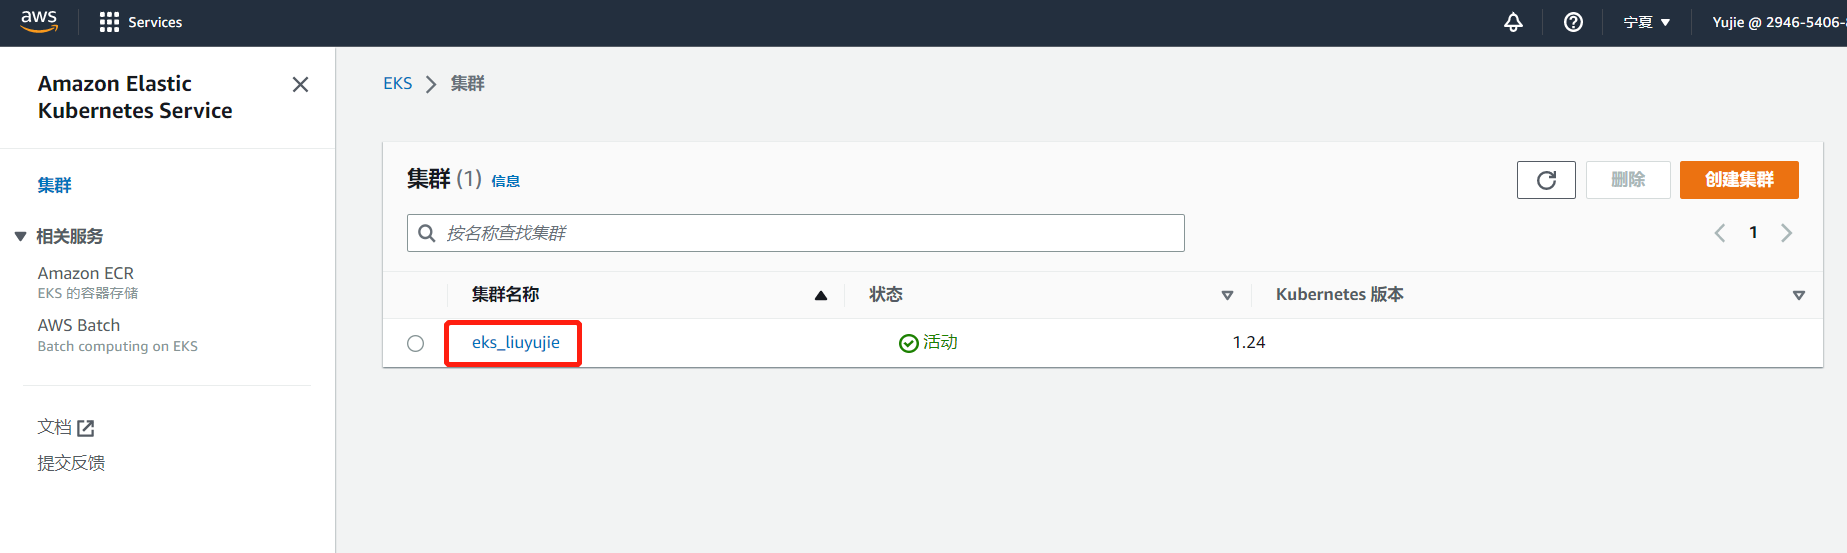
Use the following command to configure the cluster. Replace region with cn-northwest-1 and name with the EKS cluster name.

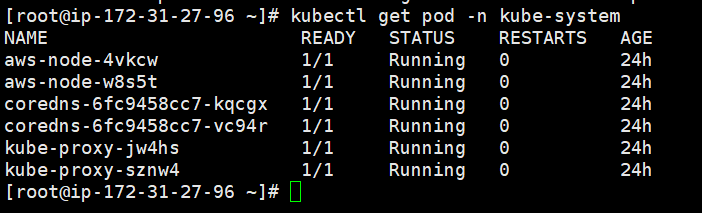
Use kubectl to check the cluster pods. If you see results, it means the connection to EKS is successful.
3 Install Helm
Log in to the EC2 instance and run the following commands to install Helm.
wget wget https://get.helm.sh/helm-v3.8.2-linux-amd64.tar.gz
tar -zxvf helm-v3.8.2-linux-amd64.tar.gz
mv linux-amd64/helm /usr/bin/helm
Check the Helm version.

4 Deploy DataKit
4.1 Obtain a Token
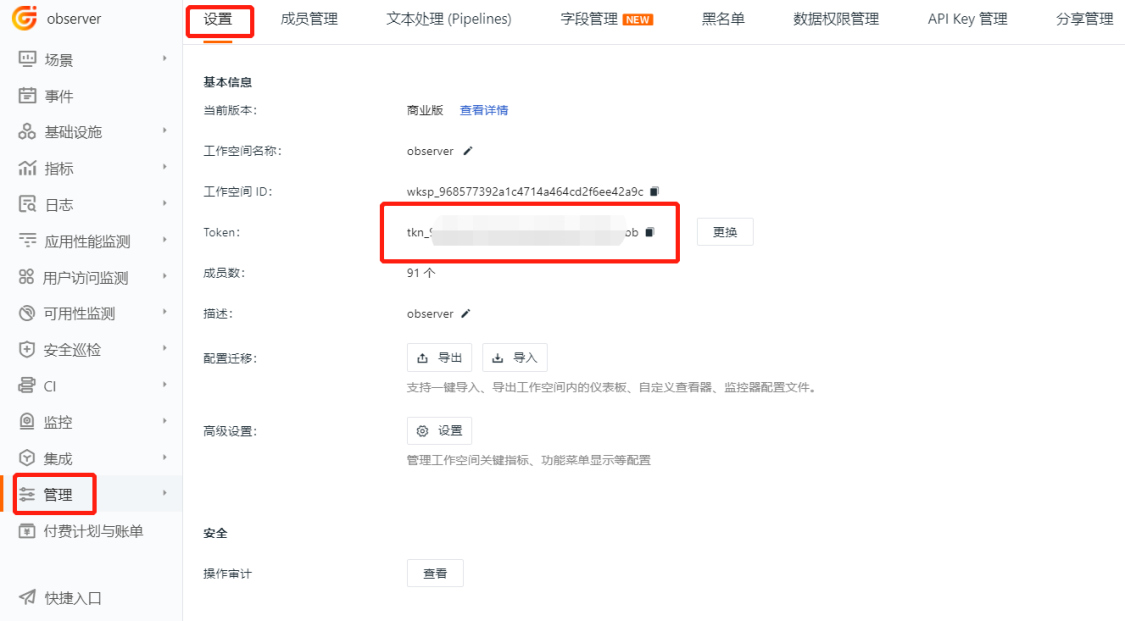
Log in to the Guance console, go to Management > Settings, find the Token, and click the copy icon on the right. The token will be used in the next step.
4.2 Add the Helm Repository
To deploy DataKit with Helm, first add the DataKit Helm repository.
Verify that the repository was added successfully.

4.3 Configure DataKit
Download and extract the DataKit chart from the repository to make it easier to add configuration.
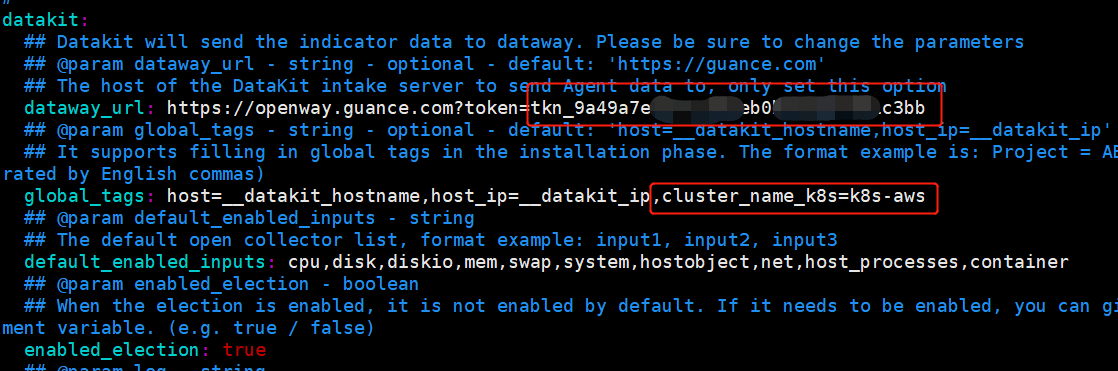
Edit the values.yaml file. Paste the token you obtained into the red box in the dataway_url field shown in the image below.
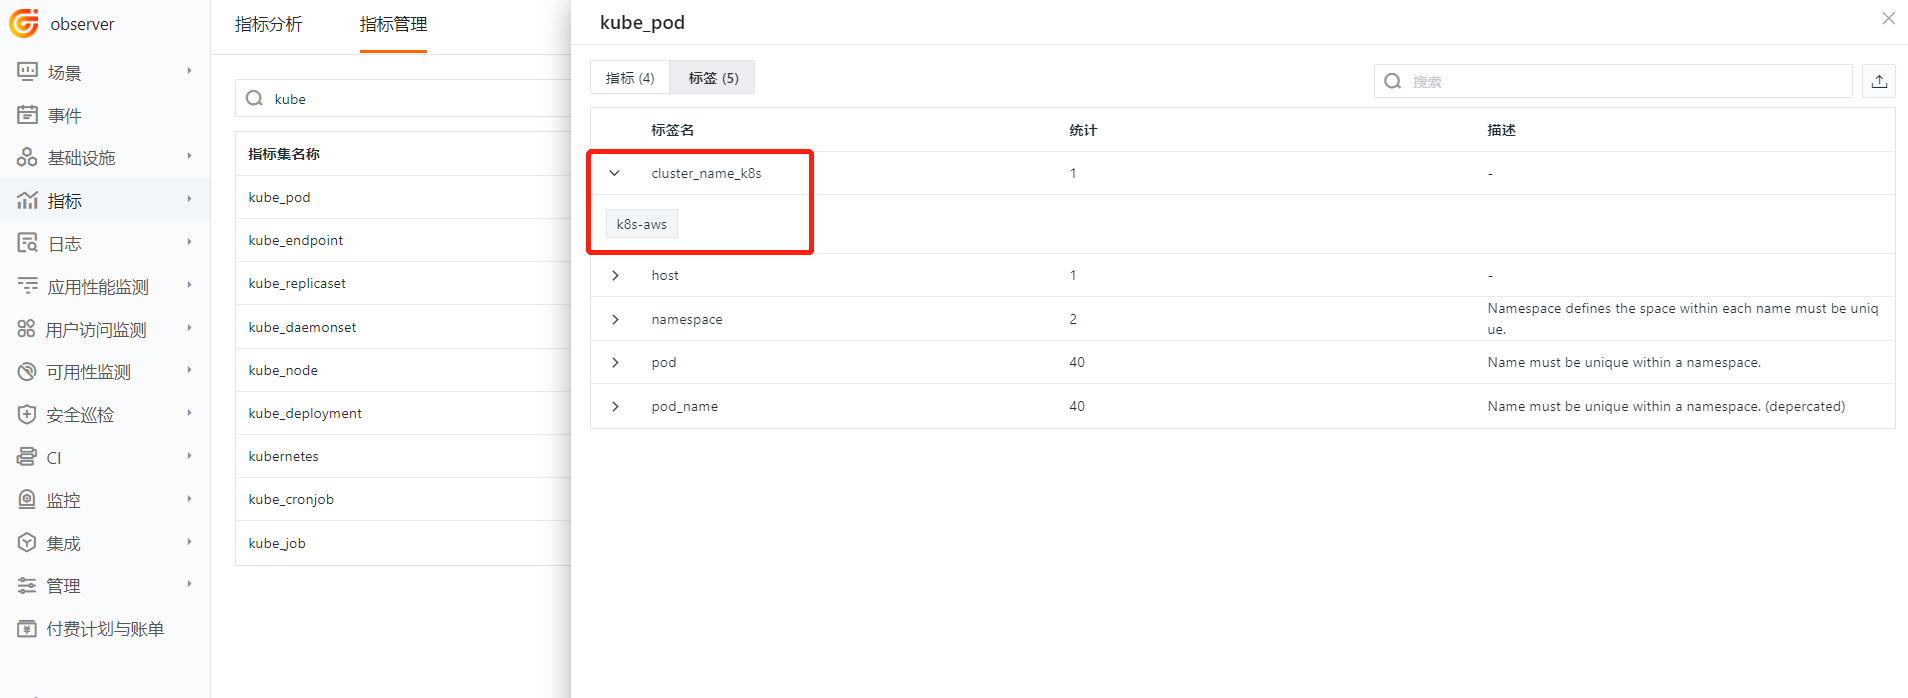
Add cluster_name_k8s=k8s-aws to the global_tags value. This adds a global tag cluster_name_k8s for non-election metric collection.
Set the environment variable ENV_NAMESPACE to k8s-aws. The DataKit election is enabled by default. Only one DataKit in the workspace plus this namespace collects election metrics, preventing duplicate collection.
Then add the environment variable ENV_GLOBAL_ELECTION_TAGS, which adds a global tag cluster_name_k8s for election metrics.
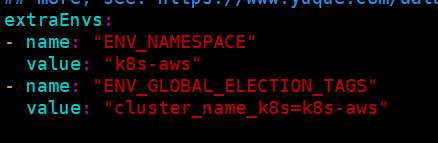
Note: The three occurrences of
k8s-awsabove can be changed to other strings, but they must be different across clusters.
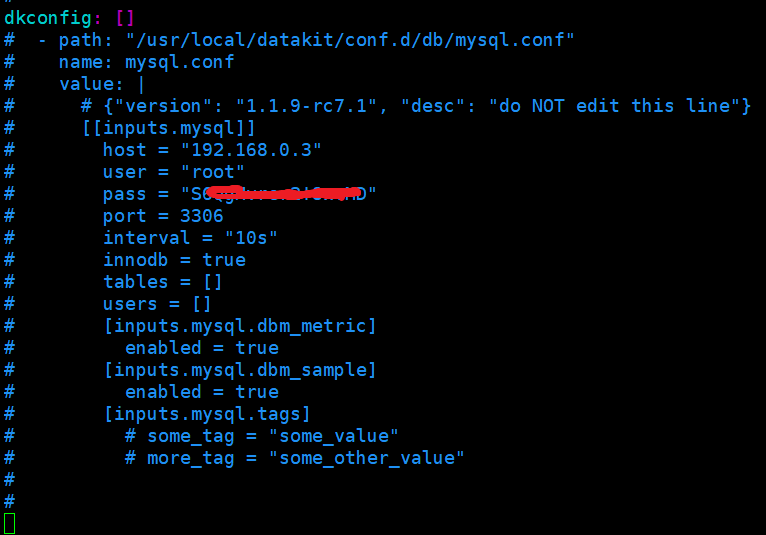
If you need to enable collectors, you can add configuration under dfconfig. The commented-out lines show an example of enabling the MySQL collector.
4.4 Install DataKit
Run the following command to deploy DataKit. If the datakit namespace already exists, you can omit the --create-namespace flag.
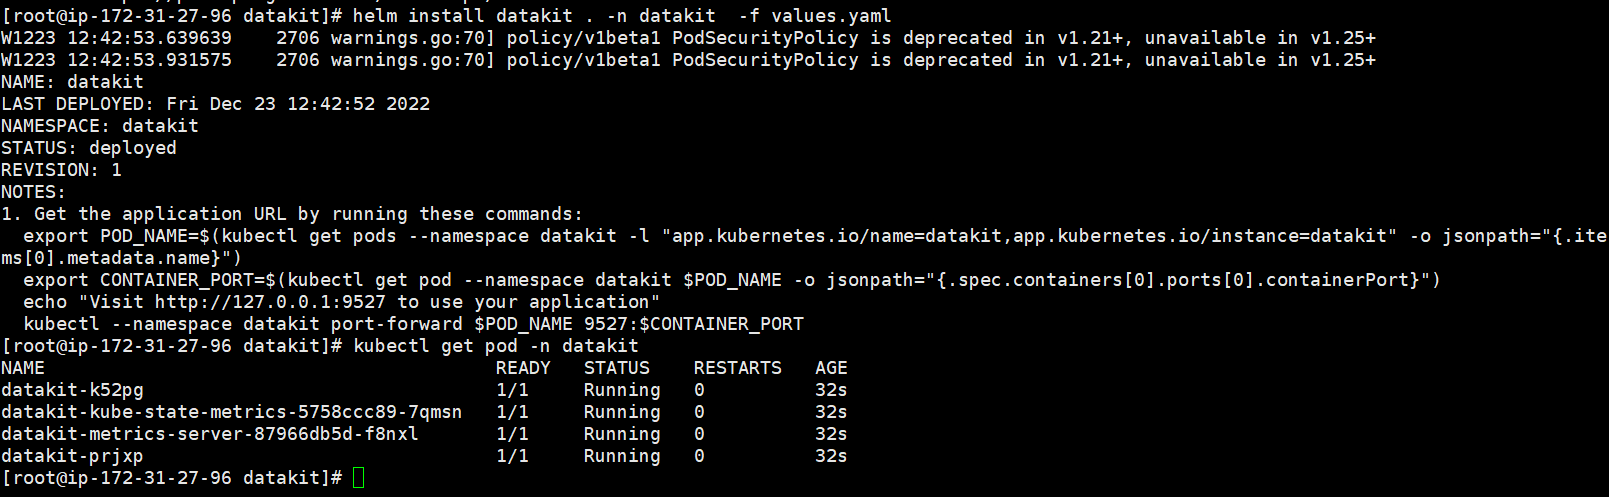
After successful deployment, log in to the Guance console, go to the Workspace, and navigate to Metrics > Metrics Management. You should see metrics starting with kube that include the global tag cluster_name_k8s.