DataKit Configuration for HTTPS
Introduction
HTTPS is an HTTP channel that aims for security, ensuring the safety of data transmission through transport encryption and identity authentication on top of HTTP. For security reasons, HTTPS protocol is often used when deploying front-end applications. When configuring RUM for front-end applications using HTTPS, if the deployed DataKit still uses IP + port with HTTP protocol, browsers will consider it insecure, preventing the application's RUM data from being reported to Guance.
This article will use Nginx's SSL to enable HTTPS on the server.
Prerequisites
- A cloud host running CentOS 7.9
- An Alibaba Cloud domain name that has been resolved to the cloud host's port 80
- The cloud host has <DataKit installed>
Procedure
Warning
The current example uses DataKit version 1.4.20 (latest version) and Nginx version 1.22.1 for testing
1 Install Nginx
1.1 Install the yum-utils Package
Log in to the cloud host and execute the following command.
1.2 Create nginx.repo
Create a /etc/yum.repos.d/nginx.repo file with the following content.
[nginx-stable]
name=nginx stable repo
baseurl=http://nginx.org/packages/centos/\$releasever/\$basearch/
gpgcheck=1
enabled=1
gpgkey=https://nginx.org/keys/nginx_signing.key

[nginx-mainline]
name=nginx mainline repo
baseurl=http://nginx.org/packages/mainline/centos/\$releasever/\$basearch/
gpgcheck=1
enabled=0
gpgkey=https://nginx.org/keys/nginx_signing.key
1.3 Execute the Installation Command
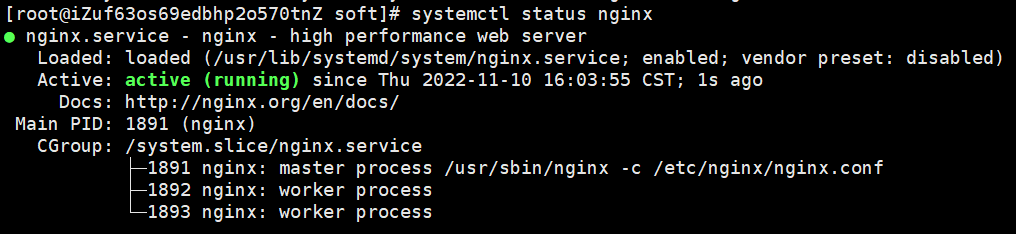
When you see "running," it indicates that Nginx has been successfully installed.
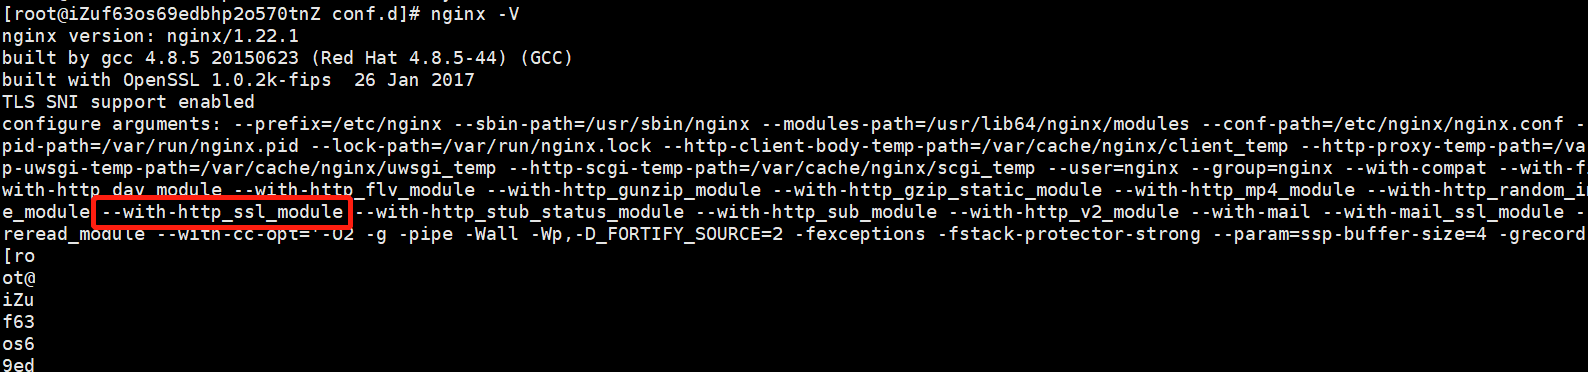
1.4 Check the SSL Module
Enter nginx -V. If the output includes --with-http_ssl_module, the SSL module is installed.
2 Download the Certificate
2.1 Download the SSL Certificate
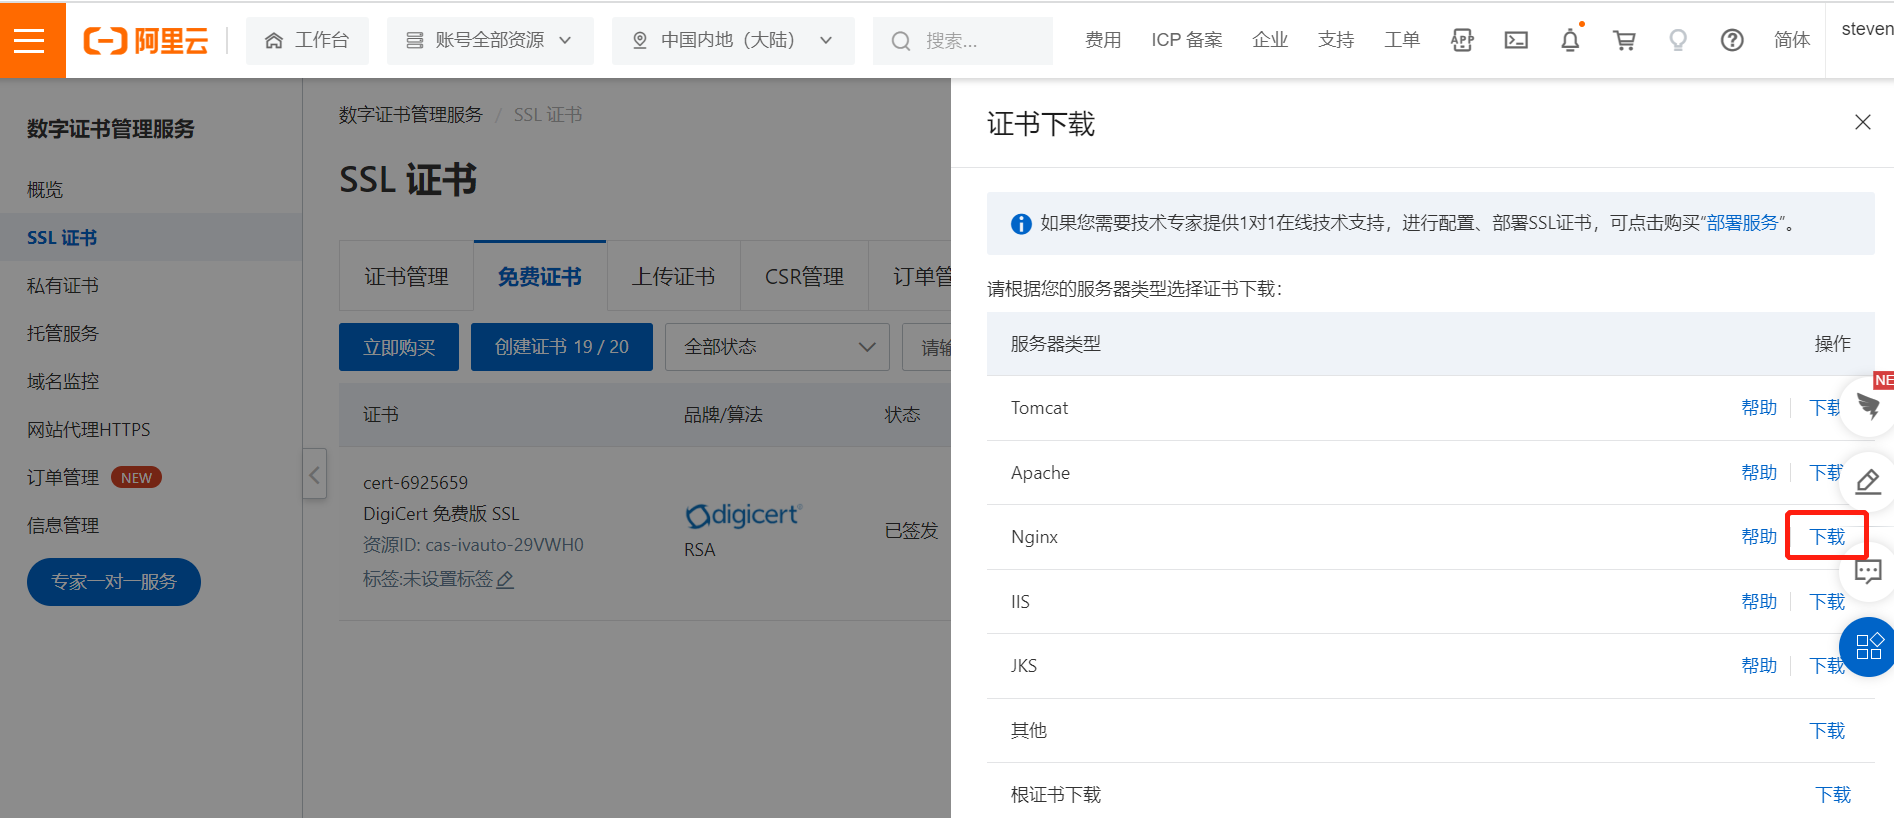
Log in to Alibaba Cloud - Digital Certificate Management Service - SSL Certificates and create a free certificate.
After successfully creating the certificate, find Nginx and click "Download."
2.2 Upload the Certificate
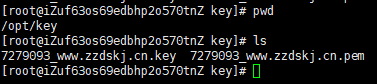
Unzip the SSL certificate and upload 7279093_www.zzdskj.cn.key and 7279093_www.zzdskj.cn.pem to the /opt/key directory on the cloud host.
2.3 Modify the Nginx Configuration File
Edit the /etc/nginx/conf.d/default.conf file and input the following content.
Port 443 will be redirected to DataKit's port 9529.
server {
    listen       80;
    server_name  localhost;

    #access_log  /var/log/nginx/host.access.log  main;
    rewrite ^(.*)$ https://$host$1 permanent;
}

server {
    listen       443 ssl http2;
    server_name  zzdskj.cn;
    ssl_certificate        /opt/key/7279093_www.zzdskj.cn.pem;
    ssl_certificate_key    /opt/key/7279093_www.zzdskj.cn.key;

    location / {
        proxy_set_header Host $http_host;
        proxy_set_header X-Real-IP $remote_addr;
        proxy_set_header REMOTE-HOST $remote_addr;
        proxy_set_header X-Forwarded-For $proxy_add_x_forwarded_for;
        proxy_pass http://localhost:9529/;
    }

    error_page 404 /404.html;
    location = /40x.html {
    }

    error_page 500 502 503 504 /50x.html;
    location = /50x.html {
    }
}
2.4 Reload the Configuration
Execute the following command.
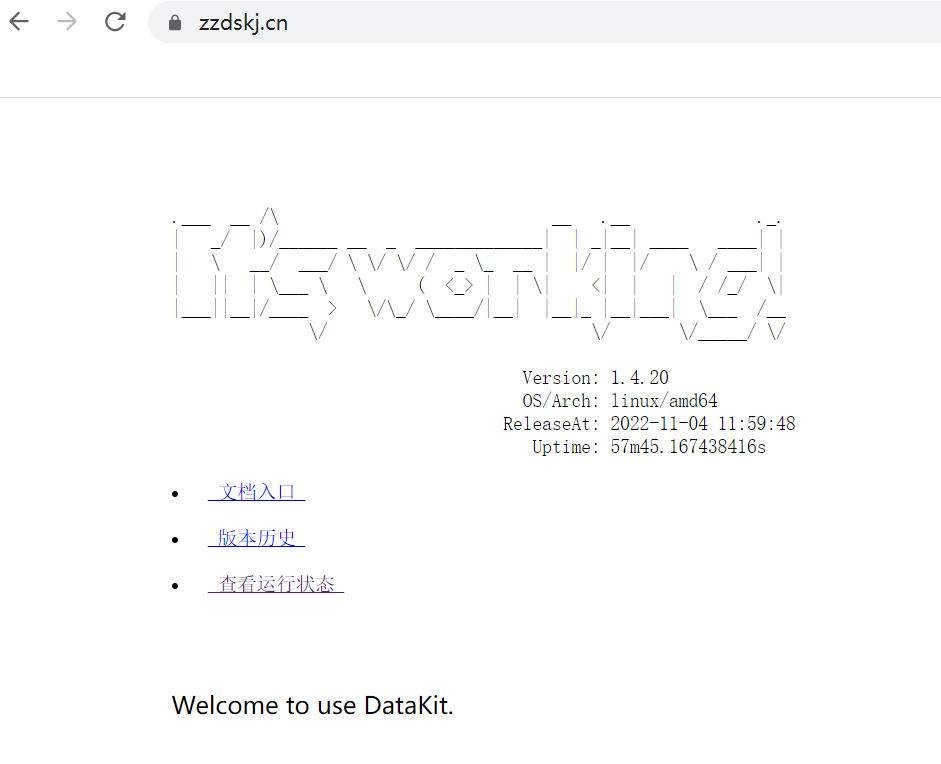
3 Verification
Enter the domain name with HTTPS in the browser. If you see the following interface, the configuration is successful.