Authorize AWS with External ID
-
Click to authorize, Go to Console.
-
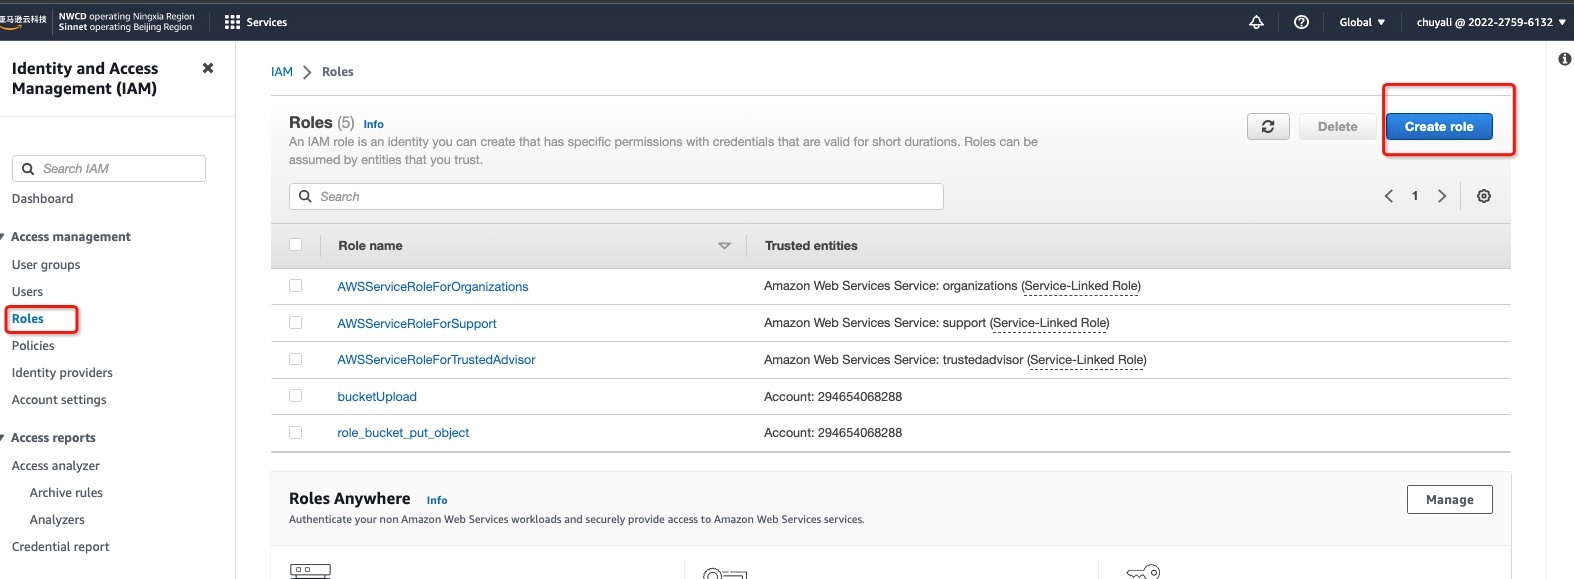
Select IAM
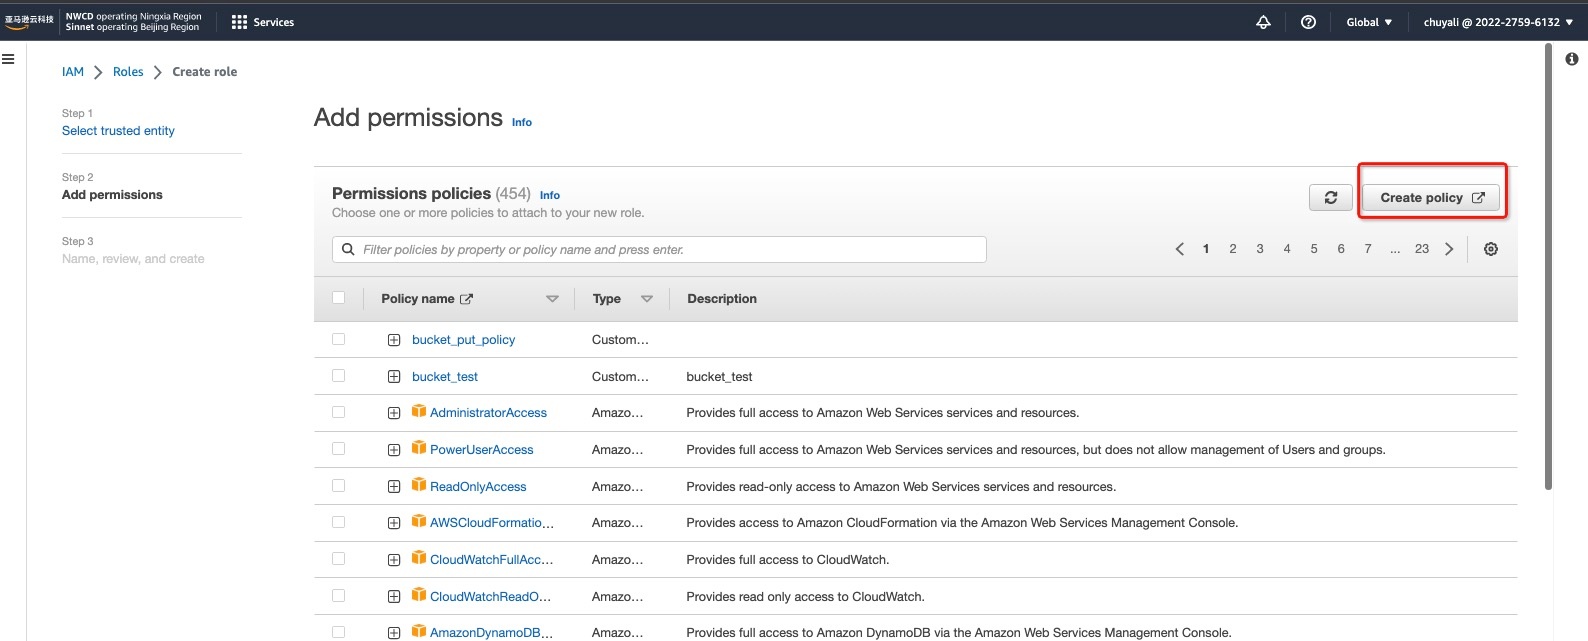
2.1 In the left sidebar, select Roles, click Create Role:
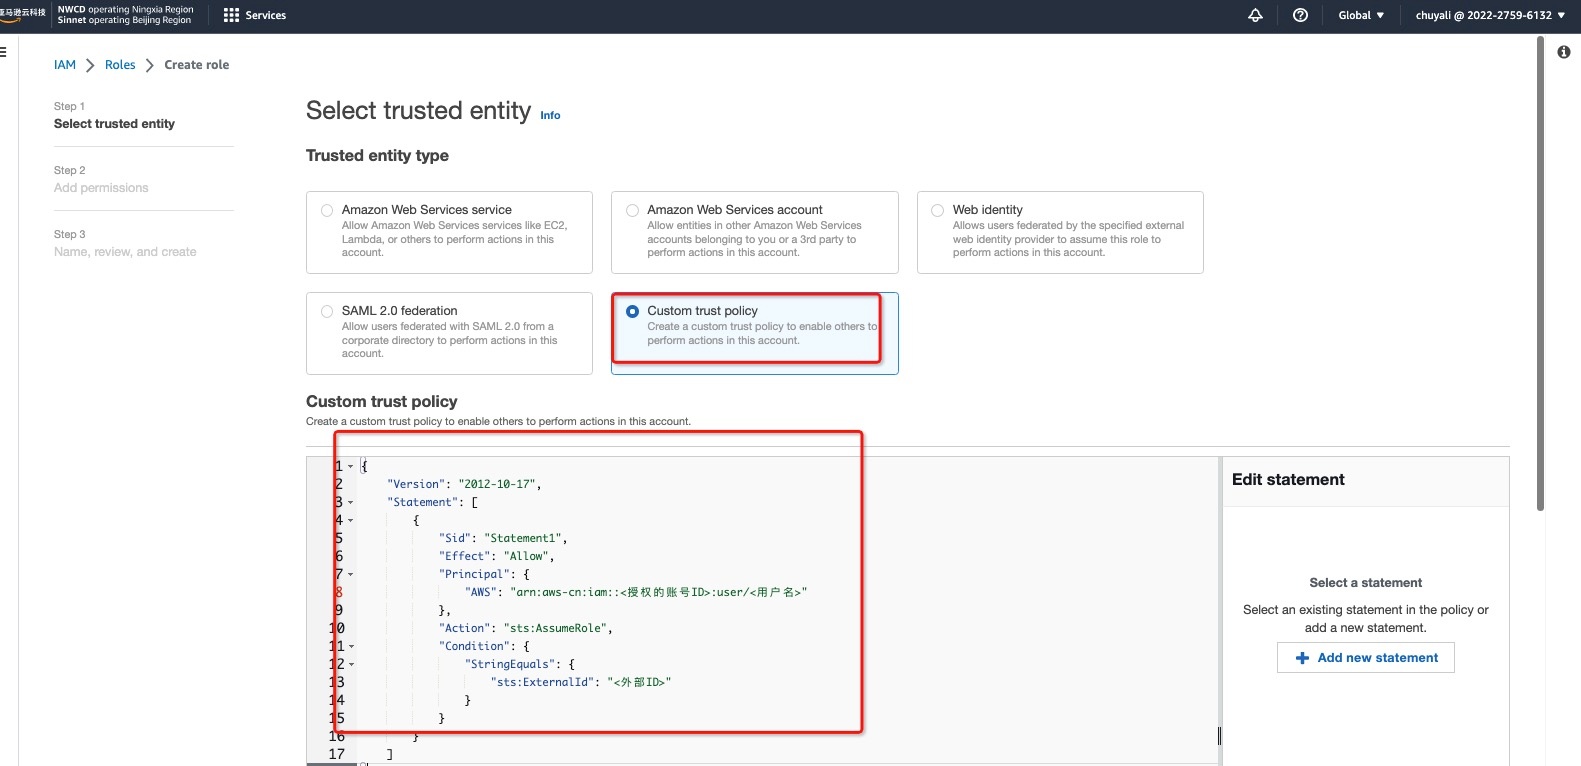
2.2 In Step 1 > Select Trusted Entity, select Custom Trust Policy:
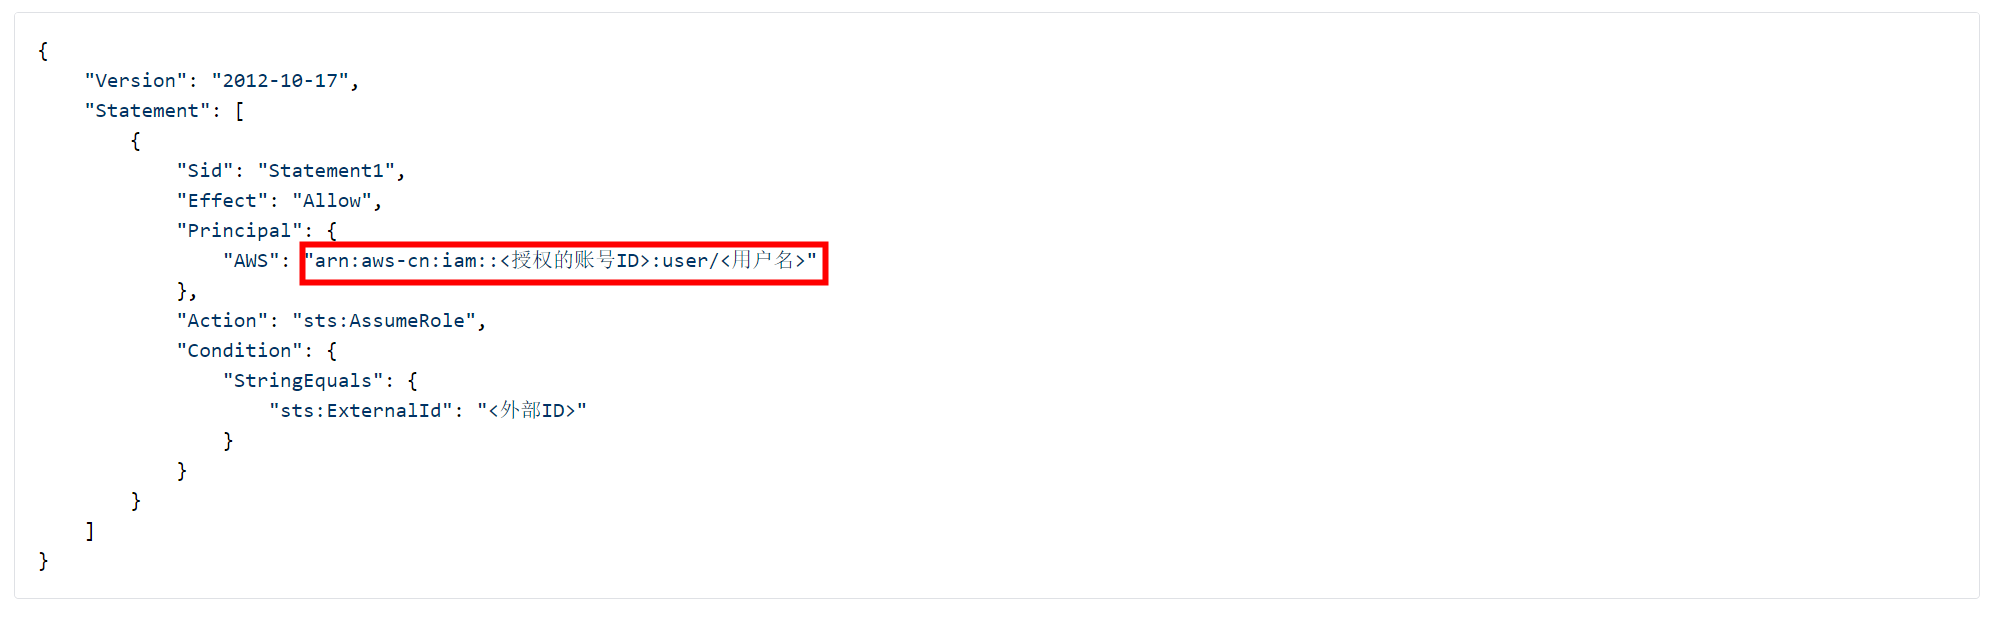
{
    "Version": "2012-10-17",
    "Statement": [
        {
            "Sid": "Statement1",
            "Effect": "Allow",
            "Principal": {
                "AWS": "arn:aws-cn:iam::<Authorized Account ID>:user/<Username>"
            },
            "Action": "sts:AssumeRole",
            "Condition": {
                "StringEquals": {
                    "sts:ExternalId": "<External ID>"
                }
            }
        }
    ]
}
Warning
When configuring the custom trust policy, you need to fill in the AWS ID and username information of Guance.
2.3 Click Next, in Step 2 > Add Permissions, click Create Policy:
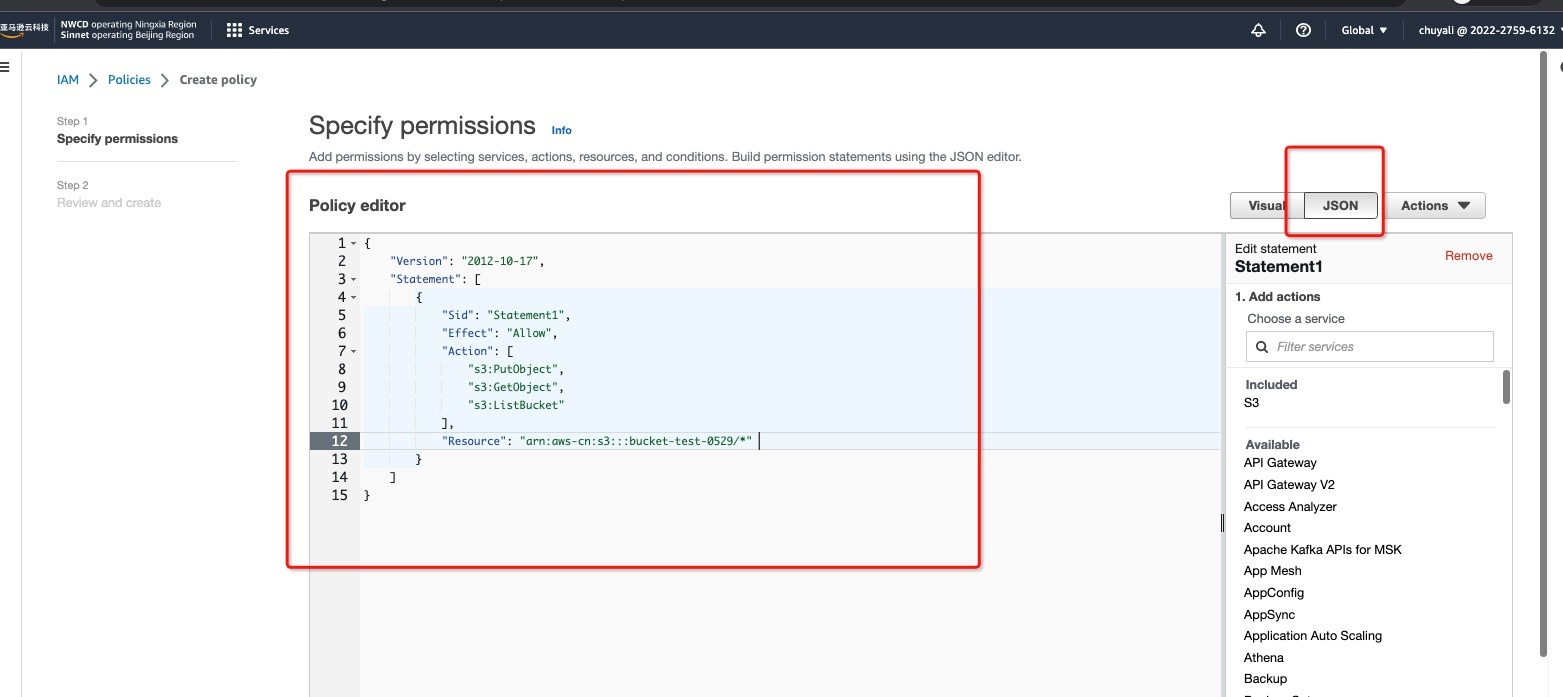
2.3.1 In Create Policy > Specify Permissions > Policy Editor, enter the following content:
{
    "Version": "2012-10-17",
    "Statement": [
        {
            "Sid": "Statement1",
            "Effect": "Allow",
            "Action": [
                "s3:PutObject",
                "s3:GetObject",
                "s3:ListBucket"
            ],
            "Resource": [
                "arn:aws-cn:s3:::<bucket name>",
                "arn:aws-cn:s3:::<bucket name>/*"
            ]
        }
    ]
}
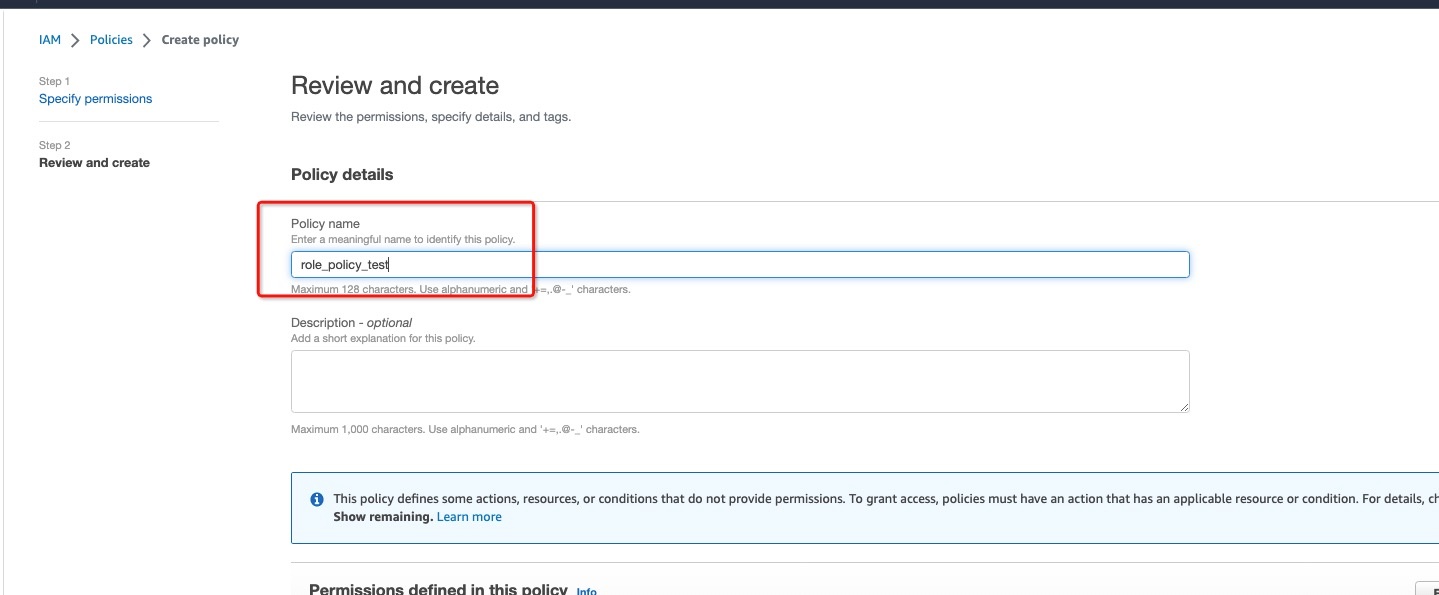
2.3.2 In Review and Create > Policy Details > Policy Name, enter a name to identify this policy, and save the permissions:
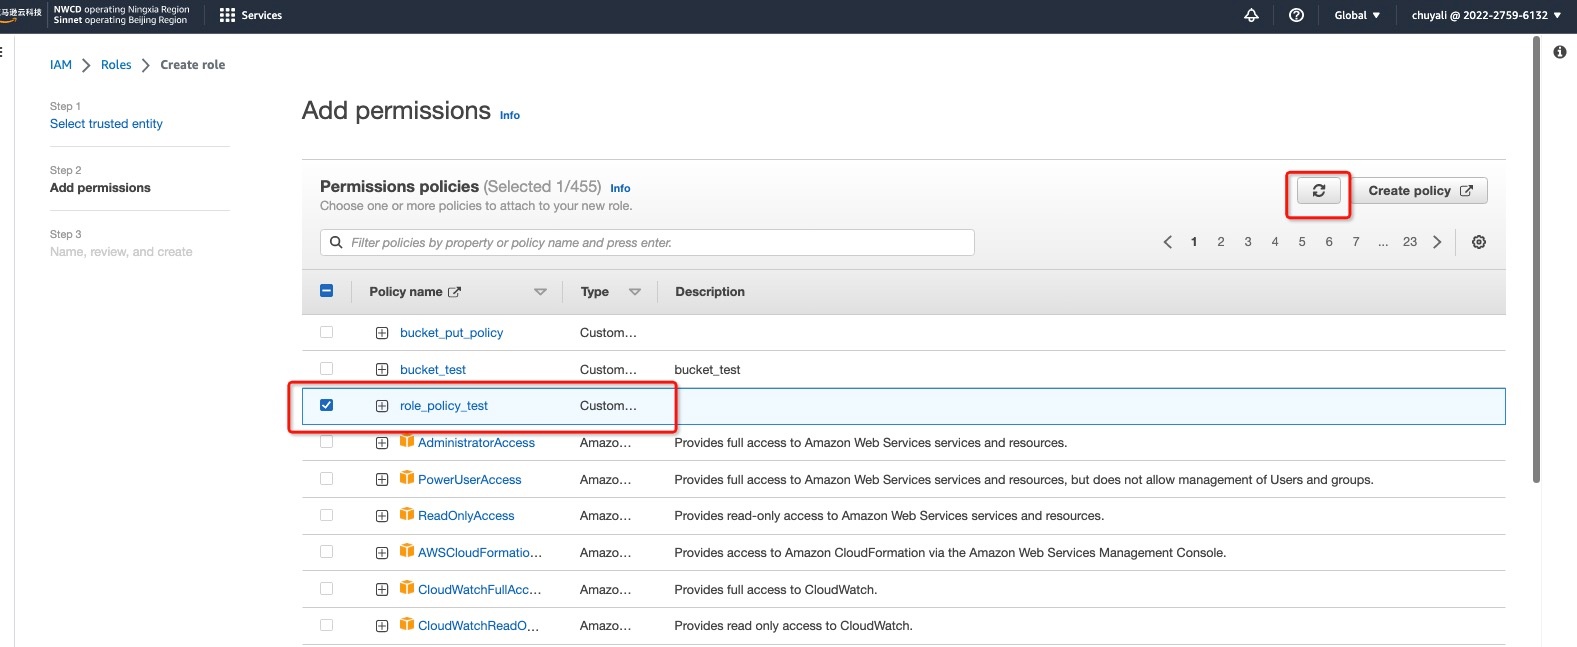
2.4 Return to the Create Role interface, click , and the previously created permission will appear. Select the permission:
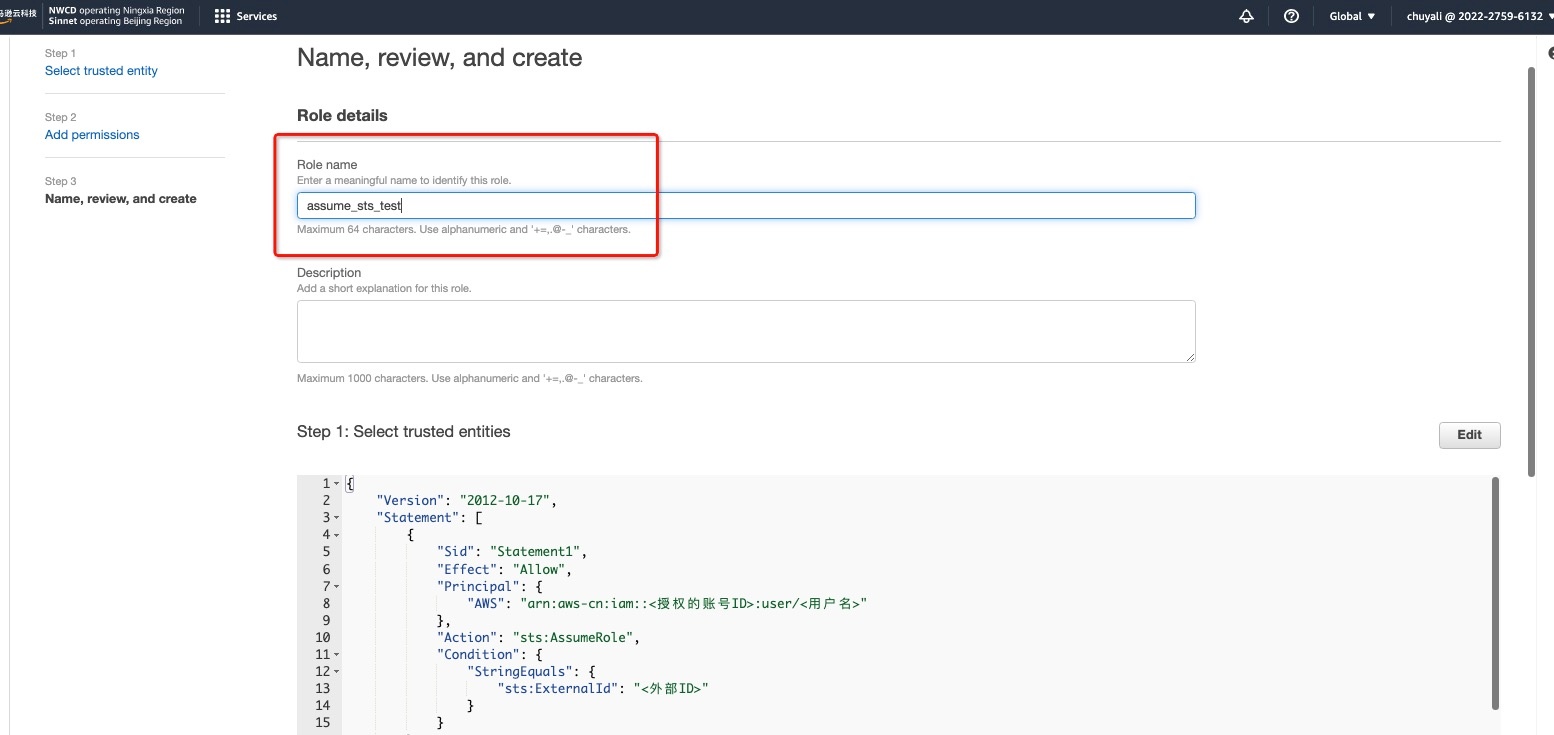
2.5 In Step 3 > Name, Review, and Create > Role Details > Role Name, fill in the Role Name to identify this role, click Create Role, and the authorization is complete. The role name here is the AWS Role Name you selected under AWS S3 > Role Authorization > Fill in Archive Information.