Notification Targets Management
Set up the notification targets for alert events, including system Default Notification Targets and Custom Notification Targets.
Default Notification Targets
You can choose from the following 6 system default notification channels as alert notification targets:
- DingTalk Bot
- WeCom Bot
- Lark Bot
- Custom Webhook
- SMS Group
- Simple HTTP Request
When configuring, you need to specify the target Webhook address. Additionally, you can define relevant notification permissions to control which users or roles can operate these notification target rules.

Note: Alert notifications for DingTalk bots, WeCom bots, and Lark bots are sent once per minute in a merged manner, rather than being triggered instantly. Therefore, there may be approximately a one-minute delay in notifications.
Configure Webhook
DingTalk Bot
To adapt to the latest creation and usage model of DingTalk bots, you must first create an internal enterprise application bot on the DingTalk development platform.
You can refer to Creating and Installing Internal Enterprise Application Bots.
Differences Between Old and New DingTalk Bots
- DingTalk Platform: Creating a bot has changed from directly creating under Group Management to creating an application on the Development Platform;
- Guance: The secret key configuration for the latest DingTalk bot is no longer mandatory.
Create an internal enterprise application bot
-
Apply for Developer Permissions on the DingTalk development platform;
-
Create an application:
-
Select Application Development > DingTalk Application > Create Application, click to create the application;
-
After the application is created, click the icon's Application Details, go to the bot configuration page and fill in related configurations;
-
In the target group, click Add Bot, select the newly created application bot from the enterprise bot list;
-
Obtain the bot Webhook address, find the newly created application bot in bot management, click to view details, and copy the Webhook address.

Note: Here, the bot is only used to receive information, there is no interaction, so the Message Receiving Mode configuration can be chosen arbitrarily, and the address can be left blank in HTTP mode.
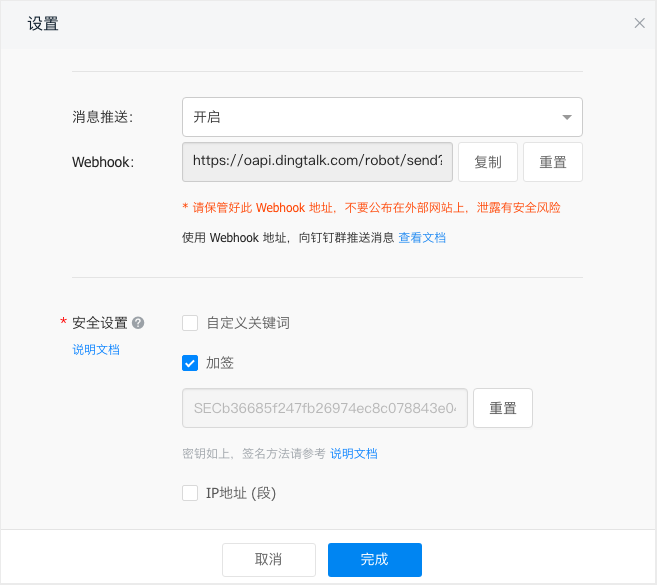
Return to the DingTalk bot configuration page
-
After successfully adding the DingTalk group bot, you can query the bot’s Signature Key and Webhook Address in the bot configuration details.
-
Input configuration information, including a custom notification target name, key, and Webhook address.
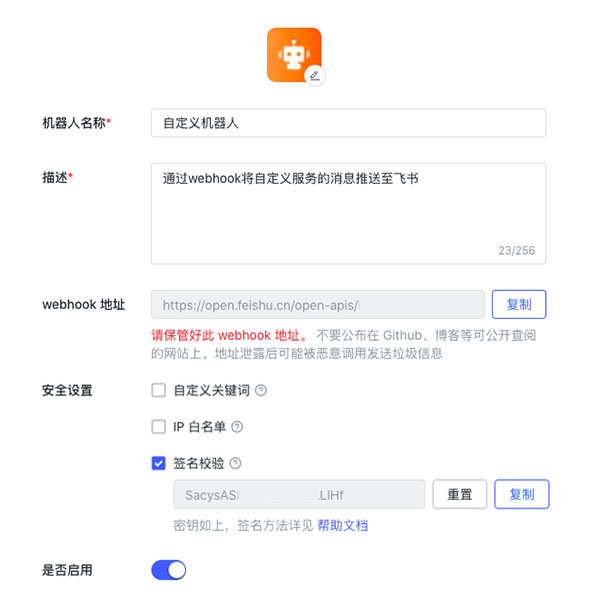
WeCom Bot
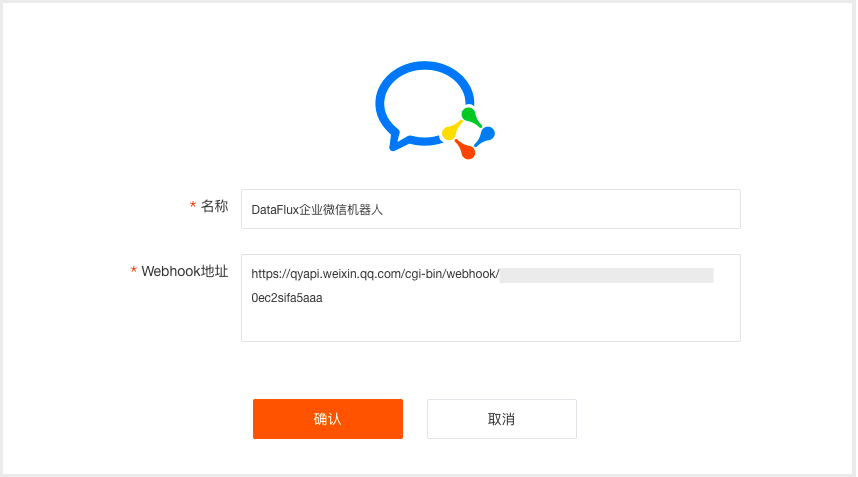
Select WeCom Bot, input configuration information, including a custom notification target name and Webhook address.
After successfully adding a bot to a WeCom group, you can query the bot’s unique Webhook Address in the bot configuration details.
Lark Bot
Select Lark Bot, input configuration information, including a custom notification target name, Webhook address, and key.
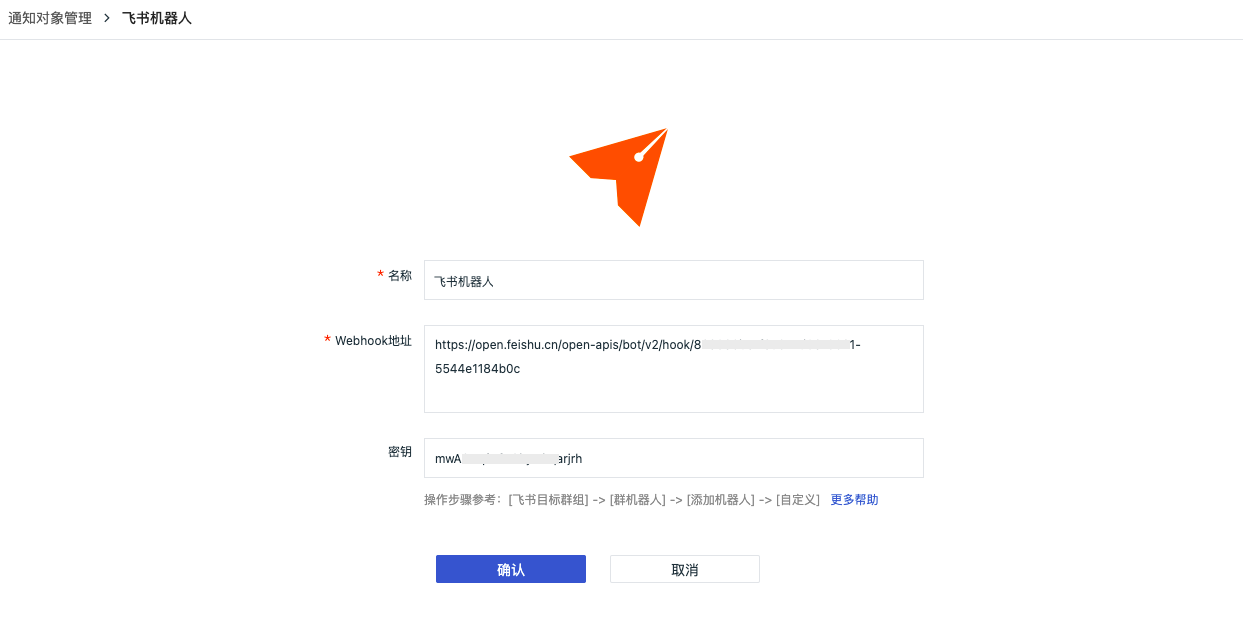
After successfully adding a bot to a Lark group, you can query the bot’s Signature Verification and Webhook Address in the bot configuration details.
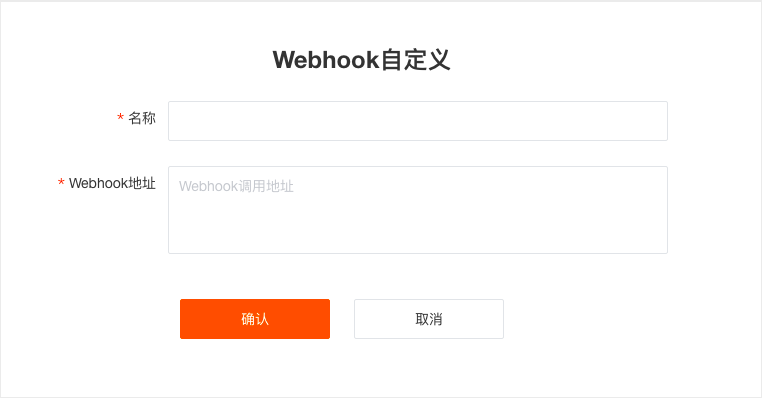
Custom Webhook
Select Custom Webhook, input name, Webhook address, and member information.
The final external Webhook event notifications include the following content:
Event Information:
bodyType is json text:
POST http://my-system/accept-webhook
Content-Type: application/json

{
    "timestamp"               : 1625638440,
    "df_status"               : "warning",
    "df_event_id"             : "event-xxxxxxxxxx",
    "df_title"                : "web001 has issues",
    "df_message"              : "web001 has issues\nCPU usage greater than 90\nMemory usage greater than 90",
    "df_dimension_tags"       : "{\"host\":\"web001\"}",
    "df_monitor_id"           : "monitor_xxxxxxxxxx",
    "df_monitor_name"         : "Anomaly Detection Name",
    "df_monitor_checker_id"   : "rul_xxxxxxxxxx",
    "df_monitor_checker_name" : "Anomaly Detection Item Name",
    "df_monitor_checker_value": "99",
    "df_event_link"           : "https://console.guance.com/keyevents/monitorChart?xxxxxxxxxx"
    "df_workspace_uuid"       : "wksp_xxxxxxxxxx",
    "df_workspace_name"       : "My Workspace",
    "Result"                  : 99,
    "...other more fields": "omitted",

    // The following are old version fields
    "date"          : 1625638440,
    "workspace_uuid": "wksp_xxxxxxxxxx",
    "workspace_name": "My Workspace",
}
Synchronize and append workspace Attribute Claims.
When configuring Webhook notification targets, you can choose to configure members. After this Webhook notification target rule takes effect, besides passing the two types of event information above, Webhook will also send the member information entered in the current configuration externally, facilitating subsequent third-party actions based on member information.
Here, selectable members include all teams and workspace members within the current workspace:

The content type for custom Webhook notifications only supports JSON format. For details about each field, refer to Event Generation.
For more detailed practice documentation on custom Webhooks, refer to Guance Custom Webhook Alert Notification Integration.
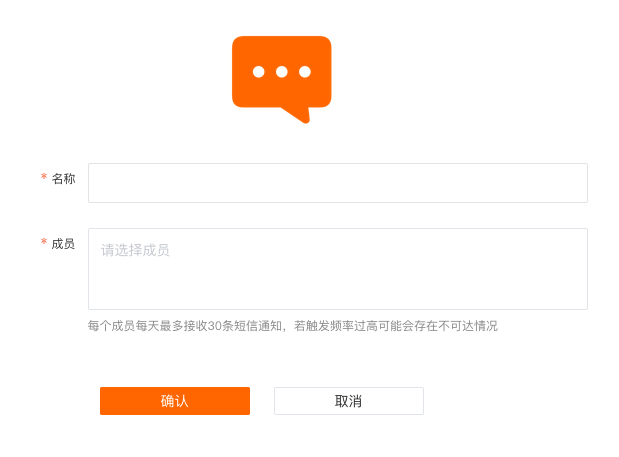
SMS
Select SMS, input required information. An SMS group can add multiple members simultaneously.
Note:
- Members need to be invited into the workspace via Management > Member Management before they can be selected;
- SMS group alert notifications are sent in a consolidated manner every minute, not immediately after generation, resulting in approximately a one-minute delay.
Simple HTTP Request
Select Simple HTTP Request, input required information. When an event triggers an alert, the service sends all alert notifications to the custom Webhook address.

Configure Operation Permissions
After setting the operation permissions for notification targets, the roles, team members, and space users of your current workspace will perform corresponding operations on notification targets according to the allocated permissions. This ensures that different users perform operations consistent with their roles and permission levels.

- Not enabling this configuration: Follows the default permissions of the "Notification Target Configuration Management";
- Enabling this configuration and selecting custom permission objects: Only the creator and authorized objects can enable/disable, edit, or delete the rules set for this notification target;
- Enabling this configuration without selecting custom permission objects: Only the creator has the permissions to enable/disable, edit, or delete this notification target.
Note: The Owner role of the current workspace is not affected by the operation permission configuration here.
Custom Notification Targets
To further meet your actual business needs, in addition to the default notification targets provided by the system, it also supports integrating external notification channels through third-party Func, sending alert information directly to the local DataFlux Func.
Specific operation steps can be found in Integrating Custom Notification Targets.
Management List
All successfully added notification targets can be viewed on the Monitoring > Notification Targets Management page. You can manage the list via the following operations.
- You can enable/disable, modify, or delete specific notification targets at the action location;
- Batch operations;
- Operation audit: Click to jump and view the operation records related to this notification target rule;
- Quick filter via the sidebar allows you to quickly locate notification rules after selecting filtering conditions;
- If the notification target rule does not grant you permission, you cannot enable/disable, edit, or delete it.

System Automatic Disablement
If a notification target rule fails to send externally for two consecutive days, the system will automatically disable this notification rule.
Under Quick Filter > Status, check the box to quickly view all automatically disabled rules.
